Create Bootable USB for Windows 7 via Rufus or Easier Tool
Need a bootable USB for system recovery or clean installation? Try Rufus or another bootable USB creator offered in this article to make it.
By Lily Updated on August 28, 2025
About Rufus
Rufus is a free and open-source utility that helps format and create bootable USB flash drives, such as USB keys, pendrives, memory sticks, etc. It is suitable for both casual and experienced users, thanks to the standard and advanced settings it brings.
It has built-in support for drive formatting, which means that you don’t have to manually do this before launching Rufus. What’s more, the application requires no setup so you can copy it onto a portable device and easily launch it on any computer to create bootable drives.
If you want an easier way to make bootable USB for all Windows, AOMEI Backupper is the best choice.
How to create bootable USB for Windows 7 using Rufus
Before creating Windows 7 bootable USB, you need to prepare:
- Windows 7 ISO (either 32-bit or 64-bit)
- A USB flash drive with at least 8 GB capacity
Then, follow the steps below to create Windows 7 bootable USB using Rufus:
✍ Notes:
✪ Rufus can only be run on Windows 8 or later systems. If you encounter “Rufus not opening on Windows 7” issue, please get a computer running Windows 8/8.1/10/11 or upgrade Windows 7 to later systems.
✪ The process will destroy any data on the target USB drive. Therefore, backup files in advance if it is not empty.
1. Plug the USB drive into your computer.
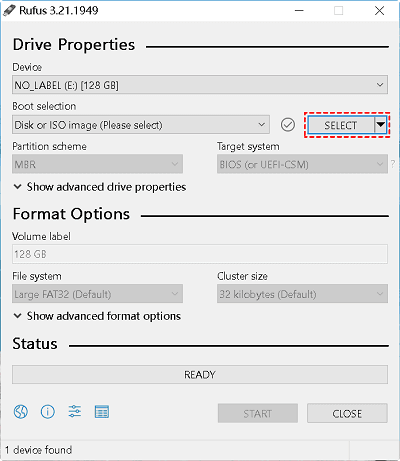
2. Download Rufus latest version and open it. It will scan for removable devices on your computer and select one by default. You can also change the selected device manually.
3. Click the Select button to choose the Windows 7 ISO file on your computer.
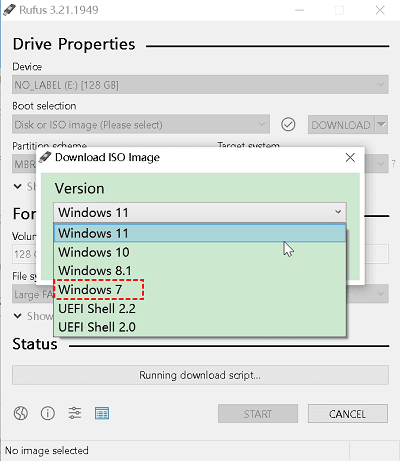
4. (Optional) If the ISO file you choose is not supported by Rufus, you can click the drop-down menu of the Select button and select Download to download the ISO file you need.
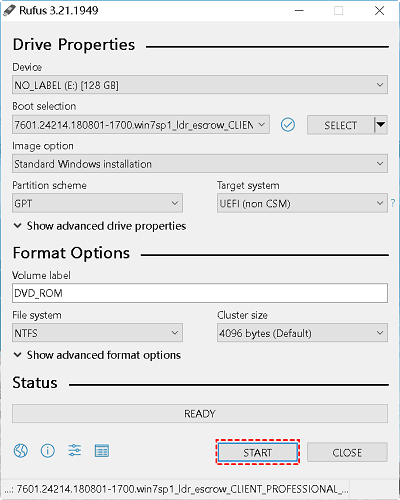
5. Choose Image option, Partition scheme and Target system based on your need. Or you can keep the default options.
6. Name the bootable USB under Volume label. Finally, click Start to begin bootable media creation.
Install Windows 7 from USB Rufus
With a Rufus Windows 7 bootable USB, you can install Windows 7 on any computer you want. Follow the instructions below:
1. Attach the USB flash drive to the PC where you want to install Windows 7.
2. Boot your PC and immediately press a certain key (usually F2, F12, Delete, or Esc) to enter BIOS.
3. Open the boot menu and set the USB drive as the first boot device.
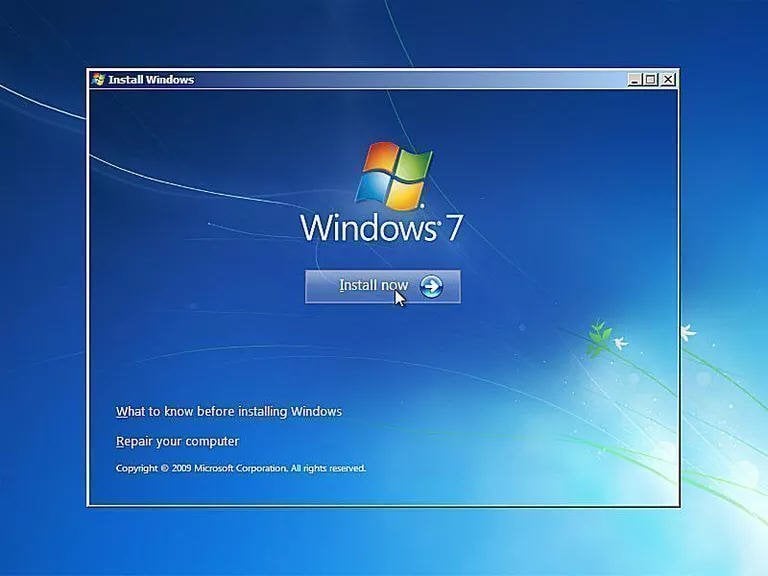
4. Follow the Install Windows wizard to install Windows 7 from scratch.
Easier way to make bootable USB for all Windows🔥
Besides Rufus, there is another bootable USB creator that is worth trying - AOMEI Backupper Standard. It is free, simple and reliable.

-
It enables you to create Windows PE boot disc or Linux boot disc.
-
You can use a USB flash drive, CD, or DVD as bootable media. You can also export the AOMEI ISO file as necessary.
-
In addition to creating bootable media, it provides full backup solutions for complete data protection.
-
It supports all editions of Windows 11/10/8.1/8/7.
Now learn how to create Windows 7 bootable USB using AOMEI Backupper as follows:
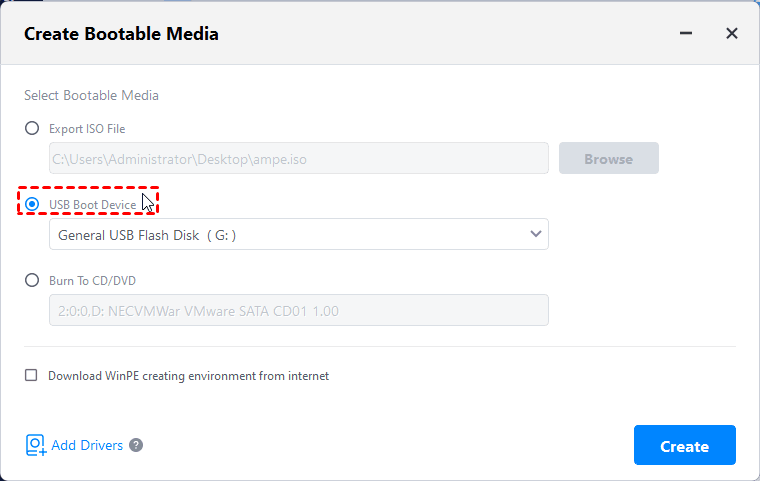
Step 1. Connect a USB drive to your computer. Install and launch AOMEI Backupper. Then, click Tools and select Create Bootable Media.

Step 2. Select USB Boot Device and click Create. You will receive a prompt to format your USB drive. If you have already backed up important files, click OK to start creating bootable media.
Restore Windows 11/10/8/7 from AOMEI bootable USB
After creating a bootable USB with AOMEI Backupper, it is necessary to make a system image or disk image of your PC. As a result, you can easily restore your computer to a previous working state in case of a system crash or hard drive failure. Let’s say you have created a system image. Follow the guidance below to restore Windows OS using AOMEI bootable USB:
Step 1. Boot your computer from the USB drive by changing boot order in BIOS.
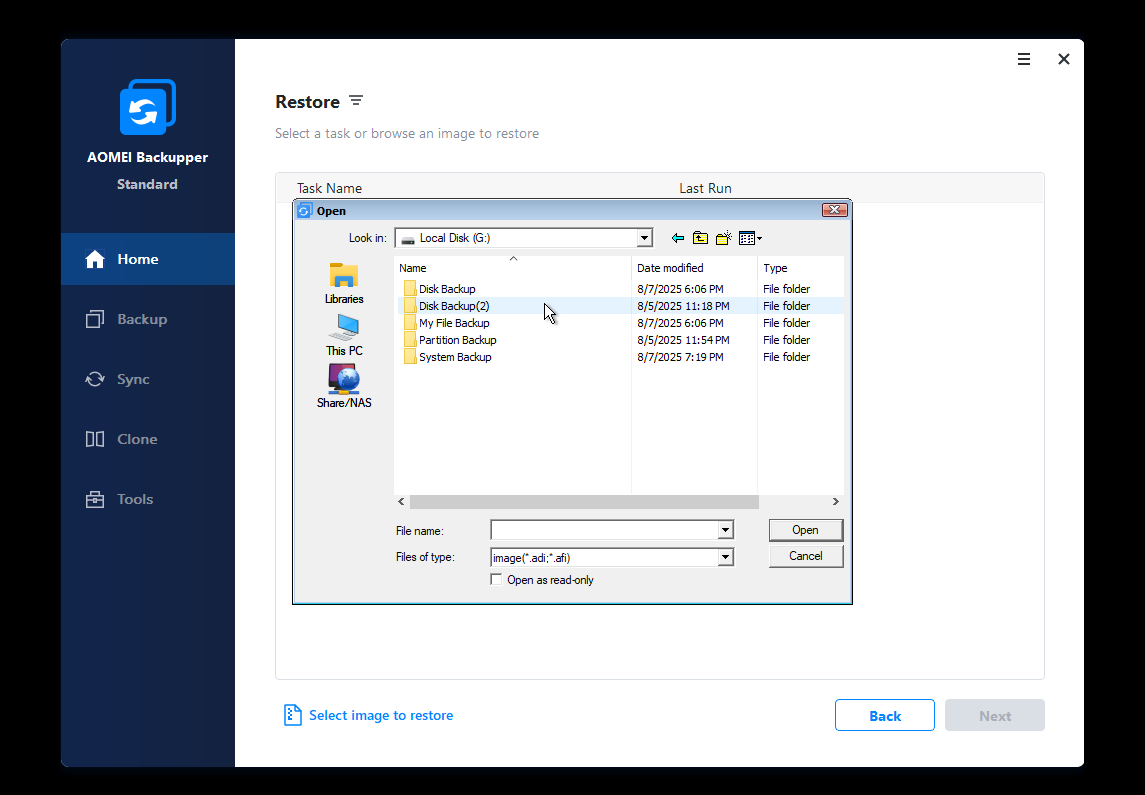
Step 2. You’ll see the loaded AOMEI Backupper once your computer starts up. Click Home > Restore and click on Select image to restore to navigate to the system image file you created before.
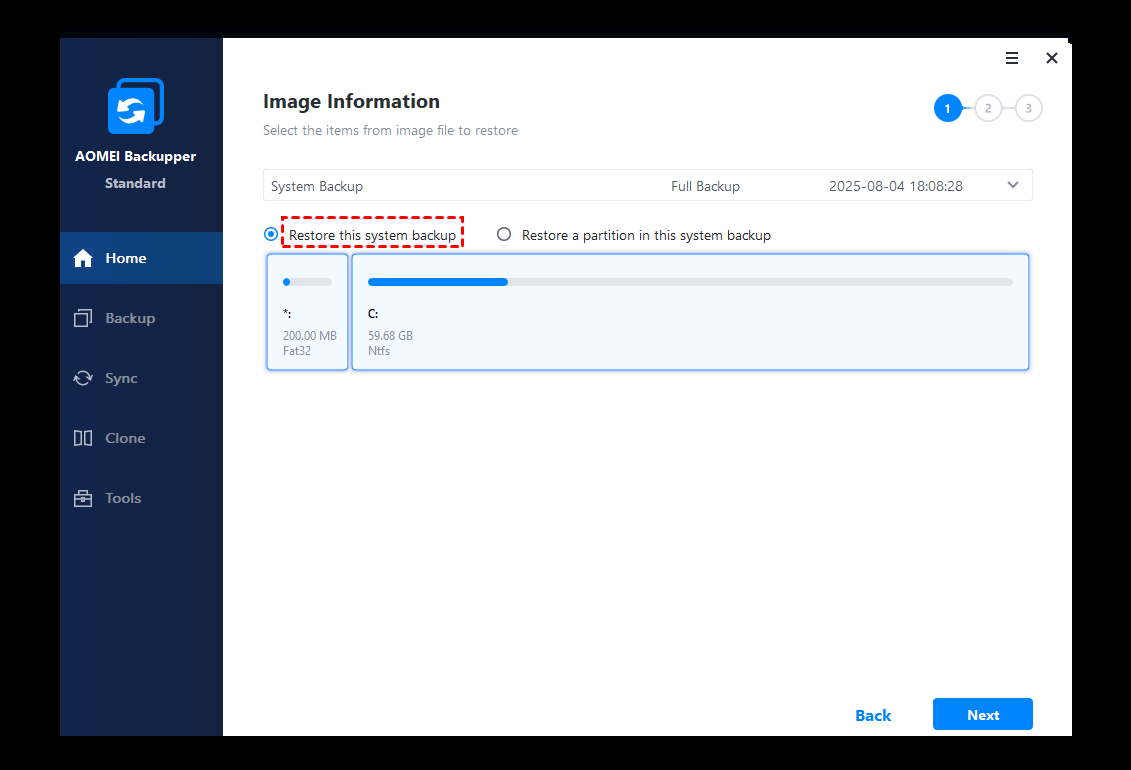
Step 3. Tick Restore this system backup and click Next to restore the entire backup image.
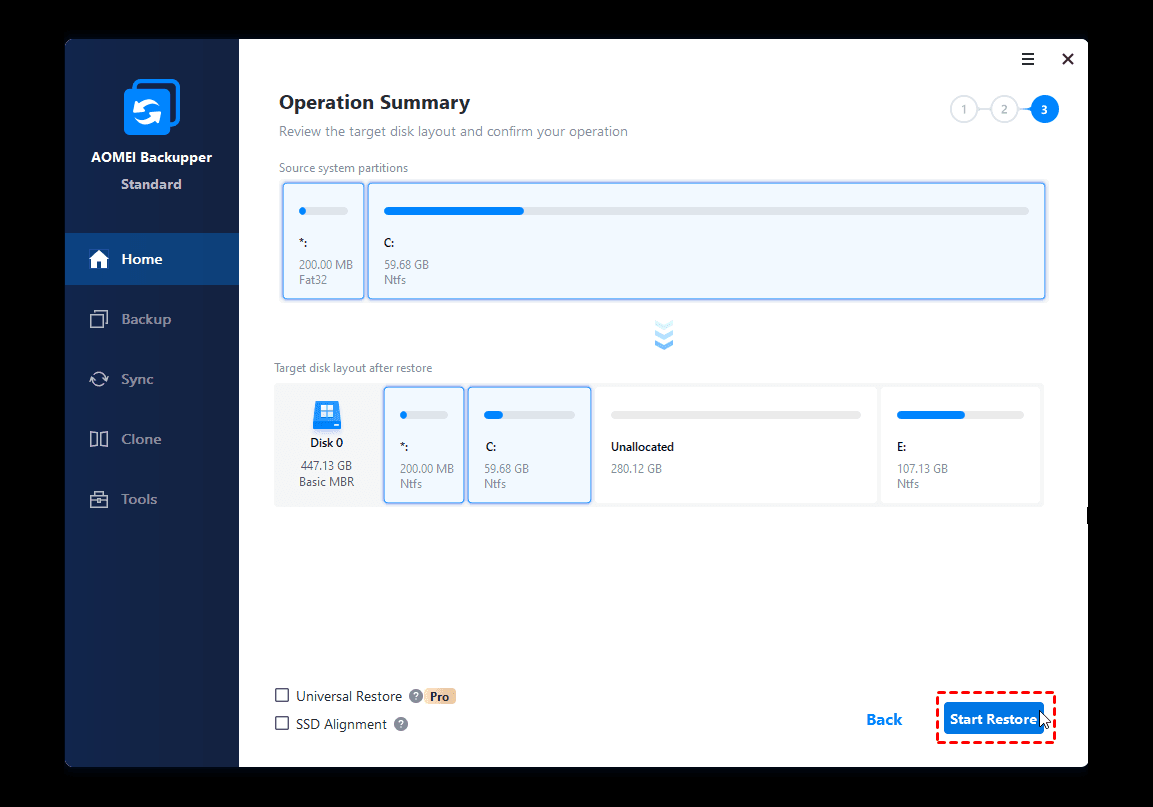
Note: The program automatically selects the original system drives as the destination partitions. If the original system drives are not detected, you need to select a destination path manually. Please select the first partition on the target disk, or the system could not boot after recovery.
Step 4. Click Start Restore to launch the recovery process.
Advanced features you may need
👉 If you don’t want to sacrifice a USB drive to be used as bootable media, you can use AOMEI Backupper Professional to create a recovery environment. It will add the AOMEI Backupper recovery environment option to the system boot menu.
👉 If your computer fails without a system image created before, you can create a system image on another PC and perform universal restore (paid feature).
FAQs about Bootable USB Creation using Rufus
#1. Why is Rufus not showing up on Windows 7?
If Rufus is not showing up or not running on Windows 7, it may caused by incompatibility mode in Windows, your system not meet the minimum requirements for running Rufus, corrupted installation, and so on.
#2. How to make Windows 7 Boot from USB?
After finishing the bootable USB creation on Windows 7, restart your computer, enter the BIOS/UEFI settings, and set the USB drive as the first boot device. Save the changes and restart the computer, and it should boot from the USB drive, initiating the Windows 7 installation process.
#3. Why is my USB drive not appearing in Rufus?
Ensure the USB drive is connected properly and recognized by your computer. If it still doesn't appear, try using a different USB port or restarting Rufus.
#4. Do I need to format my USB drive before using Rufus?
Yes, Rufus will format the USB drive during the process, so it's essential to back up any important data on the drive before starting. The USB drive should be empty or contain data you don't mind losing.
Conclusion
Now you know how to use Rufus to create bootable USB in Windows 7. You can also try the free alternative AOMEI Backupper to create Windows bootable disc. Actually, AOMEI Backupper can do much more than Rufus. It is still wonderful backup, sync and clone software. After adding OneDrive to File Explorer, you can sync local folders to OneDrive automatically using AOMEI Backupper. Just try it out!

