What is The Best Windows 11 USB Creator? Try 4 Options Here!
Looking for the best Windows 11 USB tool but don’t know which one to choose? Refer to this article and you can find the best answer among the 4 recommended tools.
By Miya Updated on December 28, 2023
What is the best Windows 11 media creation tool?
A bootable USB is a regular USB storage device that has an “ISO image” of the operating system saved on it. A bootable USB is useful when you want to do a system update, install Windows 11 on a new computer, or when your computer has a system failure and does not boot properly.
Having such relevant demands, you may be eager to know if there is a way to create a bootable USB with the best Windows 11 USB tool. Luckily, from this article, you will gain the simple and free ways to achieve this task without effort. Let’s explore how they operate together.
👉Best free media creation tool for Windows 11/10/8/7
Full guide to creating Windows 11 bootable USB
From this page, you can master top 4 Windows 11 media creation tool to create a bootable USB. You can choose to use Windows Media creation Tool, Rufus, DiskPart, or the best free third-party tool – AOMEI Backupper Standard.
Moving on, you can gain the specific steps for each tool. Each tool has its own characteristics, and you can make your choice according to your actual situation. But before that, some preparations are needed:
- Prepare a blank USB drive that does not store any data, preferably with a capacity at least or greater than 8GB.
- You need to go to Microsoft's official website to download Windows 11 ISO image file that you need for the bootable USB.

Tool 1. Windows Media Creation Tool
The free Windows 11 Media Creation Tool is a very popular tool developed by Microsoft to support you in effortlessly upgrading Windows 11 to its latest version or creating a Windows 11 installation USB drive/DVD disc to perform a clean install or fix a faulty PC. Here’s how to use it:
1. Have Media Creation Tool downloaded and installed on your PC. After that, it brings up Microsoft Software License Terms window, click Accept to move to next stage.
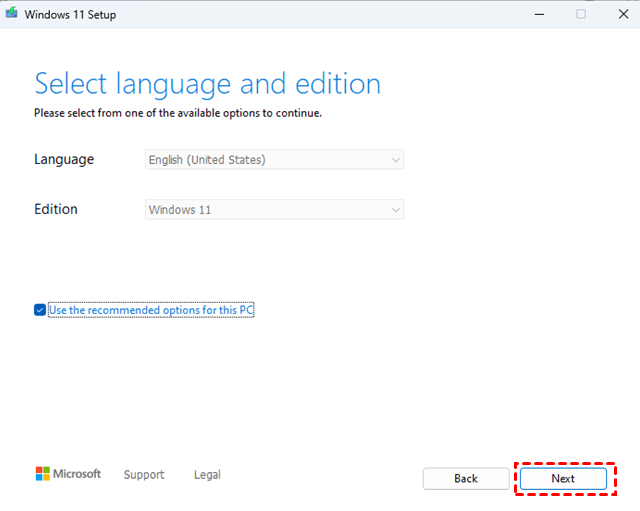
2. In the next window, select language and edition of Windows 11. Then click Next.
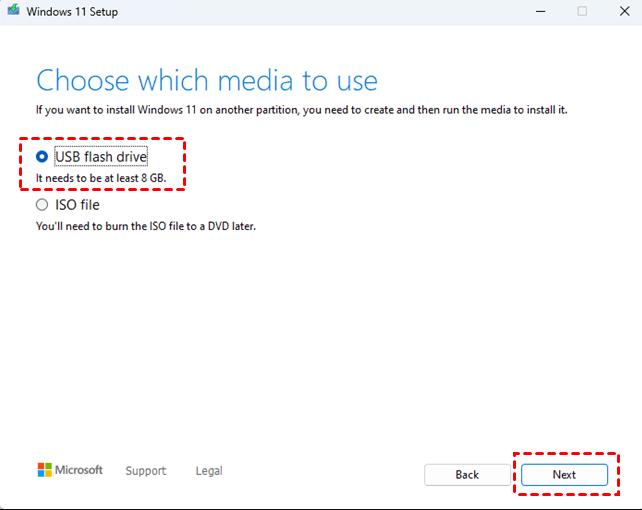
3. Select the USB flash drive, and click Next.
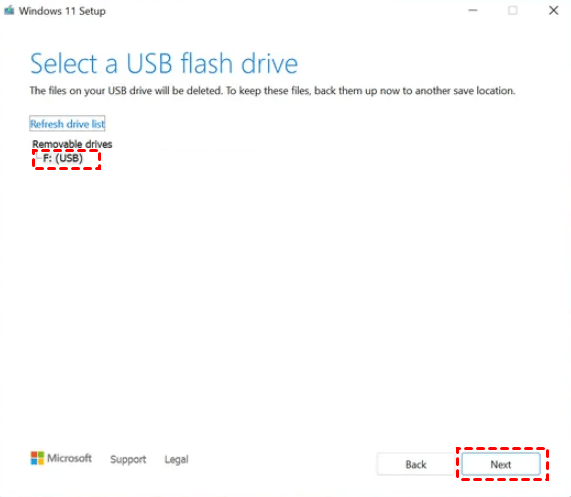
4. Select the connected blank USB drive from the list, and click Next.
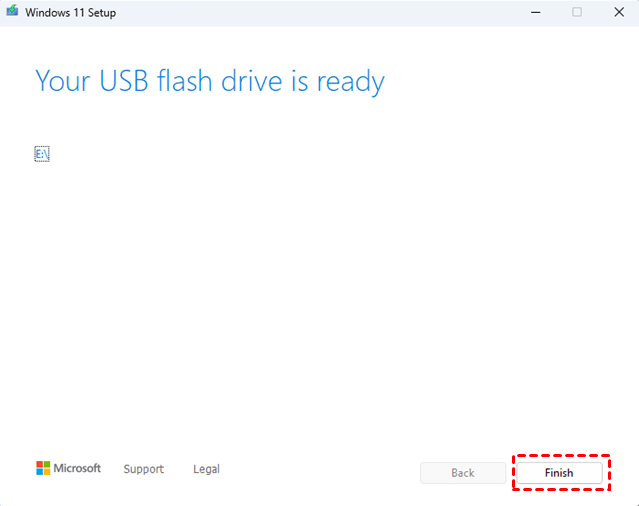
5. Wait for the process to complete. Once it is done, you will have a Windows bootable USB in hand.
Tool 2. Rufus
Rufus is a lightweight but powerful freeware to create bootable USB drives. You can refer to the following steps to use it.
1. Download the latest Rufus from the official website. Once Rufus is downloaded, it can be launched directly without any installation.
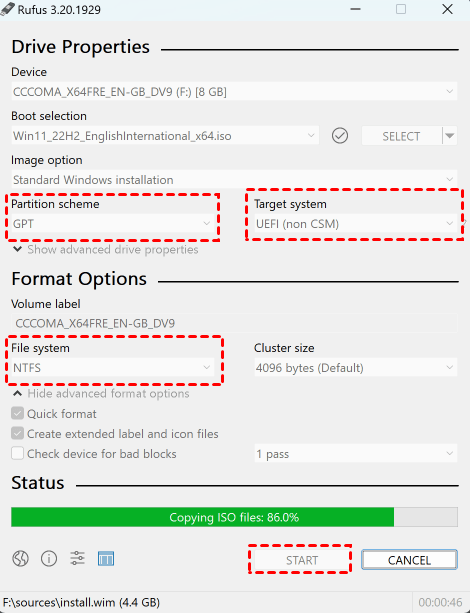
2. Under Device, select your USB flash drive with at least 8 GB storage. Then click the Select button to select the Windows 11 ISO file you downloaded before.
3. For Image Option, set the dropdown to Standard Windows Installation. Set Partition Scheme to MBR/BIOS or GPT/UEFI according to your disk style.
4. Under Format Options, set the Volume Label to type in a name for the drive.
5. When the warning comes up that all data on the flash drive will be wiped, click the OK button.
6. For the rest of the options, keep them as the original set. When you are ready, click the Start button and wait while your bootable USB drive is created. You will see a progress bar under the Status section while it’s made.
Tool 3. DiskPart
The process of using DiskPart to create a bootable USB can be demonstrated in two parts.
Part 1: Create a bootable USB flash drive
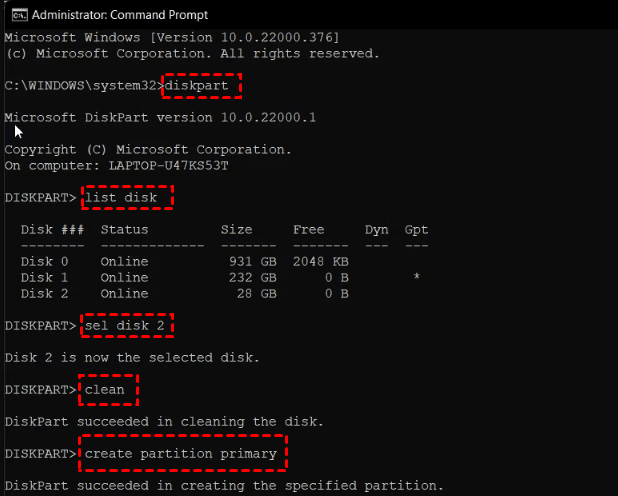
1. Insert a USB flash drive into a running computer (preferably with 4GB or more storage space). Open a Command Prompt window as an administrator and type diskpart.
2. When the command prompt window appears, type list disk to display all the disks on this PC, and then click Enter.
3. Then type sel disk 2, where 2 refers to the drive number or drive letter of your USB flash drive. Press Enter.
4. Type clean, and then click Enter. This command deletes all data from the USB flash drive.
5. Type create partition primary to create a new primary partition on the USB flash drive, and then click Enter.
6. To select the partition that you just created, type list par, and then click Enter.
7. Type active to mark the current partition as active.
8. To format the partition, type format fs=ntfs label=“BootableUSB” quick override, and then click Enter.

Tip: If your computer supports UEFI boot, you should format the USB flash drive as FAT32 rather than as NTFS. To format the partition as FAT32, type format fs=fat32 quick, and then click Enter.
9. Type exit, and then click Enter to exit DiskPart.
Part 2: Mount the Windows 11 ISO image and copy it to your USB drive
1. Type the following command to mount the ISO file and press Enter: PowerShell Mount-DiskImage -ImagePath "C:\Users\UserName\Downloads\Win11_English_x64v1.iso" (replace the Windows 11 file path of your location).
2. Type diskpart to launch Diskpart again and press Enter.
3. Type list volume to show the available volume for the mounted ISO file and press Enter. Under the Ltr section, you will see the letter associated with the volume, and the Type column will list the mounted ISO as DVD-ROM.
4. After you have the volume details for the Mounted ISO, type Exit to exit Diskpart.
5. Then type the Mounted ISO volume letter and hit Enter. For example, if your Mounted ISO volume letter is X, then type X and press Enter.
6. Type cd boot to boot from CD.
7. Next, type Bootsect /nt60 I (replace I with your USB flash drive) to apply the master boot code compatible with Bootmgr to the USB flash drive.
8. Next, type xcopy X:\*.* I:\ /E /F /H and hit Enter to copy Windows 11 ISO to the USB flash drive.
9. It may take several minutes to finish the process. If it is successfully completed, you will see a Files (s) Copied message. Then you can use the created bootable USB drive to start your PC.
To create a bootable USB manually using USB creator, many users have tried the official Windows way before, which is to use a command line tool called DiskPart. However, this tool only has minimal pages with no graphics and complex code to enter. With these inconveniences, users now prefer to use third-party software to create a bootable USB. You can access more details in the following contents.
Tool 4. Best free media creation tool for Windows 11/10/8/7
When it comes to the best free media creation tool on Windows 11, third-party software as AOMEI Backupper Standard may be an easier choice. It can create a bootable USB flash drive that helps you boot your computer in Windows 11/10/8.1/8/7/Vista/XP. The intuitive interface does not require any technical requirements, making your operation effortless. You can learn some of its excellent features as listed below:
✍ You can use it to create bootable DVD/CD or USB that can be used to start computers with no brand and system restrictions. And the created media is able to boot in both BIOS and UEFI mode.
✍ It can provide all-around protection for your computer system and data. It has functions such as backup, restore, clone, sync, etc. You can continuously backup Windows 11 to USB as a long-term protection solution.
Follow the specific steps below to create a bootable Windows 11 USB with the best free USB creator – AOMEI Backupper Standard.
1. Download and install this freeware on your PC.
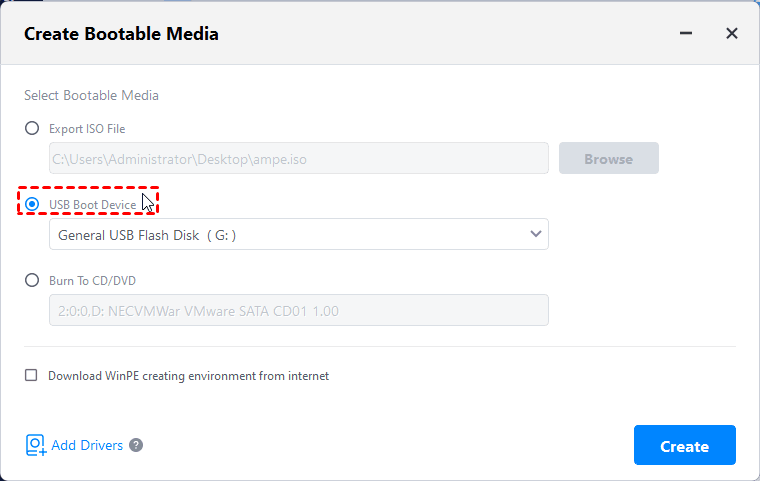
2. Launch it, click Tools from the left panel and then select Create Bootable Media.

Note: This process will overwrite all the data on the drive. If there are important files on it, you'd better back up USB flash drive in advance to avoid data loss.
3. Select bootable disc type from Linux based or Windows PE based, and click Next to continue. It is suggested to select Windows PE, which allows you to access full functions.

4. Then select USB Boot Device to create Windows 11 bootable USB and then click Next to run this process.
Notes (you can upgrade to AOMEI Backupper Professional edition to enjoy these features):
¤ If you don't have any CD/DVD or USB drive, you can simply enable the AOMEI Recovery Environment to achieve the same effect.
¤ If you haven’t made any system backups before the Windows 11 computer failure, you can also create a system image on another working computer and restore it to the computer in question with Universal Restore.
How to make the created Windows 11 USB boot successfully
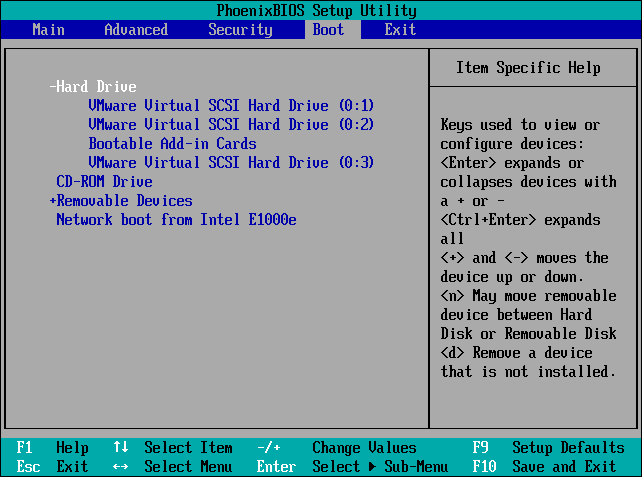
In order to boot Windows 11 from USB, you must change the BIOS boot order so that the USB device is listed first. Otherwise, the computer will load from the hard drive as usual. You can get the details of the steps below.
1. Press the computer Power button. During the initial startup screen, press F1/F2/F8/F10 or ESC.
2. Once you enter the BIOS Setup Utility window, using the arrow keys to select the Boot tab. All of the available system devices will be displayed in order of their boot priority.
3. Set the USB to be first in the boot sequence. Save the change and then exit the BIOS Setup. Then the computer will restart and boot your computer from the created USB.
Closing thoughts
Now you know what the best Windows 11 USB creator is and how to create Windows 11 bootable USB with the above four media creation tools. Besides creating a bootable USB drive, you may also need to backup Windows 11 frequently to deal with unforeseen problems such as system failures and boot errors.
Frankly speaking, I strongly suggest you give AOMEI Backupper a chance, for it can meet all of your needs simultaneously, and easily safeguard your computer data security. If you are searching for the best migration tool to clone Windows 11 to another hard drive, or clone SSD to a larger one, AOMEI Backupper can also be your best choice.

