How to Restore Right-Click Menu on Windows 11
If you don’t know how to restore right-click menu on Windows 11, then read the below content to get an idea.
By Maggie Updated on June 5, 2023
Overview of Windows 11 Right-click menu
Windows 11 introduces a fresh user interface that prioritizes simplicity and adaptability. Unlike its predecessors, Windows 11 is specifically designed to enhance touch functionality and embrace a more visually appealing approach. Consequently, notable changes are evident in various aspects, including the Settings, Start menu, taskbar, context menus, and File Explorer.
Personally, I find the redesigned user interface in Windows 11 visually appealing, but there is one notable drawback—the new right-click context menu. In Windows 11, the right-click functionality has been streamlined, resulting in the omission of several essential options that were familiar to users of previous Windows versions, such as copy, paste, and rename. Instead, these functions are now represented by icons placed at the top or hidden within the "Show more options" menu.
If you are trying to restore right-click menu windows 11, then follow to read next.
How do you reset your right-click options?
Here are two ways to perform windows 11 restore right click menu, you can choose the way that suits you best.
Method 1. Restore classic right-click context menu in Windows 11 via Registry Editor
The first way to perform Windows 11 restore context menu task is quite complex and time-consuming, but the important thing is to restore backup to the classic right-click context menu, right? Then let’s see how it works:
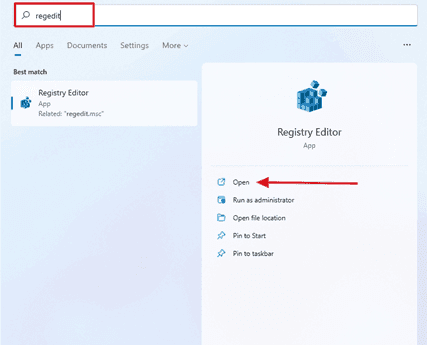
Step 1. Click on Start, type regedit and open Registry Editor.
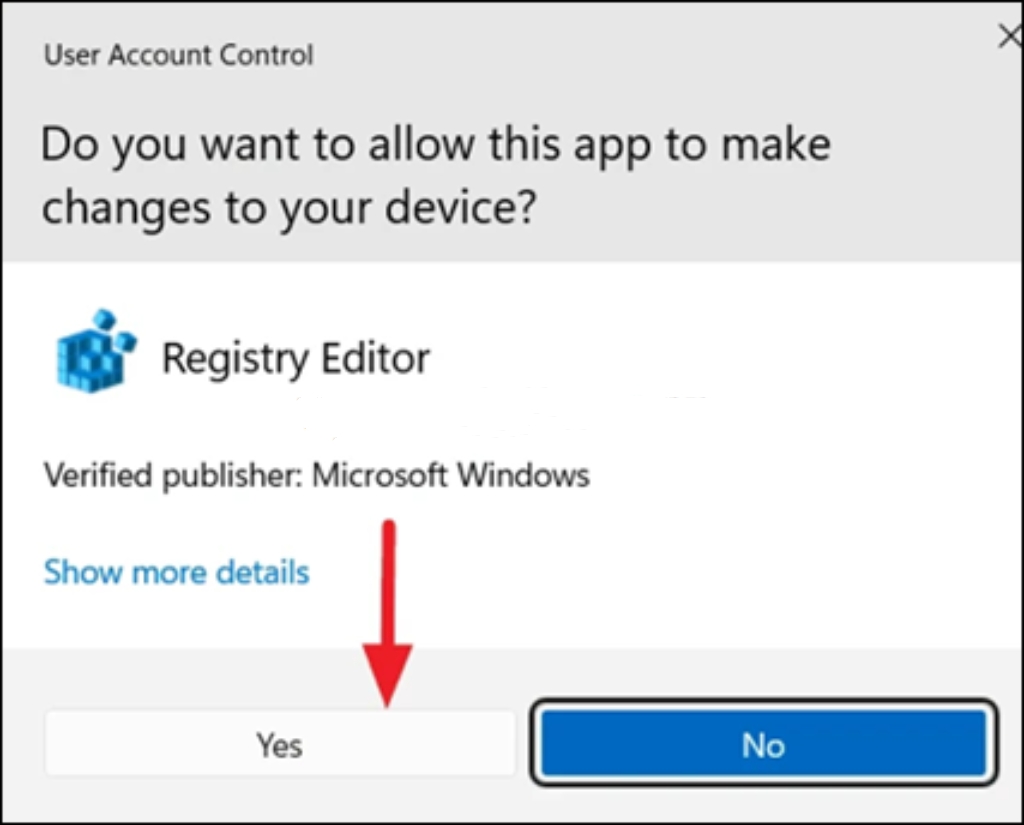
Step 2. When prompted from User Account Control, click Yes.
Step 3. Once the registry editor opens, navigate to the following location:
Computer\HKEY_CURRENT_USER\SOFTWARE\CLASSES\CLSID\

Step 4. At this step you need to execute a Backup Registry task.
✍Note: To safely navigate the delicate territory of Registry settings, it is crucial to prioritize the protection of your system. Even the slightest misstep in modifying the Registry can have serious consequences. That's why it is highly recommended to create a backup of the Registry Key you intend to update before making any changes.
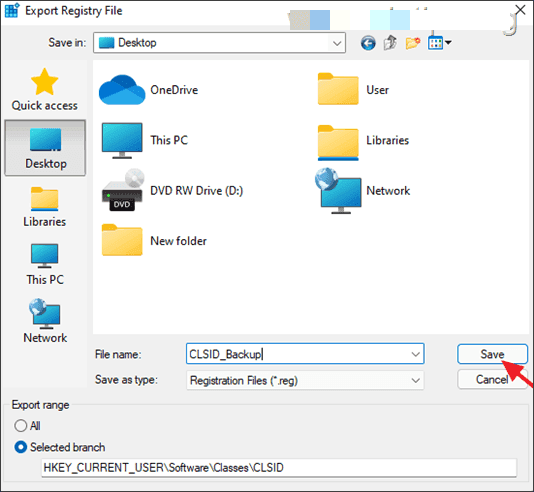
Right-Click on the CLSID key at the left-hand side panel and choose Export.

Give a suitable name (e.g. "CLSID_Backup"), and save the REG file to your desktop.
Step 5. Next, right-click the CLSID folder, Right-click New > Key. A new folder will be generated under the CLSID folder and paste in this name: {86ca1aa0-34aa-4e8b-a509-50c905bae2a2}.
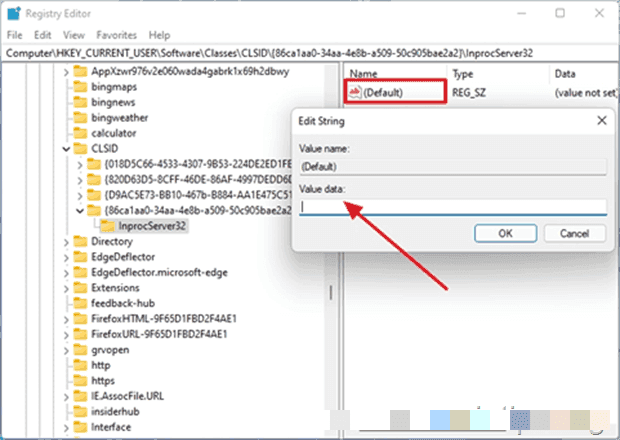
Step 6. With the new key you just created highlighted, again right-click New > Key, to create a new sub-key and paste in this name: InprocServer32.
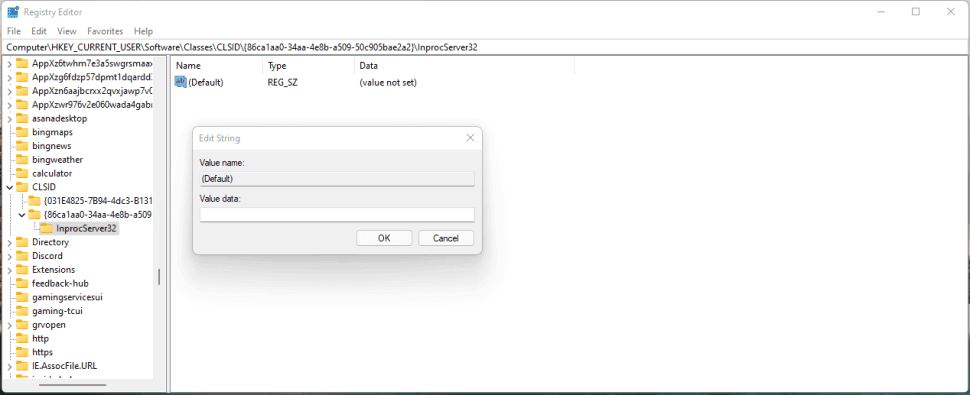
Step 7. Double-click the (Default) registry entry and then hit Enter without typing anything to set its value to blank. Before making this change, you'll see under the Data column that it says (value not set), but once you hit Enter it'll show nothing.
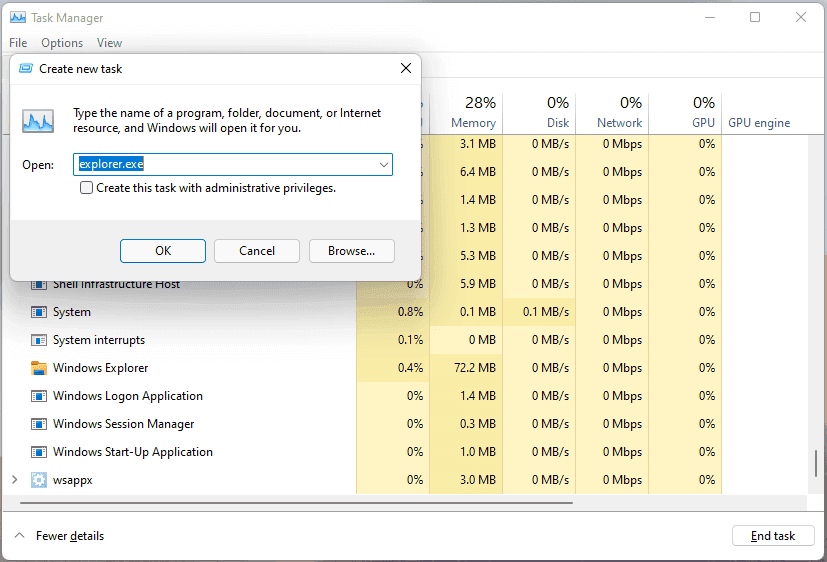
Step 8. Close Registry Editor. To see your new (classic) context menu, either restart your computer or open Task Manager, scroll down to the Windows Explorer process, and right-click End task. Then under the File tab, click Run new task and type explorer.exe to restart the Windows explorer process. And there you go: context menus changed!
Method 2. Restore old context menu in Windows 11 using the Command-line
The second way is quite easy to help you restore old context menu in Windows 11, which is through command prompt operation. Let’s start to see how to do:
Step 1. Click on Start, type Command Prompt and open the program.
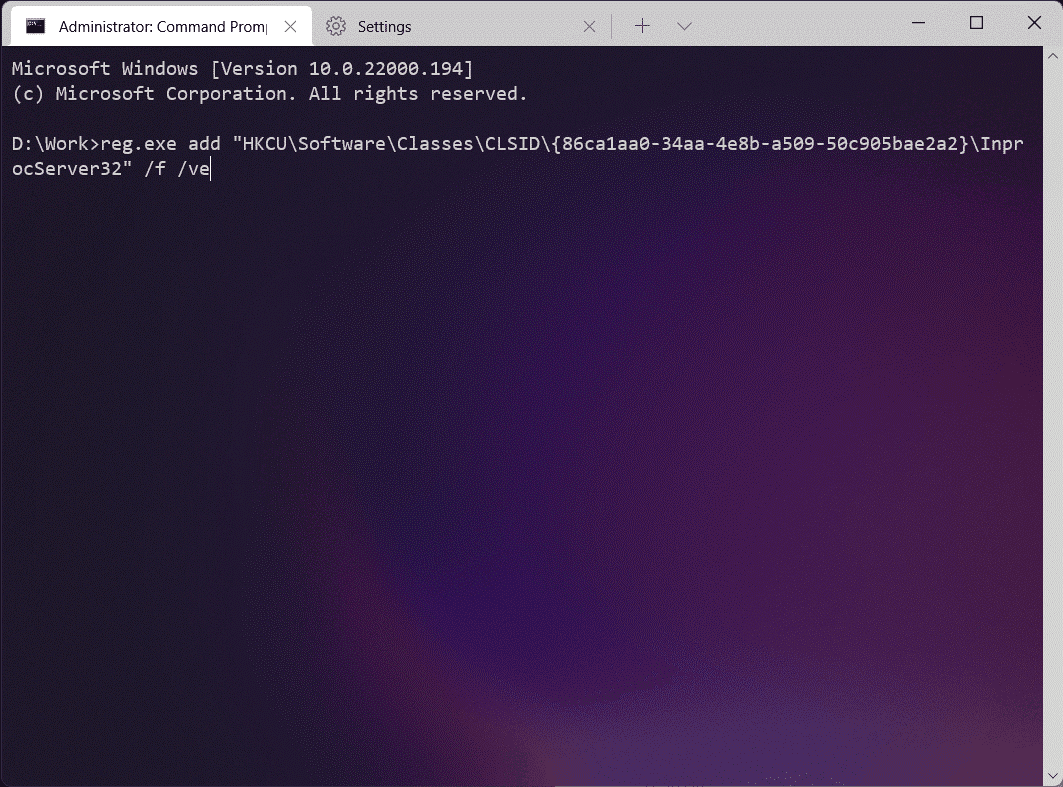
Step 2. Copy the command from below, paste it into Windows Terminal Window, and press Enter.
reg.exe add "HKCU\Software\Classes\CLSID\{86ca1aa0-34aa-4e8b-a509-50c905bae2a2}\InprocServer32" /f /ve
Step 3. Restart File Explorer or your computer for the changes to take effect.
Step 4. You would see the Legacy Right Click Context menu by default.
Recommend: Protect your Windows 11 PC with the best free backup software
Safeguarding your valuable data is a top priority in today's digital world, and that's AOMEI Backupper Standard steps in to offer you unparalleled peace of mind. With its powerful features and intuitive interface, AOMEI Backupper is the ultimate solution for securing your files and ensuring their safety.
✈It is highly compatible with multiple versions of Windows 11/10/8.1/8/7 and so on.
✈As the best Samsung T7 SSD abkcup software, it offers multiple backup options. You can backup the whole system of your Windows 11, files and disks as you like.
✈You can backup your Windows 11 system to any location, including backing up to external hard drives, network shared folders, NAS devices, SD cards, USB flash drives, etc.
Ready to take the leap towards comprehensive data protection? Download and launch AOMEI Backupper. Here is a full tutorial to execute a backup task, taking file backup as an example.
Step 1. Click on the Backup tab and select File Backup.

Step 2. Choose the files and folders you want to back up by selecting Add Folder or Add File.

Step 3. Select a destination path for the backup, you can store your backup image on .

Step 4. Review your backup settings, click Start Backup, and let AOMEI Backupper safeguard your files effortlessly.
Conclusion
Restore right click menu Windows 11 needs patience and time. Making changes to your setting during the restore process can result in system damage, it’s important to make a backup of your windows data before you start. As the best alternative to Dropbox and OneDrive, AOMEI Bakcupper is certainly the best backup choice. With just simple steps, you can ensure that your valuable files are protected and easily recoverable whenever you need them.

