


Properly Backup VMware Workstation Virtual Machine [4 Ways]
The safest way to protect your data on VMware Workstation virtual machines is to take regular backups. Here I will introduce you 4 methods to properly do this.
By Crystal / Updated on December 2, 2022
How Can You Backup VMware Workstation Virtual Machine?
No matter when, the ultimate goal of backup is to protect important data. The same is true for virtual machines (VMs). However, you may find that VMware Workstation, the most popular type-2 hypervisor for individual users and small businesses, does not have a built-in backup option. The same is also true for VMware vSphere, the most popular type-1 hypervisor for large enterprises.
So how can you back up virtual machines? How to back up VMware Workstation VMs? In fact, according to the 2 types of virtual machine backup, there are 4 ways available to perform VMware Workstation backup properly. You can click the anchor text to go to the interested part.
✦ Quick Navigation
☞ Way 1. Manually Copy VM Disk Files: The most direct way to back up a VM. A VM is essentially a set of files. By manually copying the workstation VM files, you can restore the VM by opening them directly on workstation.
☞ Way 2. Export VM to OVF Template: Open Virtualization Format (OVF) is a file format that supports exchange of virtual appliances across products and platforms. Since OVF files are compressed, you can achieve faster downloads this way.
☞ Way 3. Clone VMs: Clone is a way to create multiple same VMs. There are 2 kinds of clone, a full clone takes long time to create. If you create a linked clone, the cloned VM may be unusable if the parent VM fails.
☞ Way 4. Backup VM as Physical Machine: By installing a backup agent you can perform file-based backup of VMs just like physical machines. In this way you can also perform P2V migration, or even V2V migration.
The reason why I say “properly” is because I found that some are still improperly using VM snapshots as backups. And this is very dangerous.
VM snapshot vs backup: They cannot replace each other
Now it is commonly agreed that VM snapshot and backup cannot replace each other. Normally, VM snapshots are used as a failsafe to roll back the VM to previous states. However, since they rely on the parent disk completely, you cannot restore a VM using only snapshot files.
Besides, VM snapshots require large disk space, and may bring serious performance penalty. Therefore, you shouldn’t rely on them too much.
Exclude snapshots, here leave 4 ways to backup VMware Workstation VMs properly. Next, I will introduce the detailed steps of them respectively.
Way 1: Manually Copy Virtual Machine Disk Files
1. Launch VMware Workstation, move the cursor to the name of the VM you want to backup. There will be a box showing the folder path where the virtual disk files and configuration files of this system are stored.
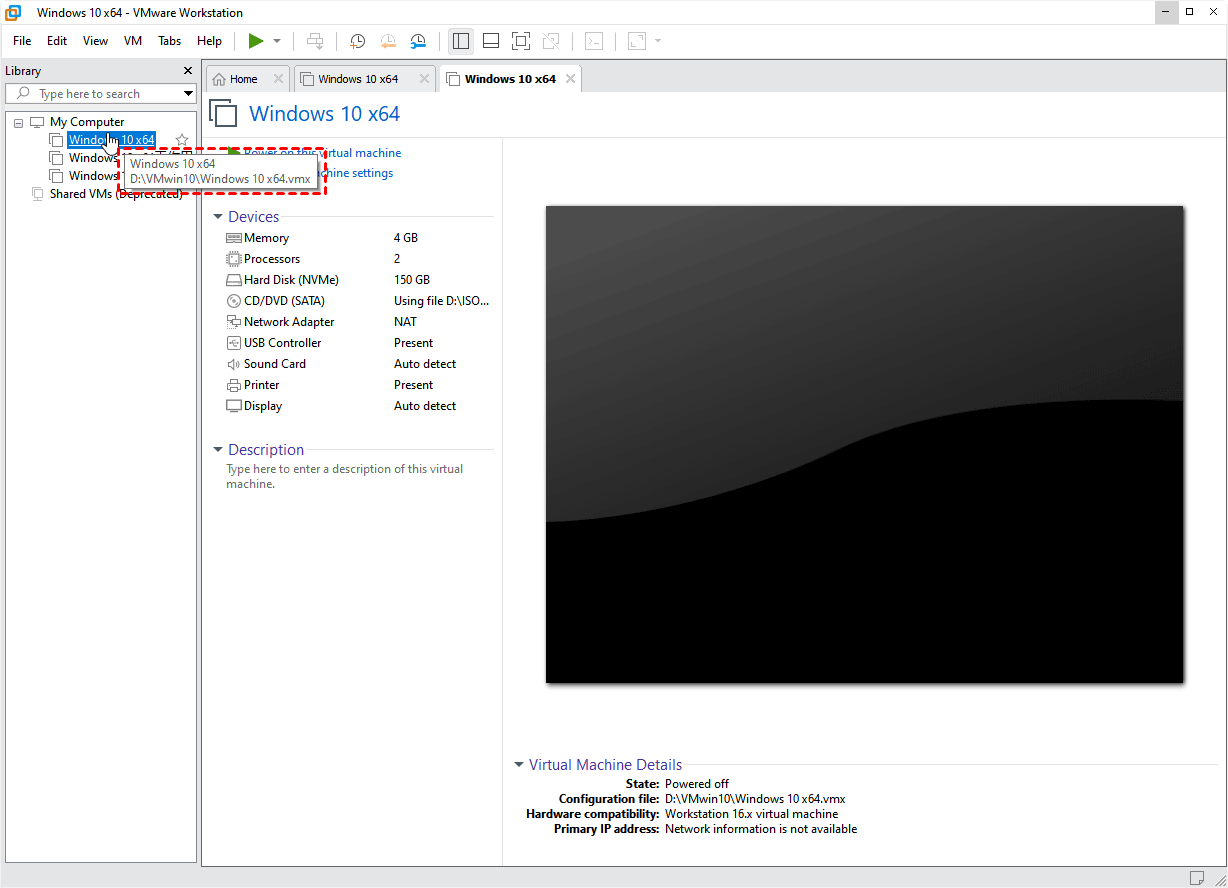
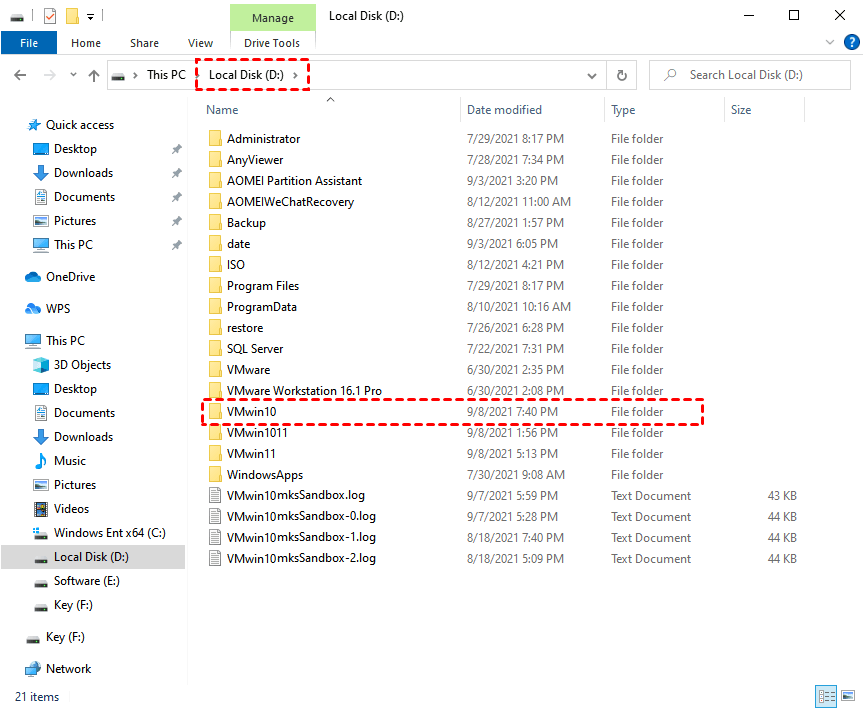
2. Come to the folder, and then copy all files or the whole folder to the destination location where you want to store the backup.
Note: In this way, you need to manually copy and save your VM data regularly, to keep the backup always new.
Way 2: Export Virtual Machine to OVF Template
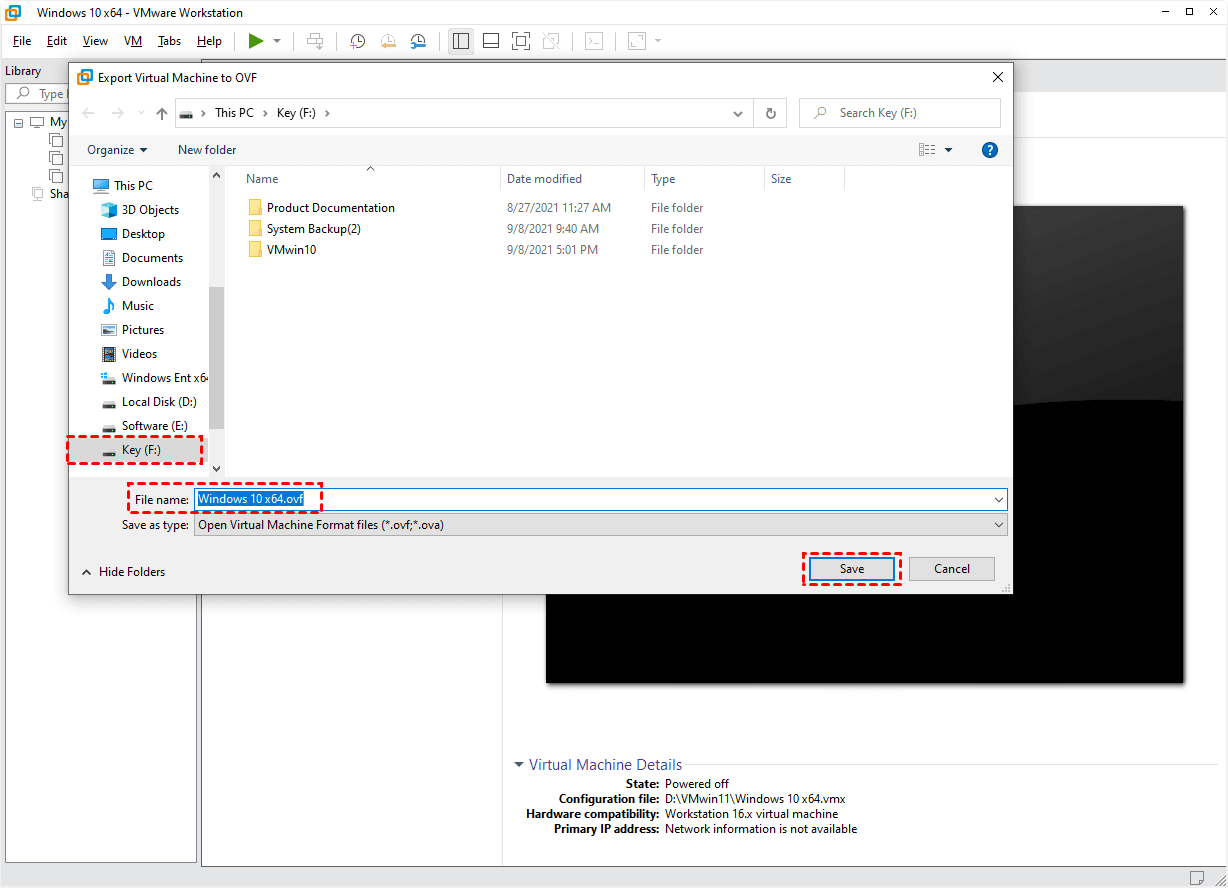
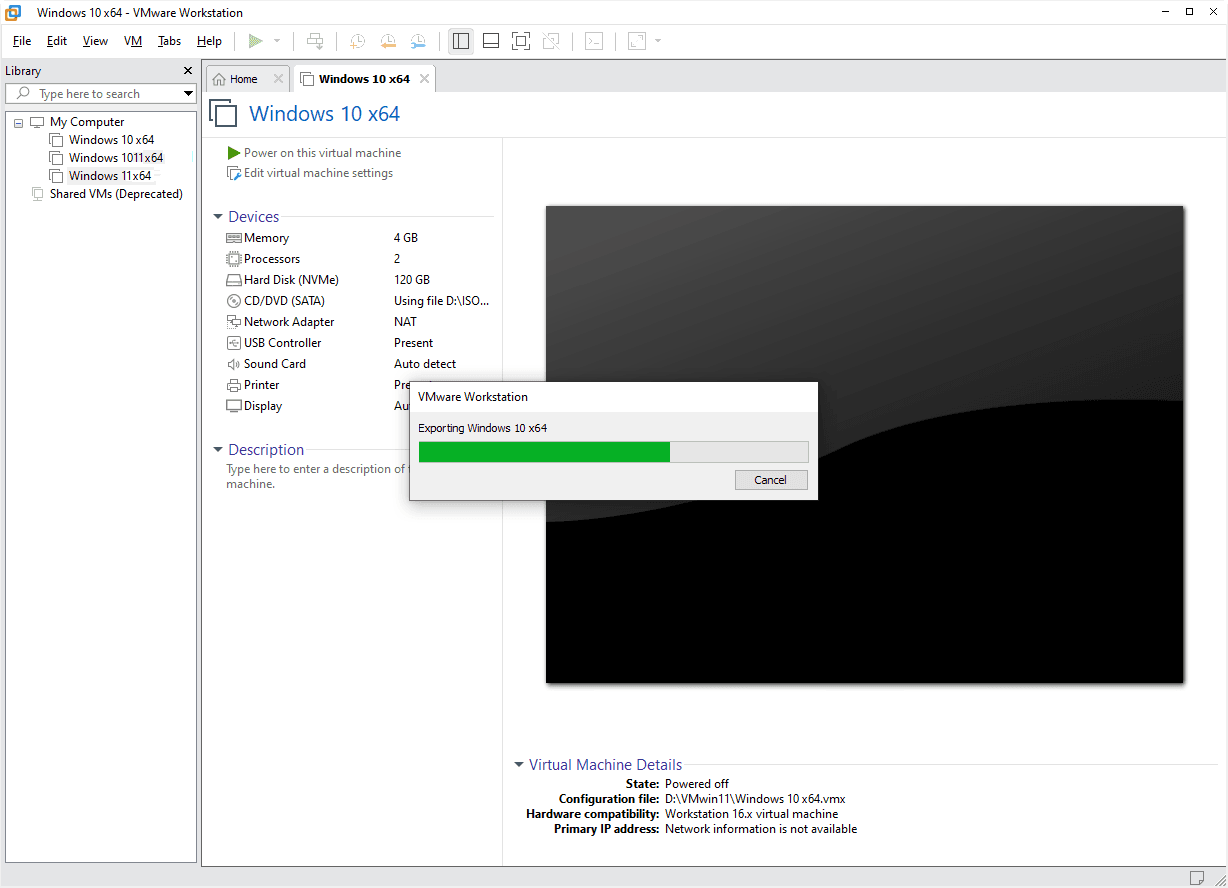
1. Launch VMware Workstation, select the VM you want to backup, then click File on the upper bar, select Export to OVF…

2. In the prompt window, select a path where you want to save the OVF template file, then click Save.
3. Wait for the Export process. The more software you installed in this system, the more time this process will cost.
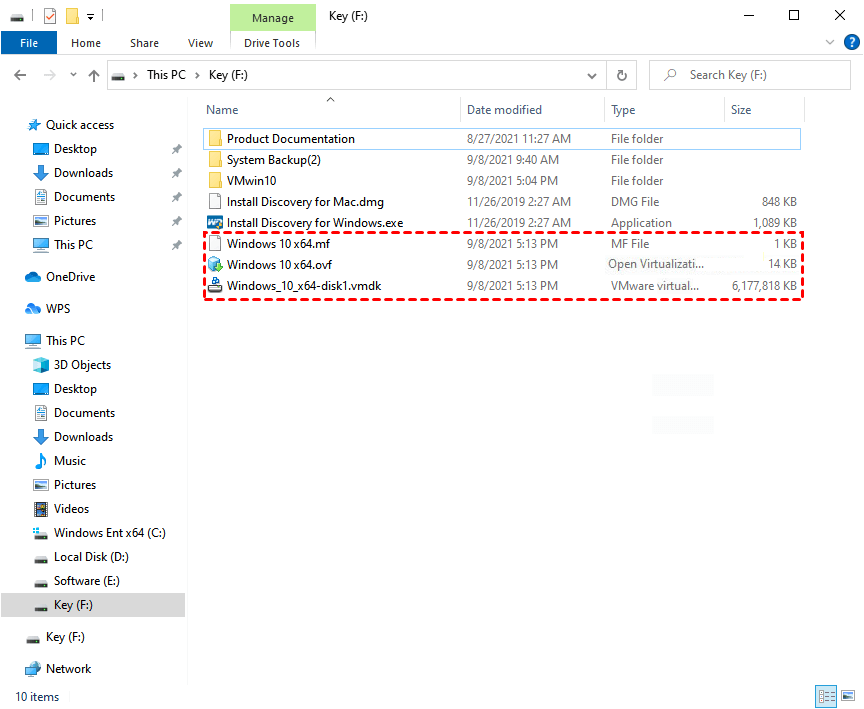
When it’s accomplished, you will find 3 files in destination location. The manifest file ends with .mf, the OVF file which provides a complete specification of the virtual machine, and the virtual disk file ends with .vmdk.
Way 3: Clone Your Virtual Machine
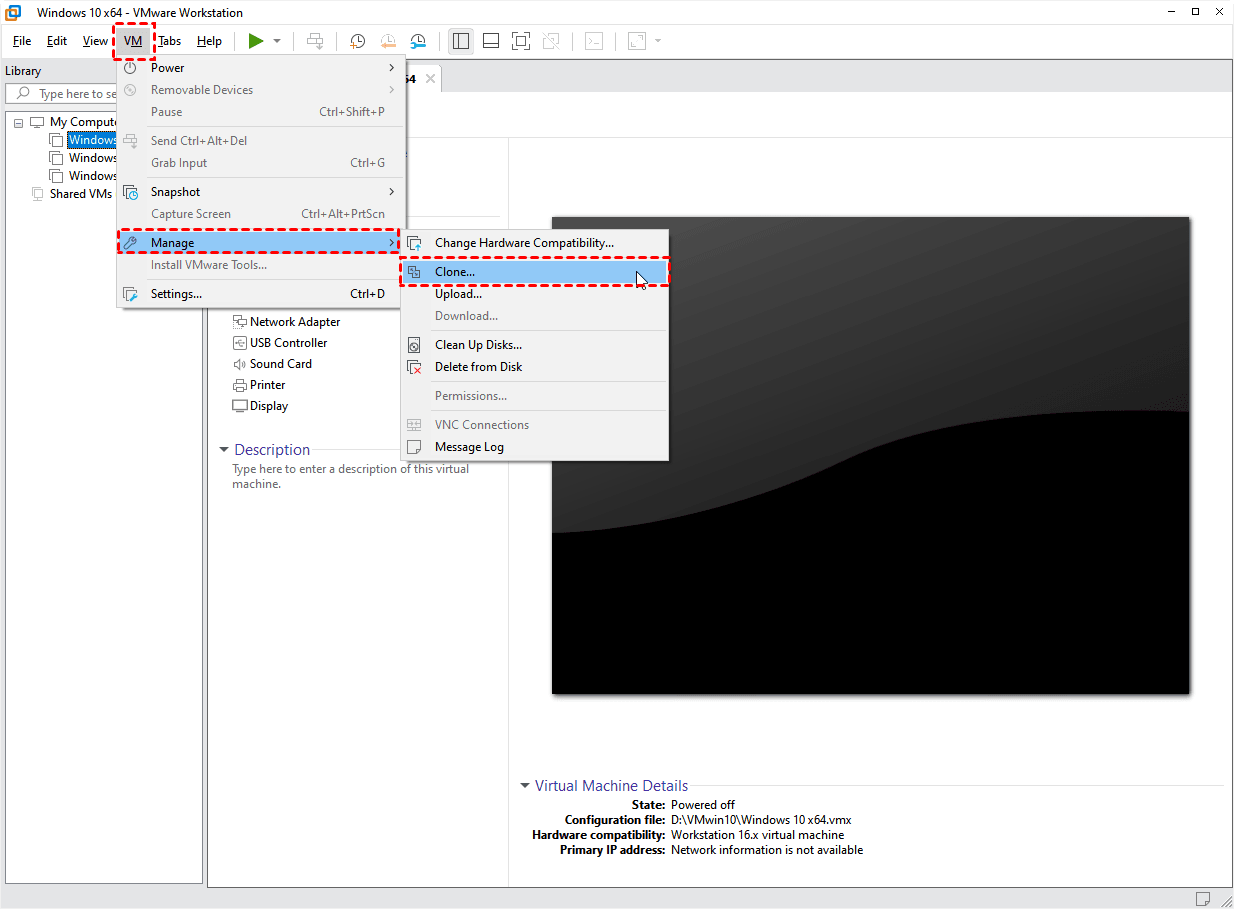
1. Launch VMware Workstation, select the VM you want to clone. Then click VM on the upper bar, and select Manage > Clone…to open Clone Virtual Machine Wizard. Click Next in the prompt window.
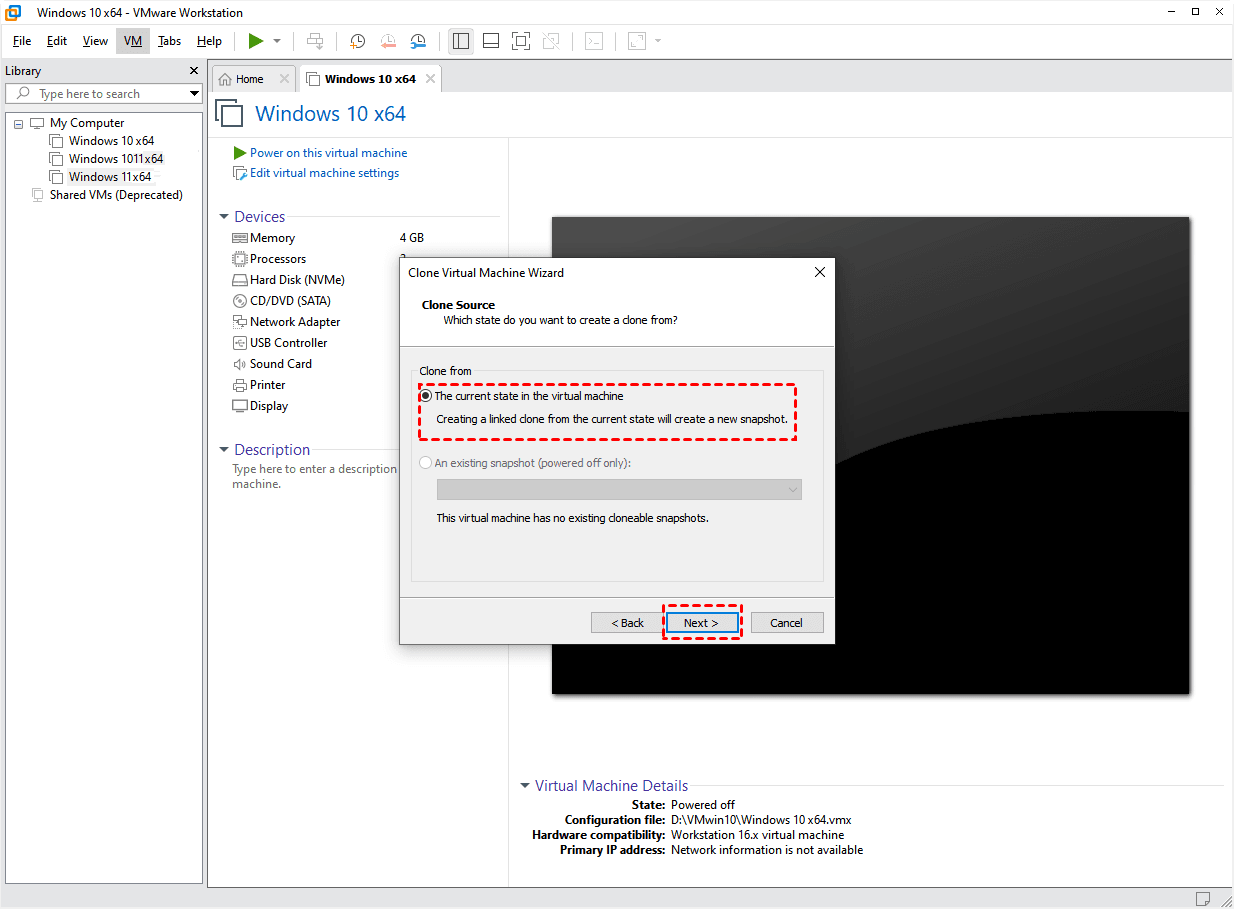
2. Designate Clone Source. You can select to clone from the current state in the virtual machine, or from an existing snapshot (powered off only).
If you select the upper one, workstation will create a snapshot before cloning it.
If you don’t have a usable snapshot, the second choice will be unselectable.
Click Next.
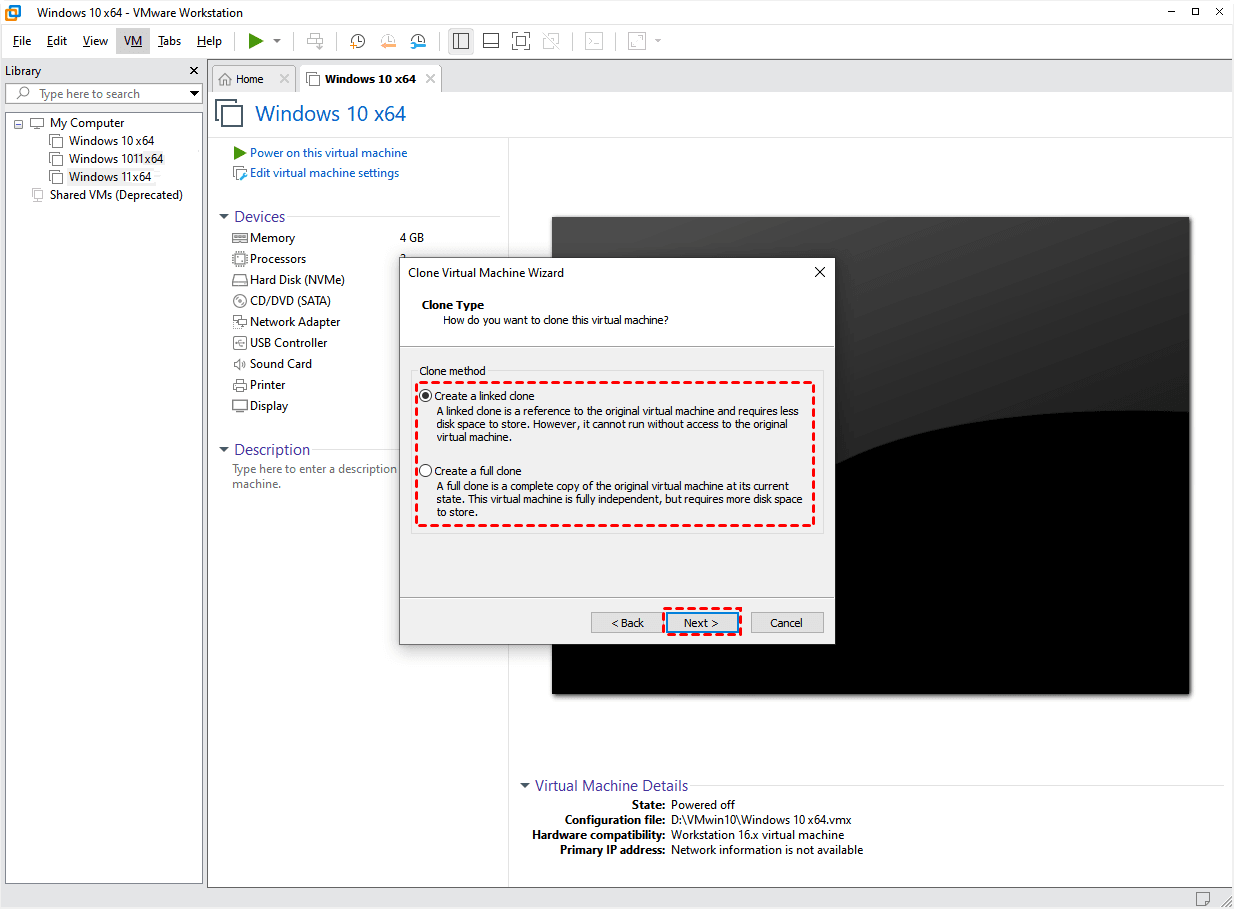
3. Designate Clone Type. You can create a linked clone, or create a full clone.
Note:
● Linked clone: A linked clone is created via parent virtual machine and shared virtual disks, and thus relies on it completely. Although it's fast and space-saving to create linked clone, the performance of cloned virtual machine will degrade. And if the parent VM corrupted or snapshot lost, the linked clone will also not be usable. Besides, if the parent VM moved, you also need to reassign the parent VM location of linked clone.
● Full clone: A full clone is completely separated from the parent VM. But the cloning will take longer since it doesn’t share virtual disks.
4. Fill in the name and storage path of your clone. Then click Finish.
Way 4. Backup Virtual Machine as Physical Machine (Most Flexible)
By installing a backup agent on the guest operating system (OS) of the workstation virtual machine, you can backup it as it is a physical machine. Which means you can exclude insignificant applications and data from backups to reduce the size, and perform granular recovery when you only need some specific files urgently.
Furthermore, in this way you can also migrate all data on one virtual or physical machine to another, for example, convert VMware to Hyper-V or vice versa. In this regard, it is more flexible than the 3 above ways.
To backup VMware Workstation VMs more efficiently, here I will introduce you a professional backup software, AOMEI Centralized Backupper which can back up all windows systems.
In addition, as a centralized backup software, you can also manage backups of multiple virtual or physical machines, for all windows PCs, workstations, and servers within LAN, on one central controlling computer. For enterprises, it can greatly promote effectiveness.
Here is a 30-day free trial for you:
To properly using AOMEI Centralized Backupper to back up virtual or physical machines of multiple endpoints, you need follow these steps:
Attach an IP (better static) to the virtual machine you want to back up.
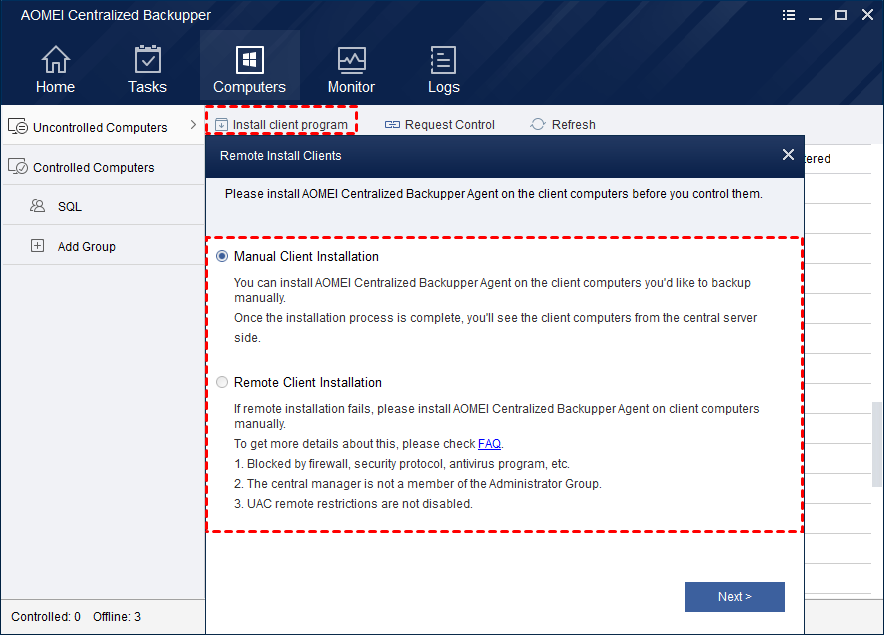
Launch ACB, and install ACB Agent remotely or manually on virtual or physical machines by clicking Computers > Install Client Program.
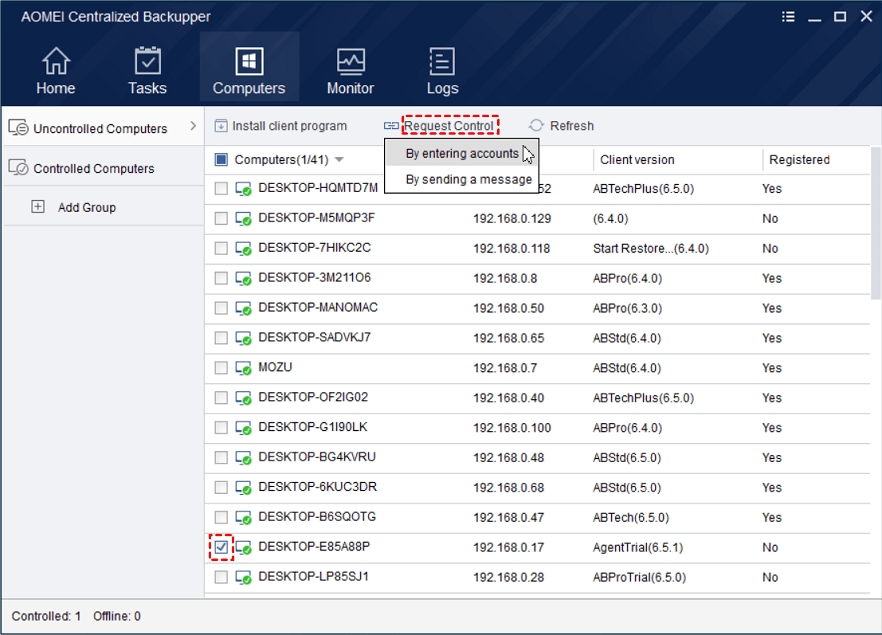
For the computers with client programs installed manually, you still need to Request Control over them for the further operation.
Click Computers > Uncontrolled Computers to find the correct IP of virtual or physical machines, then click Request Control on the upper bar. A prompt window will show on their interface, once all permission received you can start to back up them whenever you like.
How to Backup Multiple Virtual or Physical Machines on ACB
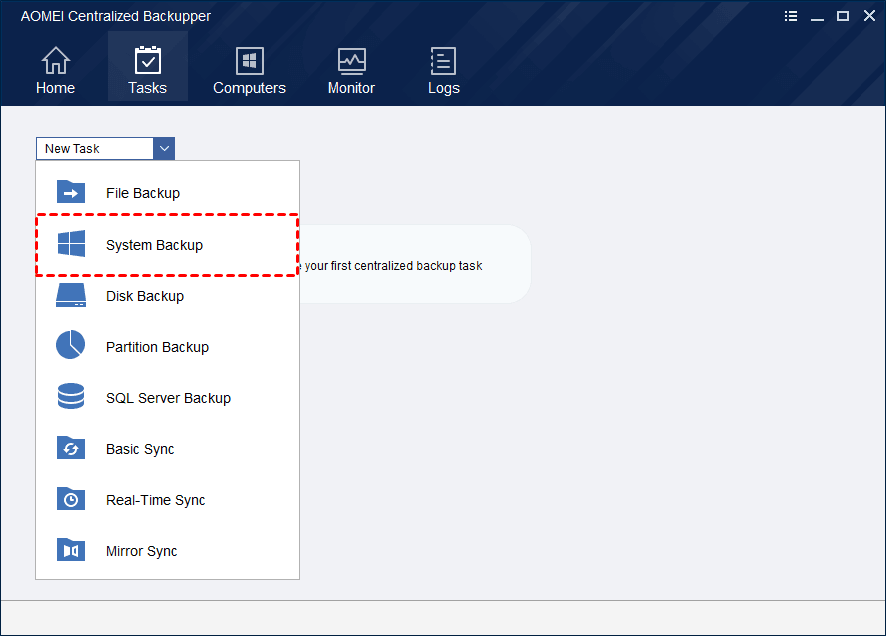
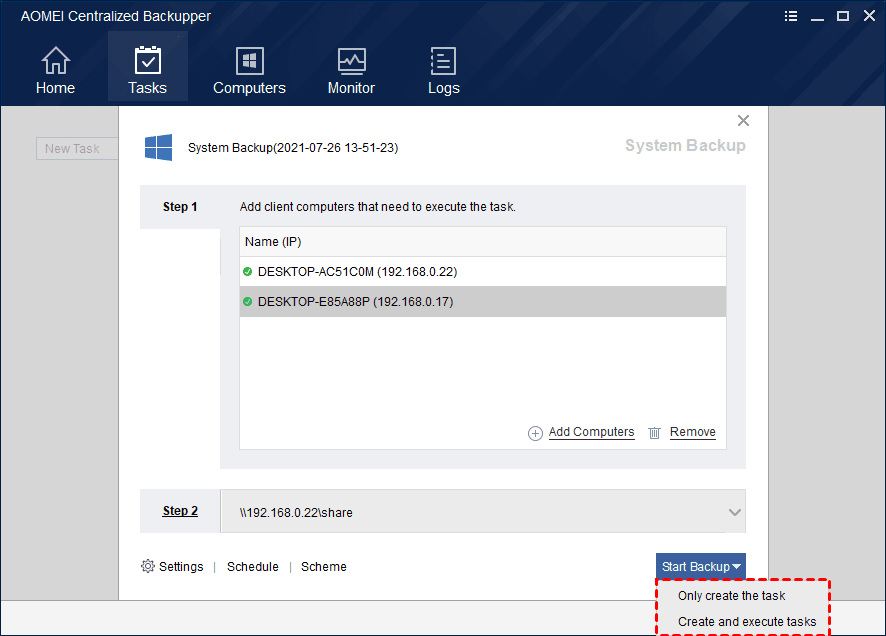
1. Click Tasks on the upper bar, click New Task and select System Backup to create a new backup task. Follow the 2 steps in the prompt window.
2. Step 1, click Add Computers to find the correct IP of the virtual or physical machines you want to backup, you can select multiple of them. click OK.

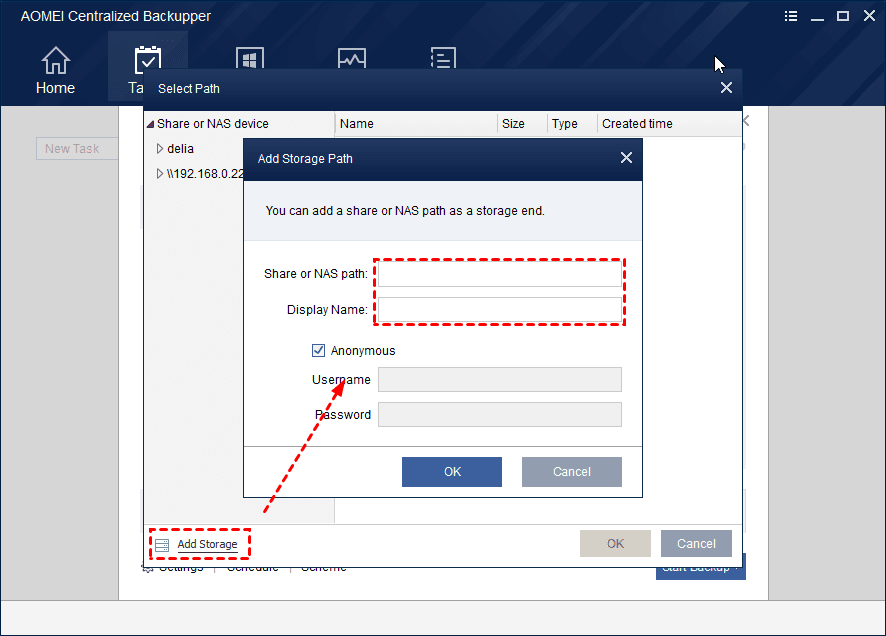
3. Step 2, select a location as the destination path. you can click Add Storage in the prompt window to add a Share or NAS Device as a storage end.
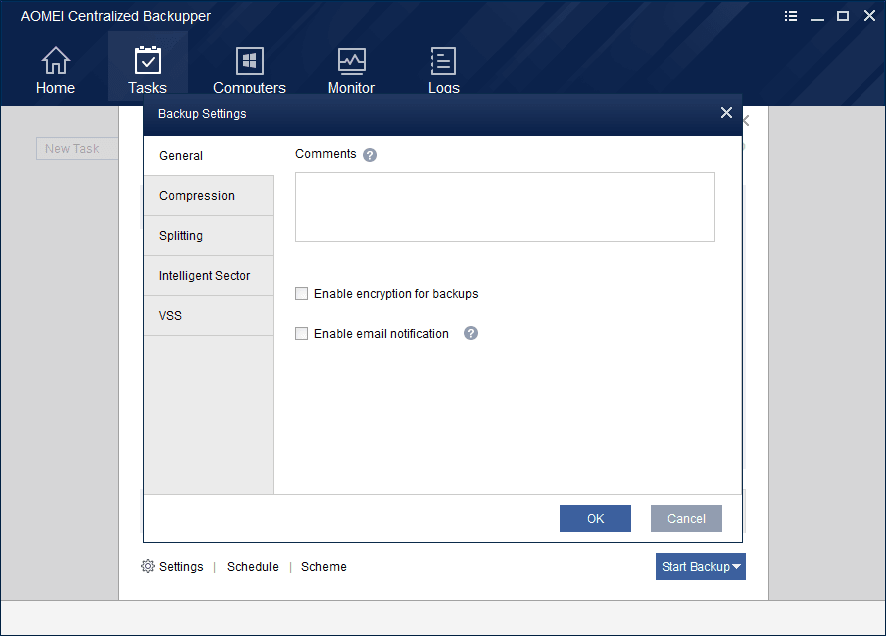
Besides, click Settings you can set Encryption, Compression level, Splitting, Intelligent Sector, and VSS in the prompt window.
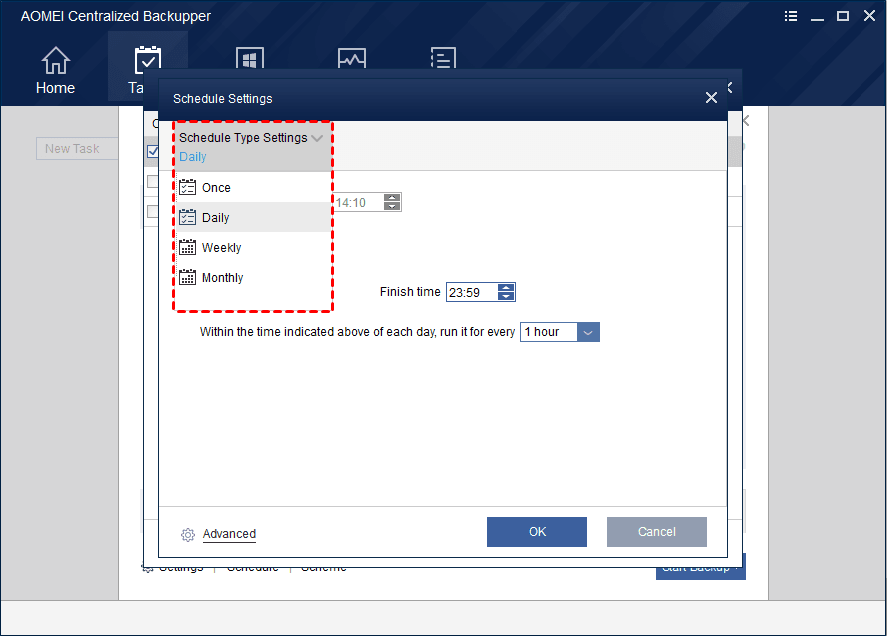
Click Schedule, you can manage the time and frequency to automatically back up virtual or physical machines.
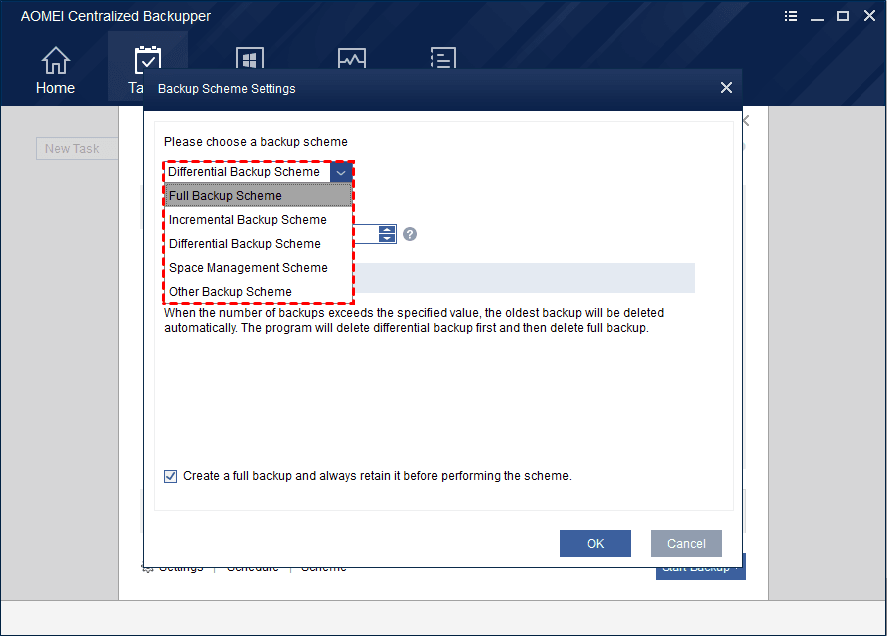
Click Scheme, the oldest backup will be automatically deleted once a new one is created, which is space saving.
4. Then click Start Backup, you can choose Only create this task, or Create and execute the tasks.
Once created, tasks will show on Tasks page separately. You can Edit Backup or Restore by clicking Advanced on the upper right of the task. To learn how you can view this article: Manage Backup Tasks
Summary
To protect your critical VM data from lost, it is very essential to back up VMs properly and regularly.
So how to backup VMware Workstation VMs? In this article I introduced 4 methods to do this. They are enough for VMware Workstation users. But if you are using VMware vSphere, they are not enough especially for enterprises that manage a large number of VMs. Built-in methods that can only back up one single VM once are laborious, and you may need some professional backup software to help backup VMs, for example, AOMEI Cyber Backup.
Always remember to back up your VM data and then go back to enjoying the virtual machine world without worries. Hope these 4 methods I shared could literally help you.

