Easiest Solution to Upgrade SSD on Lenovo Thinkpad Yoga 2 Pro
Find the easiest solution to upgrade SSD in Lenovo ThinkPad or Idea pad Yoga 2 Pro here with the help of sophisticated cloning software AOMEI Backupper.
Why upgrade SSD in Lenovo Yoga Pro 2?
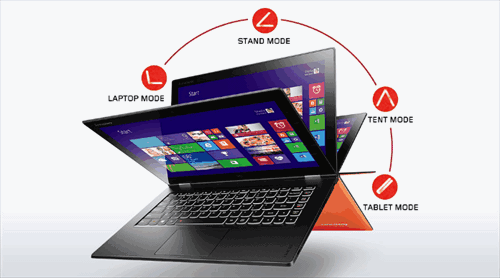
Lenovo Yoga 2 Pro is great convertible device that can be used as both a tablet and laptop computer. Yoga 2 Pro is designed for flexibility which allowing users to use it in a variety of situations since it allows the screen to swivel 360 degrees. Besides, the Yoga 2 Pro puts emphasis on touch screen integration. This laptop also has many other light-spots say 3.1 pounds weight, 3200*1800 displays etc.
The Yoga 2 Pro comes with three levels of storage, 128 GB, 256 GB, and 512 GB. If you happen to buy the laptop with small capacity before, you may want to replace SSD in Lenovo Yoga 2 Pro with larger one. What’s more, hard drive fails due to lots of factors, virus, and hacker, man-made destroy and so on.
If you bought laptop with large SSD, you would like to upgrade Lenovo ThinkPad Yoga SSD when it is about to failing. Therefore, a SSD to SSD migration is inevitable. Well, the question is how to upgrade SSD in Lenovo Yoga.
How to upgrade SSD of Lenovo Yoga 2 Pro?
Cloning current SSD to new SSD is the most straightforward method so far if you don’t want to reinstall everything from scratch. There are several events you have to prepare, torx #5 screwdrivers to unfold laptop rear cover, USB to mSATA adapter cable to connect new SSD to laptop, and reliable cloning software to clone old SSD to new. You may pay attention to the last one because it may be the vital aspect of successful booting.
The Disk Clone feature in AOMEI Backupper Professional could assist you finish the most important part. This cloning feature will move all partitions on the old SSD to new including Lenovo One Key Recovery partition. It allows you to resize partition on the destination SSD during the cloning software so that you won’t bother to configure it later.
AOMEI Backupper also provides corresponding functions in disk clone, "Live Disk Cloning” that can clone one disk to another without breaking off the running operating system and programs. Download its free trial to learn steps to upgrade SSD on Lenovo Yoga 2 Pro.
SSD upgrade for Lenovo Yoga via AOMEI Backupper
Before start, it is better to backup important data to safer place. This operation won’t cause damage to your SSD, but you cannot be more care with your data.
1. Connect the new SSD to your Yoga 2 Pro via USB to mSATA adapter, and make sure it can be recognized by Windows. Install and launch AOMEI Backupper. Select Clone and then click Disk Clone.
2. Select the source SSD.
3. Select the new SSD.
4. This is the place where you can edit partitions on the destination SSD. Remember to check SSD Alignment box to get the peak performance of SSD. After all customized configuration, click Start Clone to continue. You’re almost done.
Tips: You may receive this information if you have more than 3 partitions on GPT disk and the SSD is formatted in MBR:
“Note: The source disk contains over 3 partitions. Disk Clone only supports to copy 3 partitions at most from GPT disk to MBR disk. You could use Partition Clone to copy the remaining partitions to this destination disk.” Alternatively, you can merge partitions together to solve this issue.
5. Shut down your Lenovo Yoga 2 Pro. You may set it to shut down after completing. Unscrew all the torx screws on the bottom and put them in a safe place, a small box for example. A plastic card would help you take off the rear cover. Unplug the battery for safe.
6. Replace current SSD with the new SSD, and ensure that they are the same as before. Now reconnect the battery, install the laptop back cover and start your Yoga 2 Pro.
Although there are practical operations, it is easy to handle. The key point is you choose the right cloning software AOMEI Backupper in upgrading SSD on Lenovo Yoga 2 Pro. If you don’t want to replace the entire SSD, you may clone Windows boot drive to SSD only. As you can see from the screenshots, this cloning software is also good backup solution since it is great alternative to File History and Windows 7 Backup and Restore.


