How to Use Robocopy on Windows Server 2016 & Best Alternative
Unlock the potential of Robocopy in Windows Server 2016 and streamline your operations with unparalleled efficiency. Discover the power of robocopy Windows Server 2016 in this comprehensive guide!
By Miya Updated on February 21, 2024
Introduction:
In the fast-paced world of technology, efficiency is key. Businesses and organizations strive to optimize their operations, especially when it comes to managing data and files on Windows Server 2016. Enter Robocopy, a powerful command-line tool that can revolutionize the way you handle file transfers, backups, and synchronization.
In this comprehensive guide, we'll delve into the ins and outs of Robocopy in Windows Server 2016, exploring its features, commands, and backup capabilities. Get ready to download Robocopy for Windows Server 2016 and take your efficiency to new heights. Of course you can also use Robocopy in Windows Server 2012.
👉The Best Alternative to Robocopy in Windows Server 2016
Is Robocopy Available on Windows Server 2016?
Robocopy (Robust File Copy) is an integrated command-line tool for copying files in Windows operating systems. It comes pre-installed in Windows Server 2016 and offers advanced capabilities for file and directory replication.
Key Features of Windows Server 2016 Robocopy:
- Transfer files between computers via network.
- Mirror directories to any accessible location.
- Duplicate drives to another destination.
👉 Commonly Used Options in Robocopy:
/s: Copies subdirectories, excluding empty ones.
/e: Copies subdirectories, including empty ones.
/lev: Copies only the specified number of levels from the source directory tree.
/z: Copies files in restartable mode.
/b: Copies files in Backup mode.
/zb: Uses restartable mode, switching to Backup mode if access is denied.
/efsraw: Copies all encrypted files in EFS RAW mode.
/copyall: Copies all file information, including Data, Attributes, Time stamps, Security (NTFS ACL), Owner, and Auditing information.
❤ Note: For additional Robocopy examples, consult the Robocopy page.
Causes of Inefficient File Management:
- Manual Processes: Relying on manual file transfers and backups can lead to human errors and inconsistencies in data management, impacting productivity and accuracy.
- Lack of Automation: Without automated tools, repetitive tasks become a drain on resources, taking up valuable time and effort that could be better utilized elsewhere.
- Ineffective Synchronization: Keeping files synchronized across different servers and locations can be a daunting task, often resulting in outdated or missing data.
Solutions: Mastering Robocopy in Windows Server 2016
Now that we understand the problem, let's explore the solutions Robocopy offers. By following these carefully crafted steps, you'll be able to harness the power of Robocopy and optimize your file management workflows:
Step 1: Familiarize Yourself with Robocopy Commands in Windows Server 2016: Get acquainted with the various Robocopy commands, such as /COPY, /MIR, /LOG, and /ETA, to efficiently copy, mirror, log, and estimate the time required for file transfers.
Step 2: Create a Robocopy Script: Leverage the flexibility of Robocopy by creating scripts that automate file transfers, backups, and synchronization processes. Customize your script to suit your specific requirements.
Step 3: Schedule Robocopy Tasks: Take advantage of the Windows Task Scheduler to schedule Robocopy tasks at specific intervals, ensuring regular backups and synchronization without manual intervention.
Step 4: Monitor Robocopy Progress: Utilize the /MON and /MOT commands to monitor the progress of your Robocopy tasks, allowing you to stay informed about the status of file transfers and backups.
Step 5: Validate Data Integrity: After completing your file transfers or backups, use the /R and /W commands to verify the integrity of your data, ensuring that no errors occurred during the process.
The Best Alternative to Robocopy in Windows Server 2016
If you find Robocopy on Windows Server 2016 complex to use for file transfer, consider trying AOMEI Backupper as a simpler alternative.
AOMEI Backupper Server offers a comprehensive set of features including backup, restore, clone, and sync functionalities. Its Basic Sync feature allows you to easily sync folders to various destinations such as external hard drives, NAS, and USB flash drives. Unlike creating image files, Basic Sync operates similarly to Windows' "copy" function, and you can access the synced content at any time.
✤ Flexible sync locations: Perform one-way sync between different locations, such as syncing a laptop and desktop, or syncing files to external drives or cloud storage.
✤ Automatic sync: Schedule Sync feature automates regular file syncing, saving you time.
✤ Background sync: Copy open or running files without needing to close other applications.
Download AOMEI Backupper Server now and follow the instructions to automate file transfers to Windows Server.
Best Windows Server sync software.
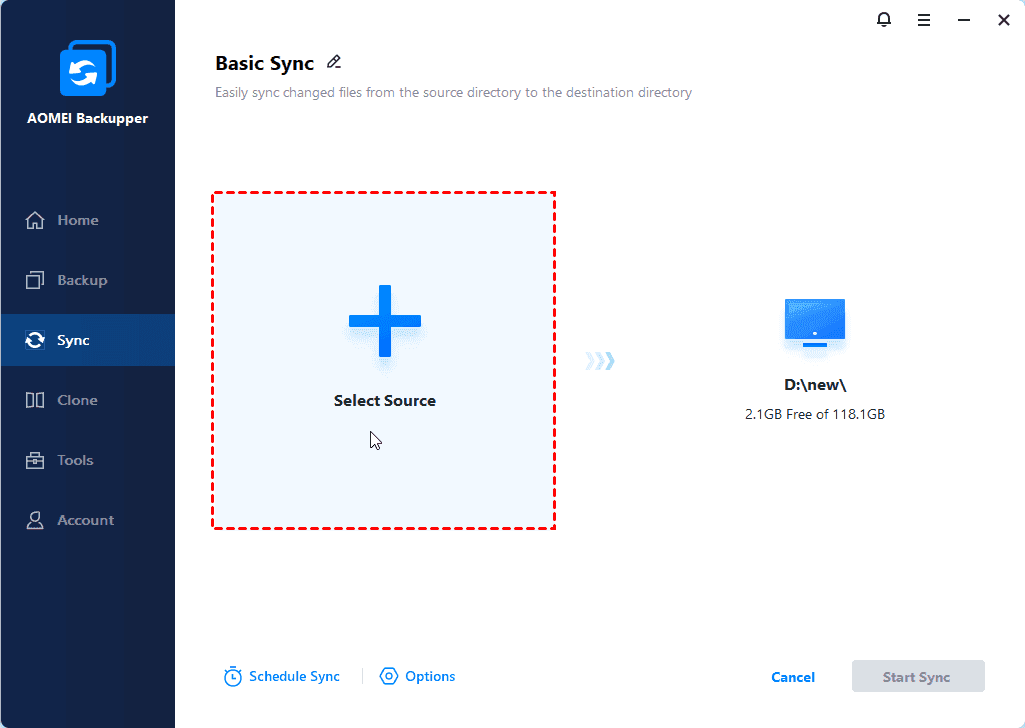
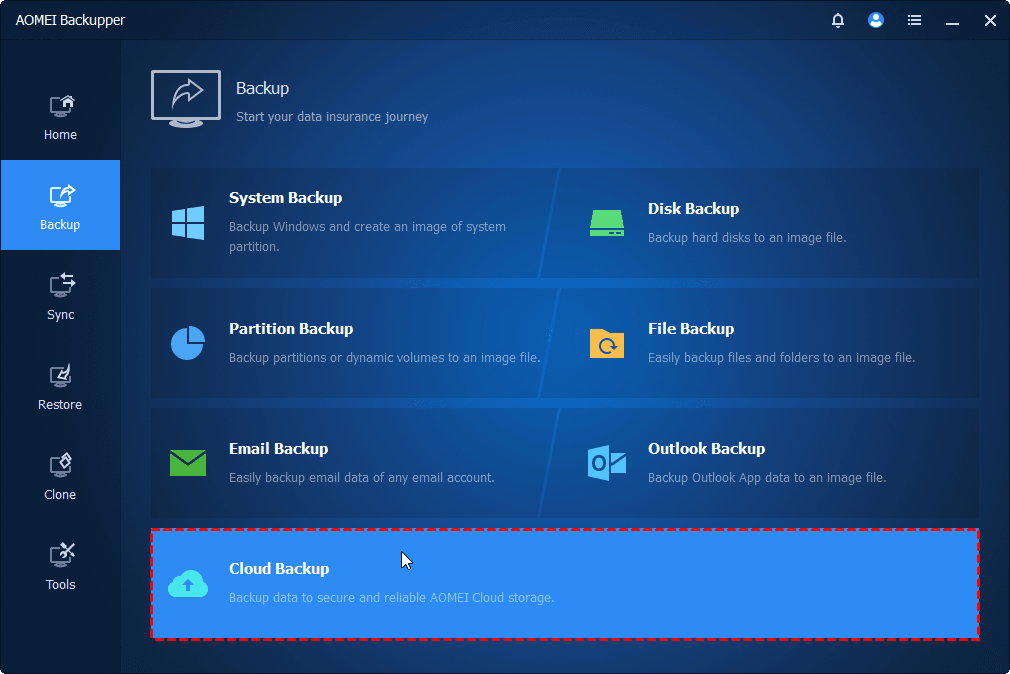
Step 1. Open AOMEI Backupper and choose Basic Sync from the Sync tab.

⚠️Note: Alternative sync modes are available:
Real-Time Sync: Instantly synchronizes files and their modifications upon detection, ideal for frequent file edits.
Mirror Sync: Ensures the destination mirrors the source directory, copying newly added or modified files. Changes in the destination path are overwritten or deleted to uphold synchronization.
Two-Way Sync: Synchronizes files and their alterations between the source and destination directories bidirectionally.
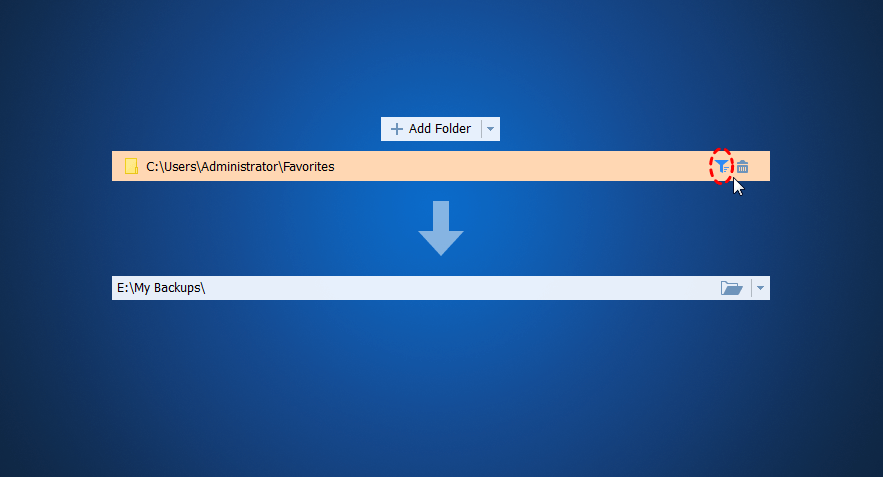
Step 2. Customize the task name to distinguish it from other sync tasks. Click "Add Folder" to choose the folder you wish to synchronize. To include additional folders, select the plus icon.
Tip: After adding folders, utilize the funnel icon to access Filter Settings if you need to refine file filtering. Here, you can specify file extensions to include or exclude, enhancing synchronization efficiency and conserving storage space.
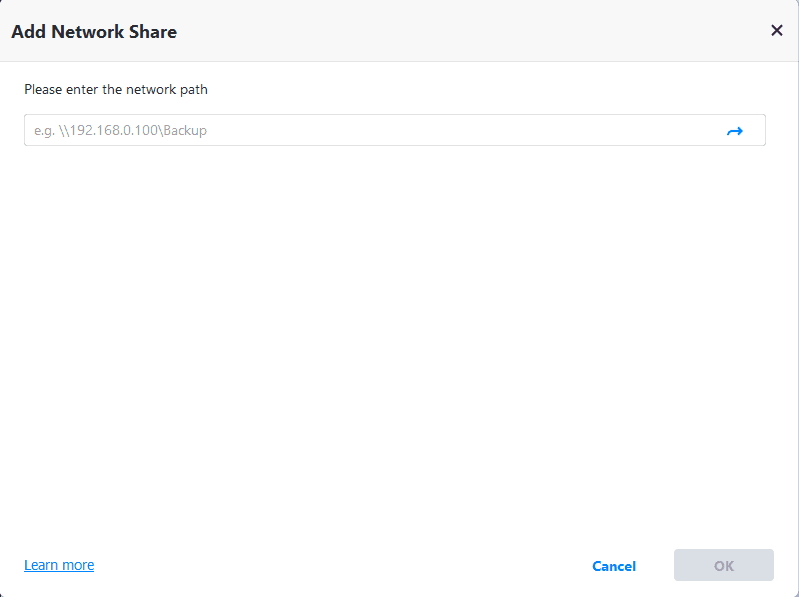
Step 3. Next, designate the sync destination by clicking the folder-shaped button below. Such as expanding the drop-down menu of the second bar and choose "Add Share or NAS Devices." Next, input the network path of the target computer and select the shared folder previously created in the network location.
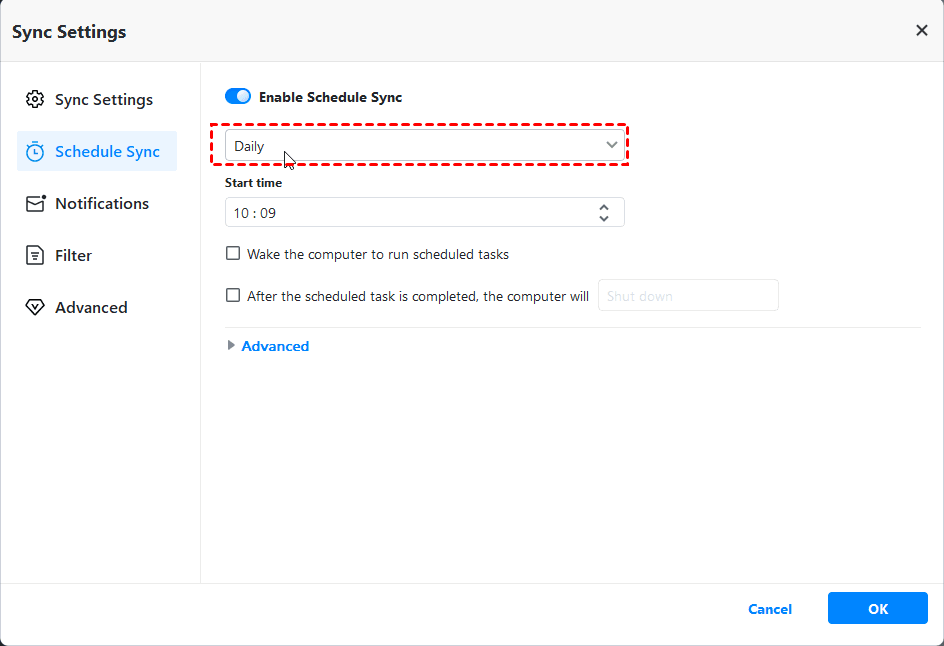
Step 4. (Optional) Click on "Schedule Sync" to establish a schedule for your synchronization task. Choose from options like daily, weekly, monthly, event triggers, or USB plug-ins, depending on your requirements.
Step 5. Lastly, click "Start Sync" to initiate the process.
🧡 Bonus tip:
►When rerunning the Basic Sync task, any data added or modified in the source directory is synchronized to the target. To remove files from the destination location when deleted from the source folder, enable the "Sync the deletions in the source directory to destination" option under Options General.
►Backup Server Files to AOMEI Cloud With the rising popularity of cloud storage, AOMEI provides users with its own cloud service - AOMEI Cloud. Upon signing up for an AOMEI account, you gain access to 1TB of free storage for 15 days.
Tech Terms Explained:
File Synchronization: File synchronization refers to the process of ensuring that files in different locations or devices are updated to reflect the latest changes, maintaining consistency across multiple systems.
- Command-Line Tool: A command-line tool allows users to interact with a computer program or operating system by typing commands into a text-based interface instead of using a graphical user interface (GUI).
- Data Integrity: Data integrity ensures the accuracy, completeness, and reliability of data throughout its lifecycle, preventing any unauthorized modifications, corruption, or loss.
Tips for Optimal Robocopy Usage:
Test Robocopy Commands in a Sandbox Environment: Before implementing Robocopy commands in a production environment, it's advisable to test them in a sandbox or non-production setup to familiarize yourself with their behavior.
- Document Your Robocopy Scripts: Maintain thorough documentation of your Robocopy scripts, including command parameters, schedules, and any customization, to ensure easy reference and future modifications.
- Monitor Log Files: Regularly review the log files generated by Robocopy to identify any potential issues, track progress, and validate the success of your file transfers or backups.
Conclusion:
Efficiency is the cornerstone of effective file management in Windows Server 2016, and Robocopy empowers you to achieve just that. By mastering the power of Robocopy commands, creating customized scripts, and leveraging automation, you can streamline your file transfers, backups, and synchronization processes. Additionally, combining Robocopy with backup software like AOMEI Backupper enhances yourMastering Efficiency: Unleash the Power of Robocopy in Windows Server 2016.

