


How to Fix VMware Internet Not Working Issues (Solved)
It’s frequent to fail to connect physical or virtual machine to Internet. In this case, you may be upset since you cannot find the exact reason to fix it. So in this article, there are detailed troubleshooting tips for you to solve problems successfully.
By Crystal / Updated on December 20, 2024
Help: My VMware Internet not working
I'm facing this strange problem from yesterday. Internet is working properly in my host machine but not working in my VM. It shows that the internet cable is unplugged. I'm getting a 'X' mark on the internet icon. Even if I'm connected in Wi-fi or LAN, I'm getting the same issue.
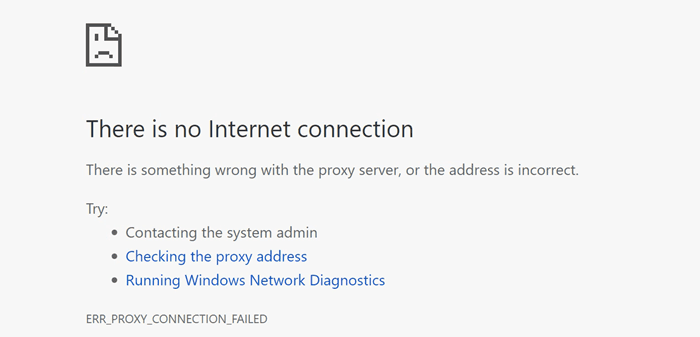
We've discussed Hyper-V VM no internet issue in a previous article. In fact, you may also encounter this situation in VMware - When you open Internet Explorer on a VM, it cannot display the webpage or an X is displayed above the network connection icon, which means your VMware virtual machine has no Internet connection.
Why does this problem occur, and how can you deal with it?
Why VMware internet not working (possible causes)
There are many reasons may cause VMware internet connection not working, for example:
- Firewall blocks Internet access.
- The virtual machine does not have an IP address.
- Bridge, host-only, or NAT network connection failed.
- The Ethernet controller driver is not installed.
……
Since it is difficult to specify which causes network problems in the first place, it's better to check each item one by one. Next, I will demonstrate how to connect virtual machines to Internet on VMware properly, and show the process in VMware Workstation as an example.
How to fix VMware Internet not working (troubleshooting)
◆ If your VMware connection to Internet not working, first, please restart the virtual machine. Power off the VM, and reboot the host. After that, re-open the virtual machine. If it still has no Internet access, please perform troubleshooting as followings.
◆ After operating each step, check if the virtual machine has an Internet access. Once the problem is resolved, there is no need to continue with the subsequent steps.
Step 1. Check the VMware host has correct network connection.
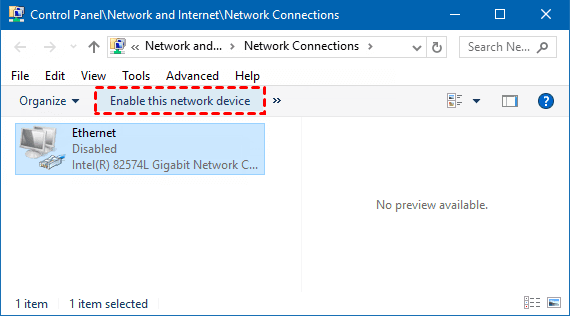
▸ Click “Start” >> “Control Panel” >> “Network Connections”.
▸ Right-click the local area network connection, and select “Enable”.
Step 2. Check that the virtual machine's firewall is not blocking Internet access.

Windows XP: Microsoft Knowledge Base article Turn Windows Firewall on or off
Windows Vista: Microsoft article Turn Windows Firewall on or off
Windows 7: Microsoft article Turn Windows Firewall on or off
Windows 10: Microsoft article Turn Windows Firewall on or off
Step 3. Check antivirus program.
Verify that the virtual machine's antivirus program is not blocking Internet access, and run an antivirus scan to ensure that no viruses or other malware are interfering with the Internet connection.
Step 4. Enable Network Adapter in VMware.
The Internet not working issue may be caused by VMware network adapter not connected. If so, enable it.
▸ Open Control Panel. In the wizard, select “Network and Internet”.
▸Select “Network and Sharing Center” >> “Change adapter settings”.
▸ Select your VMware Network Adapter and “Enable this network device”.
Step 5. Change Network Adapter from NAT to Bridged or (or vice versa).
If one of the choices is valid and the other is not, it is a network connection error instead of a Workstation or virtual machine problem.
Step 6. Remove the network adapter and then add it again.
This is to ensure that the network adapter is connected to the virtual machine. Follow the steps:
▸ Power off your virtual machine first.
▸ Click “VM” >> “Settings” >> “Network Adapter”.
▸ Make sure that the network adapter is at the status as “Connect” and “Connect at power on”.
▸ Confirm the network connection as “NAT or Bridged” instead of “Host-only”.
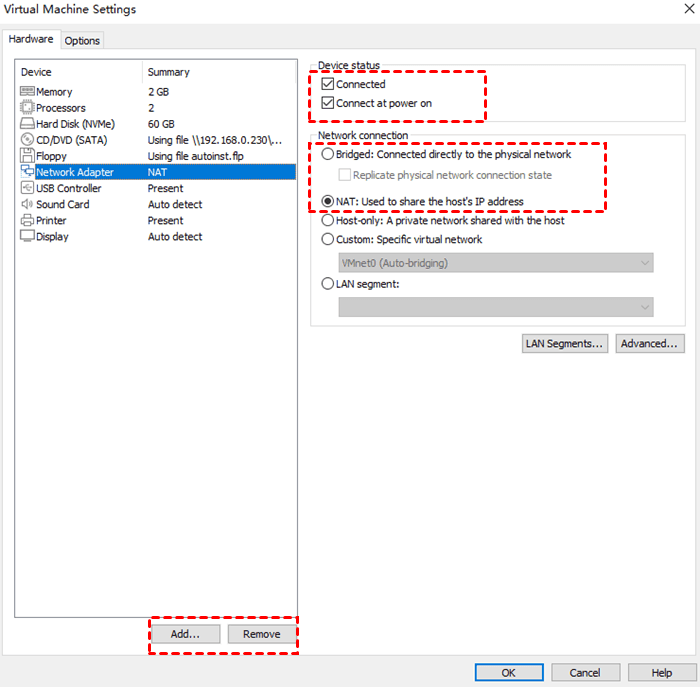
▸ Select “Remove”.
▸ Then go backup to “Settings” >> “Add” >> “Network Adapter” to add a new network adapter which matches your old one.
▸ Restart VMware host and power on the virtual machine to check if the Internet is working in Workstation.
Step 7. Update the Windows network adapter in Device Manager.
▸ Power on the VMware virtual machine.
▸ Click “Start”, right-click “My Computer” >> “Manager” >> “Device Manager”.
▸ Click the arrow to expand the “Network Adapters” section.
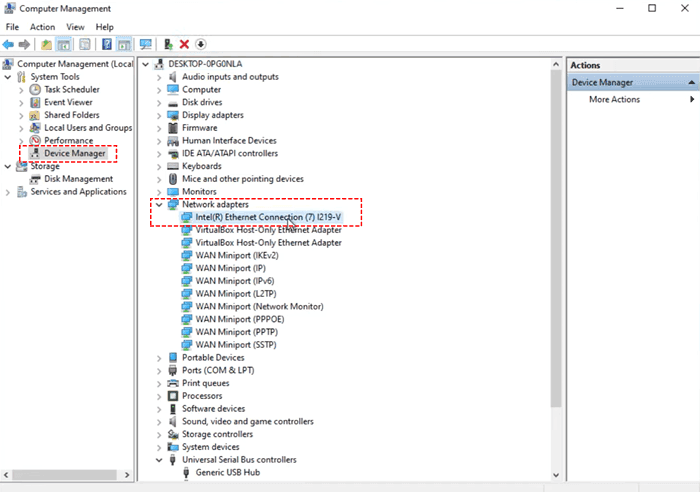
▸ Right-click your Intel(R) Ethernet Connection in the dropped-down list (name may vary) and click “Update Driver Software”. Select “Search automatically for updated driver software”. Or if the drive is not detected automatically, please select “Browse my computer for drive software” >> “Let me pick from a list of device drivers on my computer”.
For Windows XP, select VMware Accelerated AMD PCNet Adapter.
For Windows Vista and 7, select Intel Pro/1000 MT Network Connection.
Then click “Close”, and restart your machine.
Step 8. Uninstall and reinstall all network adapters in the Device Manager.
▸ Start the virtual machine.
▸ Click “Start”, right-click “My Computer” >> “Manager” >> “Device Manager”.
▸ Click the arrow to expand the “Network Adapters” section.
▸ Right-click the “Intel(R) PRO/1000 MT Network Connection” (in Windows Vista and 7) or “VMware Accelerated AMD PCNet Adapter” (in Windows XP) device and select “Uninstall”.
▸ In the menu, click “Action” >> “Scan for hardware changes”.
▸ Restart Windows virtual machine.
Step 9. Reset TCP/IP and Winsock settings to default.
Step 10. Re-download VMware Workstation. It ensures that you get the latest version and will replace/repair any missing or damaged virtual network settings. Verify that the Workstation service is running correctly.
✍ Tip: See more ways to fix a WI-FI connection issues in Windows.
Step 11. Uninstall and Reinstall the VMware Tools & Drivers.
If all else fails, you might want to try uninstalling and then reinstalling the virtual machine tools. These tools typically consist of drivers for the network adapter. See more details General VMware Tools installation instructions (1014294)
By following these steps, you can diagnose and potentially resolve internet connectivity issues and know how to connect virtual machines to internet on VMware.
Example: connect VMware Workstation to Internet
Here, I will illustrate a case to solve VMware Workstation Internet not working.
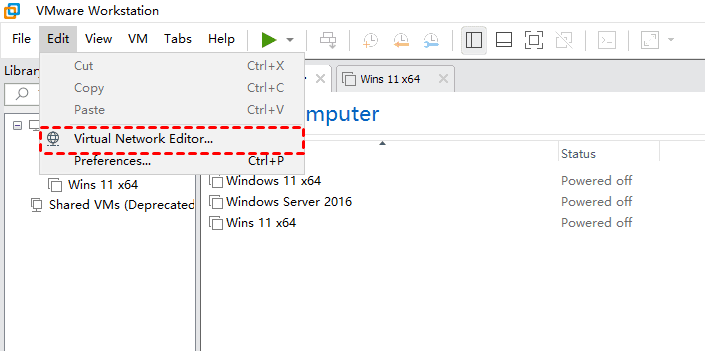
1. Open VMware Workstation, select “Edit” >> “Virtual Network Editor”.
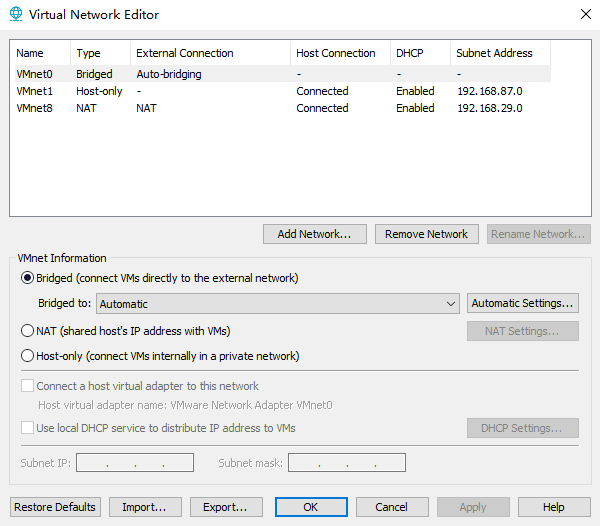
2. In the opened wizard, configure all the network adapters as we mentioned before.
For example, change Bridged or NAT. In the option “Bridge to”, select the correct NIC card used by the VMware Workstation, or select “Restore Defaults”. Then click “OK”.
This doesn’t require you to redownload the VMware Workstation, which reduces the risk of data-loss.
3. If your Workstation Internet still doesn’t work, go to check the DHCP and NAT Service.
▸ Type services.msc to open the Services Manager.
▸ Select the “VMware DHCP and NAT Service”, and select “Restart”.
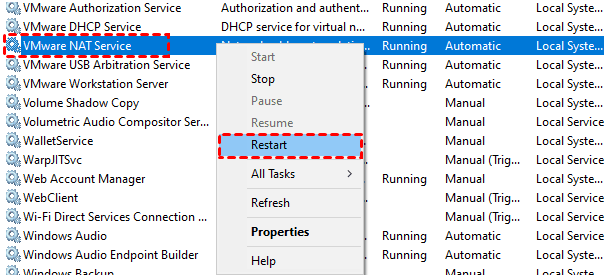
✍ Tip: If you didn't enable Automatic feature, select “Properties” item from the menu to open the VMware NAT/DHPC Service Properties dialogue, change the Startup type from manual to “Automatic”, so the Service will start automatically without the need to manually enable it on your host computer.
After performing these troubleshooting steps, you can successfully connect your virtual machine to the Internet. Network crashes or outages leads to inconvenience to business and also increases the risk of data loss. For enterprise, data-loss equals to financial damage, which is undoubtedly a fatal strike. So backup is a good habit which offers an insurance to your business and virtual machine data.
Further reading: Backup VMware to protect your VMs from errors
In some virtualized environments, the virtual machine's disk storage may be located on network-attached storage (NAS) or storage area network (SAN). Network errors that disrupt connectivity to this storage can cause the virtual machine to lose access to its disk resources, leading to data loss or corruption.
Mitigation strategies include implementing robust network infrastructure, regular data backups, configuring virtualization platforms for high availability, and promptly addressing network issues to minimize the risk of data loss.
While snapshots have their uses, it's important to note that they cannot replace proper backups. Fortunately, there are workarounds available to help protect your virtual machines. For instance, you can manually clone or export VMs, but these methods are not suitable for batch operations and require manual effort.
In contrast, using a third-party tool offers a more efficient and convenient solution for safeguarding multiple enterprise-level virtual machines. Let me introduce you to AOMEI Cyber Backup, a free VMware backup software. This tool could help you:
- streamline the backup process
- continuously monitor the status
- send email notifications in case of errors
- simplify operations into just three easy steps
- Backup data to different locations, such as your local path, external USB, HDD, NAS drive, Amazon S3 cloud
AOMEI Cyber Backup supports both the paid and free versions of VMware ESXi and Hyper-V. You can experience all these conveniences by downloading the perpetual free edition.
3 simple steps to create a VMware VM backup plan
1. Log into the web client of AOMEI Cyber Backup and add vCenter or Standalone ESXi host as the source device.
2. Click Backup Task >> Create New Task. Select VMware ESXi Backup to schedule a VMware backup task.
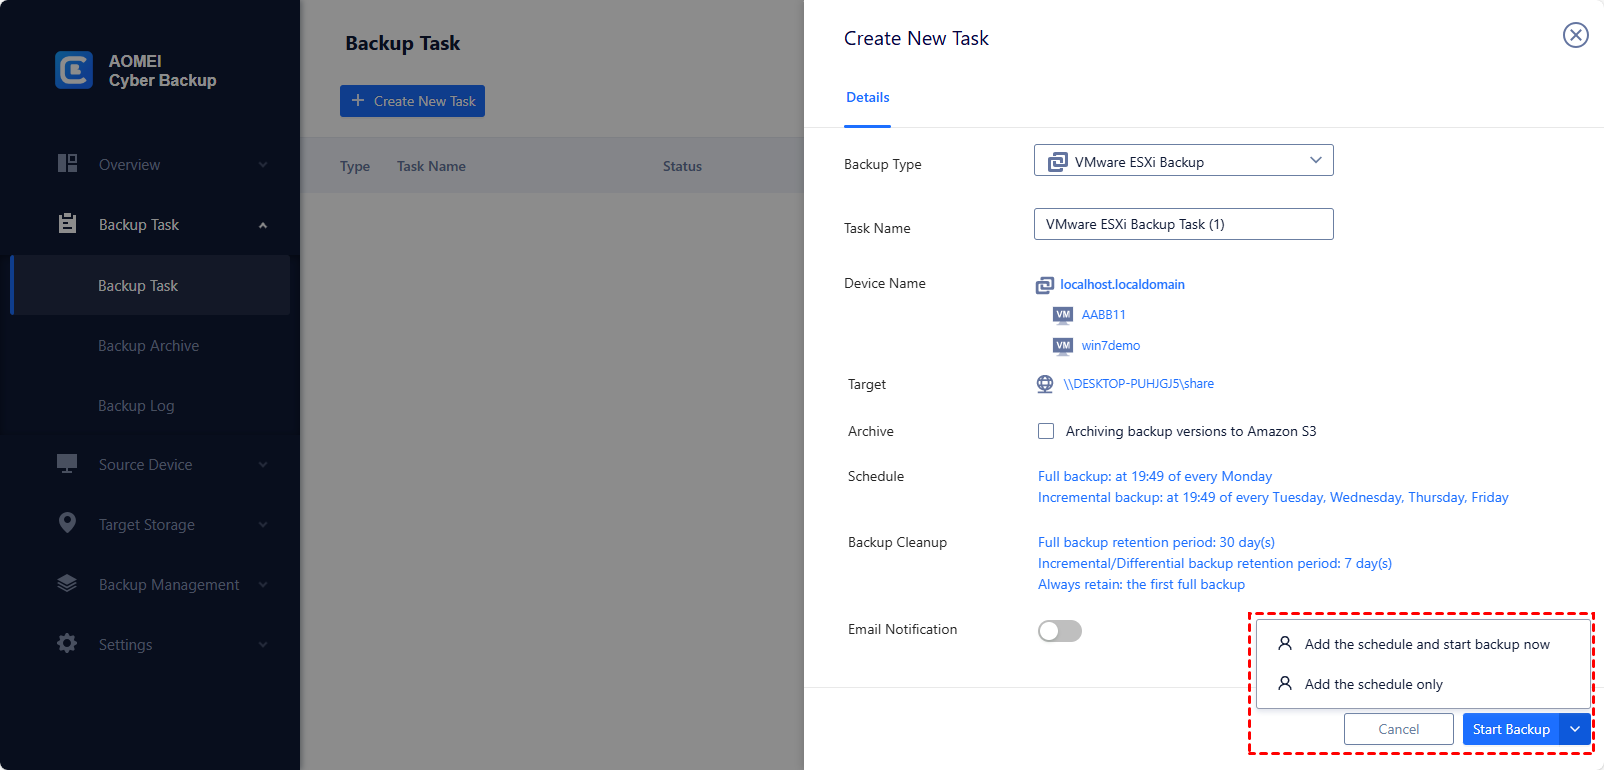
3. Click Start Backup to create and execute the task. Then you can check its status in Backup Task tab.
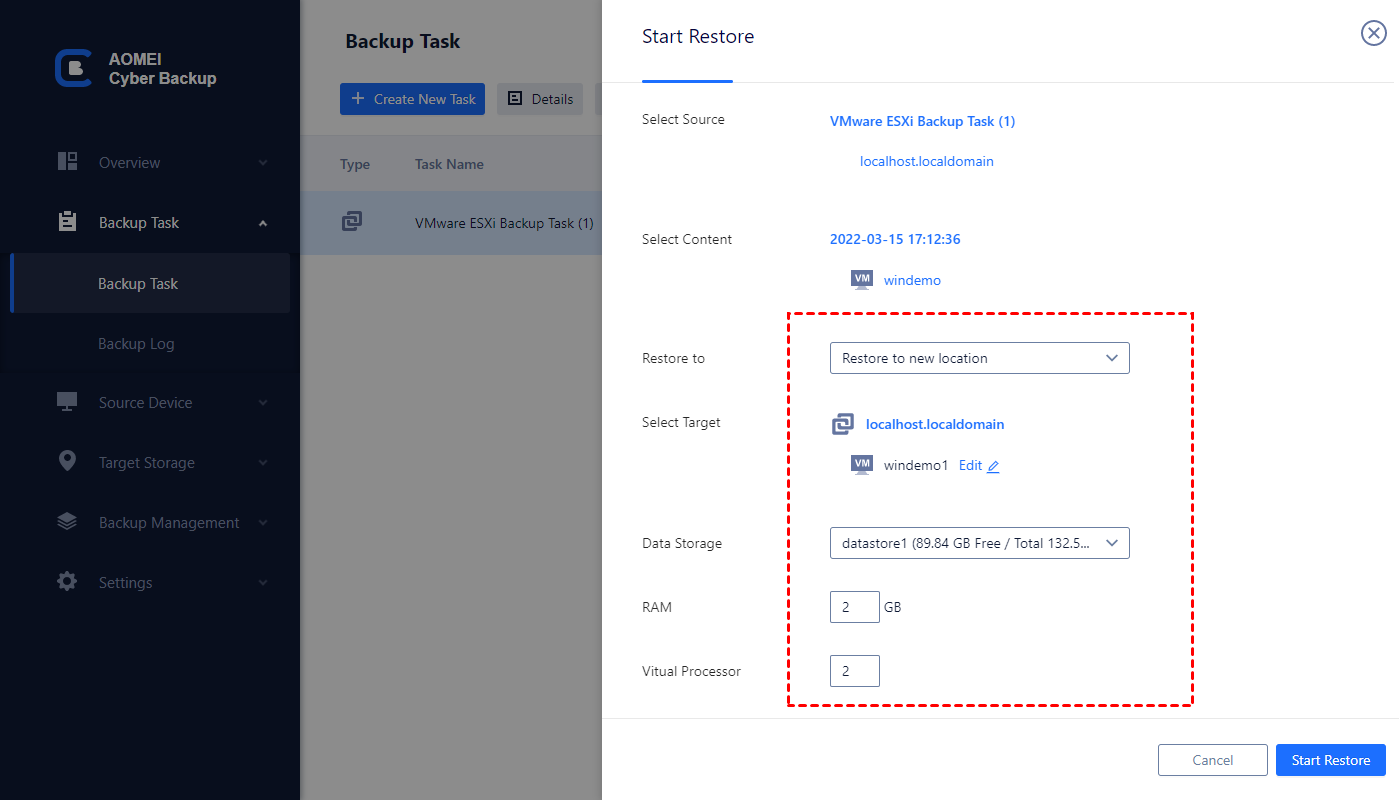
✎ After the backup is completed and when you want to recover the VMs, just click the task to choose Restore. Then you can restore the VM from any point quickly and easily.
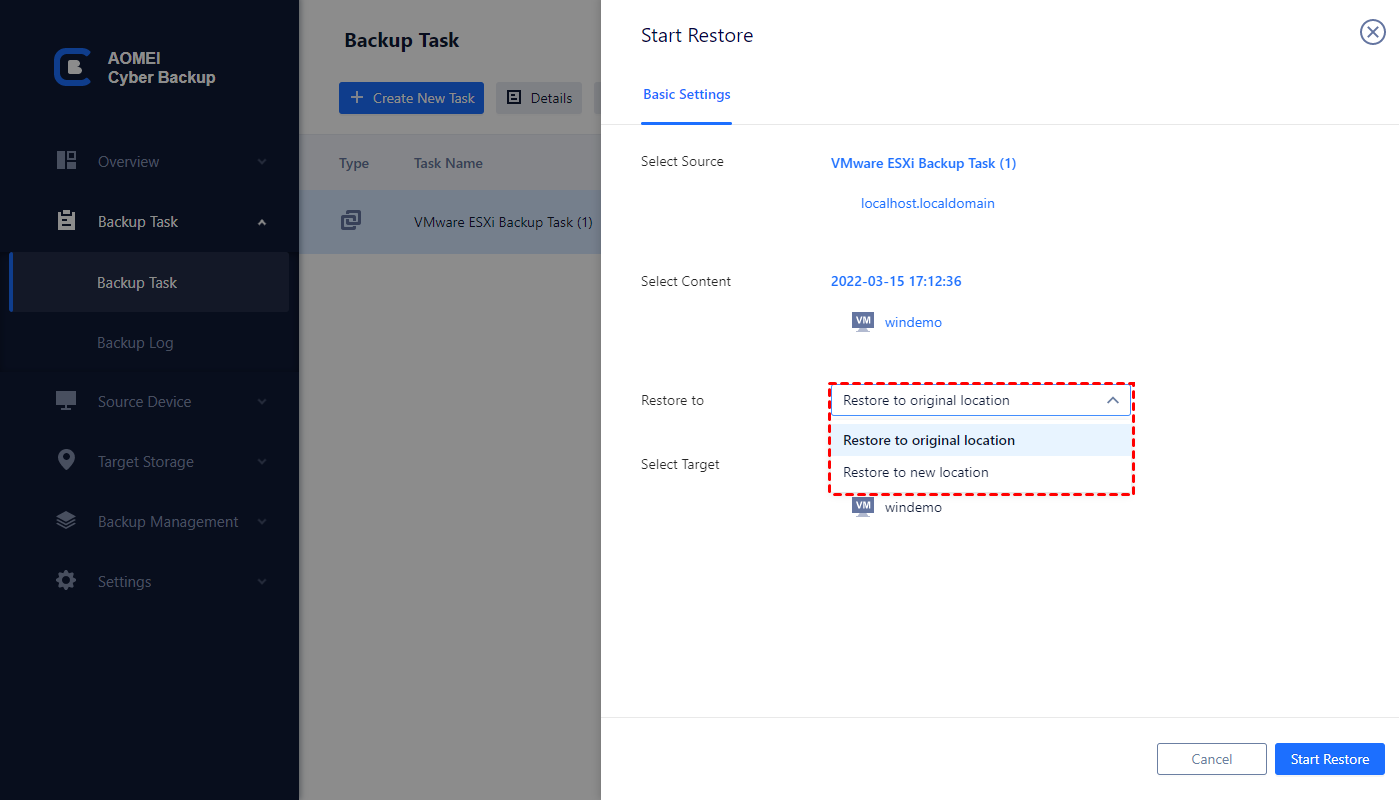
✎ If the restore failed, or you want to make a clone of the VM in the same or another datastore/host, you can also upgrade to Premium Edition to enjoy the advanced Restore to new location feature.
FAQs about VMware Internet connection not working
Q: How can I troubleshoot VMware internet issues on a Mac?
A: On a Mac, troubleshooting VMware internet problems involves verifying network settings, firewall settings, and DNS configurations within both VMware and the macOS environment. Ensure that VMware Fusion is updated to the latest version for optimal compatibility.
Q: Can outdated VMware software cause internet connection problems?
A: Yes, using outdated VMware software may lead to compatibility issues with network protocols and security standards, resulting in internet connectivity problems. It's essential to keep VMware software up to date to avoid such issues.
Q: Are there any specific firewall settings I should check for VMware internet issues?
A: When troubleshooting VMware internet connectivity problems, ensure that firewall settings allow inbound and outbound traffic for VMware virtual machines. Check for any rules blocking internet access or conflicting with VMware network configurations.
Summary
This page helps to troubleshoot VM no internet connection issues on VMware Windows environment. If you cannot browse the web or find your VMware Internet not working after upgrading or other operations, please try the methods mentioned in this article to fix it.
In addition, VMware VM backup is also a frequently used means to protect virtual machines from any unexpected errors and problems.

