


How to Boot VMware Windows 10 into Safe Mode [4 Easiest Ways]
When your VMware virtual machine stops responding or has performance problems, you cannot figure out the exact reason immediately. So you will boot Windows into Safe Mode that disables all third party applications and non-essential Windows services.
By Crystal / Updated on July 22, 2024
Help: My Windows PC Impacted by the CrowdStrike Outage Blue Screen of Death
A Microsoft outage starting Friday evening disrupted airlines, financial, health-care, and energy companies worldwide, causing many work computers to display the "blue screen of death." The outage has stranded travelers, delayed hospital appointments, and halted work.
Microsoft released a USB utility on Saturday, following CrowdStrike's instructions for fixing the issue. A reboot of the system fixes the “blue screen of death” issue for many users, but if the reboot fails, CrowdStrike suggests booting into Safe Mode and deleting corrupted files.
This article will introduce how to boot Windows 10 into Safe Mode and how to protect data from damage in VMware using Windows Backup.

How to Boot Windows 10 into Safe Mode in VMware [4 Ways]
You can use Safe Mode to troubleshoot your computer when it does not start properly, when there is a problem with your VMware network connection or application, or when Windows Update stops downloading updates.
In VMware virtual machine, there are 4 efficient ways to start Windows 10 in Safe Mode. For example, you can use the MSConfig, Startup menu, Restart and Command Prompt.
- Use Restart to enter Safe Mode in Windows 10
- Use MSConfig to boot Windows 10 into Safe Mode
- Use Startup Settings to boot VMware Windows 10 into Safe Mode
- Use Command Prompt to start Windows 10 in Safe Mode
Way 1. Use Restart to Enter Safe Mode in Windows 10
If you have just suffered from the dreaded "Blue Screen of Death", try these steps to boot Windows 10 into Safe Mode, that can effectively help you fix your Microsoft Windows PC impacted by the CrowdStrike bug.
1. Press and hold Shift on your keyboard, then click Start >> Power >> Restart to open Troubleshoot windows.
2. In short, access to Advanced options >> Startup Settings >> Restart, then Enable the Safe Mode options.
✍ Tips: You may be prompted to input your BitLocker recovery key when the device resumes. You will enter safe mode if you keep pressing F4 once the device restarts. Please be aware that in order to log in using safe mode on some devices, you must press F11.
Click Manage Devices > View Bitlocker Keys > Show recovery key to find your BitLocker recovery key.
3. To launch cmd in the Open box after entering safe mode, right-click Start, select Run, and then click OK.
4. If your system drive is different than C:\, type C: and then press Enter. This will switch you to the C:\ drive.
5. Type in the following command and then press Enter:
*Note: Your system drive is C in this case. After this, the CrowdStrike directory will be used.
6. Once inside the CrowdStrike directory, look for the "C-00000291*.sys" file that corresponds to it. Press Enter.
7. Delete the file permanently. Enter the following command and hit Enter to accomplish this.
Then manually find and remove files that match "C-00000291*.sys".
8. Give your device a restart.
Way 2. Use MSConfig to Boot Windows 10 into Safe Mode
In VMware VM, some users find that it’s hard to start Windows 10 in Safe Mode since BIOS passes too quickly to interact with the screen. So you need to add a boot delay first, then go to boot Windows 10 into Safe Mode in VMware virtual machine.
1. In VMware ESXi Web Client, power off the virtual machine you want to add a boot delay, then right-click the VM and select Edit Settings.
2. In VM Option pane, select Boot Options and check the box beside Safe boot and select Minimal (default). Enter a value of 5000 or 10000 instead of 0 for Boot Delay. There are 1000 milliseconds in a second, and the maximum value for the boot delay is 10000 milliseconds or 10 seconds. When you finish, click Apply >> OK.
Note: More information for other VMware virtualization software, please click here: Accessing the BIOS when the POST screen clears too quickly.
3. Check for Force BIOS Setup.
4. Open virtual machine and start the boot process.
Way 3. Use Startup Settings for VMware Safe Mode
Power on VMware virtual machine, then navigate to Startup Settings to start Windows 10 in Safe Mode.
1. Click Windows Start menu >> Settings >> Update & Security >> Recovery >> Advanced startup >> Restart now.
Note: If the Start menu is not working, you can right-click anywhere on Windows desktop, choose Display settings or Personalize to open the Settings.
3. When Windows 10 restart, please select Troubleshoot >> Advanced options >> Startup Settings >> Restart.
4. After Windows 10 restarts one more time, you see several options to boot Windows 10 into Safe Mode.
- Standard Safe Mode - press the 4 or the F4 key on your keyboard to start it
- Safe Mode with Networking - press 5 or F5
- Safe Mode with Command Prompt - press either 6 or F6
Note: According to your configuration, you may need to press n+F8 and then F8 at the same time.
When you’re unable to boot into Safe Mode, you can remove any recently added hardware, restart your VM and long press the Power Button to force shutdown it. Windows virtual machine crashes after passing loading screen and boots into Automatic Repair screen.
Method 4. Use Command Prompt to start Windows 10 in Safe Mode
If you are used to commands, you can open Command Prompt to boot VMware Windows 10 into Safe Mode.
1. On the Advanced options screen, click Command Prompt to open the window.
2. Type this command and press Enter.
3. Close the Command Prompt when you see the notice of The operation completed successfully, then select Continue on the next screen.
After your virtual machine reboots, Windows 10 starts into Safe Mode. You can log in with administrator permissions, and perform the changes you want.
✨Note: On Windows 7, you can press Shift + F8 to get into Windows 10’s Safe Mode. However, if you have a modern PC with a UEFI BIOS and a fast SSD drive, you cannot interrupt the boot procedure with your keypresses. But you can try the methods introduced in this article that will help you boot Safe Mode in Windows 10 successfully.
Error: Why cannot boot Windows 10 into Safe Mode
If you cannot boot Windows 10 into Safe Mode, it might be due to several issues:
- Corrupted System Files: Damaged or missing system files can prevent the system from booting into Safe Mode.
- Hardware Issues: Faulty hardware components, such as a failing hard drive or memory, can cause boot failures.
- Software Conflicts: Recently installed software or drivers might conflict with Safe Mode booting.
- Boot Configuration Data (BCD) Errors: Issues with the BCD can prevent the system from entering Safe Mode.
- Malware: Malware infections can interfere with the boot process, including Safe Mode.
To troubleshoot, you can also try using Windows Recovery Environment (WinRE) to repair your system or try System Restore.
Although booting Safe Mode in Windows 10 is a good way to troubleshoot a virtual machine when it fails to start or has any program problems, it’s too late to save your enterprise data at that moment since you've already exposed yourself to the dangers of data loss. So it’s important to regard VMware backup as a part of daily routine. Regular backup reduces the data risk and protects business security.
[Important] Always backup VMware Windows 10 VMs to avoid computer failure
Safe Mode is designed to load only essential system files and drivers. However, it's important to remember while in Safe Mode, your system may not be fully protected against security threats since certain security features and software may not be active. Therefore, it's advisable to back up your crucial VMware VMs before booting Windows 10 into safe mode.
In VMware ESXi, you can manually clone a VM, copy files in datastore or export VM at once. It’s time-wasting and easy to cause human errors. In order to simplify multiple VM backup and management, you can use the free VMware backup software - AOMEI Cyber Backup to perform virtual machine backup and recovery. It offers flexible backup strategies to secure your VMware environment continuously and automatic backups for multiple virtual machines. You can easily enjoy the following features via the centralized console.
Support Free ESXi: support both paid and free versions of VMware ESXi.
Perpetual Free: 100 % free for AOMEI Cyber Backup Free version.
Easy-to-use: backup and restore multiple virtual machines via a central console without complicated configuration and reinstallation.
Auto VM Backup: run multiple VM backups automatically without human intervention and business downtime.
Fully Compatible: Backup the entire Hyper-V or VMware virtual machine including OS, configuration, application, personal data and system state.
Restore From Any Point: backup VMs according to 3-2-1 backup rule, and restore a virtual machine easily.
Centralized Backup: works for all size of business and creates backups from a central console instead of Agent backup.
Please hit the button below to download and use AOMEI Cyber Backup for free:
Automate VMware backups for free via AOMEI Cyber Backup
With the 100% automatic backup workflow, Hyper-V backup and management is no longer a day-to-day job ensuring you ease-of-use and data consistency.
1. First of all, you need to bind your VMware ESXi to AOMEI Cyber Backup. Then click Create New Task to start scheduling VMware Backups.

2. In the opened window, enter Task Name and select VMware ESXi Backup. Then select the VMware virtual machines on the host.
3. In Target section, backup VMware ESXi VMs to different locations, such as NAS or local disk.
4. In Schedule section, create the automated backup based on daily/weekly/monthly, and it can keep tracking the VM data with full/incremental/differential backup.
5. Click Start Backup.
✍ While the Free Edition covers most of the VM backup needs, you can also upgrade to Premium Edition to enjoy:
✦ Batch VM Backup: Batch backup large numbers of VMs managed by vCenter Server or standalone ESXi hosts.
✦ Backup Cleanup: Specify retention policy to delete unwanted VM backups automatically, thus saving storage space and cost.
✦ Restore to new location: Easily make a clone of a virtual machine in the same or another datastore/host, without reinstalling or configuring a new VM.
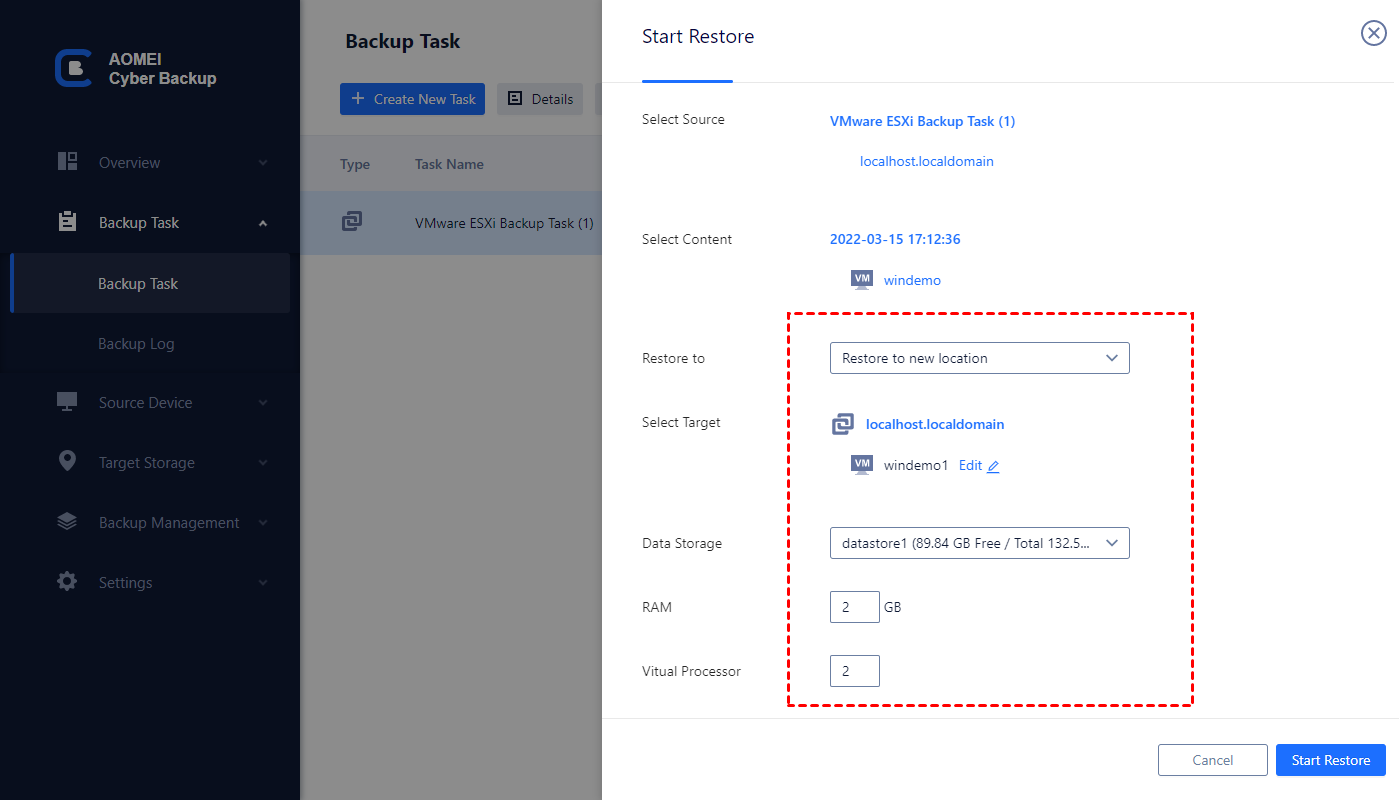
With AOMEI Cyber Backup, you can easily restore VMware to its previous state or restore it to another host without any complicated reinstallation and configuration.
Summary
Booting Windows into Safe Mode is necessary for troubleshooting various issues like blue screen errors, driver conflicts, or software problems. It's also crucial for removing viruses or malware as Safe Mode prevents most third-party software, including malware, from running. Additionally, it can help with problematic software installation or removal, driver issues, system maintenance tasks, and performing System Restore to revert to a previous working state when the system fails to boot properly. Overall, Safe Mode serves as a valuable tool for diagnosing and resolving a wide range of Windows-related problems.
By the way, it’s important to perform virtual machine backups regularly, which protects business from security threats.

