


How to Configure Failover Cluster Manager | Detailed Steps
High Availability guarantees continuous performance for an extended period. How to achieve high availability in Hyper-V virtual machine? This article will take about how to use Hyper-V Failover Cluster Manager to ensure HA in Hyper-V VM.
By Crystal / Updated on September 11, 2024
What is Hyper-V Failover Cluster Manager
Failover Cluster Manager is a tool to create and maintain Hyper-V Failover Cluster which consists of a set of independent Hyper-V nodes that work together. When one node fails, another Hyper-V node will take over its workloads to reduce VM downtime and keep business continuity.
In older to set up High Availability Failover Cluster, you need to access Failover Cluster Manager (FCM) in Hyper-V or configure vSphere HA Cluster in VMware environment.
In this article, I will introduce the Microsoft Failover Cluster Manager which can create a new DNS entry to manage your server cluster. If you’re interested in the Hyper-V failover cluster, don’t forget to check a list of requirements and limitations before you go ahead and attempt to deploy it.
How to install and configure Failover Cluster Manager
Before you configure Failover Cluster Manager, make sure that you have installed FCM. The followings steps are all based on Windows Server 2016, so make sure you have installed Windows Server 2016 on your two servers.
Install Failover Cluster Manger
1. Click on dashboard of Server Manager >> Add roles and features.
2. In the open wizard, click Next to start installing FCM.
3. Select Role-based of feature-based installation.
4. Select a server from the pool on which to install roles and features.
5. Specify Hyper-V as roles and select Failover Cluster as features to install on the selected server.
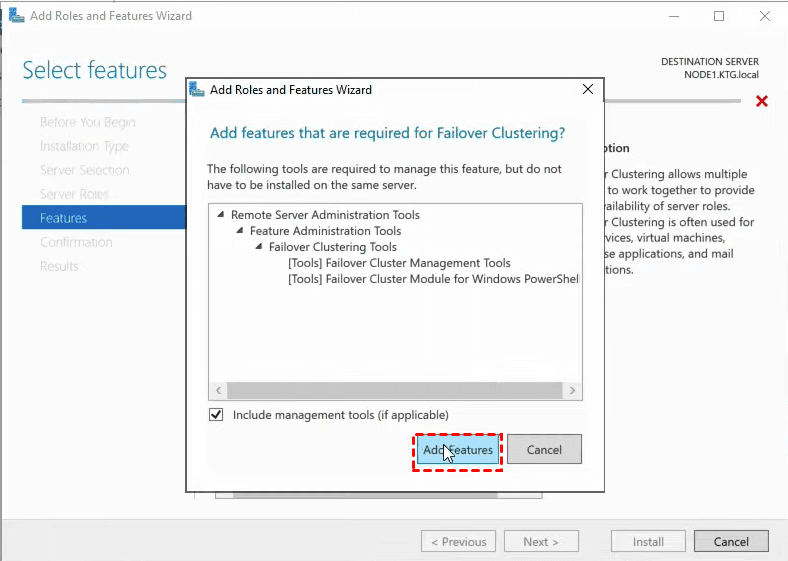
6. Confirm the settings, then click Next to start installation.
Tips: Repeat this procedure on every server that you want to add as a failover cluster node.
Configure Failover Cluster Manager in Hyper-V
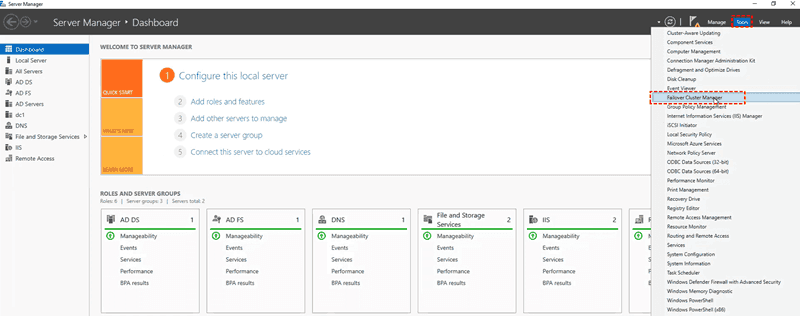
1. Back to main screen, click Tools >> Failover Cluster Manager.
2. On the Failover Cluster Manager page, click Create Cluster.
3. Click Next to start creating Hyper-V failover cluster.
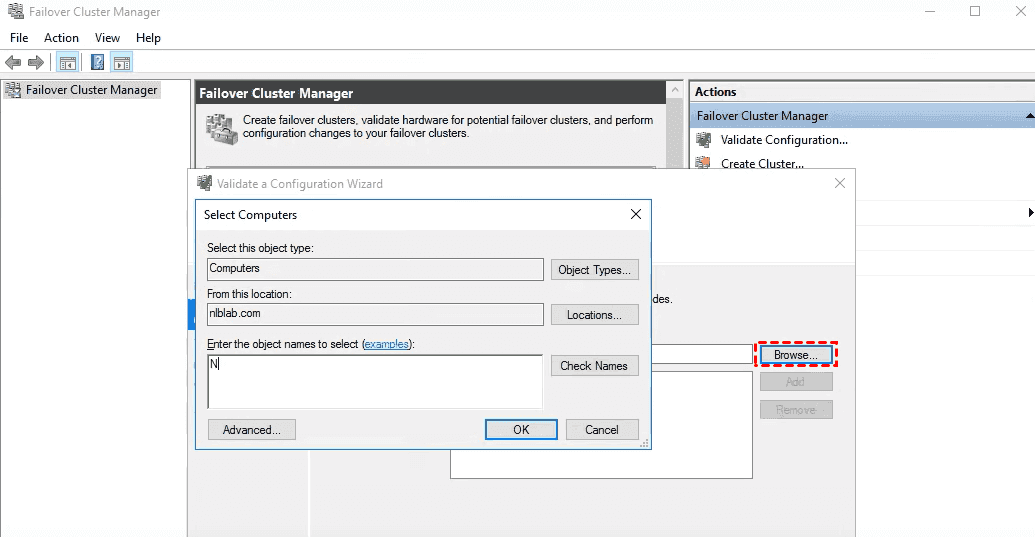
4. Enter the cluster name and select server, or click Browse to find it.
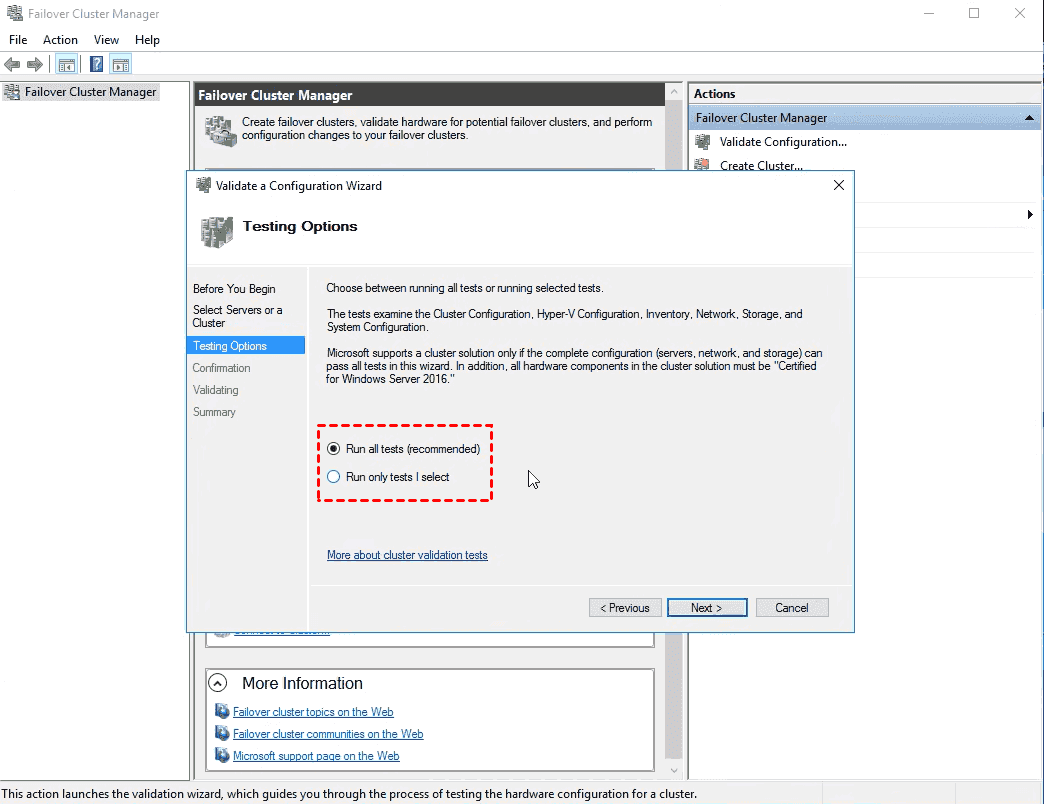
5. Select Run all tests or Run only tests I select. It’s recommended to choose run all tests that includes cluster configuration, Hyper-V configuration, inventory, network, storage and system configuration.
6. Confirm the following settings and click Next to check if the nodes are properly configured to create the cluster. This process may take a while. If you are validating tests in a production environment, it requires disk offline which leads to downtime.

7. Review the tests, and check if there are warnings. You can also click View Report to generate a huge report that describes every single problem. Click Finish.
Move VM to Hyper-V Failover Cluster
There are several ways to add VMs into a newly configured cluster. Besides creating a new VM (applicable mostly for new deployments), you can also choose to migrate an existing VM into the cluster.
This part introduces the detailed steps to move VM to failover cluster manager.
Step 1. Create a High Availability Hyper-V VM
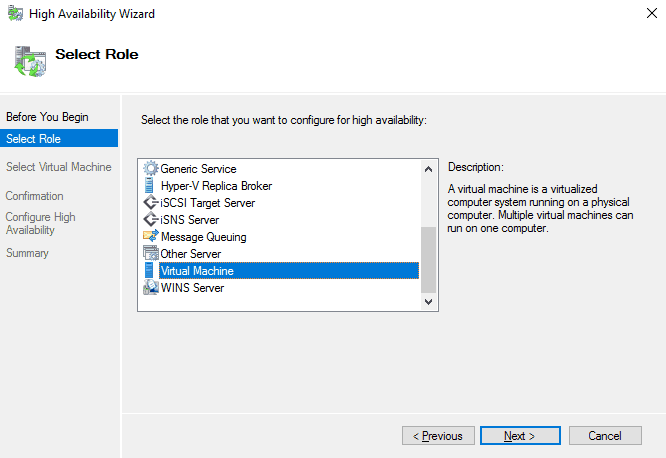
1. Back to the main screen of Failover Cluster Manager, click Role >> Virtual Machine >> Next.
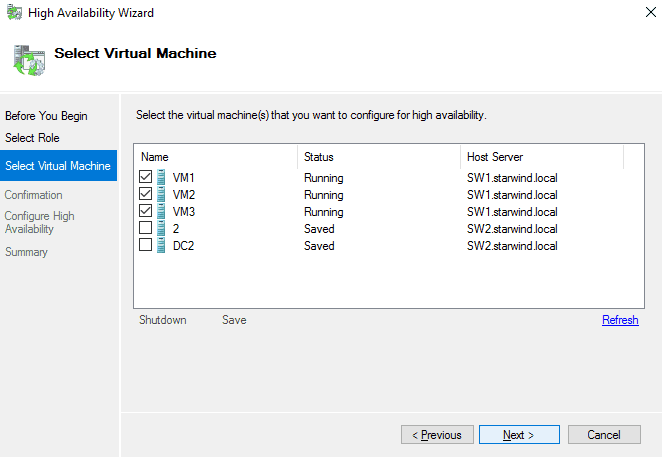
2. On the High Availability wizard, it lists the VMs located on clustered nodes, then select the virtual machines that you want to configure for high availability.
3. Check the configuration and click Finish.
Step 2. Move VM to Failover Cluster
Live migration does not apply to VMs in a new cluster, as their files are located on local storage. Before enabling Hyper-V live migration, the VM files should be relocated to the cluster shared volume.
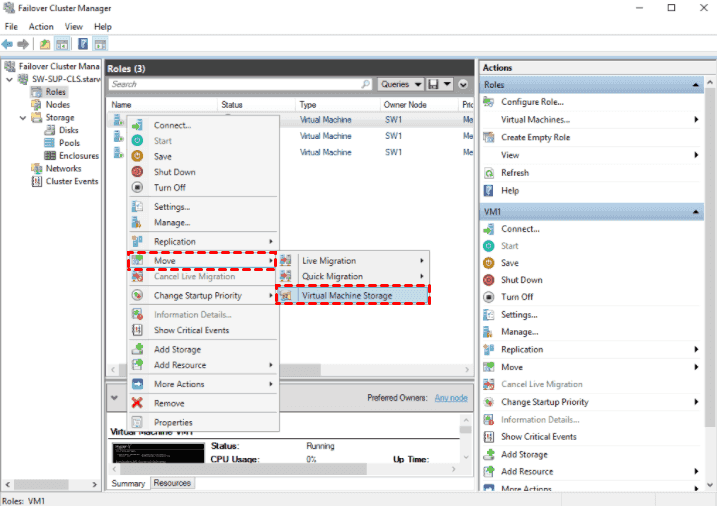
1. In Hyper-V Failover Cluster Manager interface, right-click the VM >> Move >> Virtual Machine Storage.
2. Select the virtual machine files on the upper wizard, and drag them into the lower wizard. Click Start.
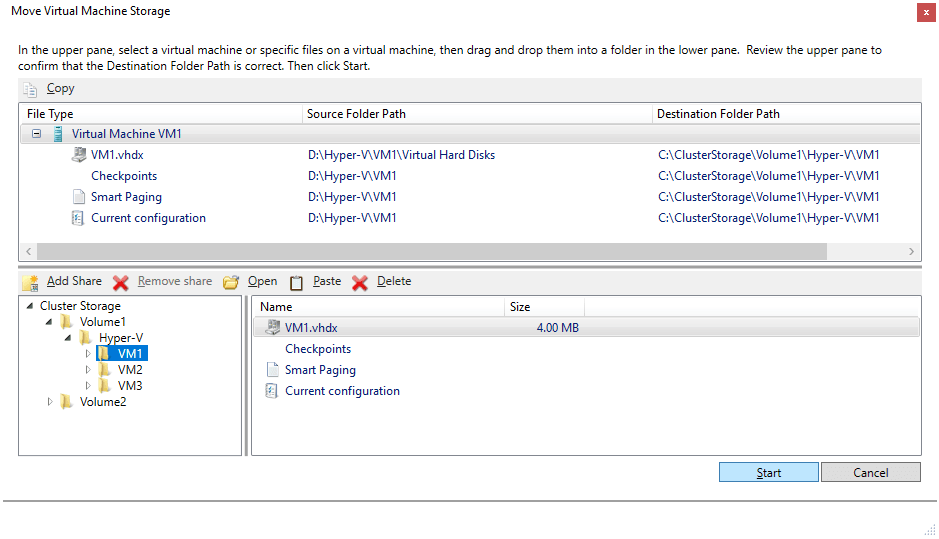
Back to Hyper-V manager screen, you can check the status of moving. When the process is completed, the VM is successfully moved to the cluster storage and can be live migrated between the cluster nodes.
3. Then click on VM >> Move >> Live Migration >> Select Nodes.
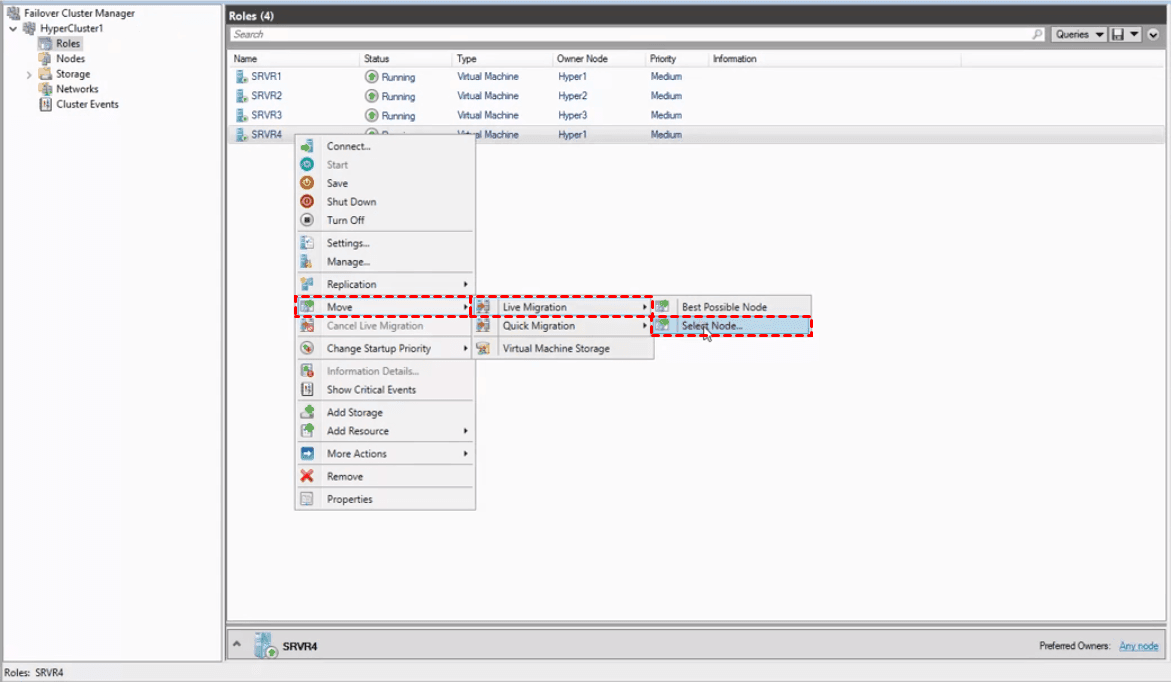
4. Select the destination nodes for the live migration, and click OK.
5. Click information on Failover Cluster Manger interface, you can monitor the progress of VM migration.
Should you back up VMs in Hyper-V Failover Cluster
Hyper-V Failover Cluster have high scalability which are able to take over services quickly once a server corrupts. However, if you want to avoid expensive cost on Cluster and pursue stable protection for a long term, free backup solution is necessary for you.
The free Hyper-V backup tool - AOMEI Cyber Backup is able to offer flexible backup strategies to save storage and costs. Besides, it can perform hot backup that reduces downtime and achieves fast disaster recovery.
Perpetual Free: no time limit for AOMEI Cyber Backup Free Edition.
Easy-to-use: backup and restore multiple virtual machines via central console without complicated configuration and reinstallation.
Secure VM Backup: schedule VMware or Hyper-V virtual machine backups and perform hot backup to protect crucial data continuously without human errors.
Instant Disaster Recovery: instantly restore the whole virtual machine to the previous state from any selected history version.
Role-Assignment: allow one administrator to create sub-accounts with limited privilege, effectively reduce administration cost and manual errors.
Please hit the button below to download and use AOMEI Cyber Backup for free:
*You can choose to install this VM backup software on either Windows or Linux system.
Secure steps to protect VM via backup and recovery for free
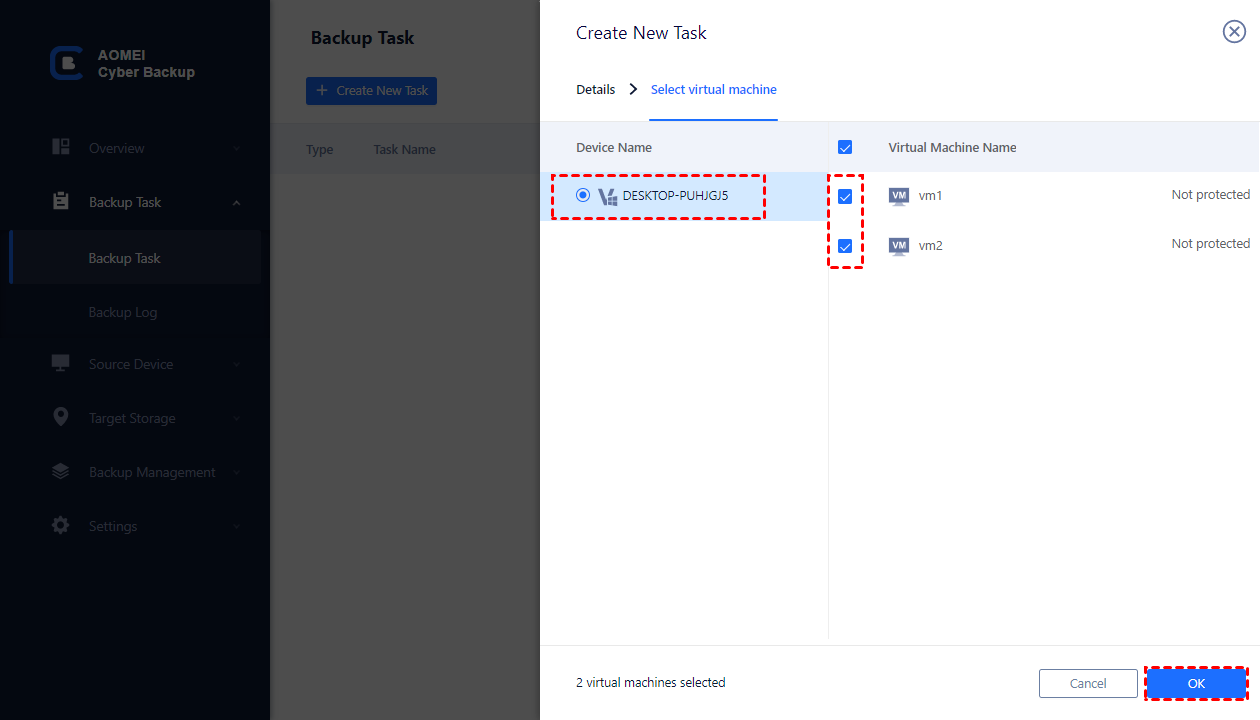
1. Download AOMEI Cyber Backup and bind the devices to it. Then go to click Backup Task >> Create New Task.
2. Enter a task name and select Hyper-V Backup. Then select Hyper-V virtual machines for backup and click OK.
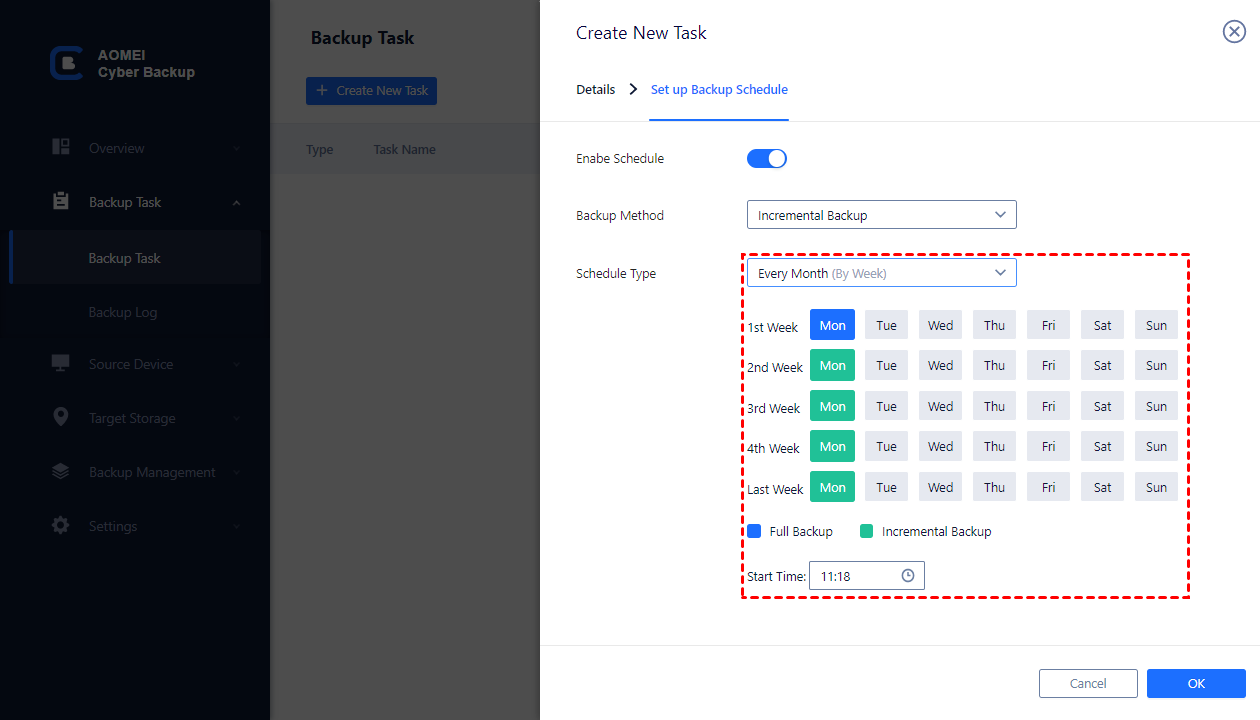
3. Select destination (local / network) to store backup files, then schedule backup task.
Backup Method: Full Backup / Incremental Backup
Schedule Type: Daily / Weekly / Monthly (by date) / Monthly (by week)
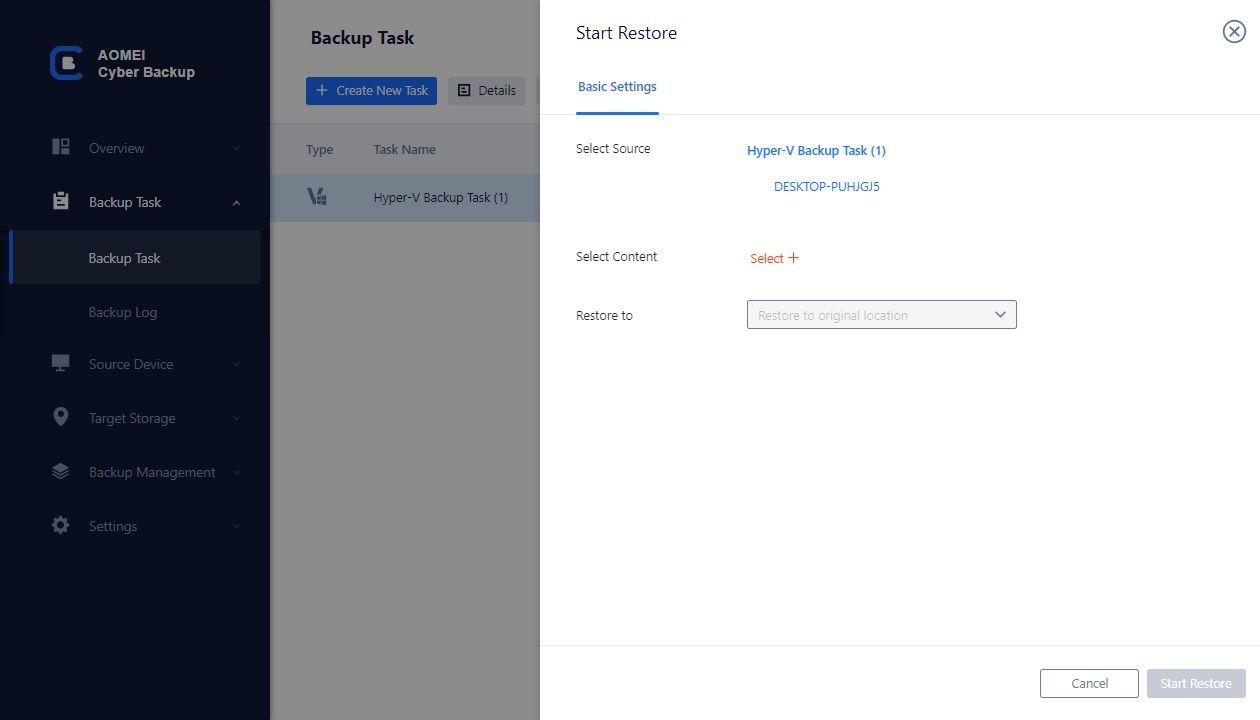
4. Click “…” >> Restore to select the backup content. It allows you to restore VM to original location easily.
✍ While the Free Edition covers most of the VM backup needs, you can also upgrade to Premium Edition to enjoy:
✦ Batch VM Backup: Batch backup large numbers of VMs managed by hosts.
✦ Backup Cleanup: Specify retention policy to delete unwanted VM backups automatically, thus saving storage space and cost.
✦ Restore to new location: Easily make a clone of a virtual machine in the same or another datastore/host, without reinstalling or configuring a new VM.
Summary
Hyper-V Failover Cluster Manager is efficient to create a high availability cluster. In this article, I have also introduced the steps to move VM to Hyper-V failover cluster.
Besides creating Hyper-V failover cluster, backing up Hyper-V is also important for you to protect virtual machines comprehensively.

