


How to Delete Hyper-V AVHDX File when No Snapshot on That VM
If you find there are orphaned Hyper-V AVHDX files in the VM folder, but no snapshot on that VM, then you need to manually merge AVHDX file to the original VM. In this article, I will introduce you 2 ways to do this.
By Crystal / Updated on June 4, 2026
How to delete Hyper-V AVHDX files without available checkpoints?
Case:
I have a Hyper-V virtual machine with no checkpoints available, however i can find a lot of AVHDX files on its virtual hard disk folder. And it is taking almost all the space. Is there any solution to delete these AVHDX files?
- Question from community.spiceworks.com
If you find that in a VM folder, there are some orphaned Hyper-V AVHDX file but no snapshot on that VM, it may because the deletion/merge of the Hyper-V snapshot didn’t complete properly. In this case, you can only manually delete the checkpoints and merge the AVHDX files to the original VM.
![]()
In this article, I will introduce how to find the parent disk of the Hyper-V AVHDX filed, and 2 ways to manually delete or merge AVHDX files to the original VM.
Before you start, please make sure you have good backups of your VM data, and leave yourself enough downtime.
How to find the parent disk of Hyper-V AVHDX files
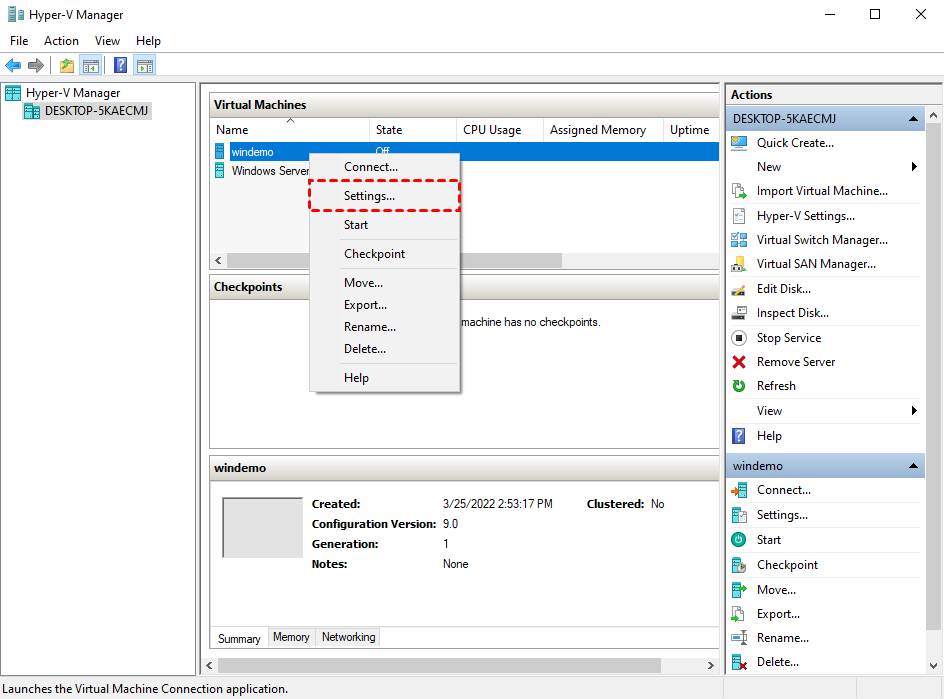
1. Launch Hyper-V Manager, power off the target VM and right-click on its name, select Settings.
2. Navigate to Hard Drive from the left inventory, Click Inspect and Inspect Parent… button in the pop-up window.
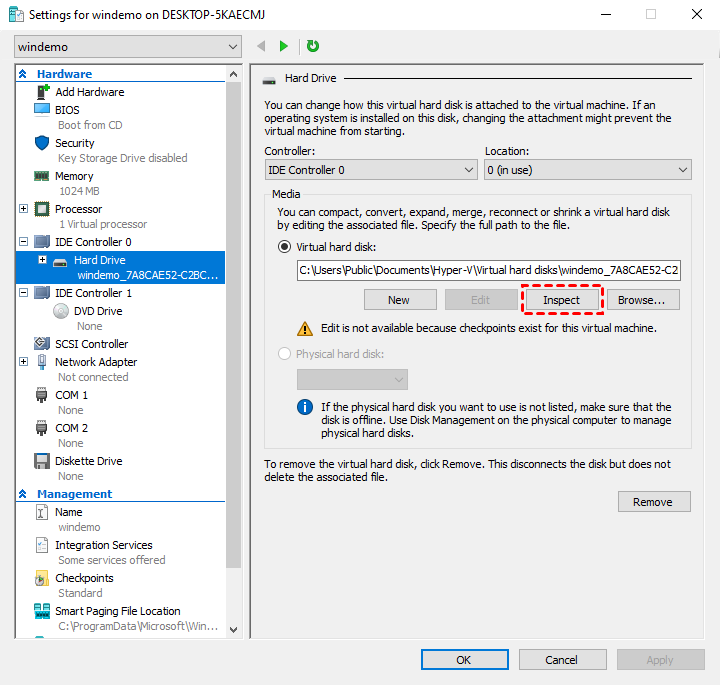
Now you can see the parent disk of this AVHDX file.

Important: Backup your VMs to avoid unexpected data loss
Before you start, backup Hyper-V VMs to avoid unexpected data loss. Here I recommend you AOMEI Cyber Backup, the free Hyper-V backup software for the following benefits.
✦ Easy Steps: After adding devices, you can quickly create a complete backup task with 2 steps.
✦ Agentless Backup: Centrally back up and manage virtual machines without installing Agent.
✦ Restore Entire VM: You can quickly restore the entire VM from any recorded history versions.
✦ Supported Versions: Hyper-V in Windows 8/8.1/10/11, Windows Server/Microsoft Hyper-V Server 2012 R2 and later versions.
✦ Perpetual Free: You can always use this free edition with no time limit.
Next, I will show how to quickly create a Hyper-V VM backup task. You can click the button to download and enjoy the free edition:
*You can choose to install this VM backup software on either Windows or Linux system.
How to quickly create a backup task via AOMEI Cyber Backup
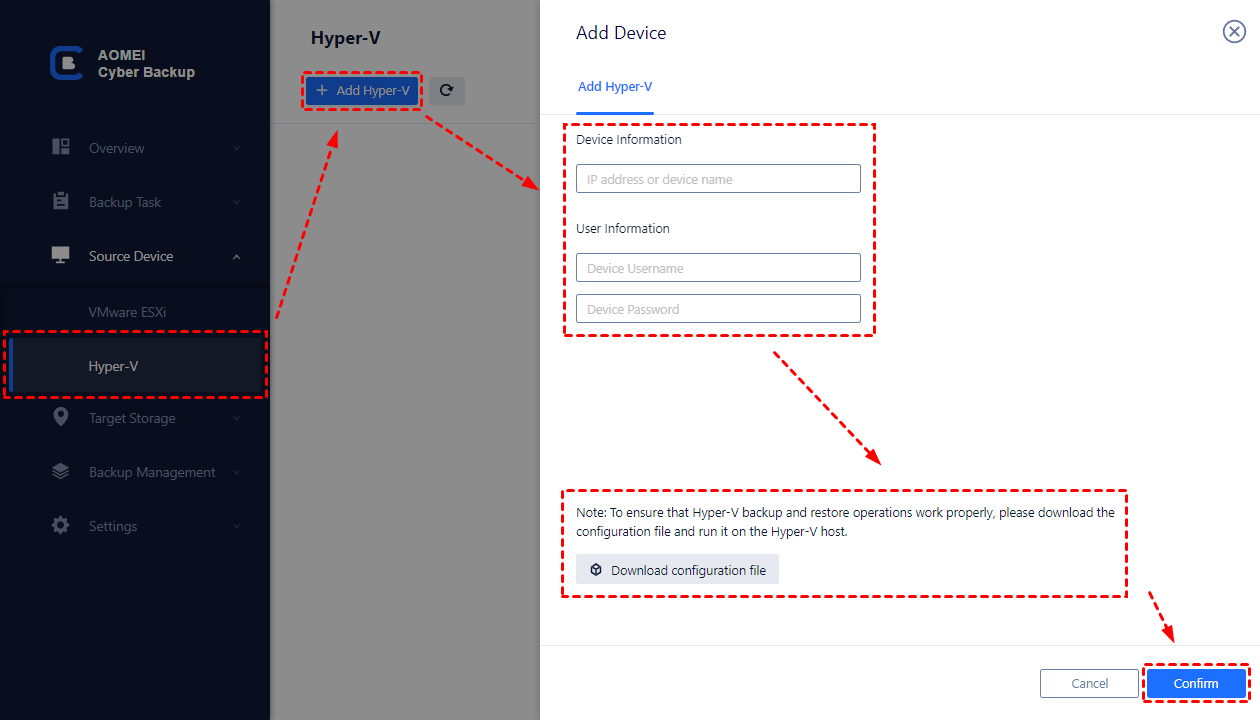
Note: The first time you use AOMEI Cyber Backup to back up VMs on a Hyper-V host, you will need to Bind Device for authentication.
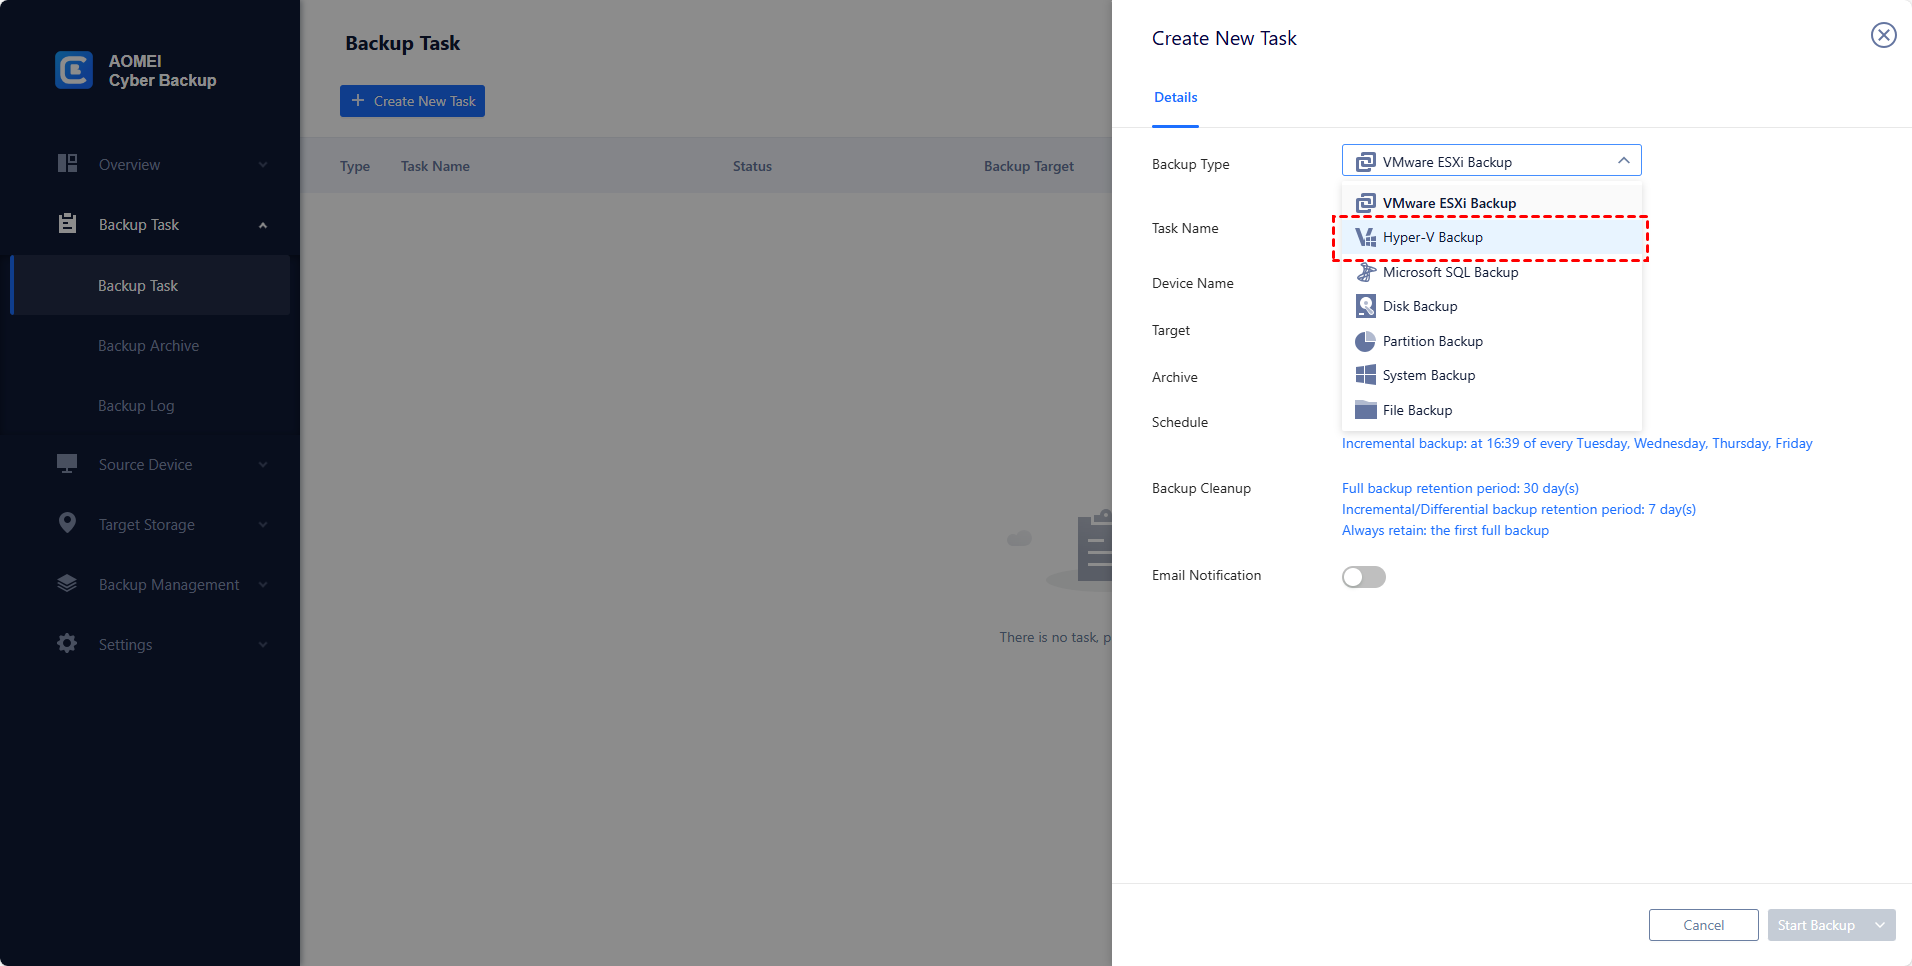
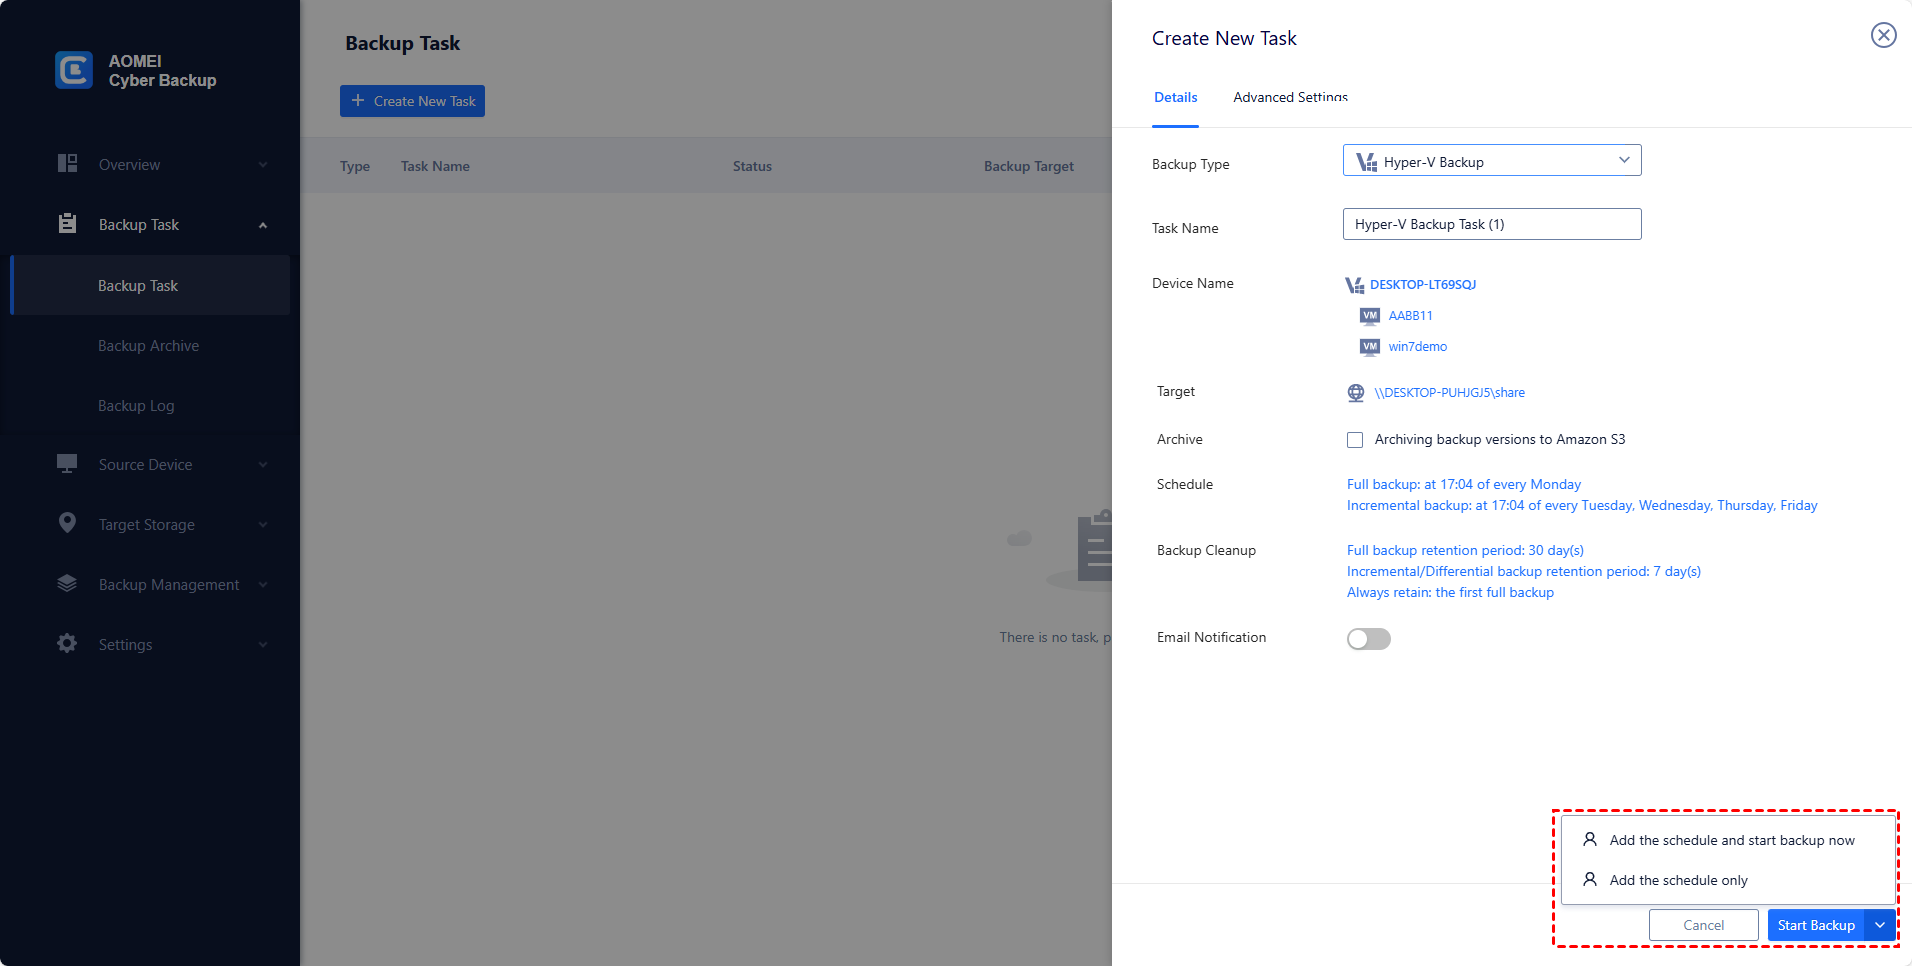
1. Launch AOMEI Cyber Backup, navigate to Backup Task, and click + Create New Task. Set the Task Name, Device, Target, Schedule, and Cleanup as needed.
2. Now you can click Start Backup and select Add the schedule and start backup now, or Add the schedule only.
How to delete Hyper-V AVHDX files with no snapshot available
After you have backed up your VM data, you can follow the 2 ways I introduce below to manually delete/merge Hyper-V orphaned AVHDX files to the original VM.
How to merge AVHDX files in Hyper-V Manager manually
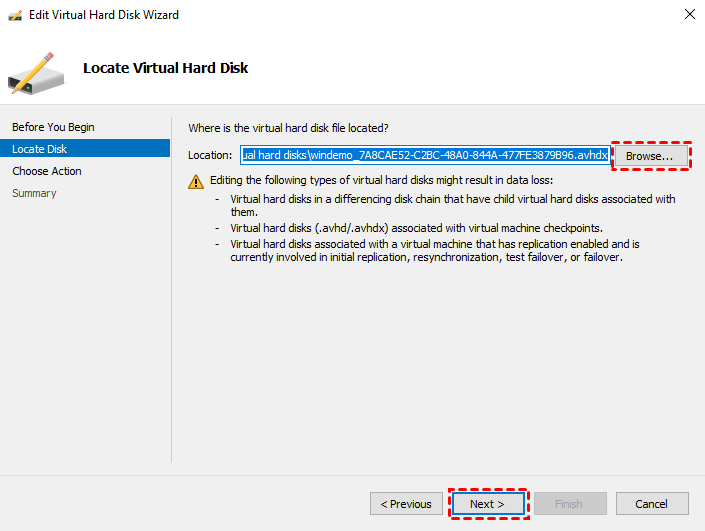
1. Launch Hyper-V Manager, select the target VM and click Edit Disk… button to open an Edit Virtual Hard Disk Wizard.

2. Click Next to skip the introduction page and go to the Locate Disk tab, click Browse… to select the AVHDX file you want to delete. Click Next to continue.
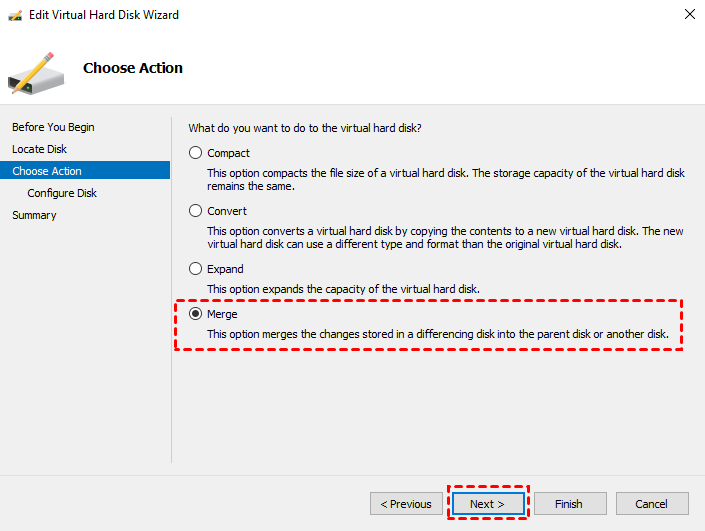
3. On Choose Action tab, select Merge and click Next.
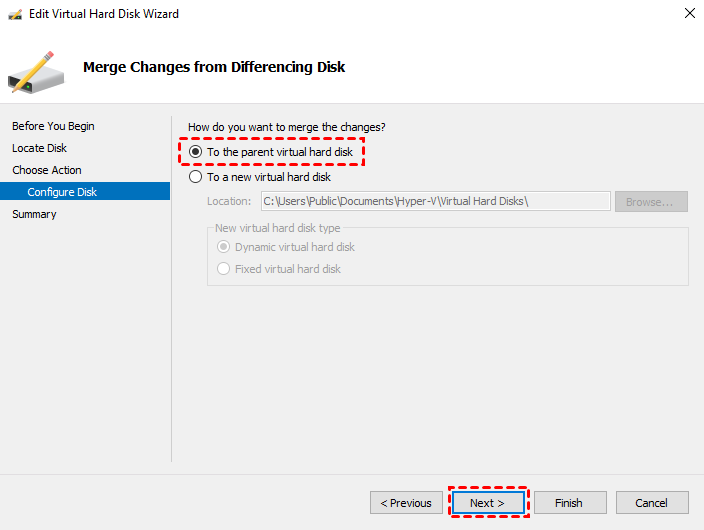
4. On Configure Disk sub tab, select To the parent virtual hard disk option and click Next.
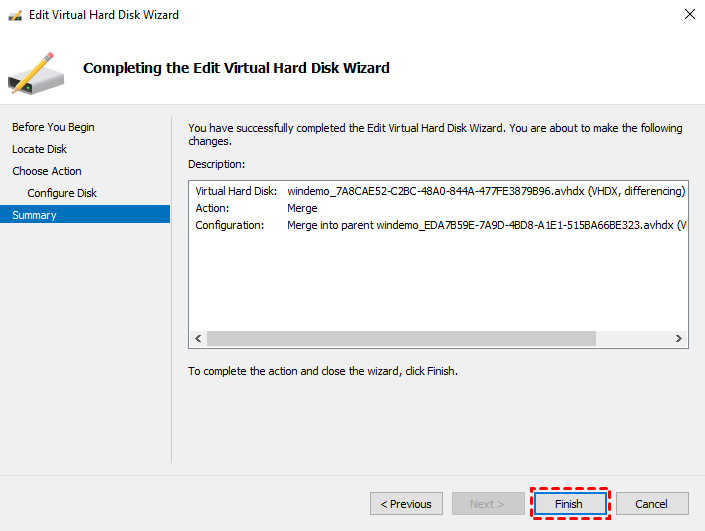
5. Review the Summary and click Finish to start merging.
How to delete AVHDX file Hyper-V via PowerShell
Note: You need to install Hyper-V PowerShell module in advance to run cmdlets.
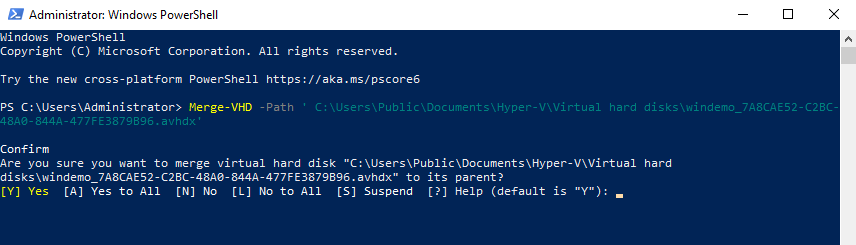
Power off the target Hyper-V VM, launch Windows PowerShell, and run the following command to merge the AVHDX file:
Merge-VHD -Path 'complete avhdx file path\avhdx name.avhdx'
For example:
Merge-VHD -Path ' C:\Users\Public\Documents\Hyper-V\Virtual hard disks\windemo_7A8CAE52-C2BC-48A0-844A-477FE3879B96.avhdx'
Summary
If you find that there are Hyper-V AVHDX file but no snapshot on that VM, you may need to delete them manually, but properly. In this article, I introduced 2 ways to delete/merge AVHDX file to the original VM.
Keep a good virtual machine backup is always a reliable insurance. Here I recommend you AOMEI Cyber Backup, a professional and free backup software that allows you to cover multiple VMs in one backup task. In addition, you can create sub-accounts with limited privileges to avoid mis-operations.

