[6 Ways] Transfer Data from Android to iPhone 12 Pro Max/Mini
This guide will show you all workable methods that can help you transfer data from Android to iPhone 12, iPhone 12 Pro/Pro Max, iPhone 12 mini. The methods to move data from Android to iPhone after setup is included.
By May / Updated on March 9, 2026
Want to Transfer Data from Android to iPhone 12 Pro Max/Mini?
iPhone 12 series comes with 4 models, 6.1-inch iPhone 12, 5.4-inch iPhone 12 mini, 6.1-inch iPhone 12 Pro, and iPhone 12 Pro Max. Each model is equipped with an A14 processor and will support a 5G network, let alone the display, camera, and other improvements.
Attracted by the new technology of iPhone 12, you buy one to replace your Android phone. However, you may get confused about how to transfer data from Android to new iPhone because they run two completely different operating systems. Well, don’t worry! This guide will tell you all ways that can help you transfer data from Android to new iPhone 12, iPhone 12 Pro, iPhone 12 Pro Max, iPhone 12 mini.
You can choose to set up iPhone 12 and then let Move to iOS utility to help you transfer data wirelessly. Or there are also several methods that can help you move data from Android to iPhone 12 after setup.
Part 1. Transfer Data from Android to iPhone 12 During Setup
To help users easily switch from Android to iPhone, Apple introduced the Move to iOS app. You can take advantage of this tool to transfer contacts, messages, Camera Roll photos/videos, mail accounts, calendars, and web bookmarks.
You can access the data transfer screen during the setup process. Or if you have already set up your iPhone, you should go to Settings > General > Reset > Erase All Content and Settings to restart.
Preparation and Attention
> It requires your Android phone to run Android 4.0 and later.
> Download Move to iOS app on Android phone and make sure Wi-Fi is turned on.
> Make sure both your Android phone and iPhone have enough power.
> To ensure the Chrome bookmarks will be transferred successfully, update to the latest version of Chrome on Android phone.
Steps to Move Data from Android to iPhone 12
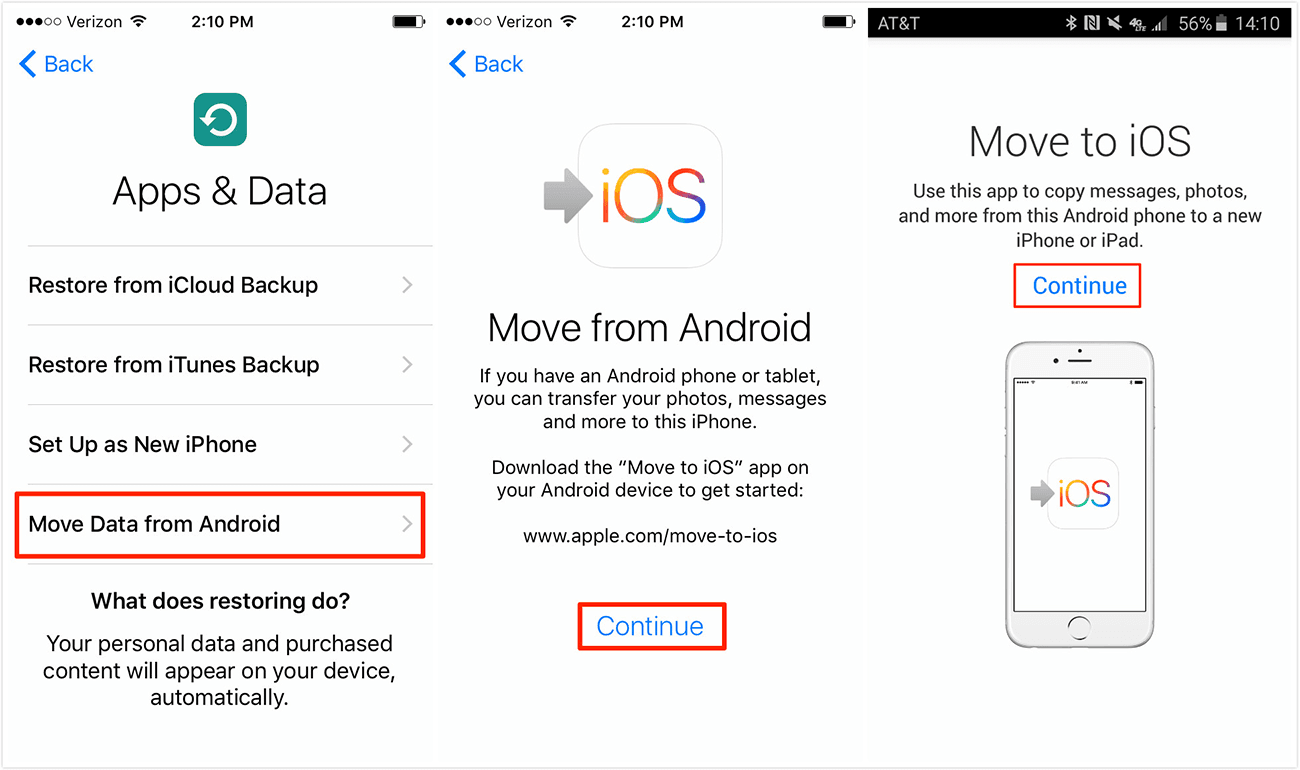
1. Set up iPhone 12 until you see the App & Data screen > Choose Move Data from Android.
2. On your Android phone: Open Move to iOS app > Tap Continue > Read the terms and conditions that appear and tap Agree > Tap Next in the top-right corner of the Find Your Code screen.
3. On your iPhone 12: Tap Continue on the Move from Android screen > Wait for a ten-digit or six-digit code to appear.
4. On your Android phone: Enter the code that appears on iPhone > Wait for the Transfer Data screen to appear > Choose the content you want to transfer and tap Next.
Note: Please leave both devices alone until the loading bar that appears on your iOS device finishes even if your Android phone indicates that the process is complete.
5. The whole transfer can take a while depending on how much content you're moving. When you see the loading bar finish on iPhone 12, tap Done on Android phone > tap Continue on iPhone and follow the onscreen steps to complete the setup process.
Part 2. Transfer Data from Android to iPhone 12 After Setup
If you have already set up your new iPhone and do not want to erase your device, here are some methods that can help you move data from Android to iPhone after setup.
1. Sync Contacts/Notes/Calendars from Android to iPhone via Gmail
On your Android Phone: Go to Settings > Tap Account & Sync > Choose your Gmail account > Tap Sync Contacts/Mail/Calendars > Tap Sync Now.
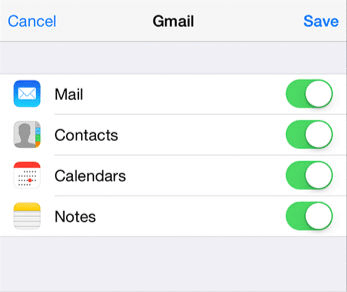
On your new iPhone 12: Go to Settings > Tap Accounts & Passwords > Tap Add Accounts > Choose Google > Enter the required information to add your Gmail account and tap Next > Tap Save when your account is verified > Turn on Mail, Contacts, and Calendars sync option.
2. Import Contacts to iPhone 12 via SIM Card
To transfer contacts, you can first save contacts to SIM Card on Android phone and then export the contacts to new iPhone 12.
On your Android phone: Go to the Contacts app and find Import/Export contacts > Choose Export to SIM card option.
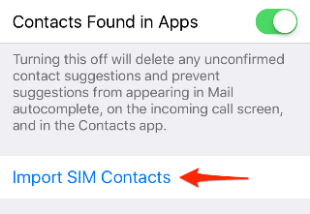
On your iPhone 12: Insert the SIM card > Go to Settings > Tap Contacts > Tap Import SIM Contacts.
3. Transfer Android Photos/Music/Videos to iPhone 12 with FoneBackup
FoneBackup for iOS is a professional phone data transfer tool for iOS and Android users. With the help of FoneBackup, you can easily transfer photos, videos, songs, contacts, and more between your iOS and Android devices. Most importantly, you do not need to reset your new iPhone and it will not erase any existing data.
Below is a full guide on how to transfer data from Android to iPhone 12 using FoneBackup:
Step 1: Install and open FoneBackup on both your Android and iPhone12 > Activate WLAN access by enabling the Wi-Fi option, without requiring an actual Wi-Fi connection.
Step 2: Go to Connect Device > Connect to iOS on your Android device > Use your iPhone to scan the provided code to establish a safe connection.

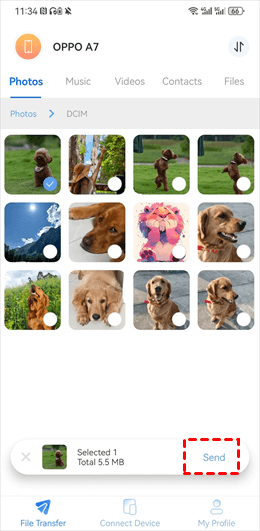
Step 3: On your source Android device, select File Transfer> Select the data you wish to transfer to your iPhone 12 and click Send to initiate the process.
Step 4: Tap Confirm on your iPhone on your iPhone. Once done, check if the data is transferred successfully.
4. Transfer Data from Android to iPhone 15/14/13/12 with iTunes
iTunes is the official application developed by Apple to help users sync photos, videos, and songs to iPhone. However, please be aware that it will erase the existing content on your iPhone. If you still want to have a try, see the steps below.
1. Connect your Android phone to computer > Copy the songs, photos, videos you want to transfer to a new folder on computer.
2. Download and install the latest version of iTunes on your computer > Launch it.
3. Connect your iPhone to computer via the USB cable.
>> Sync music: Click File > Choose Add Folder to Library > Browse your computer and select the music folder to transfer it to iTunes library > Click the Device tab > Choose Music > Click Sync Music > Choose the entire library or specific songs > Click Apply.
>> Sync photos and videos: Click Device tab > Choose Photos > Select Sync Photos > Select the folder you created before > Choose all folders and select include videos > Click Apply.

5. Share Files from Android to iPhone 12 via Cloud Services
Cloud services, such as Dropbox, Google Drive, OneDrive, etc. offer personal space for storing files & sharing, which make it possible to access files on any device.
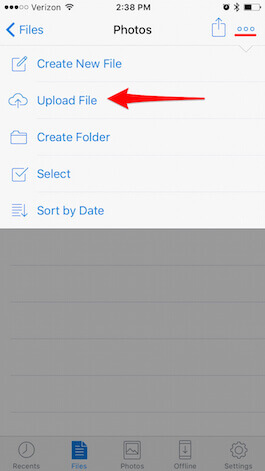
To move data from Android to iPhone 12, you can first download app on two phones > upload files to cloud service on Android phone > then download files on iPhone.
Bonus Tip: An Easy Way to Backup iPhone 12
The above is how to transfer data from Android to iPhone 12. Here in this part, we’d like to introduce an easy iPhone backup way to protect your important data. You may have also heard that you can use iCloud and iTunes to backup your iPhone. However, both two methods have annoying shortcomings.
● It will back up the entire phone content and will not allow you to select the files you want to back up.
● When you want to perform a restore to find the lost data, you will have to erase your device and all the existing data will be replaced by the backup.
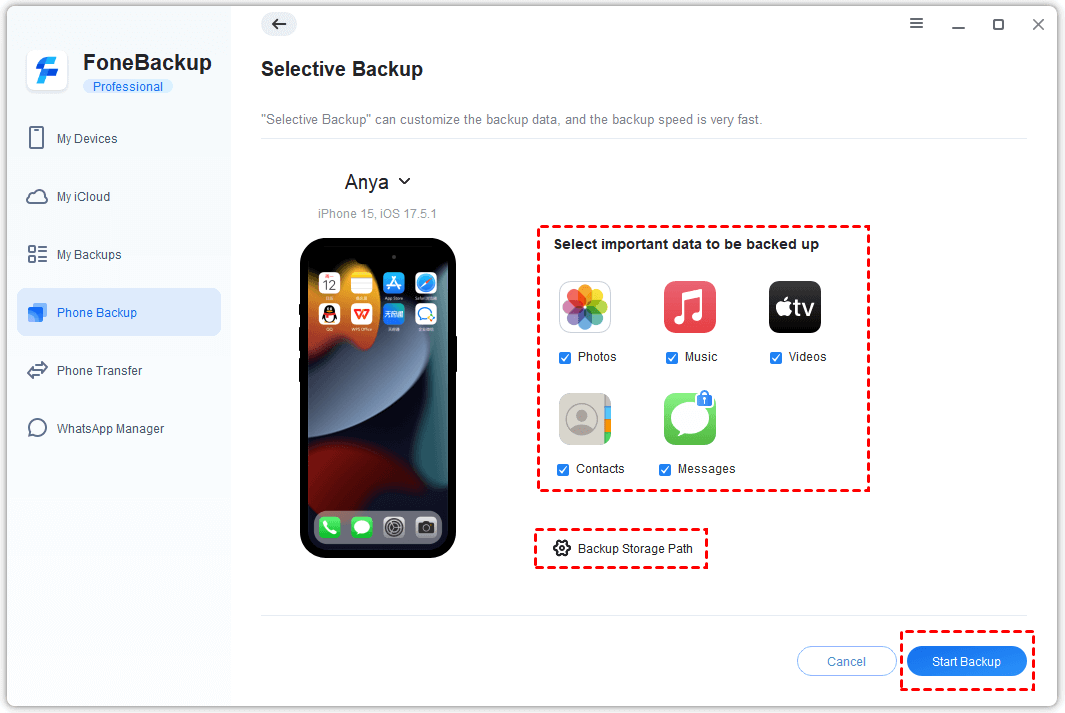
You definitely want a more flexible and safer way to backup your iPhone and one professional iPhone backup software - FoneBackup can be your best choice.
★ Supported File Types - Contacts, messages, photos, music, videos, etc.
★ Selectively Backup and Restore - It lets you preview and select the data as per your needs.
★ Check Backup Files Freely - It allows you to view the backup files anytime you want.
★ No Data Loss During Restore - It will not erase any existing contacts or other data on the device.
For detailed steps, you can refer to this How to Backup iPhone guide to learn more.
For people who need to finish the iPhone-to-iPhone transfer, FoneBackup can also help you transfer old iPhone data to new iPhone 12 or other later iPhone models in one click.
Conclusion
That’s all for how to transfer data from Android to iPhone 12. You can utilize the Move to iOS app to copy all data from Android phone to iPhone wirelessly or take advantage of email, iTunes, and cloud services to transfer the data you need.
If this passage solves your problem, you could share it to help more people. If you have any problems, don’t hesitate to leave them in the comment section and we will reply to you as soon as possible.