Ultimate Guide: Enable Shadow Copies in Windows Server 2019
If you want to configure shadow copies on Windows Server 2019, read this post to get a full guide. Also, a more effective way to back up files on Windows Server 2019 is covered here.
By Jonna Updated on December 13, 2023
What are Shadow Copies in Server 2019?
Windows Server incorporates the Shadow Copy feature as a practical implementation of the Volume Shadow Copy Service (VSS). This technology facilitates the creation of backup snapshots or duplicates of computer volumes and files, regardless of whether they are currently in use. Shadow Copies rely on the NTFS file system, meaning that only volumes formatted with NTFS can benefit from this protection.
When enabling and scheduling shadow copies on a disk, you gain the ability to restore individual files, folders, or entire volumes. Shadow copies efficiently capture the modified portions of each file, resulting in minimal space consumption. Recovering data using shadow copies is a quick and straightforward process. Undoubtedly, Shadow Copy is a valuable service. Would you like to learn how to configure shadow copies on Windows Server 2019? Follow this comprehensive guide to easily enable or disable shadow copies on Server 2019.
How to Enable Shadow Copies in Windows Server 2019
When you enable Shadow Copy on Windows Server 2019, what you're essentially doing is creating a snapshot of the modifications made to the directories and files within that volume at a specific moment. In this way, you can revert to previous versions and restore your folders and files.
Now, you can follow the steps below to learn how to perform a Windows Server 2019 shadow copy:
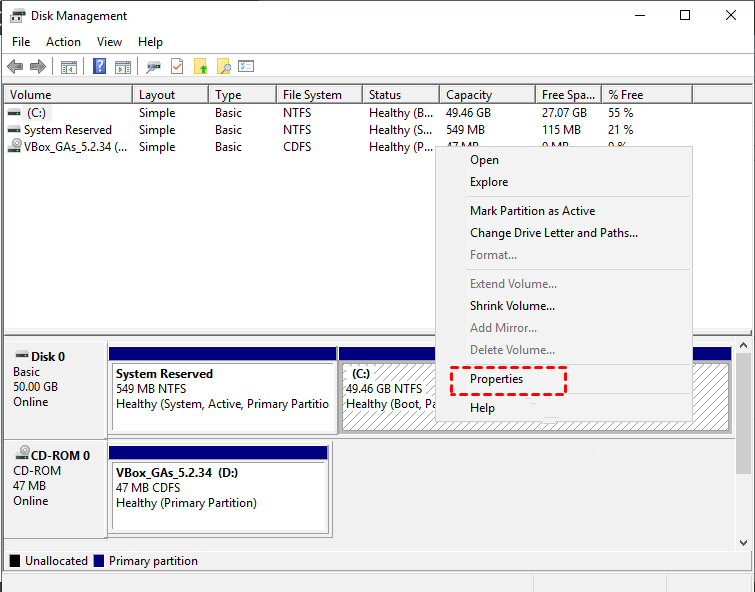
Step 1. Press Win + X button on the keyboard to open the power user menu, and select Disk Management.

Step 2. Locate and select the partition where the server is installed. Right-click on it and choose Properties.
Step 3. On the Properties window, navigate to the Shadow Copies tab and click on Enable. A confirmation window will appear, where you should click Yes to proceed with the creation.
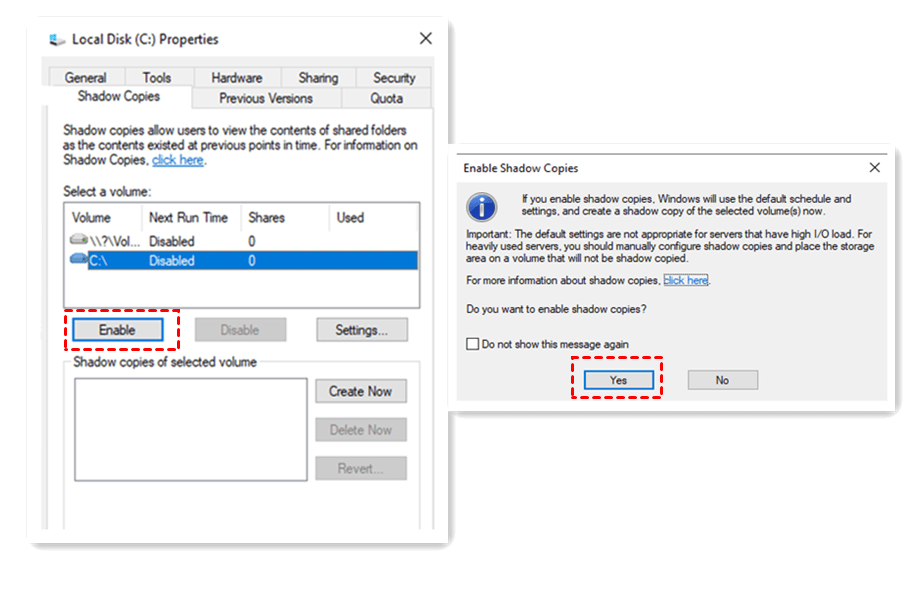
Step 4. Once the confirmation is given, you will notice that a restore point has been generated in the selected volume.
Step 5. To further customize the shadow copy settings, click on Settings. From there, you can specify the maximum copy size, determine the storage location for shadow copies, and establish a custom backup schedule.
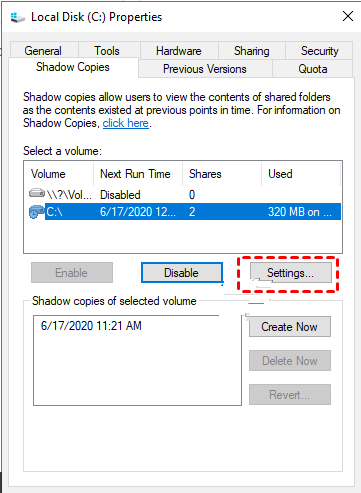
Step 6. After configuring the shadow copy settings, please hit Create Now to enable a shadow copy on Server 2019 now.
If you meet Shadow Copy could not be created on Server 2019, it is possible that your Volume Shadow Copy service is not started.
And one thing you should keep in mind is that Shadow Copy is not intended to replace the traditional backup process. Unlike traditional backups that encompass all files and folders, Shadow Copy selectively tracks and captures changes made to them. This limitation prevents shadow copy from serving as a complete substitute for traditional backups.
How to Disable Shadow Copies on Server 2019
What if you want to turn off Shadow Copy after configuring shadow copies on Server 2019? To disable or delete shadow copies on Windows Server 2019, you can follow these steps:
Step 1. Access the Shadow Copies section likewise. From there, click on the Disable button to turn off Shadow Copy on Server.
Step 2. You can select useless versions of shadow copies by tapping on the Delete Now button.

Easier and Securer Solution to Backup Files in Windows Server 2019👍
Are you searching for a safer method to back up your Windows Server files? AOMEI Backupper Server is the ideal solution. This software serves as an excellent alternative to Microsoft Volume Shadow Copy, enabling you to create file, folder, system, disk, and partition backups tailored to your specific requirements.
✍ Support Windows Server 2003/2008 (R2)/2011/2012 (R2)/2016 (R2)/2019/2022/SBS, Backupper Server allows you to backup Server files flexibly.
✍ It allows you to create a backup regularly based on daily, weekly, and monthly, and offers different backup methods, such as full backup, incremental backups, etc.
✍ It can automatically delete old backup images based on different types of backup cleanup methods to help you intelligently manage disk space.
✍ If you are a Windows system user, you can also use AOMEI Backupper Standard to create Shadow Copies on Windows 10 and other operating systems effortlessly.
Download the free trial, and follow the simple guide below to create file backup on Windows Server 2019 now.
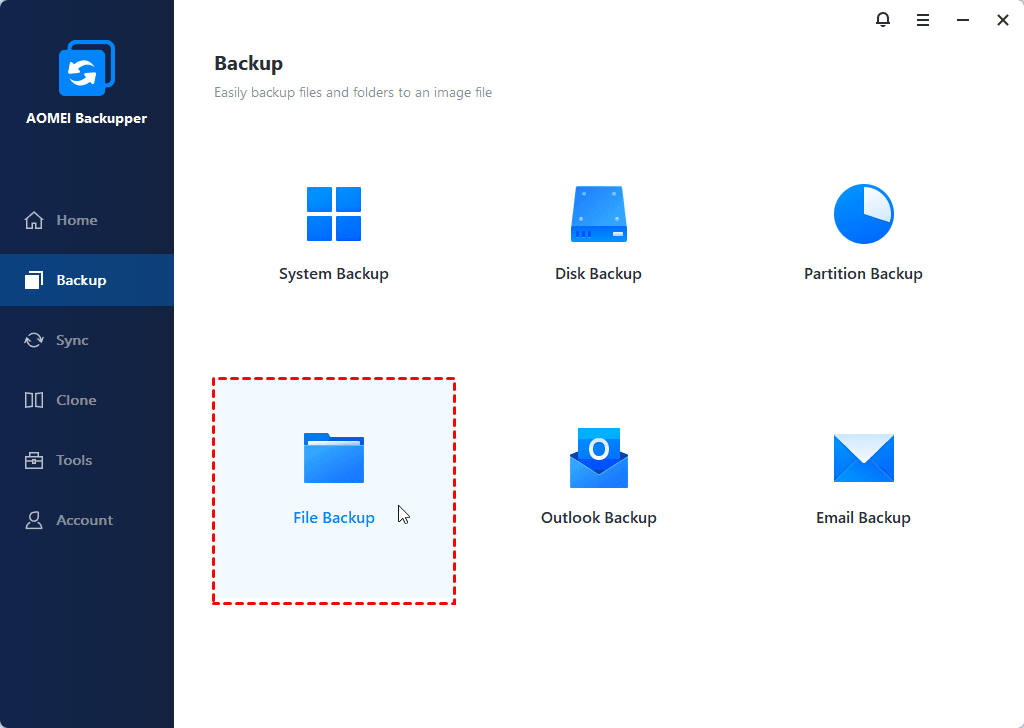
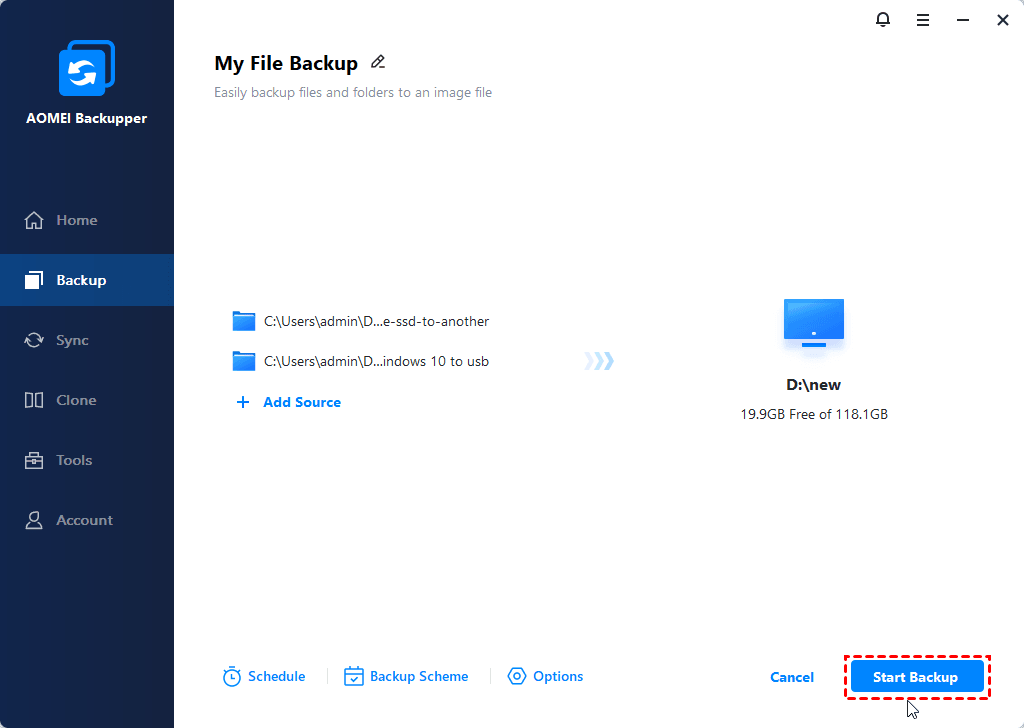
Step 1. Run AOMEI Backupper, and choose Backup then File Backup.
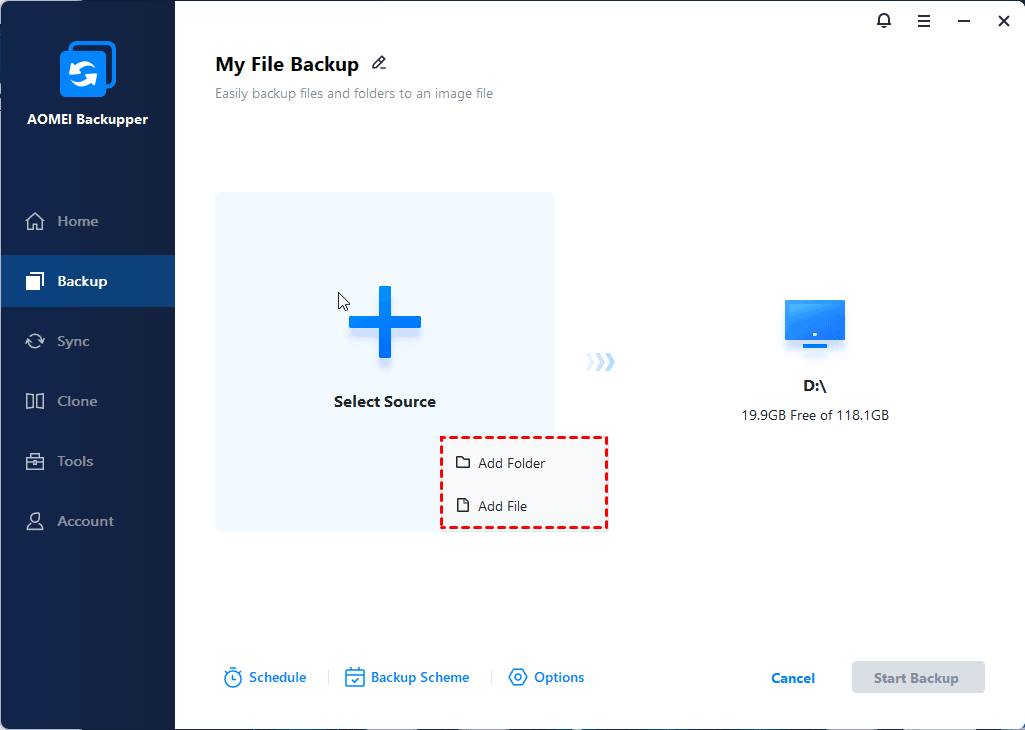
Step 2. Name the task as desired. Tap on Add File or Add Folder to choose the items you wish to back up.
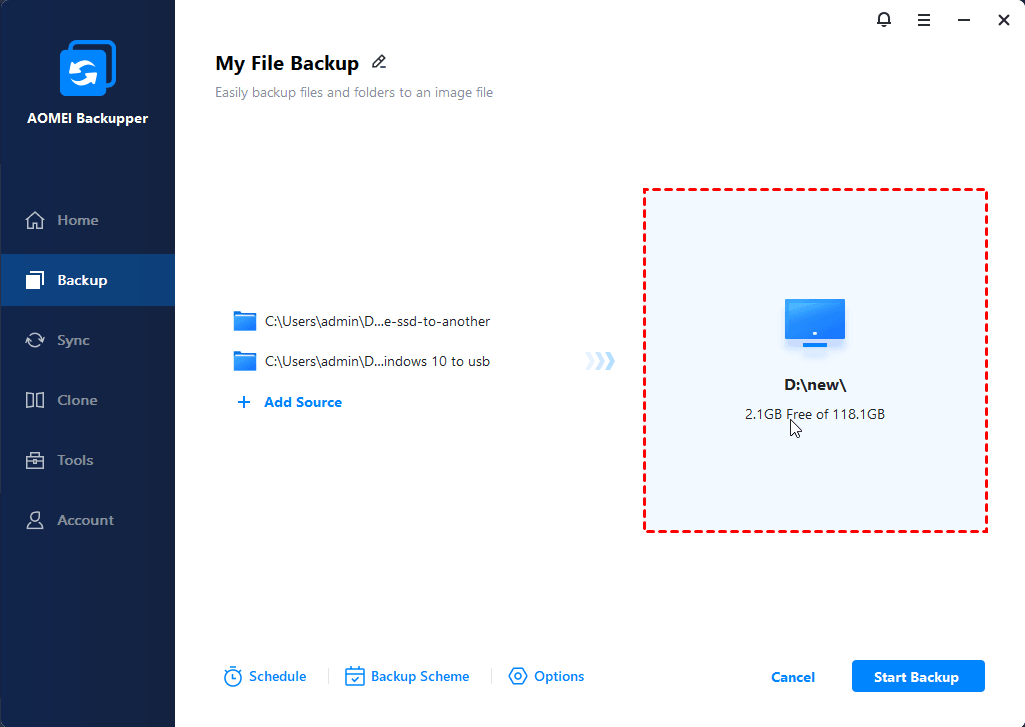
Step 3. Select a destination path to save the backup files and folders.
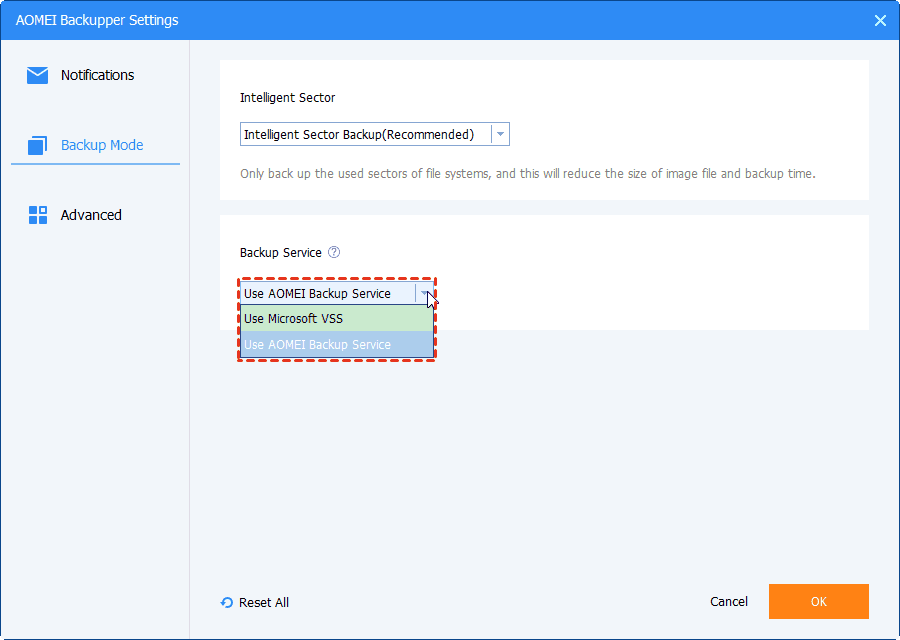
Step 4. (Optional) By default, this software uses Windows built-in VSS. But you can hit Options > go to Backup Mode > Backup Services to switch to Use AOMEI Backup Service.
Step 5. After that, press the Start Backup button to do shadow copies on Server 2019 without a hitch.

✈ Further reading: If you are planning to back up Server files on cloud and looking for a secure and huge cloud storage solution, you can take AOMEI Cloud into consideration. With a free AOMEI account, you can backup files to AOMEI Cloud, offering 1TB of free storage for 15 days since signing up.
Bonus Tip: Best Enterprise Data Backup Solution🔥
If you are an enterprise user who has multiple Windows Server devices that need to be backed up, you can try the best enterprise backup software - AOMEI Cyber Backup. It offers you all-around enterprise data backup solutions:
- It enables you to create system/disk/partition backup for a bunch of Windows PCs and Servers, supporting Windows 11/10/8.1/8/7 and Windows Server 2022/2019/2016/2012 (R2)/2008 (R2).
- You are allowed to save backup images on a local disk, external hard drive, network share or NAS device, etc.
- You can schedule a backup task to run every day/week/month using the full/incremental/differential backup method.
Download this powerful enterprise backup software now to have a try!
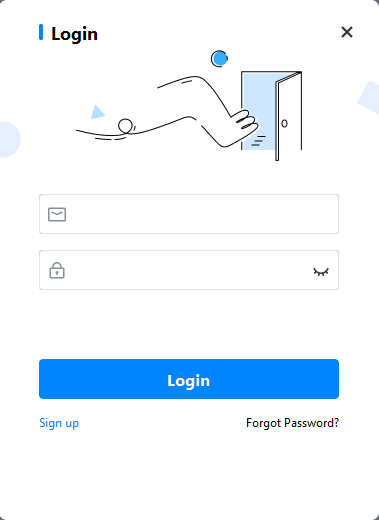
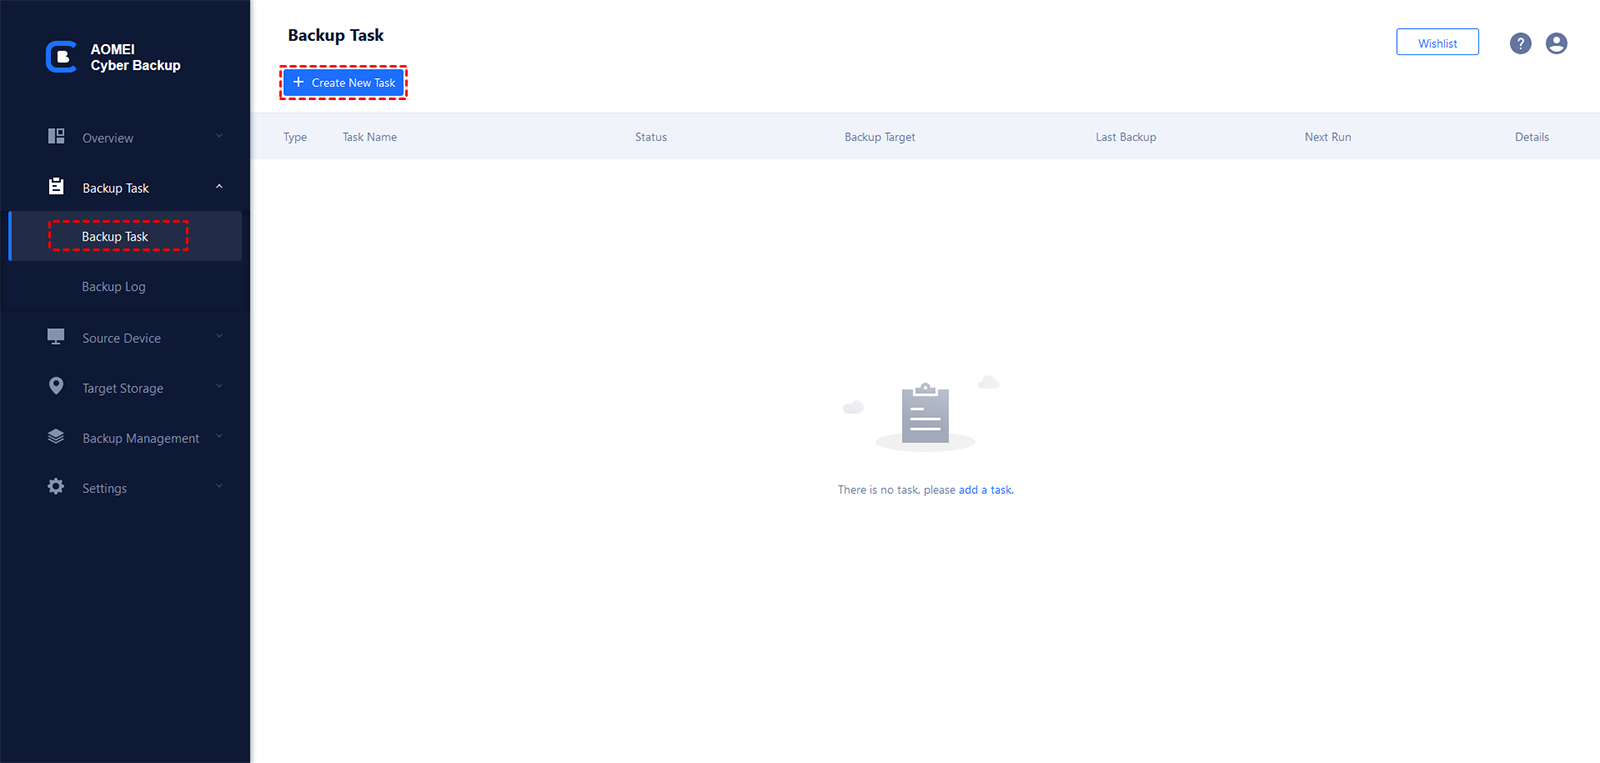
To make backups for client computers, just log in AOMEI Cyber Backup, and add the Windows device that you want to backup. Then click Backup Task on the left menu bar and select Backup Task > Create New Task.
Note: AOMEI Cyber Backup can not only help you backup physical machines but also virtual machines. It enables you to backup Hyper-V and VMware easily.
Concluding Words
In this write-up, we have covered how to enable shadow copies on Windows Server 2019. We have also provided you with a reliable alternative solution for backing up files in Windows Server 2019 with the help of AOMEI Backupper.
This freeware helps to overcome some difficulties caused by VSS in terms of data recovery. In addition, AOMEI Backupper also provides automatic backup and multiple backup destinations to help you complete Windows Server 2019 backup more easily.

