How to Enable Previous Versions on Server 2019
This article covers how to enable Previous Versions on Server 2019 and offers an easier way for Server file backup and restoration.
By Jonna Updated on February 6, 2024
Overview of Previous Versions in Windows Server 2019
Having spent a lot of time editing a Word document, numerous changes have been implemented. However, there might arise a sense of regret, thinking whether the current edition surpasses its earlier one. In this case, the inquiry emerges: How to restore the previous version of files?
Previous Versions is a feature in Windows Server 2019 that allows users to restore previous versions of files or folders that have been modified, deleted, or otherwise changed. Here previous versions are usually copies of files and folders the system saves automatically as part of a shadow copy. Essentially, it is a form of file-level backup and recovery that provides a way to recover data from a previous point in time without needing a complete system restore.
How to enable Previous Versions on Server 2019? How to restore previous versions of certain files? Here comes the step-by-step guide.
How to Enable Previous Versions (Shadow Copies) in Server 2019
By enabling Shadow Copies, you can tailor the frequency at which the server generates recoverable snapshots of your files and folders. This allows you to go back to the past and revert to earlier states. To let Windows Server 2019 enable Previous Versions, go on with the following procedure:
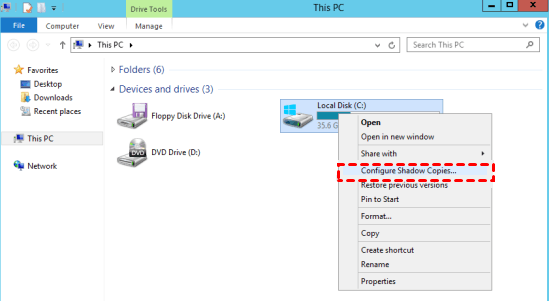
Step 1. Launch File Explorer and right-click the volume where you intend to enable shadow copy. Opt for Configure Shadow Copies.
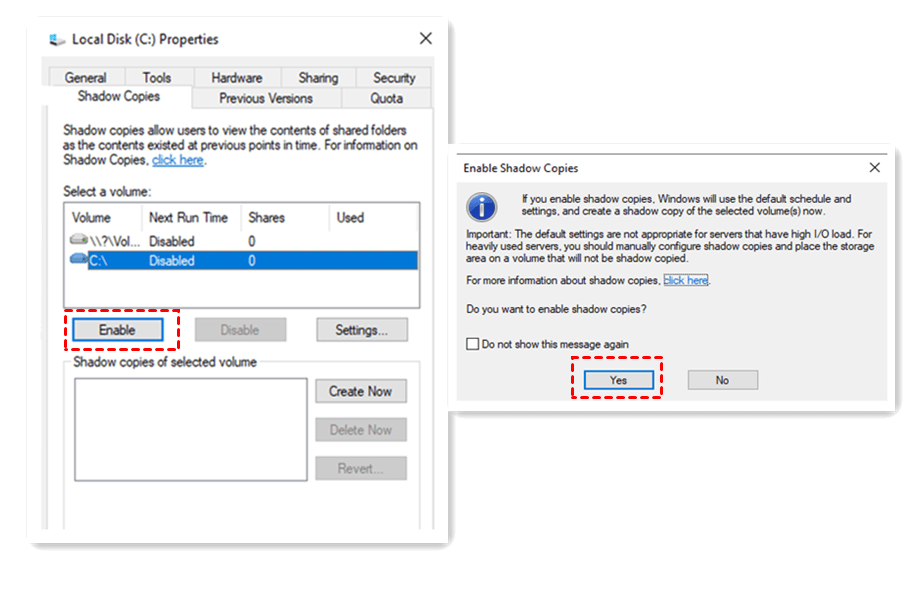
Step 2. Click on the target volume and select Enable.
Step 3. Microsoft recommends designating a dedicated drive for storing Volume Shadow Copies. Validate this suggestion by clicking Yes.
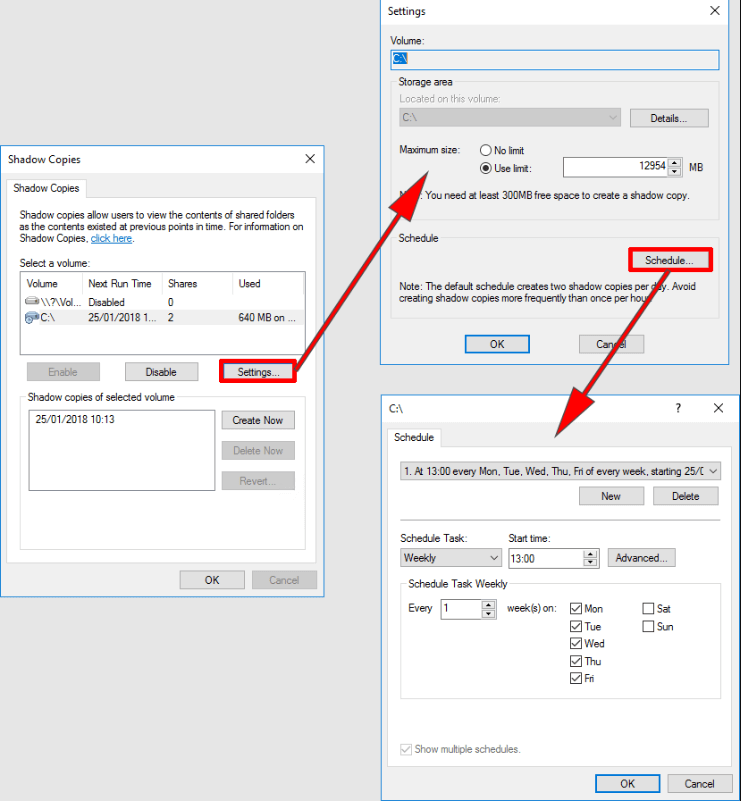
Step 4. Then, you will return to the Shadow Copies window, with the previous selected volume enabled. Subsequently, click on Settings.
Step 5. Within the Settings page, you can set the maximum size to No limit or define a specific value via Use limit. Moreover, you could set up a copying schedule under Schedule.
How to Restore Previous Versions in Server 2019
If you want to restore your files after enabling previous versions on Windows Server 2019, you can go on with the following guides:
Step 1. Right-click the file you wish to restore. Then, choose Restore previous versions from the presented menu.
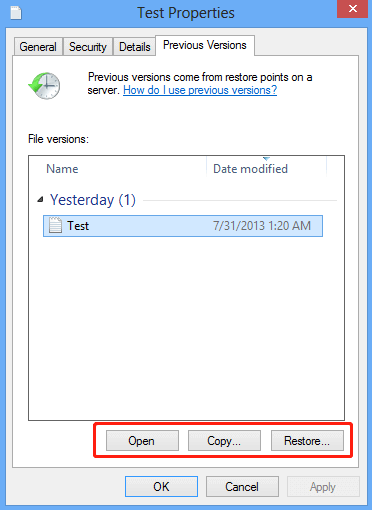
Step 2. Within the Previous Versions tab, you can see a list of previous versions of your file.
Step 3. Pick the version you need and click on Restore.
- ★Tips:
- You can utilize the Copy button to create a copy of the selected previous version of your file.
- Keep in mind that the restored file will overwrite your existing file, and this replacement cannot be reversed.
- If there is no Restore previous versions option on the Server, it is because you may have not enabled Shadow Copies in Windows Server 2019. In such an instance, utilizing this method for restoring specific file versions might not be feasible.
Better Way for Server File Backup and Restore: AOMEI Backupper Server
Sometimes, you may find Previous Versions not working to get back files. Or, if the volume containing these files or folders you make a shadow copy is corrupted, you will lose all of your files. AOMEI Backupper Server helps you meet your backup and restore needs in a securer manner.
This fully-featured Shadow Copy alternative not only allows you to create Server file backup but also provides system backup, disk backup, and partition backup functions. Windows Server 2003/2008 (R2)/2011/2012 (R2)/2016 (R2)/2019/2022 and Windows XP/Vista/7/8/8.1/10/11 are supported. Free download it to have a try now!
Here we take file backup as an example to show you how it works. Please follow the steps below carefully.
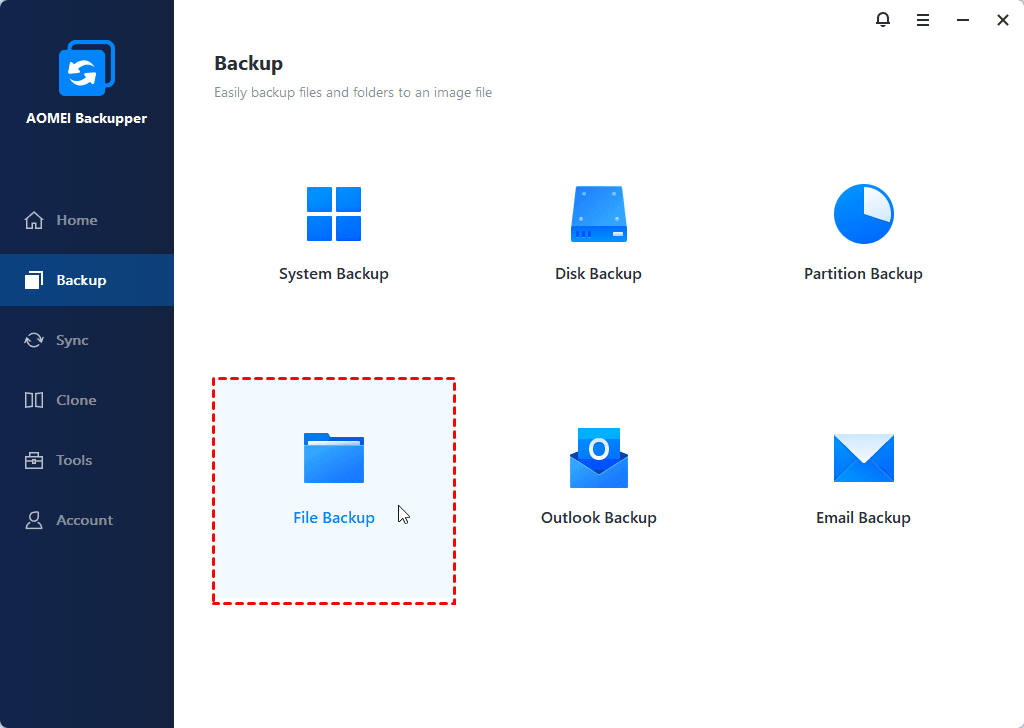
Step 1. Run AOMEI Backupper after installing, choose Backup, and then File Backup.
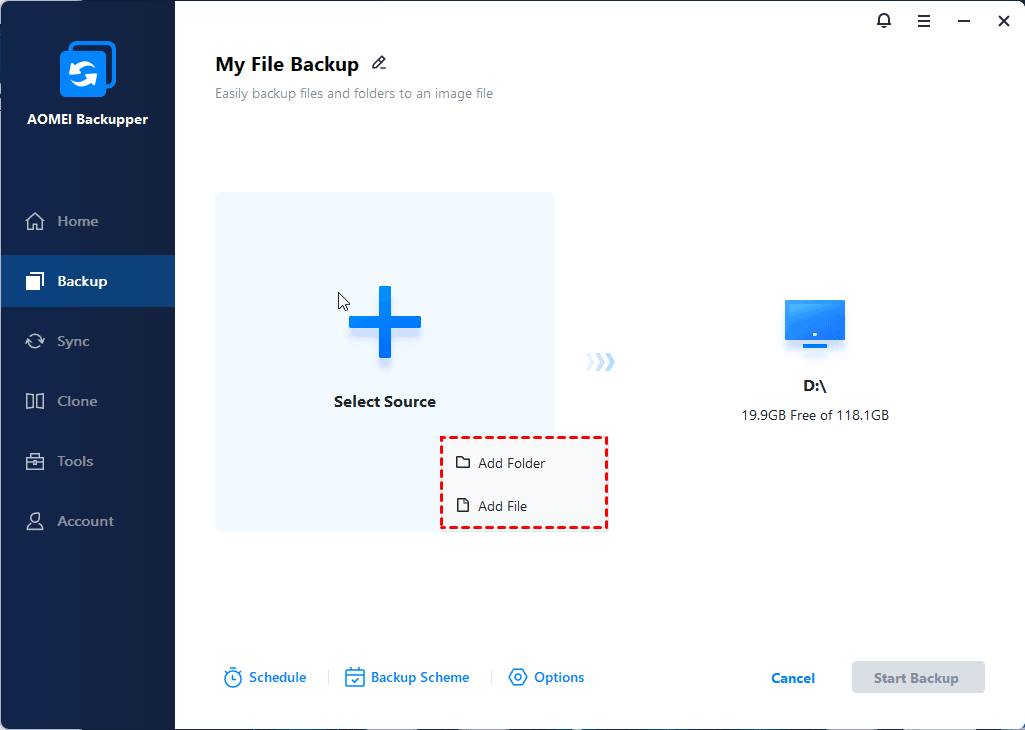
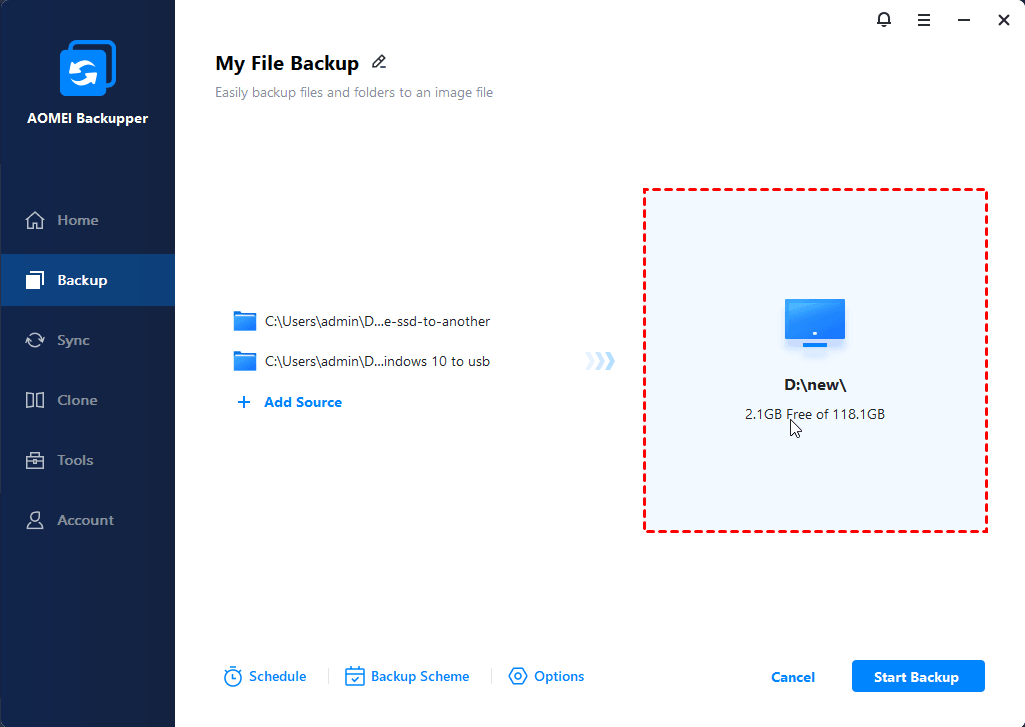
Step 2. Customize the task name as preferred. Tap on Add File or Add Folder to select the files/folders you intend to include in the backup.
Step 3. Select a destination location to store all the files and folders you want to backup.
Three options are at your disposal here:
- Select a local path: It allows you to backup files to an internal or external disk, provided it's recognized by Windows Server.
- Add Share or NAS Devices: With this option, you can create Windows Server 2019 backup to NAS or network locations after inputting display name, IP address, user name and password.
- Select a cloud drive: You can backup files to Google Drive, OneDrive and Dropbox if you install the desktop apps on your computer.
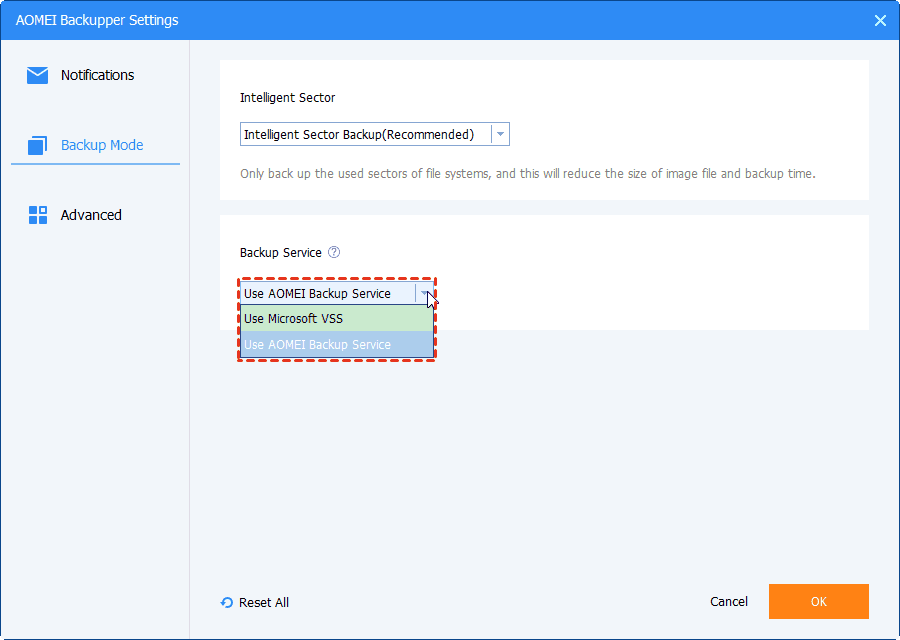
Step 4. (Optional) By default, this software employs Windows built-in VSS. But you can have the option to navigate to Options > go to Backup Mode > Backup Services to switch to Use AOMEI Backup Service.
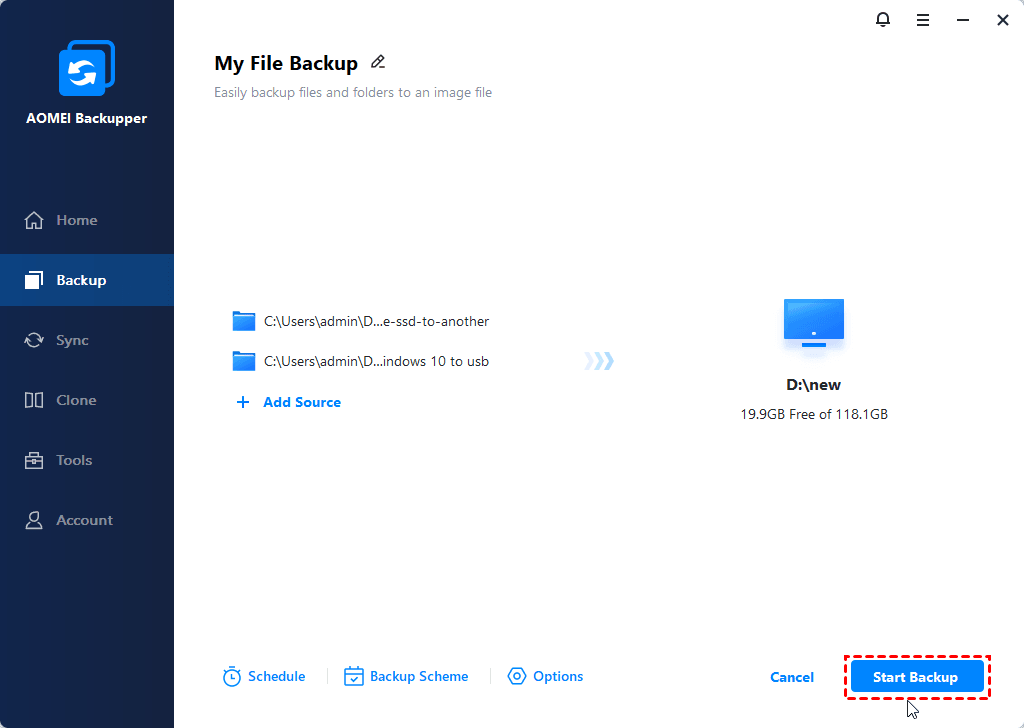
Step 5. Activate Schedule Backup to set automated file backup in Daily, Weekly, Monthly, Event Triggers, or USB Plug in if you don’t want to backup files manually. Finally, click Start Backup.
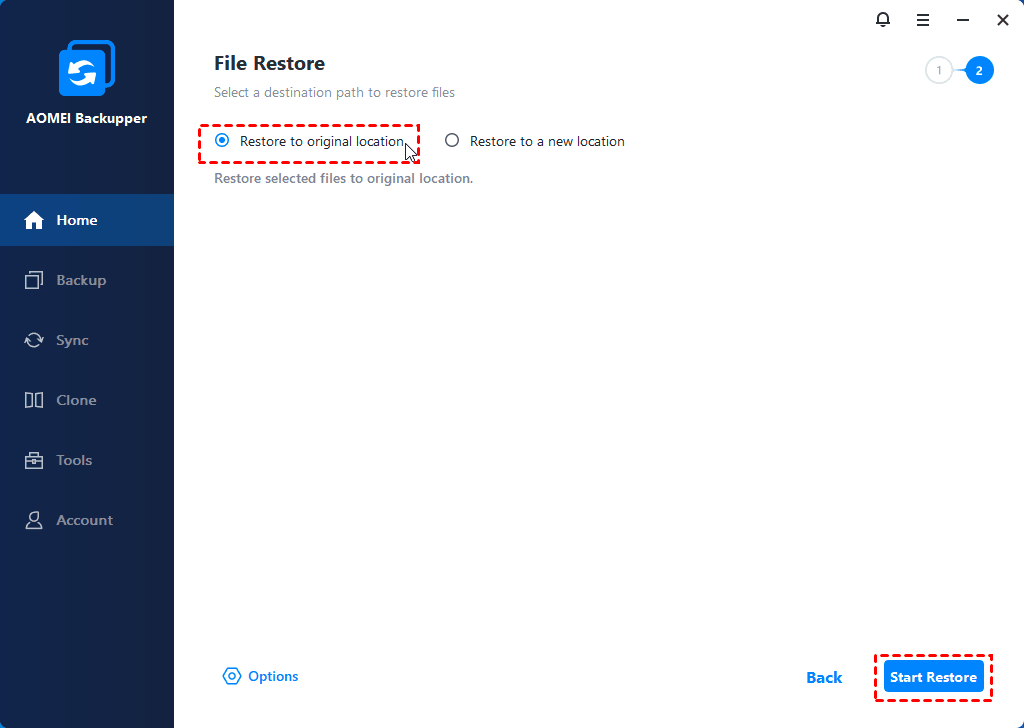
After backup, you can go to Restore > click Select Task to choose the file backup task > choose a backup version to restore > select files or folders you want to restore > choose a restore location. Finally, hit Start Restore to recover your backup files on the targeted path.
- ★Tips:
- In cases where Windows Server 2019 will suddenly crash and not start properly, you can create a system backup on a regular basis and create bootable media for Server 2019 for system restore.
- For those who establish an AOMEI account, you are able to backup files to AOMEI Cloud. This secure cloud provides 1TB of free storage for 15 days after sign-up.
- For enterprise users and users who have multiple computers, you can also use a robust enterprise backup solution - AOMEI Cyber Backup solution. This tool helps you easily backup all Windows servers, PCs, virtual machines, SQL databases, etc. from one location.
Conclusion
After reading, you may already know how to enable Previous Versions in Server 2019. The same method applies to enable Previous Versions in Server 2016.
Other than letting Windows Server enable previous versions for files using the built-in feature, we also provide you with a reliable alternative solution for backing up and restoring files in Windows Server 2019 with the help of AOMEI Backupper. It provides a comprehensive backup solution for your computer, and lets you delete backup files regularly to make sure there is always enough space for new backups.
If you have multiple computers, you may be interested in the Technician Plus version. It facilitates the installation of the software on an unlimited number of computers and lets you create a portable version of this software. Obviously, choose the right one with your specific needs.

