You will receive the “Not enough server storage is available to process this command” error due to different reasons, and you can easily fix it and enjoy better way to share files in this article.
Nowadays it isn't uncommon to work on multiple computers. To maintain data consistency, users need to transfers files between computers. The common practice is to share files over a network. To do so, Windows provided users with many practical features such as Public folder, File Sharing and so on.
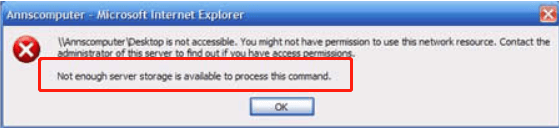
After sharing, you can access the shared files most of the time, but randomly, you failed to access them with an error message: “Not enough server storage is available to process this command”. Also, you may receive similar error message in the following:
This problem may occur if the IRPStackSize registry entry on the server is set too low. Besides, you can receive this error due to non-zero PagedPoolSize in the registry, old temporary and cache files, etc. So I'll show you how to fix not enough server storage is available to process this command error in the next section.
When you get the error: “Not enough server storage is available to process this command” in Windows 10 or server computersLog i, you can follow the corresponding solutions to fix it, such as, set the PagePoolSize to 0, increase the value of the IRPStackSize registry entry, clean up temporary and cache file.
Step 1. Log onto the server computer as an administrator and start the registry editor by typing regedit.exe in the Run box.
Step 2. Move to the following registry path:
HKEY_LOCAL_MACHINE\SYSTEM\CurrentControlSet\Control\Session Manager\Memory Management
Step 3. Find PagedPoolSize, right-click it, and select Modify. Then, set its value to 0 and click OK to confirm this change.
After settings the PagedPoolSize to 0, it will then allows NT to dynamically allocate memory, at this time, you may encounter the not enough storage is available to process this command Windows 10 error if you install ARCServer. And it's known to cause this issue while accessing Windows NT Server share from a client due to small IRPStackSize value.
Step 1. Log onto the server computer as administrator, it can be Windows 10 or server 2012 R2 system. And then Press Windows logo key + R at the same time. Type regedit in the Run box and click OK.
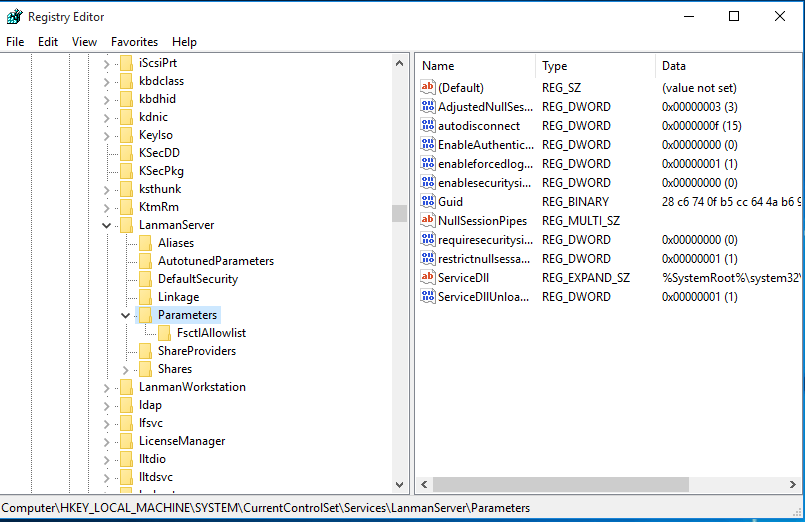
Step 2. Locate and then click the following registry subkey:
HKEY_LOCAL_MACHINE\SYSTEM\CurrentControlSet\Services\LanmanServer\Parameters
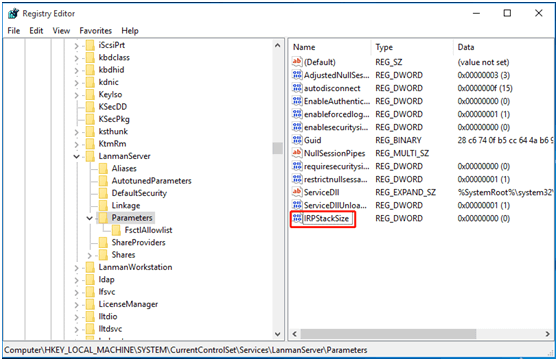
Step 3. Look for the IRPStackSize key, right-click IRPStackSize and choose Modify.. If the IRPStackSize entry is not present in this subkey, you need to create one.
Step 4. Type a larger value in the Value data box and click OK. (Values may range from 0x1 to 0xC. These values are equivalent to 1 to 12 in decimal notation.)
Tips:
If the error message remains afterwards, increase the value of IRPStackSize more.
These operation steps also apply for removing the error message: “Not enough server storage to process this command" in Windows 7.
Since temporary or cache files not only take up hard drive space but also conflicts with runing services, so it's a worth trying way to fix not enough server storage to process this command.
Step 1. Log onto the server system as administrator. And then press Win + R key to open the Run window, type %temp% and then hit Enter.
Step 2. It will open the Tem folder, which stores all the temporary files. You can select all the files and delete them to clear temporary or cached files.
When this error message disappears, you can access the shared resource on the network. For better data protection and transmission, you may continue to share files on a network. However, many users mentioned that the sharing features provided by Windows don’t always work fine, for instance, Windows 10 file sharing not working. Fortunately, you’re given a free sync utility in the next section.
AOMEI Backupper Standard provides the file sync feature that enables you to synchronize files or folders from or to internal or external hard drives, cloud drives, NAS devices, networks, etc. It’s not only easy to use, but also works smoothly on Windows 11/10/8.1/8/7/Vista/XP. There are many wonderful features you can take advantage of:
To use this freeware, you should download and install it first. For server users, try AOMEI Backupper Server.
Then perform the following steps to share your files over a network.
Step 1. Click Basic Sync under Sync tab.
Step 2. Change the Task Name as you like. Click Add Folder to select the folder you want to share.
Tip: If you want to share files only with certain file extensions, such as, *.doc;*.xls;*.ppt;*.temp;*.bak;*~*temp;temp*, click the funnel-shapped button and directly type the file extension you want to exclude or include. We call it Filter settings, before using it, you need to upgrade to AOMEI Backupper Professional.
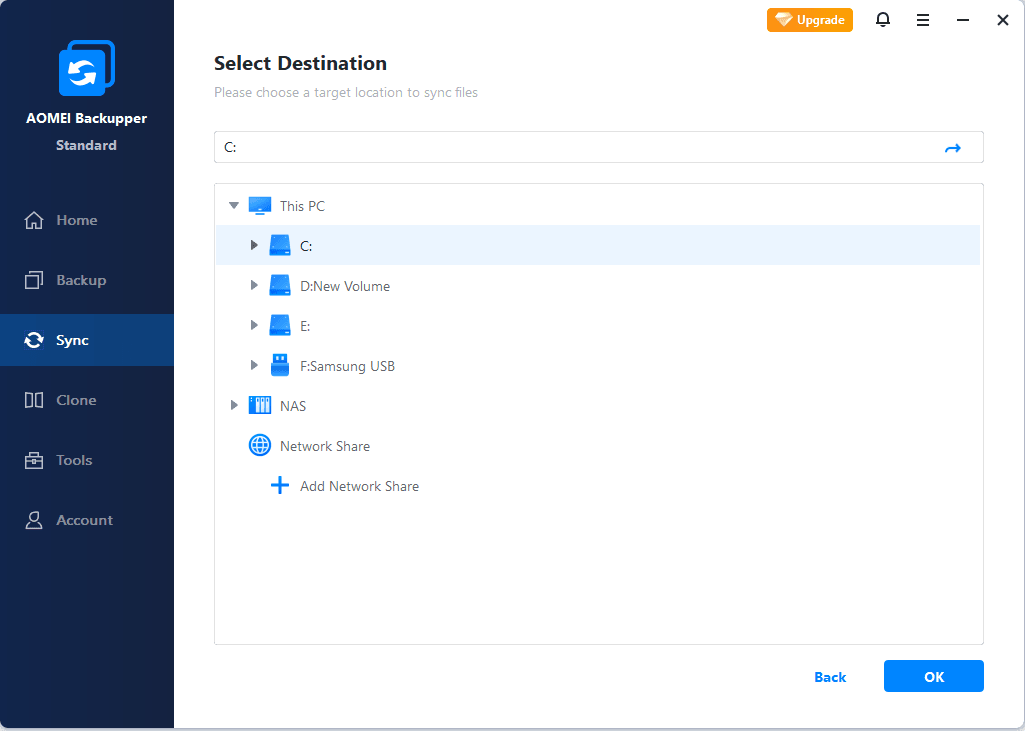
Step 3. Click the inverted triangle icon > Add Share or NAS Devices.
Step 4. Input the Network Path (NAS IP address), it will list all the shared folders. Select one of them to store files you want to share.
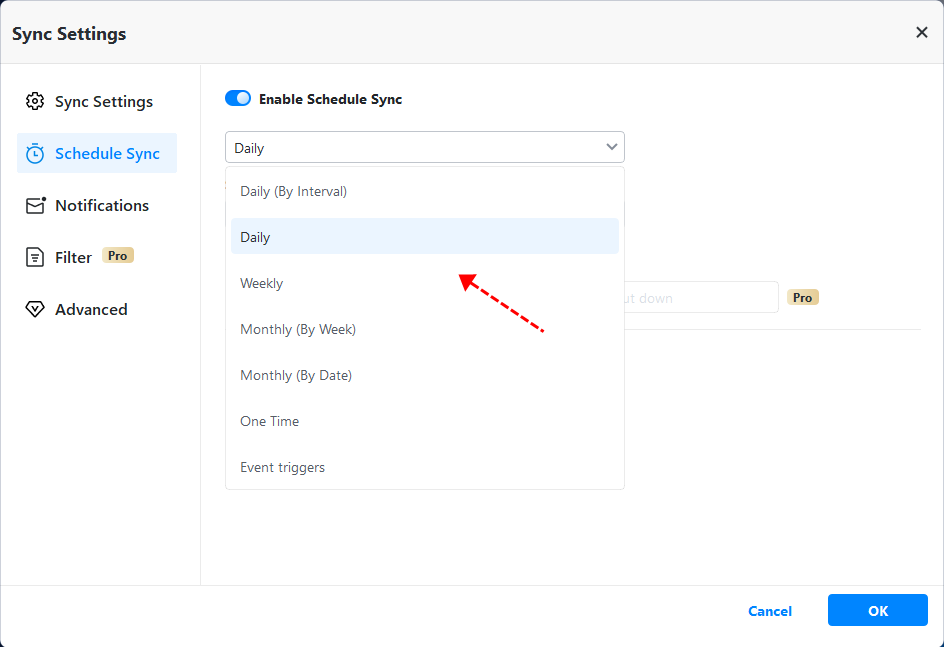
Step 5. To share files over a network continuously, click Schedule Sync and enable it, then select Daily, Weekly, Monthly. You can also go Options > General to write a unique comment can help you distinguish files from others.Then click Start Sync >> to share your files or folders over the network.
Tips:
Except for daily, weekly, and monthly settings, you still can use Event triggers or USB plug in on the premium version. Both of them require an upgrade.
With Pro version, you can enjoy other sync methods to meet different needs, such as, real-time file sync, mirror sync(keep an exact copy of original files), two-way sync.
Please don't modify the folder name of the source after syncing. Otherwise the program cannot synchronize it anymore.
🌟 Useful feature you may need
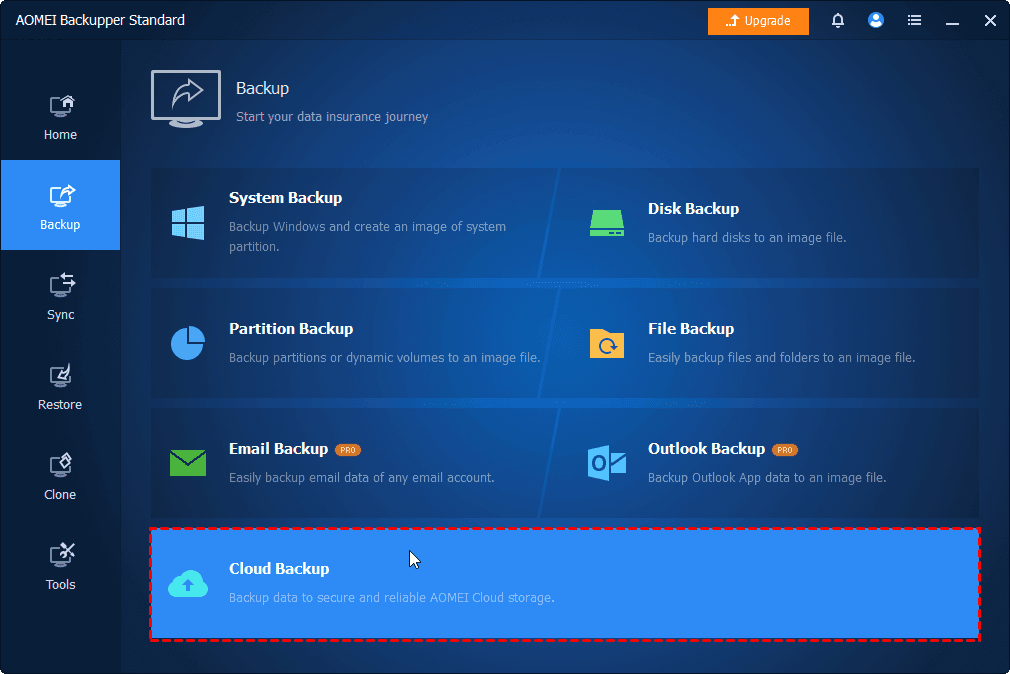
As cloud storage is becoming more and more popular, AOMEI offers users its own cloud - AOMEI Cloud. After you sign up for an AOMEI account, you can use 1TB storage for free within 15 days. Just click Backup > Cloud Backup to backup files to AOMEI Cloud.
You may receive an error message: “Not enough server storage is available to process this command” when you try to view the files you share on a network. Don’t worry! This article serves serveral solutions for you.
At the same time, it still introduces you a better way to share files over a network. You can sync files from or to any recognized device and run this task automatically, even multiple folders. Thus, you also can transfer files from laptop to laptop with the same feature. Don’t hesitate to give it a shot!