


(3 Methods) Backup Remote SQL Server Database to Local Drive
What should I do if I want to backup database from remote SQL Server to a local drive? For those who have this question, this article will provide detailed steps for several methods.
By Crystal / Updated on June 28, 2024
Can you backup database from remote SQL Server to local drive?
To facilitate the data management, you may want to use one computer as a central server in the LAN for storing backups of other client computers. When it comes to MSSQL, you may also want to backup remote SQL Server database to local drive. But can you really do that?
Well, the answer is yes, but the steps will be different from normal MSSQL backup. Because even if you can connect to remote server in SSMS and run BACKUP DATABASE TO DISK commands, the *.bak file will be stored on local drive of that server, and normally you do not have access to process the file further.
To backup SQL database from remote to local successfully, you need to do some additional operations.
How to backup remote SQL Server to local drive (3 methods)
Please note that Method 1 require you to operate on both the remote server and the local server. If you only want to operate on your local server, then you can refer to Method 2 and Method 3, but Method 2 is not available for SQL Express versions and has more restrictions on use.
- Backup remote SQL Server database to network then copy to local drive
- Copy database from remote SQL Server to local SQL Server directly
- Centrally backup databases from remote SQL Server (easiest)
1. Centrally backup databases from remote SQL Server (easiest)
Some methods require you to operate on both servers separately, or have limitations in terms of downtime, scope of application, etc. If you want to back up or restore SQL database between any two computers within a LAN, it is easier to use a centralized SQL Server backup software like AOMEI Cyber Backup. It enables remote and intuitive backup of any SQL Server.
This program works as a central console to manage all the devices within LAN, supporting you to backup any SQL Server remotely and intuitively. When setting up a database backup task, you have the flexibility to adjust the schedule, choose the compression level and retention policies according to your requirements.
To make use of it, you need to download and install AOMEI Cyber Backup first:
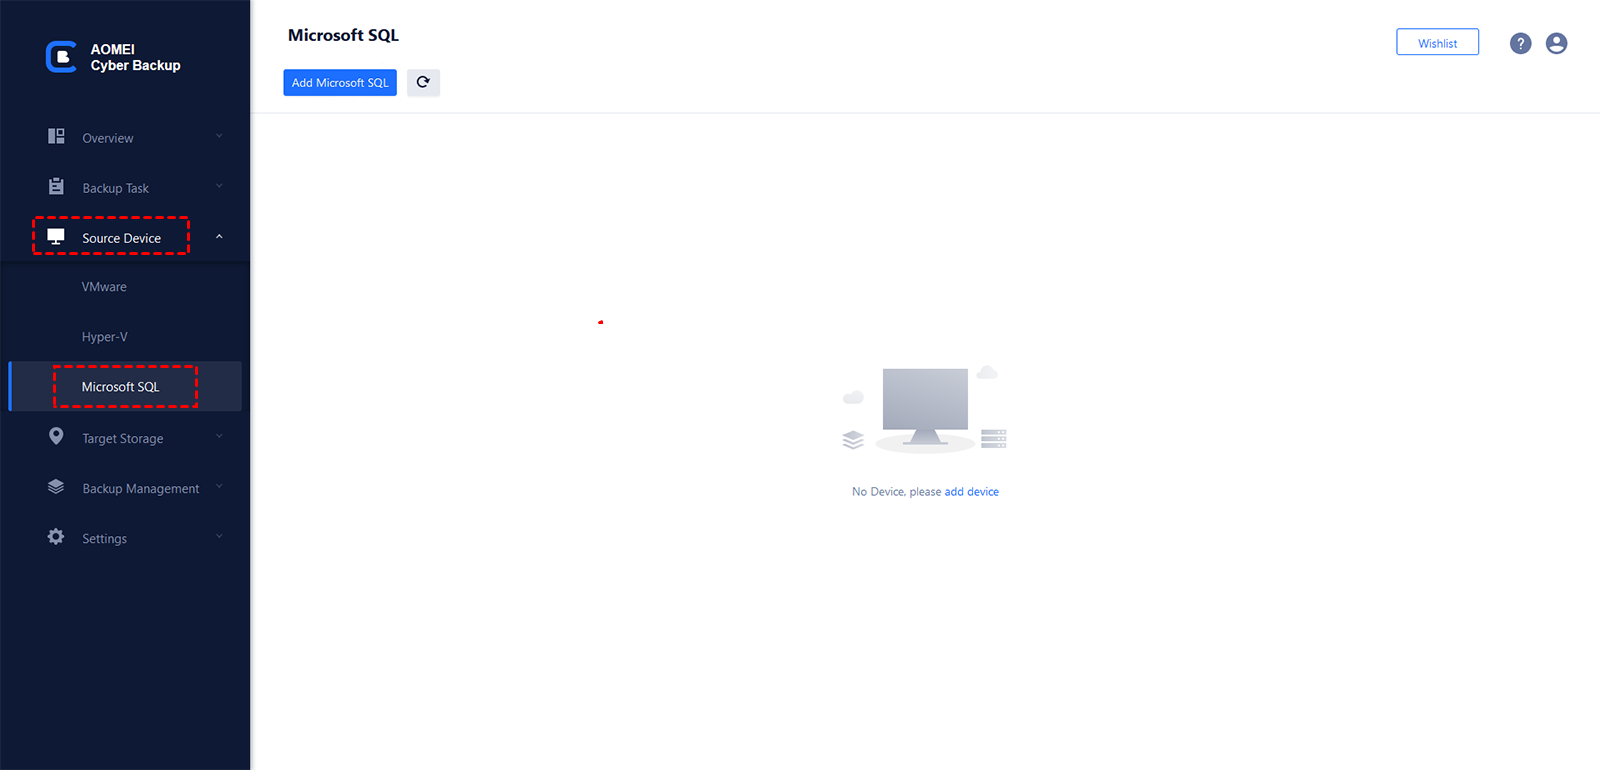
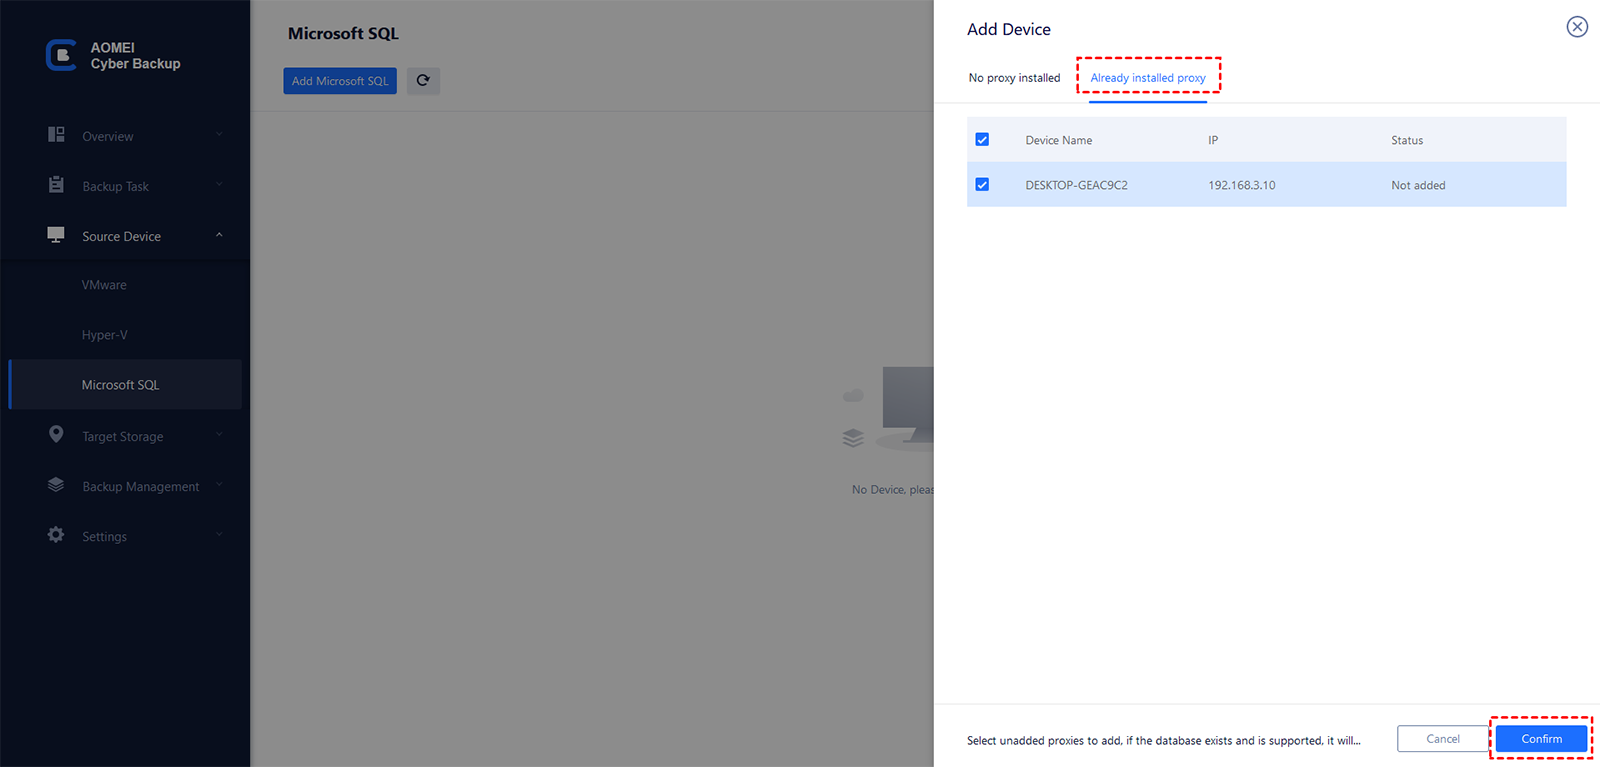
💡 To set up the SQL backup software, please run the downloaded .exe file to install it, and then launch the main interface. Navigate to Source Device -> Microsoft SQL -> Add Microsoft SQL.
💡 After that, click ![]() -> Authentication to validate the database instance. And then you can follow the steps below to back up a SQL database.
-> Authentication to validate the database instance. And then you can follow the steps below to back up a SQL database.
✍ Steps to backup remote SQL database to local drive:
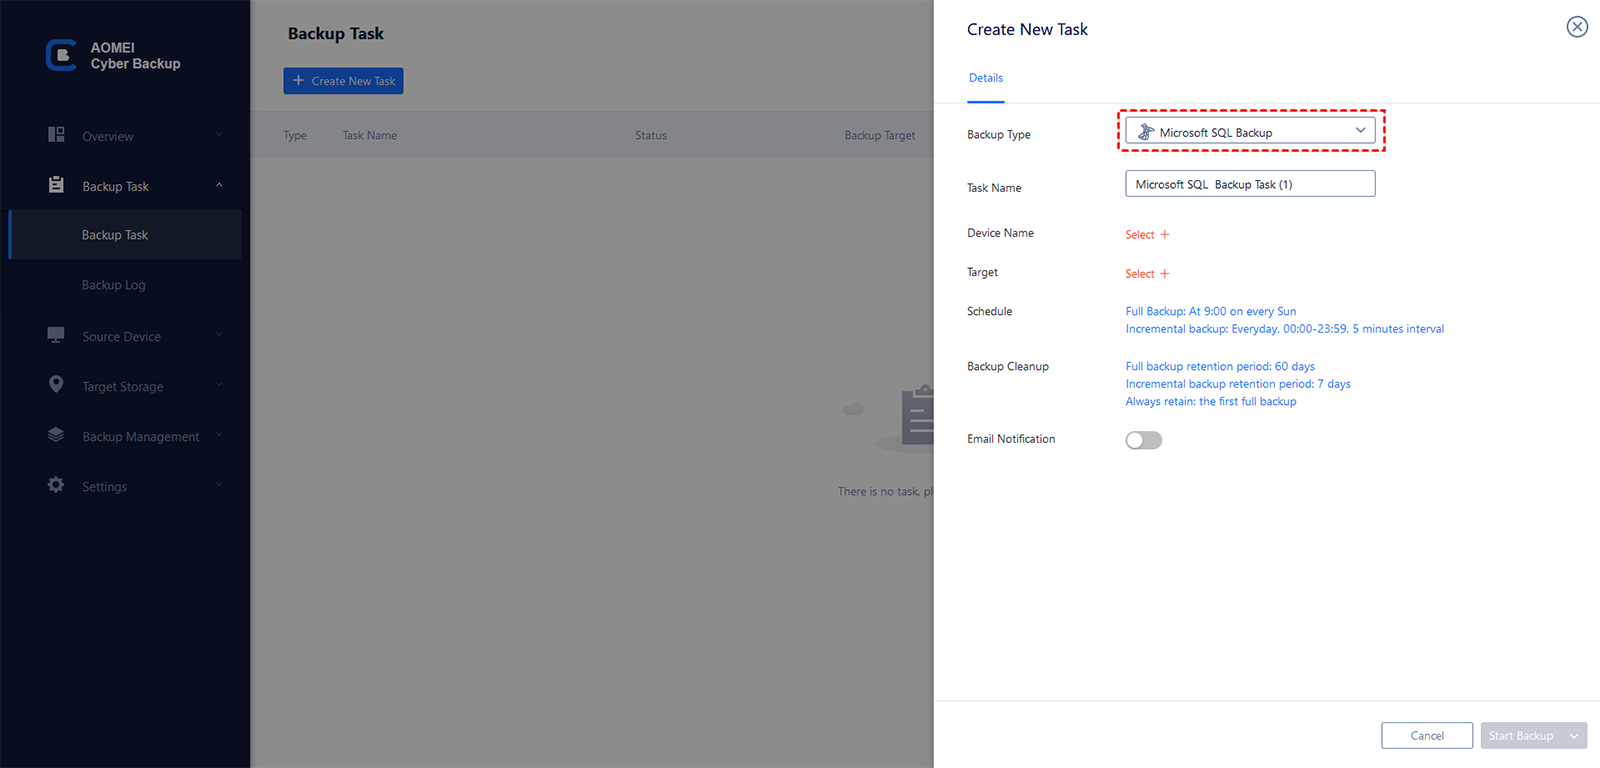
1. Click Backup Task -> Create New Task, and select Backup Type as Microsoft SQL Backup. Enter a special name for the SQL backup task.
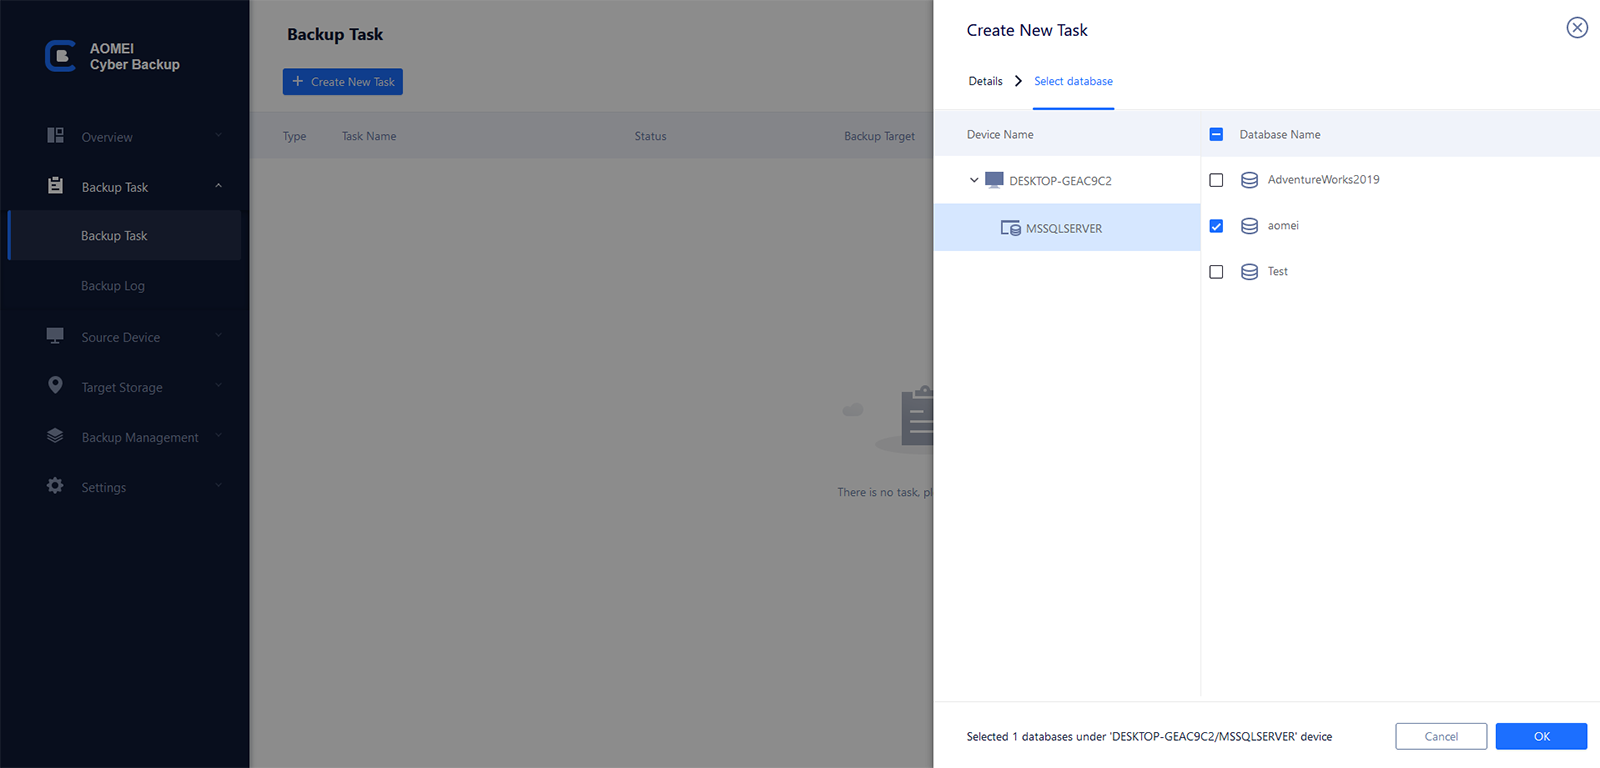
2. Select the SQL instances and databases for backup. You can select multiple databases at once.
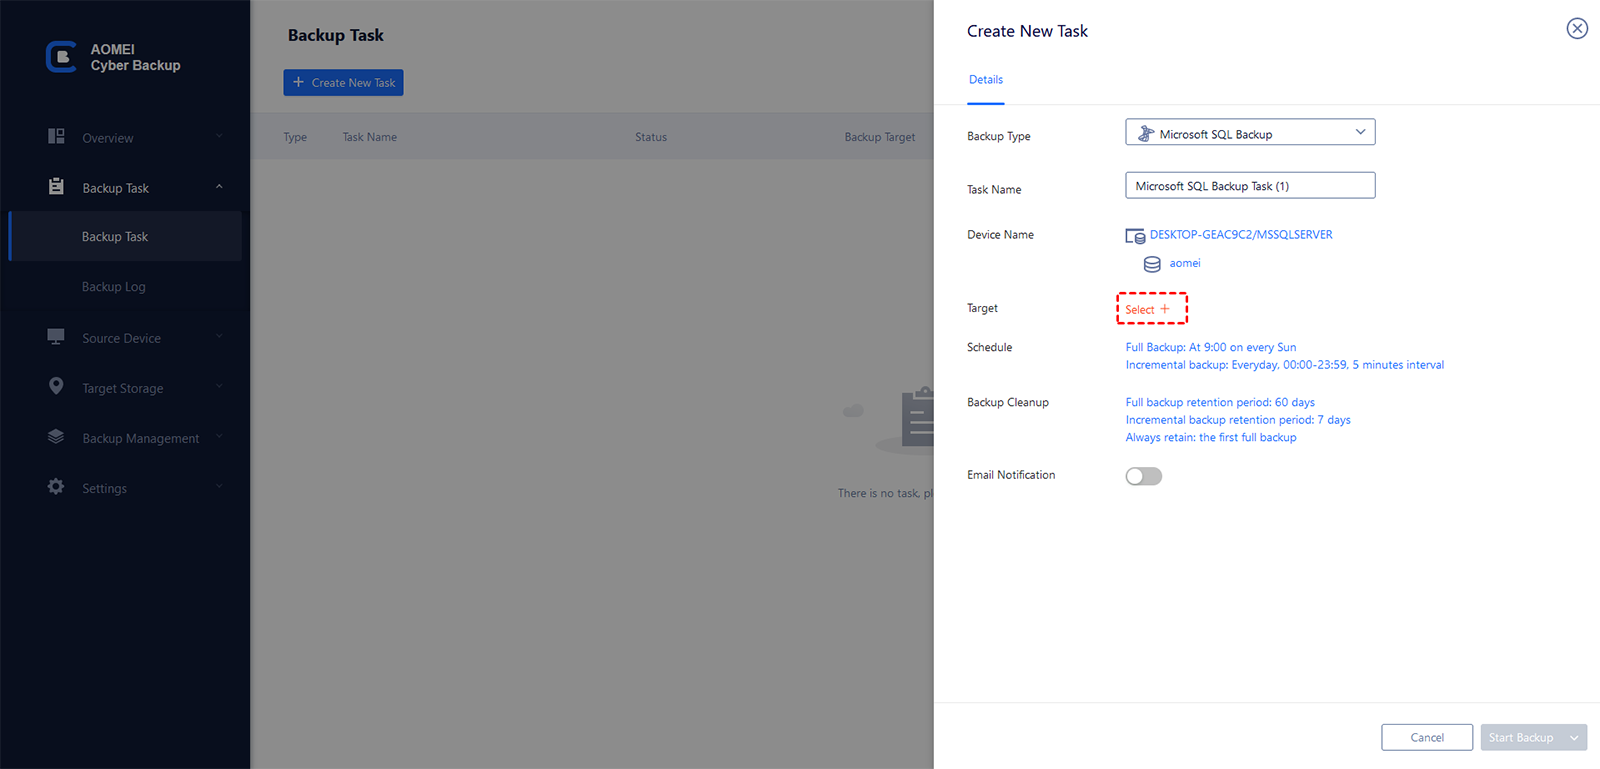
3. Specify a local path (or network path) as backup Target. The added path will be saved in Add storage.
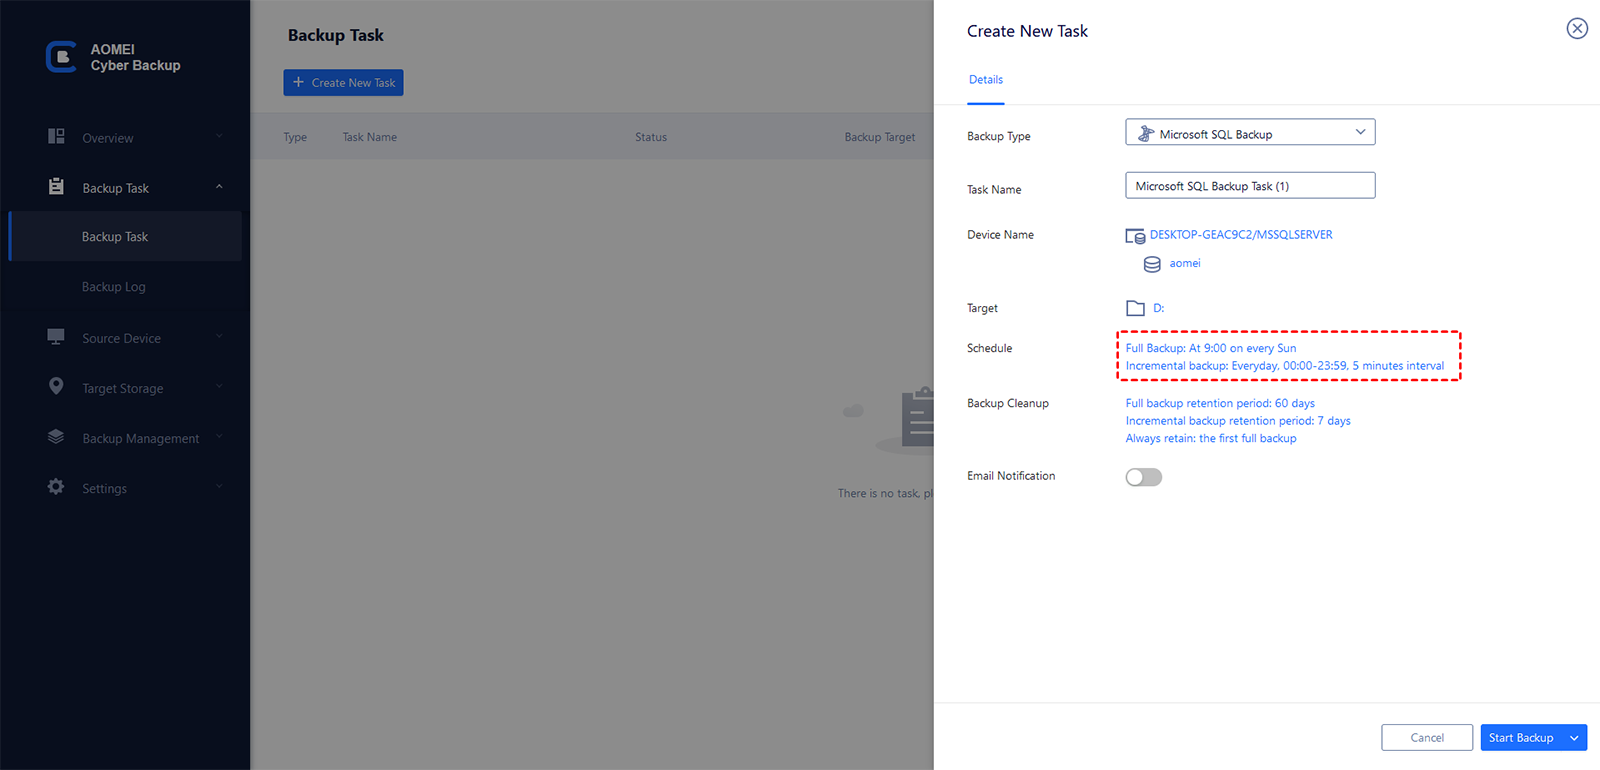
4. Set up a Schedule (optional) to run the SQL database backup daily/weekly/monthly, and set the backup method as full/incremental/differential. It's easy to back up your SQL Server databases to a local drive.
✍More useful features:
* Backup Cleanup helps you to delete older backup version automatically and therefore save storage space.
* Email Notification enables you to receive email notifications when the task is abnormal or successful.
* Archive: AOMEI Cyber Backup also supports cloud archive after backup. You can add a Amazon S3 storage and save your backup to it.
5. Now you can click Start Backup to create and execute the SQL Server automatic backup to local drive.

2. Backup remote SQL Server database to network then copy to local drive
How to backup remote server database to local drive? The method actually involves backing up the database to the network path on the remote server, then accessing the network path on the local server and copying the backup file to the local disk.
For backup methods, you can use either backup GUI or T-SQL in SSMS. the former does not allow you to select a network path directly, but you can enter it manually. Also, no matter which method you use, you need to use the UNC name (\\fileserver\share\filename.bak) instead of mapped drive letter, otherwise you may receive Operating system error 3 (The system cannot find the path specified).
You can check details in backup SQL database to remote location, here I will use T-SQL as an example.
On remote server: backup SQL Server database to remote location
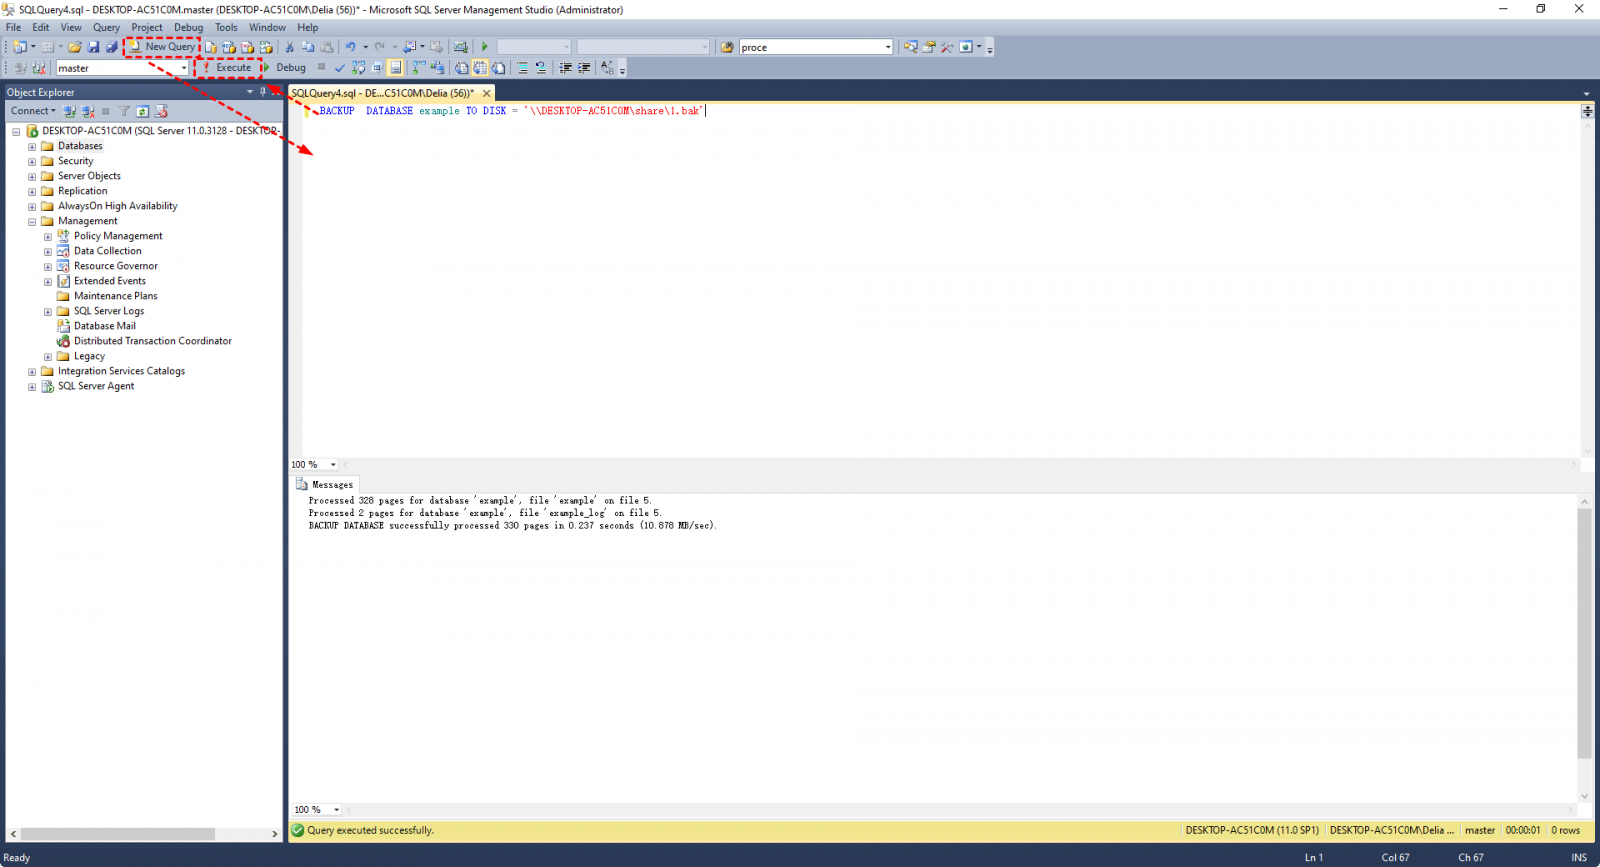
Launch SSMS on the remote server, connect to the instance you want to backup, and click New Query.
In the popping out window, enter the T-SQL statements to perform the backup, and hit Execute to run it:
BACKUP DATABASE databasename TO DISK = 'filepath\filename.bak'
Here’s my example:
BACKUP DATABASE example TO DISK = '\\DESKTOP-AC51C0M\share\1.bak'
If it returns Operating system error 5 (Access is denied.), this is because the account you log on the SQL Server as doesn’t have the permission to read & write data to the share. To fix it, please refer to SQL Server backup to network share access denied.
On local server: copy backup files to local drive
Once the backup is successful, you can access this network path from the local server and copy the backup file to the local disk.
If you want to do it regularly, you can use xcopy or robocopy commands to create a backup batch file, and use Windows Task Scheduler to automate it.
3. Copy database from remote SQL Server to local SQL Server directly
The Copy Database Wizard makes it easy to move or copy databases and certain server objects from one instance of SQL Server to another without downtime. However, it also has the following limitations:
- The Copy Database Wizard is not available in the Express version.
- It is not possible to move or copy databases to earlier versions of SQL Server.
- The Copy Database Wizard cannot be used to copy or move system databases.
- The Copy Database Wizard requires SysAdmin privileges...
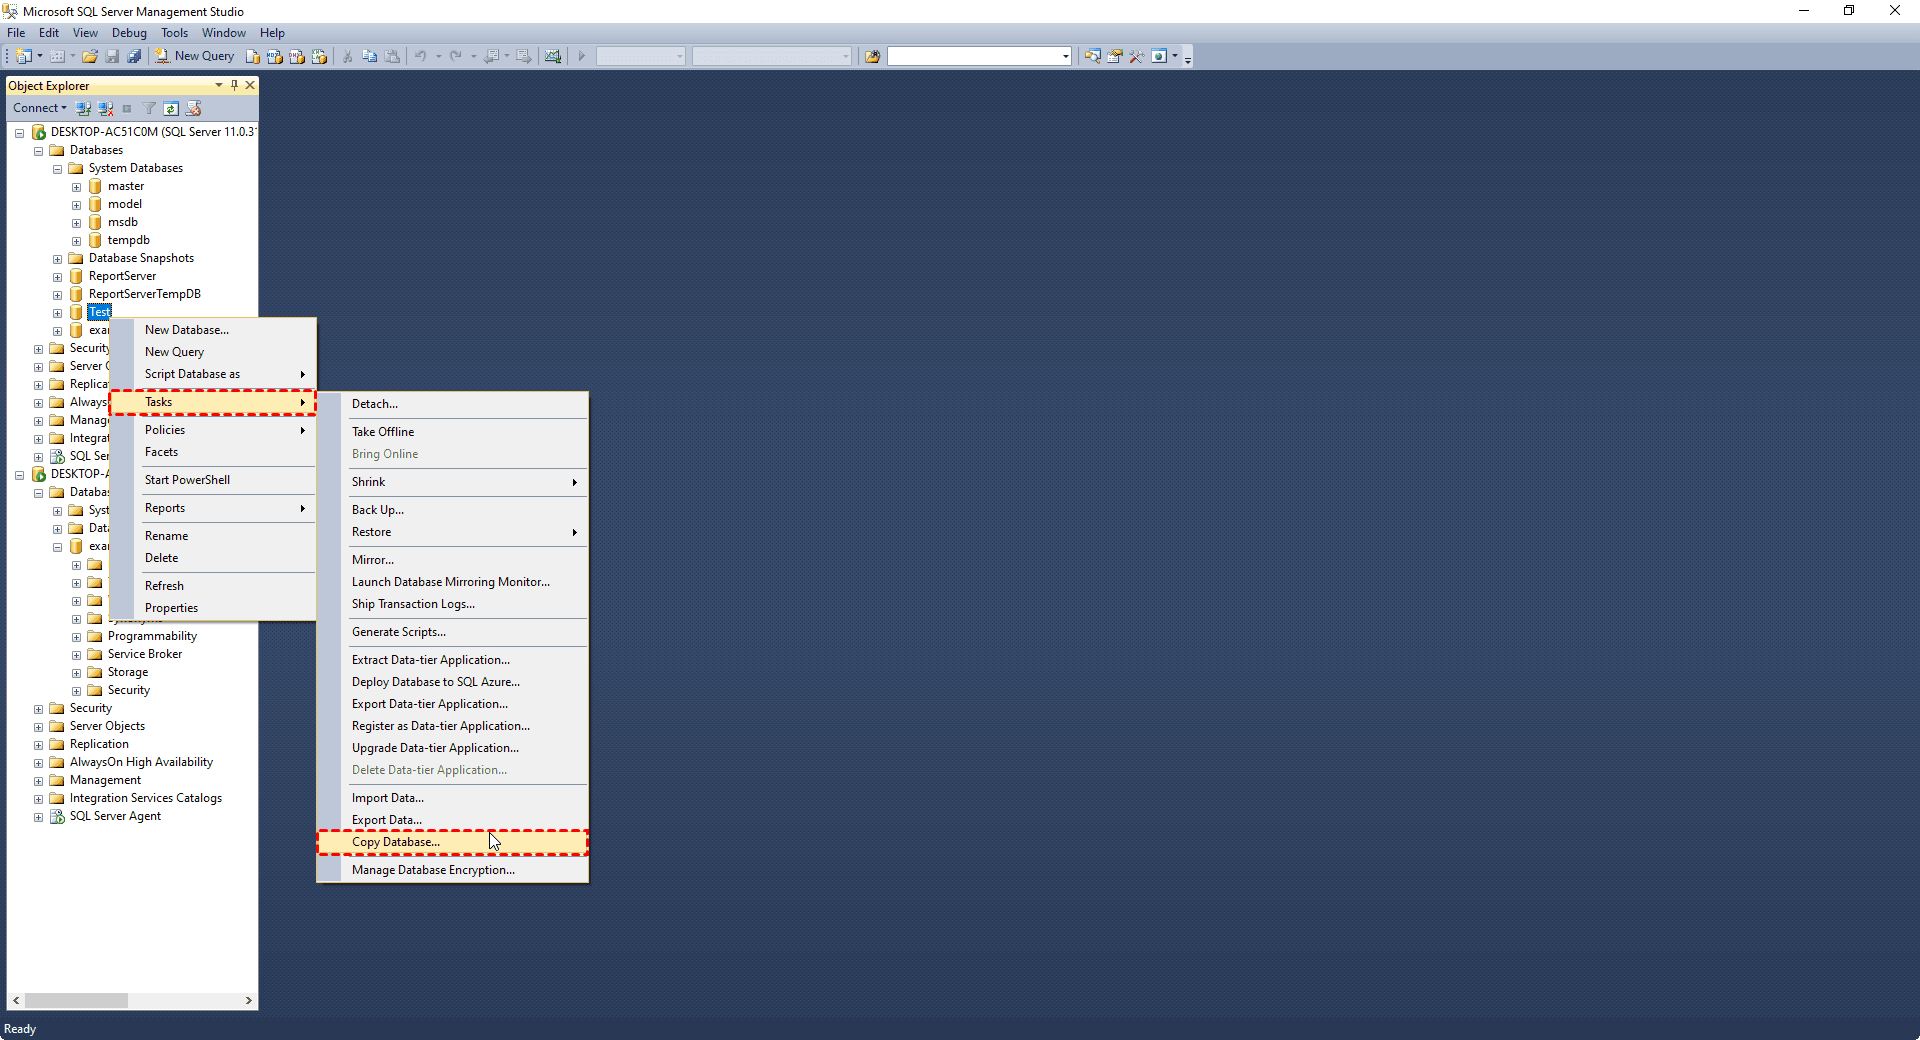
1. Launch SSMS, connect to your instance, and right-click any user database under Object Explorer. Choose Tasks in the menu and click Copy Database.
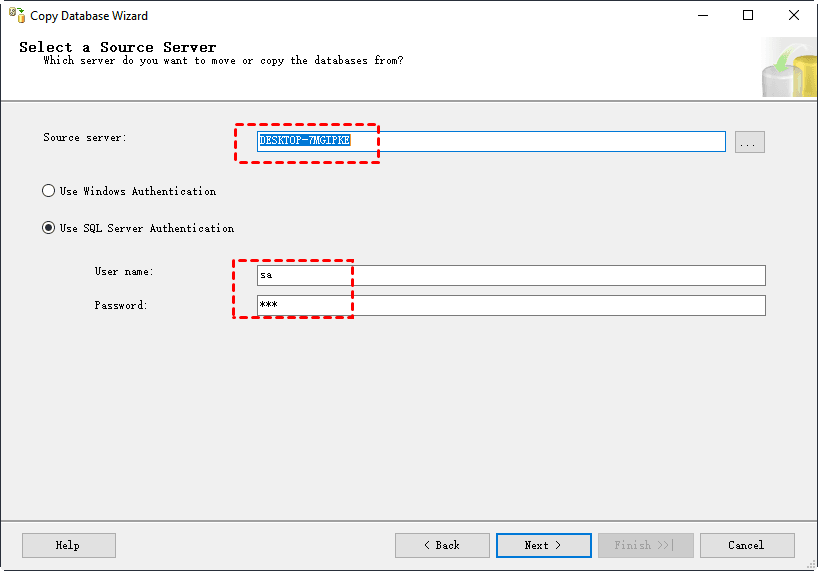
2. In the popping out Copy Database Wizard, specify the Source server first, which is the remote server you want to backup database from. You can either enter Windows Authentication or SQL Server Authentication, then click Next to connect to it.
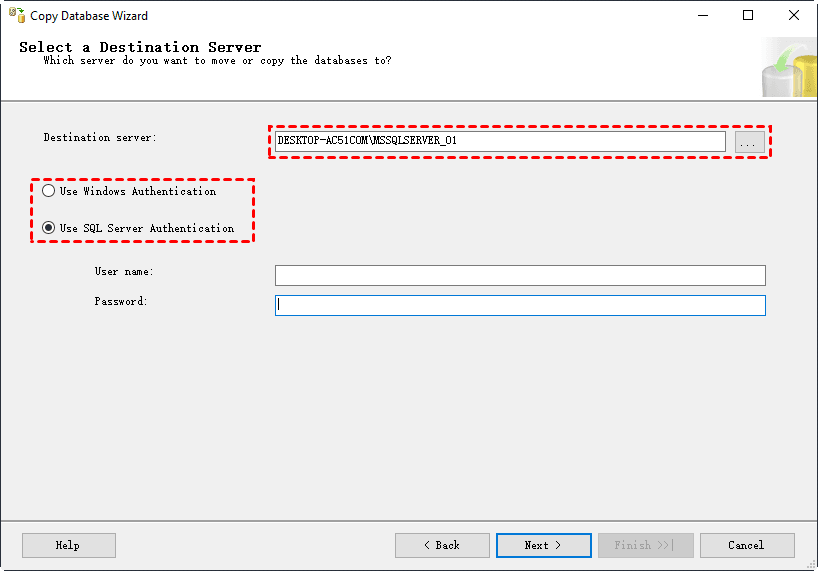
3. In the next page, you can specify the Destination server, which should be your local server as the receiving end. Again, enter the required authentication information and click Next to establish the connection.
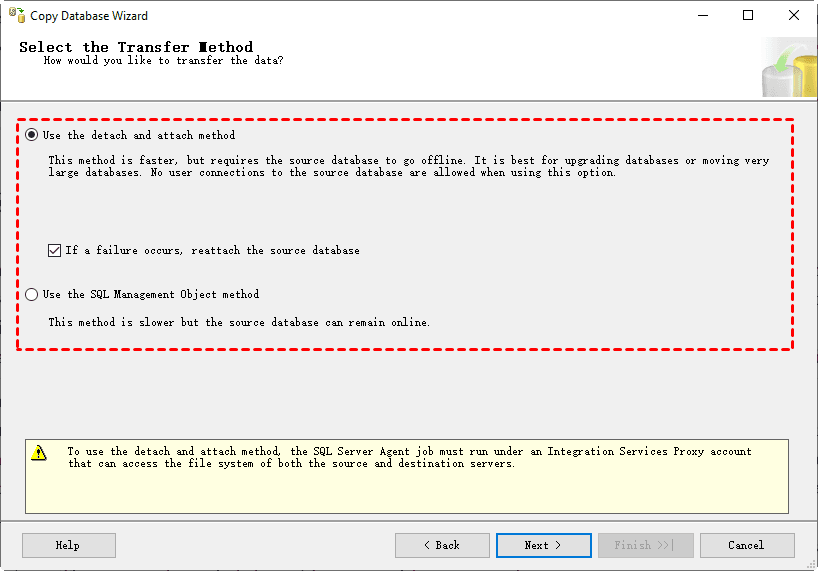
4. Then, select the transfer method. SSMS will automatically check Use the detach and attach method because it’s generally faster and better suited for large databases. If you don’t want any downtime, Use the SQL Management Object method is a better option. It’s slower, but can ensure the source database remain online.
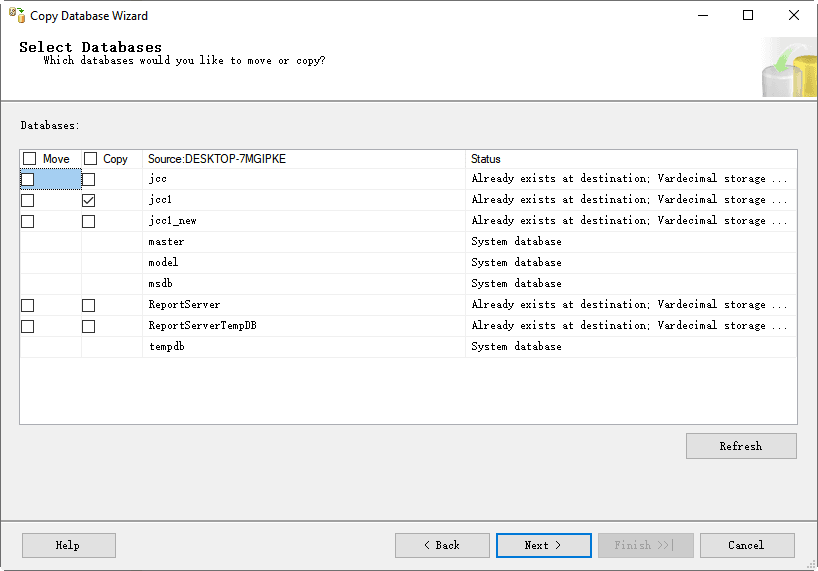
5. In this dialog box, you can select the database you want to Copy or Move and then follow the wizard to make your settings.
Note: If you select the Move option, the wizard will automatically delete the source database after moving it.
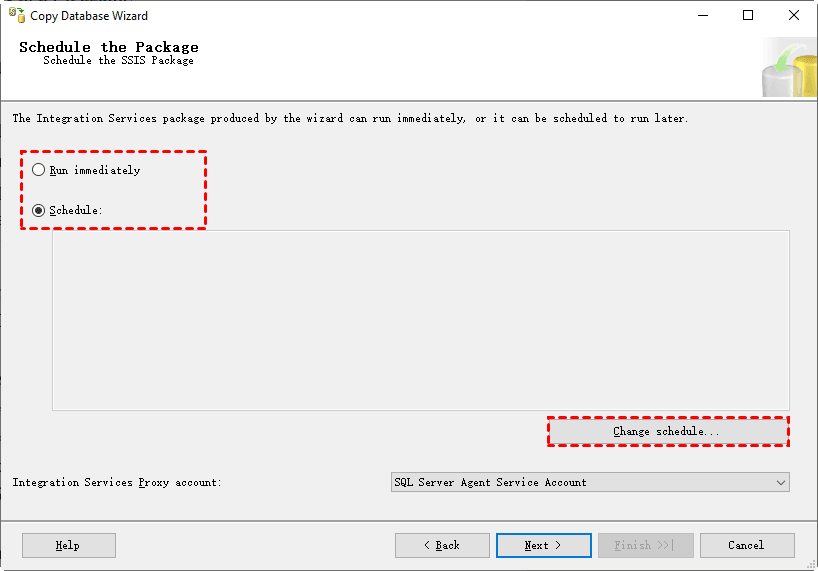
6. After setting, you can choose to execute immediately or check Schedule in this screen, and then click Change Schedule to open the schedule dialog box to configure it.
7. Once the settings are complete, click Finish to perform the database replication.
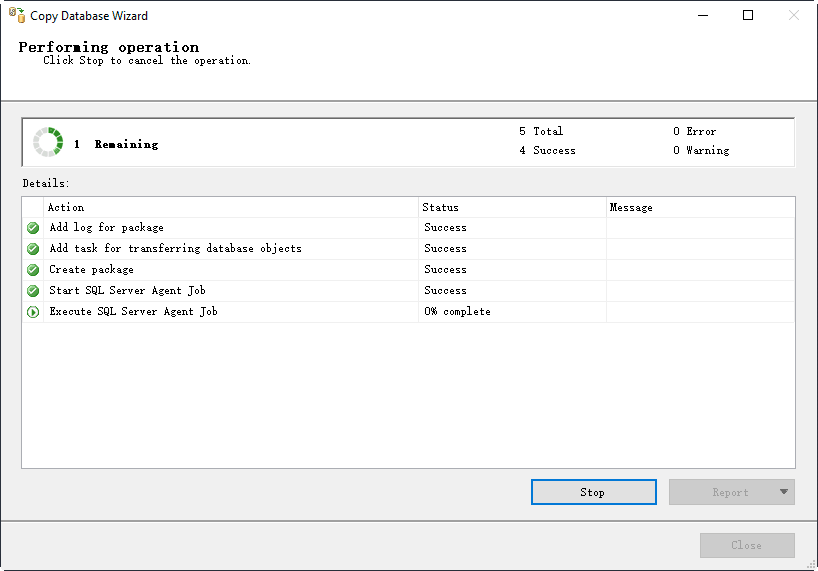
8. Finally, select the database you copied successfully, then you can backup remote SQL Server database to local drive.
Conclusion
What to do if you want to backup not only your local computer, but also a remote computer? This article describes approaches to backup remote SQL Server database to a local drive, most of which require you to operate on two computer separately. If you want to do this on your own computer, you can use a professional backup tool - AOMEI Cyber Backup.
It can back up SQL databases on any computer within your LAN. The created tasks will be displayed in Tasks tab for centralized management. You can even restore database to another SQL Server directly.

