4 Ways: Windows Server 2019 Network Discovery Not Working
If you find network discovery keeps not working, you can try to troubleshoot this issue with the below 4 best methods. Additionally, other effective and simple syncing methods are given as well.
By Maggie Updated on December 11, 2023
Why does Windows network discovery keep turning off?
Network discovery is the built-in Windows utility which refers to the process of identifying and mapping the devices and resources within a computer network. This includes computers, servers, routers, printers, and other networked devices. The primary goal of network discovery is to create an accurate and up-to-date inventory of the network, allowing administrators to understand its structure, monitor its health, and ensure proper management. However, in the process of using Network Discovery, some users reported that ‘windows server 2019 network discovery not working’ issue like the below user case:
"Why in Advanced sharing settings the Turn on network discovery can't save the settings in Windows Server 2019 Preview? Although as an admin I turn it on and save settings, it's again off when I open Advanced sharing settings.
The second problem is that when I click Choose media streaming optons, I get the message The page failed to load."
Likely, if you have the same symptoms below, you are in the right place!
- Changes to Advanced sharing settings in Network and Sharing Center are not saved.
- Network Discovery cannot be enabled.
- Issues browsing or finding network shares.
- Unable to view shared folders on the local network.
The underlying root for such issue may lie with two major causes:
- Dependency services for Network Discovery are not running.
- Windows firewall or other firewalls are preventing Network Discovery.
By addressing these potential causes, you should be able to resolve the issues related to turn on network discovery Windows Server 2019 not working.
Is Windows Server 2019 network discovery not working? Try 4 possible solutions
Method 1. Change advanced sharing settings
The first way is the change the advanced sharing settings, please follow me to learn how:
Step 1. Press Windows+R simultaneously to open the Run dialog box. And then type the command: control /name Microsoft.NetworkAndSharingCenter. Click OK to access the Network and Sharing Center.
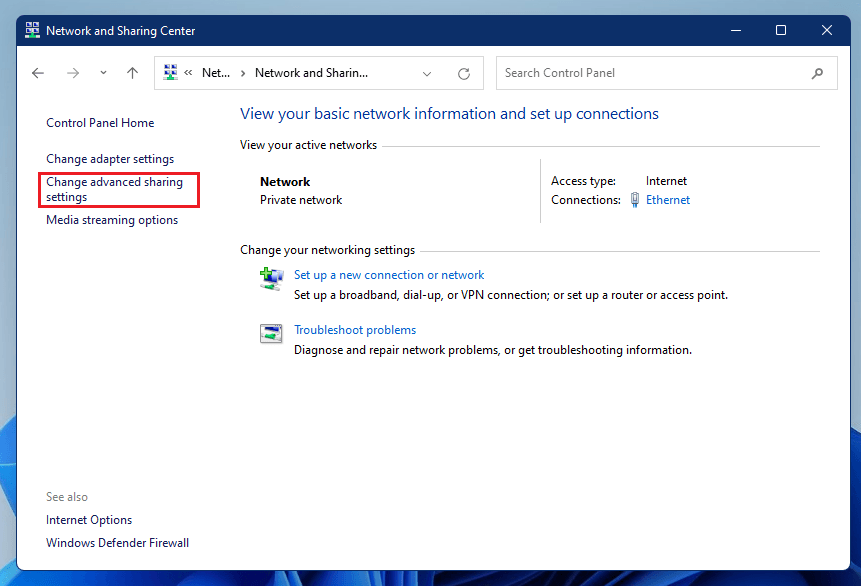
Step 2. In the Network and Sharing Center, navigate to Change advanced sharing settings in the left panel.
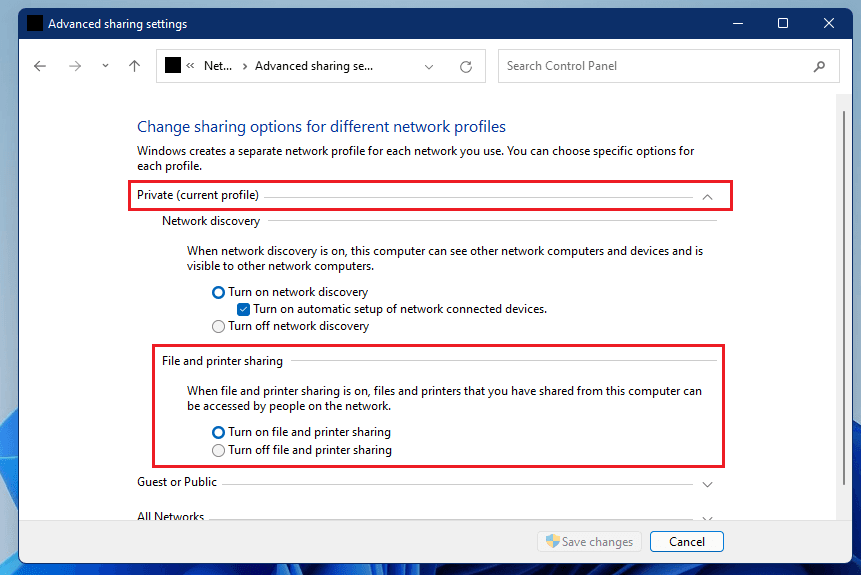
Step 3. Locate the Private section and expand the options, and click on the Turn on network discovery button, and File and printer sharing section as image shown and choose Save changes.
Now, your Windows server has Network Discovery enabled, allowing you to locate other devices on your network.
Method 2. Tweak the firewall settings
Step 1. Press Windows + S to open the search bar and type Windows Defender Firewall and choose it from the results.
Step 2. In the left panel click on Allow an app or feature through Windows Defender Firewall.
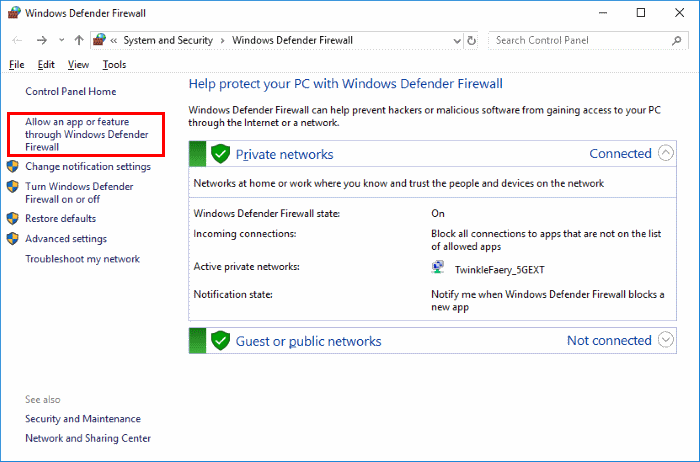
Step 3. Then enable the checkbox of Network Discovery. Then, to the right, enable the checkbox for Private.
You’ve now successfully whitelisted Network Discovery in your firewall, then test if Windows server 2019 network discovery keeps turning off.
Method 3. Reset Network
Another way is to reset network settings, here is how you can do it:
Step 1. Press Windows + I to open Windows Settings. Then click on Network & Internet.
Step 2. Click on Status. And scroll down and locate Network Reset.
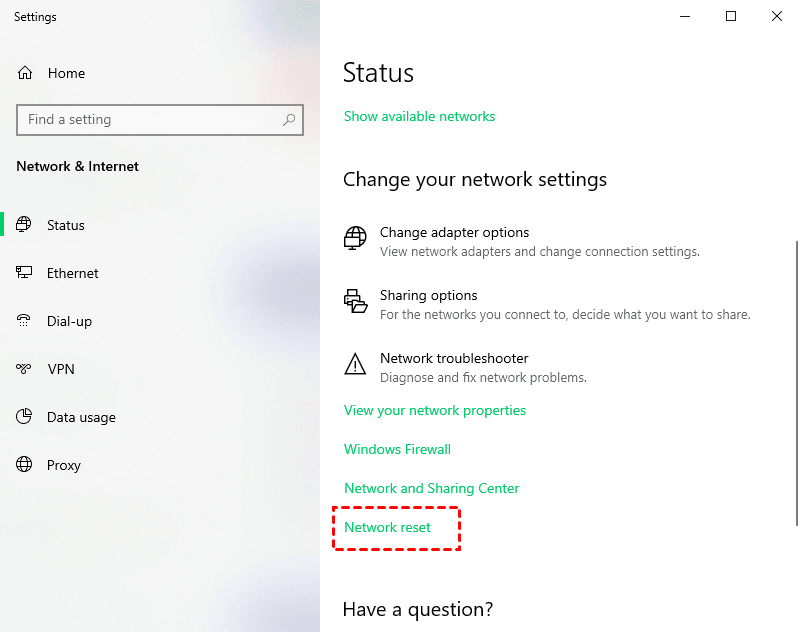
Step 3. Click Reset Now to proceed with the network reset.
Following these steps will promptly initiate a network reset on your Windows system.
Method 4. Manage Windows Services
A common reason why you can’t use Network Discovery is that the feature’s dependency services aren’t running. To fix this, use the Services app to start those required services.
Step 1. Press Windows+R to open Run. And then type services.msc and click OK.
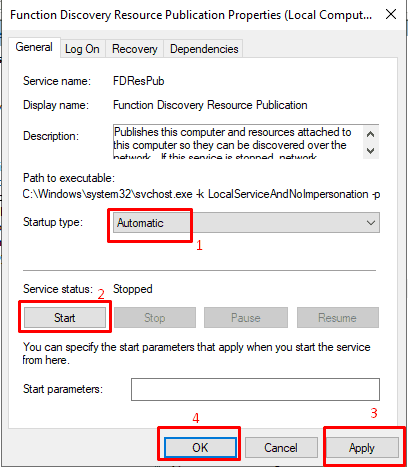
Step 2. Scroll down to find Function Discovery Resource Publication. Double-click to open it.
Step 3. Change Startup type to Automatic. And click Start under Service status section and then click Ok to save the changes.
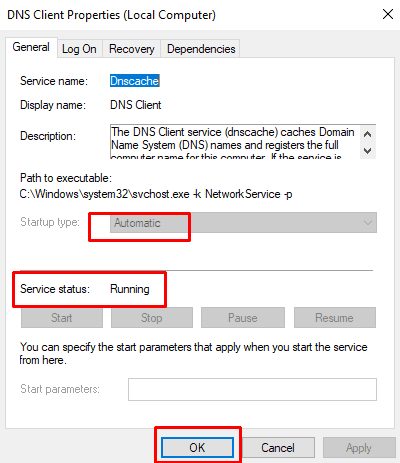
Step 4. Locate the DNS Client service and confirm it is set to Automatic. What’s more, ensure the service is Running. Click OK to save changes.
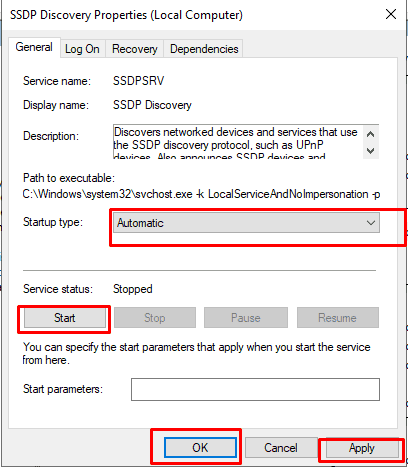
Step 5. Find SSDP Discovery and double-click to open.
- Change the Startup type to Automatic.
- Click Start under Service status.
- Click OK to save changes.
Step 6. Restart your Windows server to apply the changes.
Following these steps should resolve issues with Network Discovery by ensuring the necessary services are running.
Free & reliable: sharing files with the best alternative----AOMEI Backupper
If you want to try other methods to sync your files with network drive effectively, here are 2 other ways.
1. Command Prompt:
You can take use of Command Prompt to run basic commands to get the file access and sharing over the network.
2. File Sync Software:
AOMEI Backupper Server enables folder synchronization to network drives across various storage devices such as your computer, external hard drive, or USB flash drive.
Here I will recommend the second alternative to sync your files over network devices for its reliability and effective outcomes:
Download AOMEI Backupper Server and install it on your computer.
Best Windows Server Sync software.
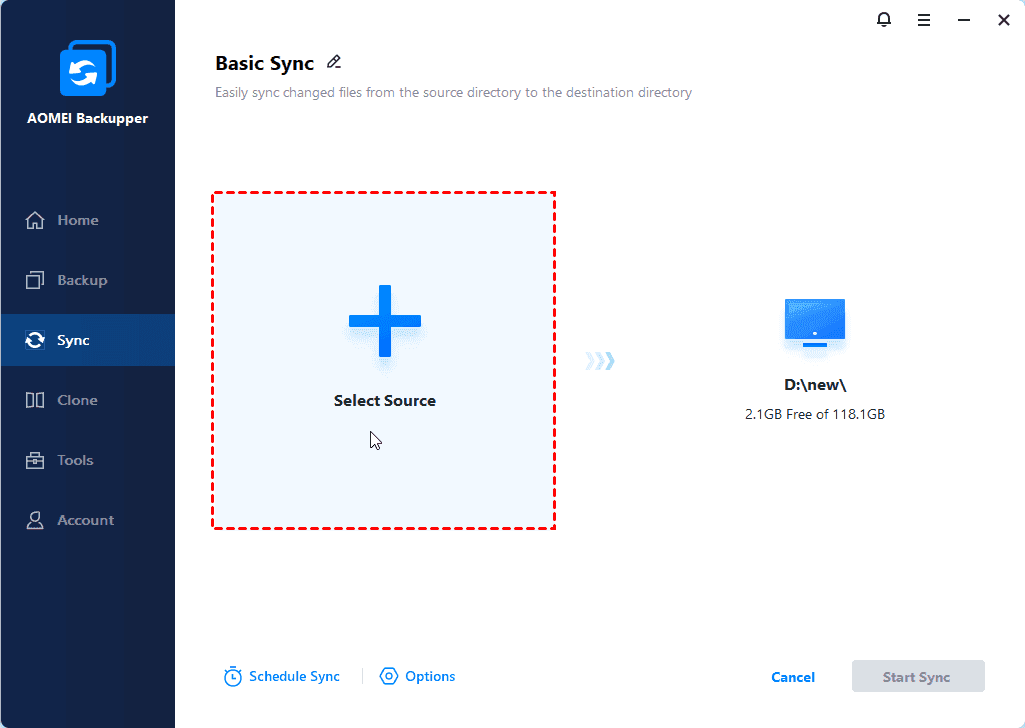
Step 1. Open this software and go to Sync > Basic Sync.

Here are 3 other sync options for you:
Real-Time Sync: It allows you to sync files and their changes immediately when detected. This is very useful if you need to modify your files frequently.
Mirror Sync: It makes sure that the destination directory has the same files or folders as the source directory. Any newly added or modified files in the destination path will be deleted or overwritten.
Two-Way Sync: It will sync files and their changes in the source directory to the destination, and vice versa.
Step 2. The Task Name can be modified according to your needs. Click Add Folder to choose the folder that contains the files you want to sync.
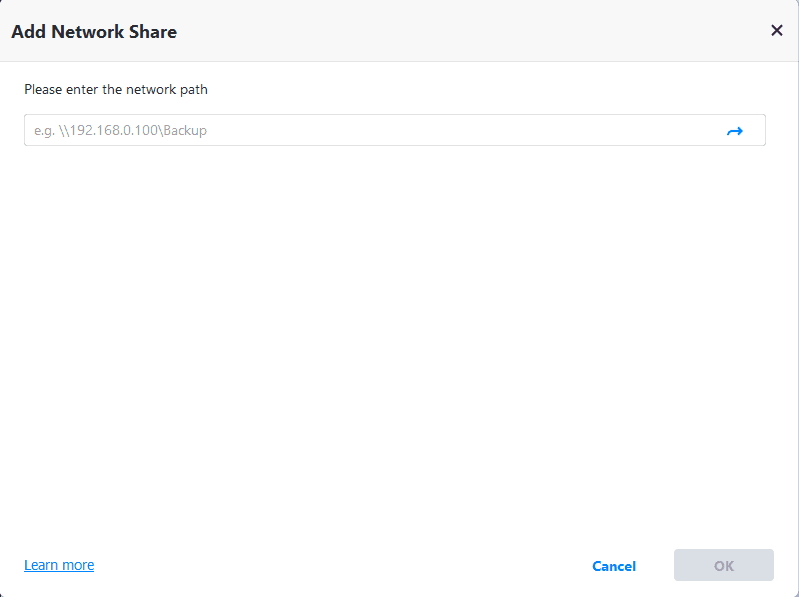
Step 3. Click the inverted triangle and select Add Share or NAS Device.
Step 4. Then, type network path or name in the next window, you will see all shared folders, select one folder as the destination path and click OK.
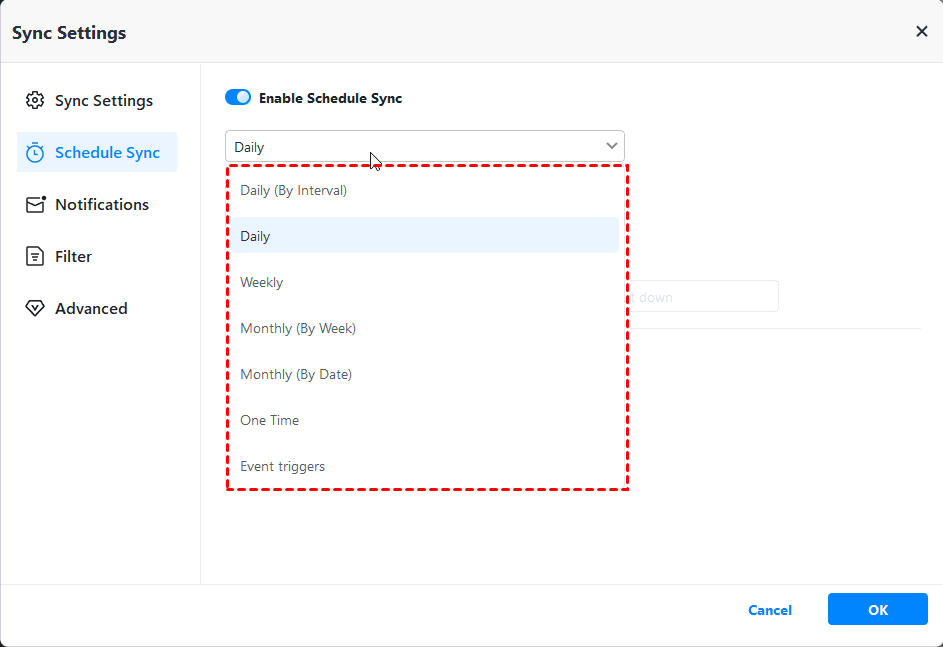
Step 5. (Optional) You can click Schedule Sync to enable scheduled sync and specify your sync frequencies as daily, weekly, monthly, event-triggers and USB plug-in mode.
Step 6. Click Start Sync to efficiently share files over the network.
✍ In addition to syncing folders over a network path, an alternative option is to synchronize them with cloud drives such as OneDrive. For users with limited free cloud storage, AOMEI Cloud offers a solution by providing 1TB of storage for free from the sign-up date for a duration of 15 days.
Summary
I hope one of these methods proves helpful in resolving your Windows Server 2019 network discovery not sharing issue. To prevent future sharing problems, consider using AOMEI Backupper Server. This software allows you to sync folders on the same computer, automatically sync files to an external hard drive, and sync folders to a network drive.
Additionally, it offers features such as cloning files to an external hard drive, backing up files, and restoring files from backup images. If you want to safeguard your files and prevent loss, explore these practical functions. Give it a try yourself!

