Top 2 Ways to Create Windows 11 Image for Deployment
You can learn 2 ways to create Windows 11 image for deployment in this article. Read this article carefully and then choose the kind of method that works for you.
By Yuka Updated on March 22, 2024
2 Cases for Creating Windows 11 Image to Deploy
![]()
There may be different reasons why many people deploy Windows 11 to multiple computers these days, but there are two broad categories.
- For business users. Companies need to set up new computers or update Windows 11 in bulk for their employees, which makes it easier to implement standardized management. And it can greatly reduce the time and effort of company technicians.
- For individual users. If family members each have a computer and want to deploy several identically configured computers, creating a Windows 11 image for deployment can greatly reduce the hassle of reinstalling one by one.
How Do I Create A Windows 11 Image for Deployment?
Next, I will share with you two easy ways to create Windows 11 image that you can then use to deploy Windows 11 to multiple computers. One way is to professional third-party deployment software, the other is to use Windows 11 Media Creation Tool to do it. You can choose either of them according to your needs.
#1. Deploy Windows 11 to Multiple Computers via Professional Deployment Software
Although you can create Windows 11 image for deployment with the Media Creation Tool, it's hard to work with, especially for greenhorn computer users. And it has relatively few features. If you want an easier and more useful way to create Windows 11 image to deploy to other computers, you can try these 2 powerful combined third-party software provided below.
You need to backup your computer's system first with the help of AOMEI Backupper Standard, and then use AOMEI Image Deploy to restore it to multiple client computers. AOMEI Image Deploy is an excellent tool for Windows 11 deployment and can deploy images to unlimited computers at the same time. It has the following advantages:
🧁 Easy to use: It has a very clear user interface and provides you with a step-by-step wizard guide. You can get started quickly.
🧁 Real-time process monitoring: You can monitor the IP addresses of all client computers and their recovery status in real-time, and you can manage all client computers remotely.
🧁 Supports multiple operating systems: It supports Windows 11/10/8.1/8/7/Vista/XP and Windows Server 2003/2008(R2)/2011/2012(R2)/2016.
If you don't want to download two software, then you can choose the all-in-one backup and recovery software - AOMEI Backupper Technician or Tech Plus to complete your system backup and image deployment. In addition, you can also use various other functions on the software, including backup, restore, clone, create bootable disks, etc. to protect your computer in all aspects.
🎇 Note: The standalone AOMEI Image Deploy only supports BIOS boot, while the integrated AOMEI Image Deploy in AOMEI Backupper Technician/ Technician Plus supports both BIOS and UEFI boot.
The preparation and steps are the same. Next, I will show you how to use the two AOMEI software to create Windows 11 image for deployment. It is also applied to creating Windows 10 image for deployment.
✨ Part 1. Create Windows 11 Image without SID
To deploy Windows 11 to multiple computers on the same network, you need to first create a custom Windows 11/10 image with AOMEI Backupper.
- Click the download button below to install AOMEI Backupper Standard on your computer and open it.
- On the main interface, click Tools -> Create Bootable Media, select bootable disc types - Windows PE and boot device - USB, CD/DVD or ISO file, and click Next.

-
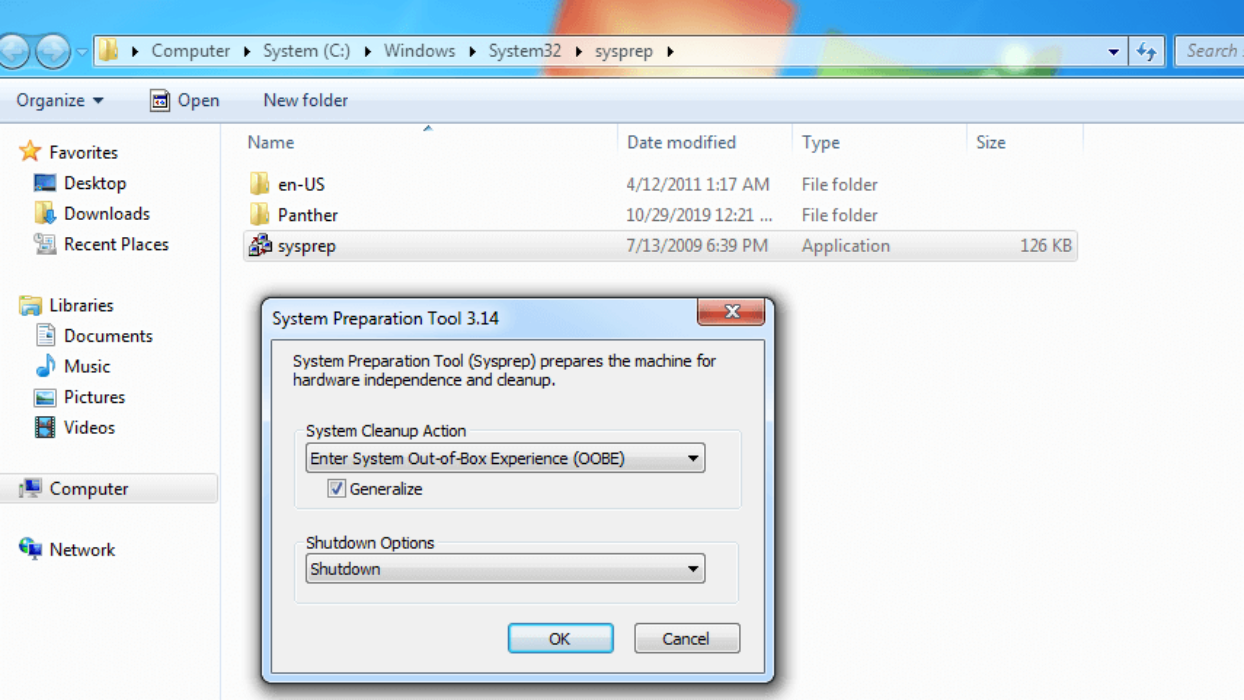
Remove SID on the well-configured server computer. Press Win + R and enter sysprep in the textbox to find Sysprep.exe. Run it and choose Enter System OOBE, tick Generalize option, and select Shutdown. This step is necessary for users to avoid compatible issues after deployment.
- Create a system image backup without SID using AOMEI Backupper.
- Insert the bootable USB created in Step 2, set it as the first boot option, and boot from it.
- On the main page of AOMEI Backupper, click Backup -> System Backup.
- Then, select a network path to store backup image and Start Backup to execute this operation. For detailed steps, you can refer to backup Windows 10 to network drive.

🎇 Note: If you want to clone disks over network, select Disk Backup under the Backup tab to create a disk image for deployment.
✨ Part 2. Deploy Windows 11 Image to Multiple Computers
Before installing Windows 11 on multiple computers, you need to do some preparation work.
- Make sure that the server computer and all client computers are on the same network segment of the same LAN.
- Please make sure that the serial numbers of the target disks used for image deployment are the same. It is recommended to delete all other disks from the client computers, but keep only the target disks used for image deployment.
- Ensure that all client computers have network adapters that support PXE boot (also known as network booting).
- Verify that the Windows Recovery Environment is complete on the server computer system. If it is not complete or if the system is older than Windows 7, download Windows AIK/ADK. If you do not want to download it, select a machine running Windows 7 or higher as the server computer.
Once you have completed all the preparations, you can follow these steps to deploy Windows 11 to multiple computers. Download AOMEI Image Deploy, install and open it.
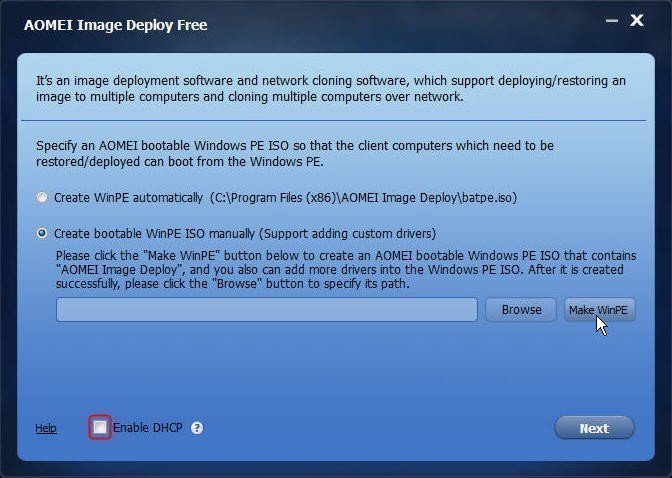
- Tick Create bootable WinPE ISO manually -> Make WinPE -> click Next.
🎇 Notes:
🎄 If you do not need to add additional drives, you can simply select the first option.
🎄 To deploy images over the network, you must have a DHCP server on your LAN. If not, please check "Enable DHCP".
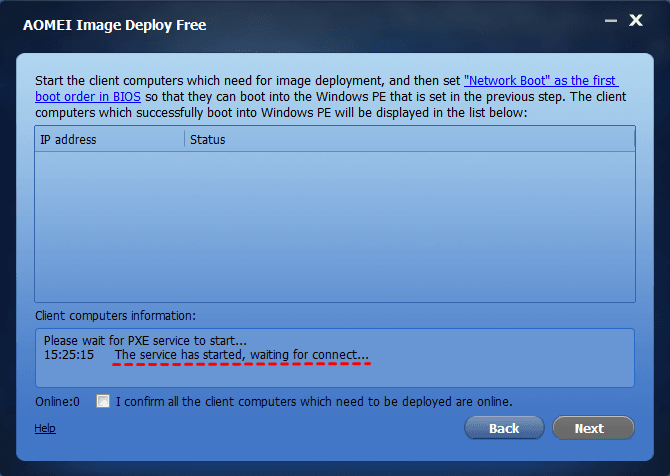
- The software will automatically create the PE environment and you will see a message: "The service has started, waiting for connect to ... ".
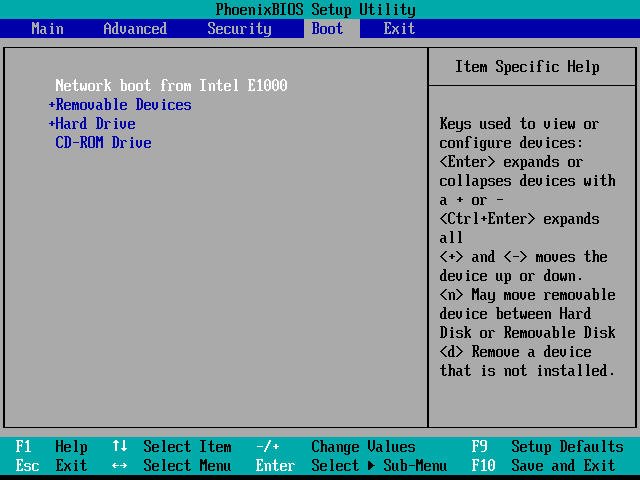
- Start client computers and change the boot priority of each client computer in BIOS. Make sure they boot from network.
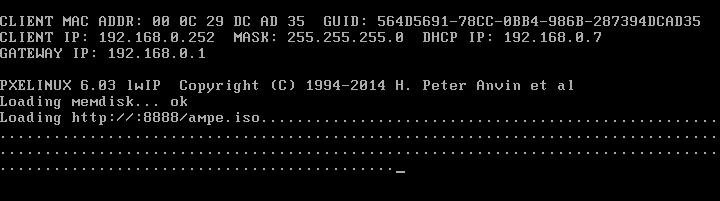
- If all the settings are correct, the computers will boot into AOMEI Image Deploy recovery environment and display its booting progress as shown below.
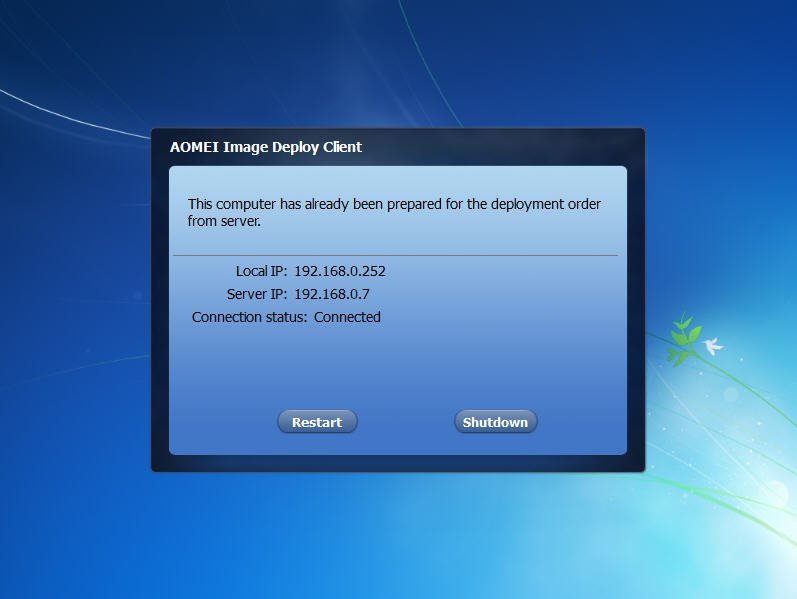
- When it is finished, you will see the client computer display local IP, server IP and connection status.
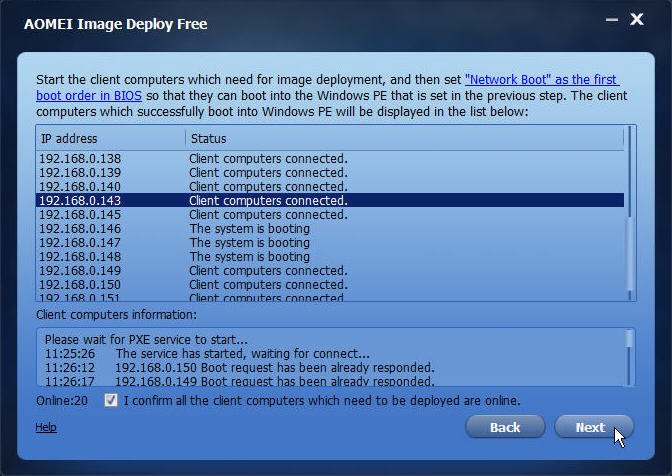
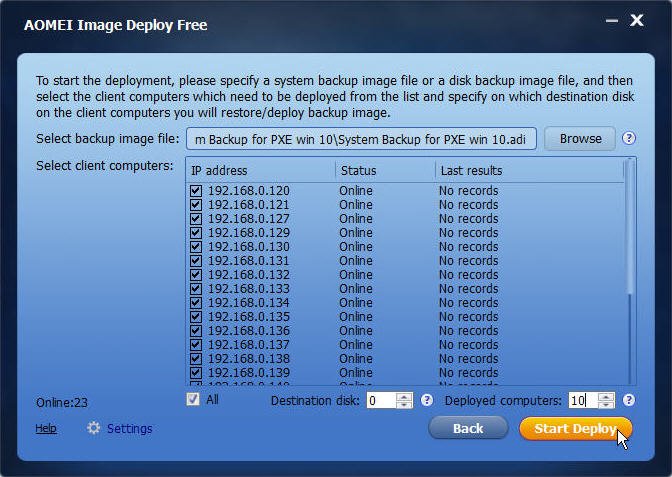
- The sever computer detects all the client computers are connected via their IP and select I confirm all the client computers which need to be deployed are online > Next.
- Click Browse to select a backup image from your network or NAS.
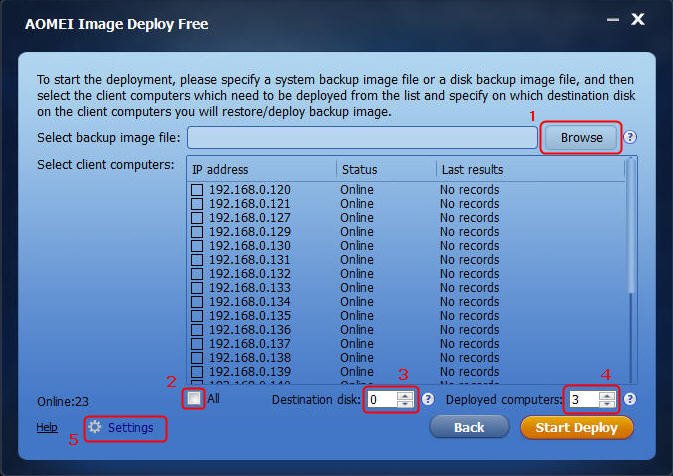
- Click Start Deploy and you will see the progress of the image deployment. Simply wait for the deployment to complete. You can upgrade to a higher version so that you can use Universal Recovery to easily recover multiple computers.
🎇 Notes:
🎍 IP preset and deploying image to computers with different hardware is only available in AOMEI Image Deploy Technician Edition.
#2. Create Windows 11 Image for Deployment via Media Creation Tool
Windows Media Creation Tool is a tool provided by Microsoft that can help you upgrade your PC or laptop to the latest version of Windows. It can also help you perform reinstallation and even create a bootable installation USB drive. It is completely free and you can simply download the media creation tool through the relevant section of the official website.
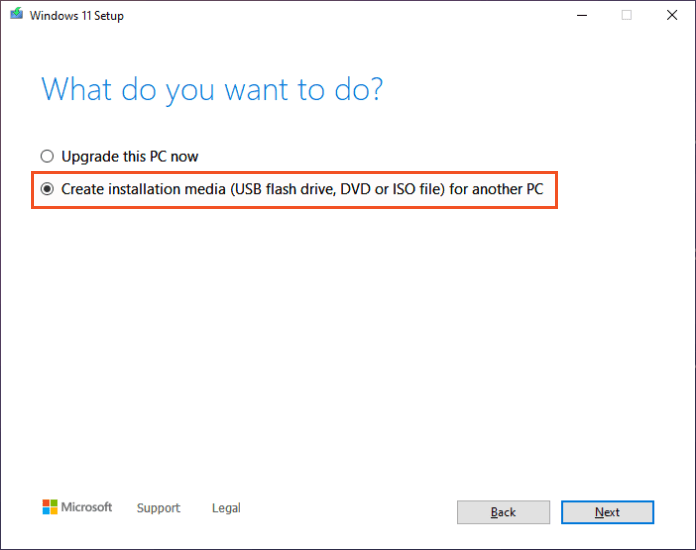
- Download Windows 11 Media Creation Tool and open it. On the What do you want to do? page, select Create installation media for another PC, and then click Next.
- On the next page, select the appropriate language, version and other details. Usually, the default settings are selected.
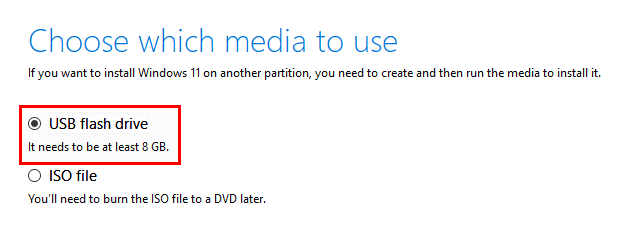
- Select the USB flash drive as the destination for creating and running media.
- You will see a list of USB drives (flash drives and external hard drives) connected to your Windows computer. Click on the one you want to use and press Next.
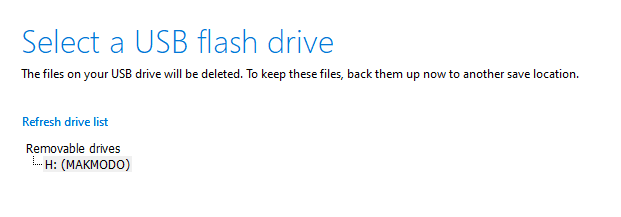
🎇 Note: If you advance to the next step, the USB drive you selected will be formatted (all data on it is deleted). Therefore, it is recommended that you create a USB backup in advance if there are important files on it.
- The Windows 11 Media Creation Tool starts downloading the installation files for the operating system. You can minimize the Media Creation Tool window and continue doing your thing while checking from time to time to see if it has moved on to the next step.
- Once created, remove the USB drive from your computer, and then you can start using it to boot any computer and install the latest version of Windows 11.
For Enterprise - Solid Backup & Recovery Solution
After deploying Windows 11 image to multiple computers, you’d better create a backup for each computer regularly. AOMEI Cyber Backup, the best backup software for businesses of all sizes, can help you easily backup multiple Windows computers at once and restore them whenever you need.
- It enables you to create system/disk/partition backup for a bunch of Windows PCs and Servers from one central console.
- You can schedule a backup task to run daily/weekly/monthly using the full/incremental/differential backup method.
- You are allowed to restore the backup image to the same computer or different computer.
- If your backup has multiple versions, you can choose to restore from any point you want.
Download this powerful enterprise backup software now!
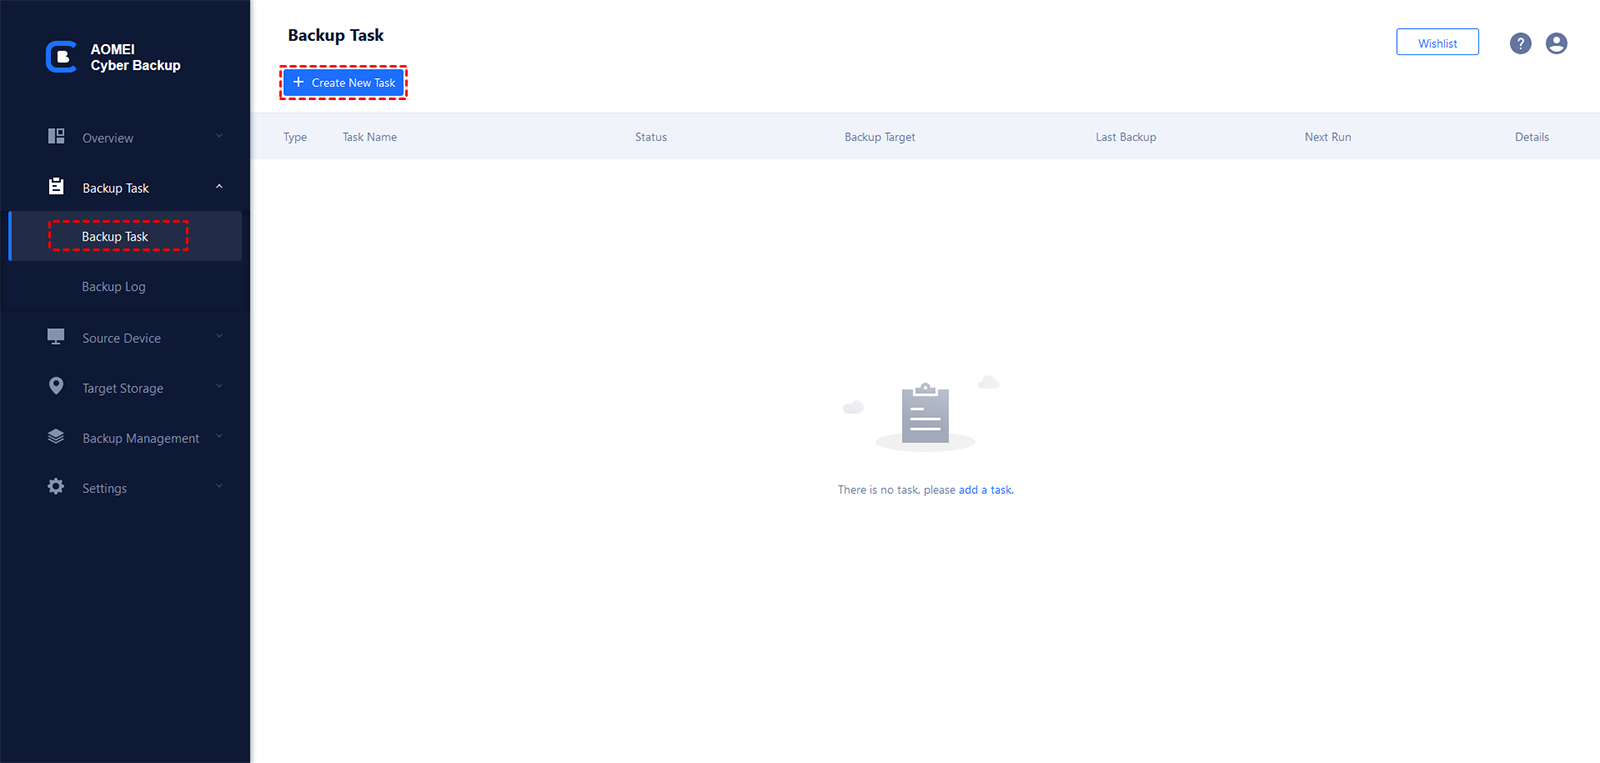
To make backups for client computers, just log in AOMEI Cyber Backup, and add the Windows 11 device that you want to backup. Then click Backup Task on the left menu bar and select Backup Task > Create New Task.
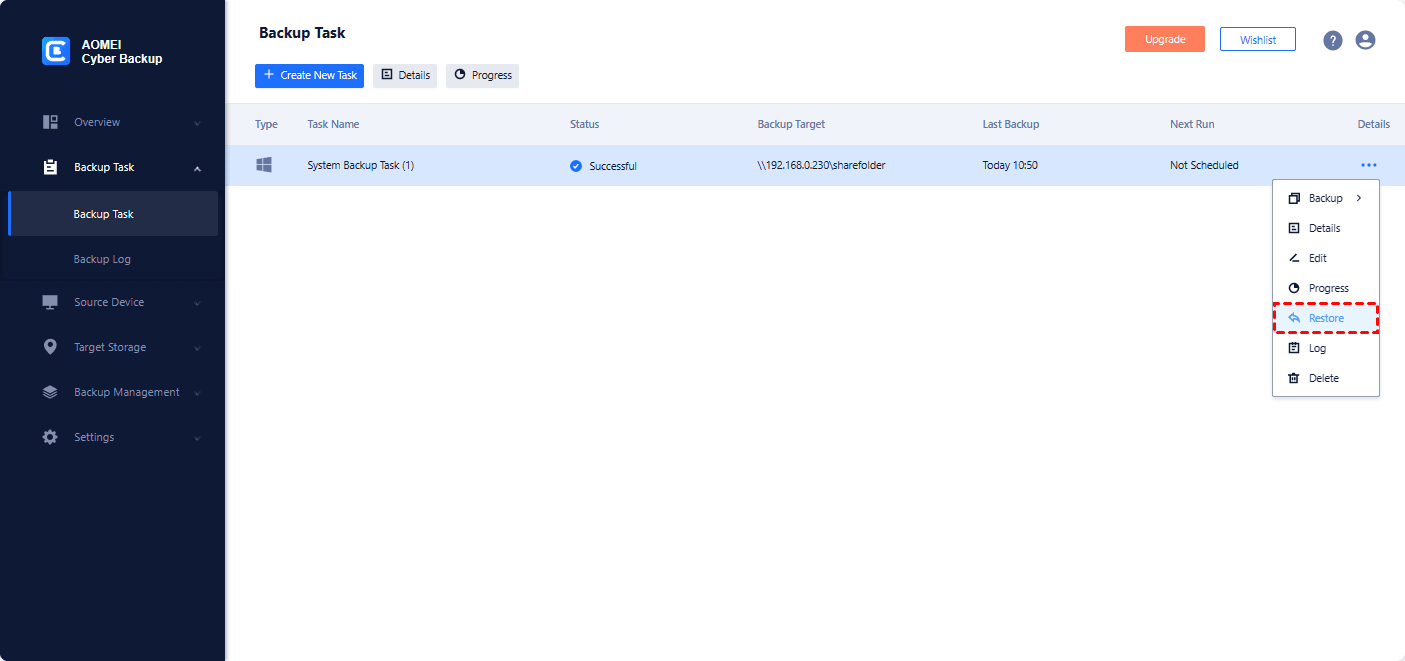
To restore data on client computers, you need to click Backup Task on the left menu bar and click the three dots icon on the task you want to restore. Then select Restore from the drop-down menu.
Note: AOMEI Cyber Backup can not only help you backup physical machines but also virtual machines. It enables you to backup Hyper-V and VMware easily.
FAQs about Creating Windows 11 Image for Deployment
#1. How do I create a custom Windows 11 installation media?
You can download the Windows 11 Media Creation Tool, select "Create installation media for another PC", and follow the on-screen guide to customize installation options, like UUPDump to create a bloat-free Windows 11 install disk, as needed.
#2. How to custom install Windows 11 from USB?
To custom install Windows 11 from a USB drive, you should create a USB installation device and inset it to start the installation, then choose the "Custom" (advanced) option to select the disk partition where you want to install Windows 11 and continue to finish the installation process.
#3. How do I create an ISO image of my operating system?
You can create a system ISO image with the Windows Media Creation Tool directly.
#4. Is Microsoft Deployment Toolkit compatible with Windows 11?
According to users, it is possible to deploy Windows 11 with Microsoft Deployment Toolkit(MDT). However, to make sure your Microsoft Deployment Toolkit is compatible with deploying Windows 11, you need to ensure that your MDT installation is the latest available.
Summary
If you need to create Window 11 image for deployment, both Media Creation Tool and AOMEI Image Deploy can help you. You can choose according to your needs. But to be honest, the second method is easier. You can use AOMEI Backupper to backup your system, and then use AOMEI Image Deploy to install it on multiple computers, which can save you time and effort. Just download it and try it out for yourself!

