
How to Recover Deleted Files in Windows Server 2012 R2
How to recover deleted files in Windows Server 2012 R2/2012, or the latest Windows Server 2025? Refer to the following methods, including Recovery Wizard, Previous Version, and Windows Server data recovery tool.
By Teresa / Updated on March 9, 2026
Help! My files are deleted accidentally in Windows Server 2012 R2
"One file is missing from E drive which is used for user data and on Windows Server 2012 R2. I deleted it and want it back now. Checked the Recycle Bin and it is not there. Guessing it was deleted from the Recycle Bin or has been hard deleted (Shift-Delete). What should we do to recover deleted file from Windows Server 2012 R2? Any advice will be appreciated."
Data loss is a common issue that troubles users a lot and there is no reason for just being deleted in an accident. Usually, Word and Excel keep a copy for a short while. Look in the Options, File Locations area to get them back. And you can get files back in the Recycle Bin if it is not too large.
But if it's too large, it will delete files permanently. Also, if you empty the Recycle Bin, the deleted files are gone forever. Even so, you can recover deleted files in Windows Server 2012 R2 from a backup image or previous versions, or a professional data recovery software. Please continue to read below and learn the methods and steps carefully.
How to Recover Deleted Files from Windows Server 2012 R2 [3 Ways]
In the first place, it is not suggested that you re-write data to that volume or path where you’ve lost files. As mentioned, data loss is troublesome (such as Ransomware WannaCry), so many users have an awareness of data backup.
The first way you can recover deleted folders or files in Windows Server is the Windows Server Backup images; the precondition is you’ve imaged Windows Server 2012 in advance. The second way is to restore files from previous versions with the help of shadow copies. If neither of these methods can help you, you can also use data recovery software to recover lost files on Server 2012 R2/2012/2016/2019/2022/2025.
▶ Method 1. Recover deleted files from Windows Server Backup image
Step 1. Open Windows Server Backup from the tools menu. In the wbadmin console, select Local Backup and then Recover in the right pane.
Step 2. Select This server if you’ve stored the backup image on the disk attached to this server. If you’ve stored the backup on a remote drive, you may need to provide the share path.

Step 3. Select the Backup Date, the time when your files are not deleted.
Step 4. On the Select Recovery Type step, check Files and folders.
Step 5. On the Select Items to Recover step, expand the server to select the folder that you want to restore.
Step 6. On the Specify Recovery Options step, choose Original location normally. You can also choose Another location if you have a different plan.
Step 7. On the Confirmation step, be sure you’ve chosen the right files. Click Recover then. Wait for the process to be completed. Close the Recovery Wizard after.
▶ Method 2. Recover deleted files from Previous Versions via shadow copies
In general, Windows Server creates shadow copies for all saved versions, so you can try to recover deleted files in Windows Server 2012 with the following steps.
Step 1. Go to the directory on the Windows Server 2012 R2.
Step 2. Right-click the blank space in Windows Explorer and click Properties.
Step 3. In the pop-up window, select Previous Versions. It should list the shadow copies. See if there is any file you need.
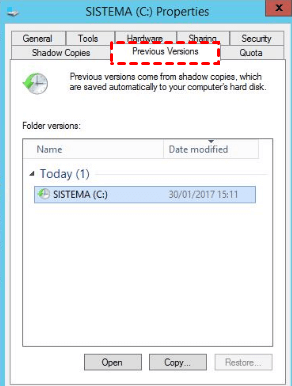
Step 4. Choose the right version and click Restore to start.
That method is simple as well. By now, you can use those methods to recover deleted files in Windows Server 2008 R2 as well. However, some users report that there is no restore previous versions option in Windows Server 2012 R2, or the shadow copy is not enabled.
Further, some users try to do a system restore to get the files back. If you’re using a domain and server, the system restore will not fix the problem. In that case, it is suggested to recover the deleted files by recovering deleted partitions in Server or using professional Windows data recovery tools.
▶ Method 3. Recover accidentally deleted files from Windows Server 2012 R2 efficiently
As mentioned above, Windows backup image and the Previous Versions feature are feasible options for users to get deleted data back; however, many users haven’t formed a good habit of backing up files.
In addition, disasters and accidents always fall on people with no clues, leaving no time for users to take precautions.
If you are one of these users, don’t worry, with the help of an efficient Windows data rescue app, it will be an easy task to recover accidentally deleted files from Windows Server 2012 R2.
FastRecovery is one of the eligible apps you could utilize. It is specially designed for Windows users, compatible with Windows Server 2012, 2012 R2, or the latest 2025, facilitating you to recover data easily.
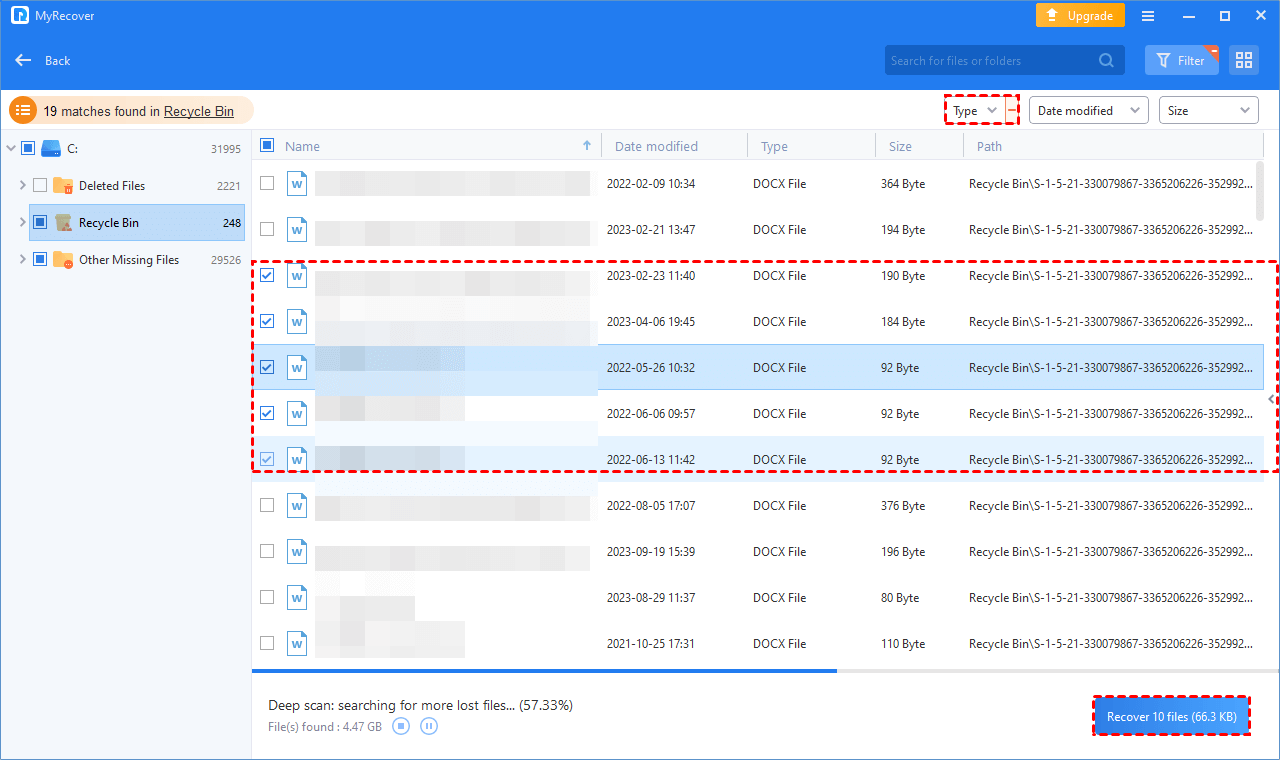
Step 1. Install and run the program > select the affected drive > Start Scan.

Step 2. Files could be sorted and searched by extensions, Type, Size, Date modified, etc.

Step 3. Go to Deleted files > go to the original location > select wanted files > click Recover x files.
The reliable way to prevent files deleted in Windows Server 2012 R2
If there is a backup image or shadow copy, you can easily recover deleted files in Windows Server 2012 R2. But if you don't have either of them, you will lose your files without a doubt. To ensure your data is always there, it's suggested to backup files in Windows Server 2012 R2 with a professional server backup software like AOMEI Backupper Server instead of the built-in freeware. Here are the reasons:
- The built-in tool does not allow you to backup individual files or folders unless you backup the entire partitions where the files are located
- It only supports scheduling a backup task once a day or more than once a day.
- Its incremental backup not doing sometimes. In this case, it will create a full backup instead, which takes more time and space.
- ....
Instead, in AOMEI Backupper Server, you can choose to backup files or folders individually, such as documents (eg: word, excel), pictures, music, videos, etc, and run them automatically, such as, daily, weekly, or monthly.
And it provides you with two practical methods in the following and both of them back up only changed files (with incremental backup) by default. Then, which one should you use?
- Select File Backup if you want to backup local files as well as network files. It supports more storage devices, such as external hard drive, USB flash drive, network drive, cloud drives like Google Drive, etc. More importantly, it still supports differential backup, automatic backup cleanup, etc, which do a big favor in greatly reducing backup time and disk space usage.
- Select Cloud Backup if you have an AOMEI account and want to backup files to a cloud drive (here is AOMEI Cloud) without installing the desktop app again. And it still offers you 1TB of free cloud storage in 15 days.
So the File Backup feature is suitable for most users and we will take it as an example to show you the detailed steps.
Step by step guide: Backup files in Windows Server 2012 R2
Step 1. Open AOMEI Backupper Server and then click Backup > File Backup.
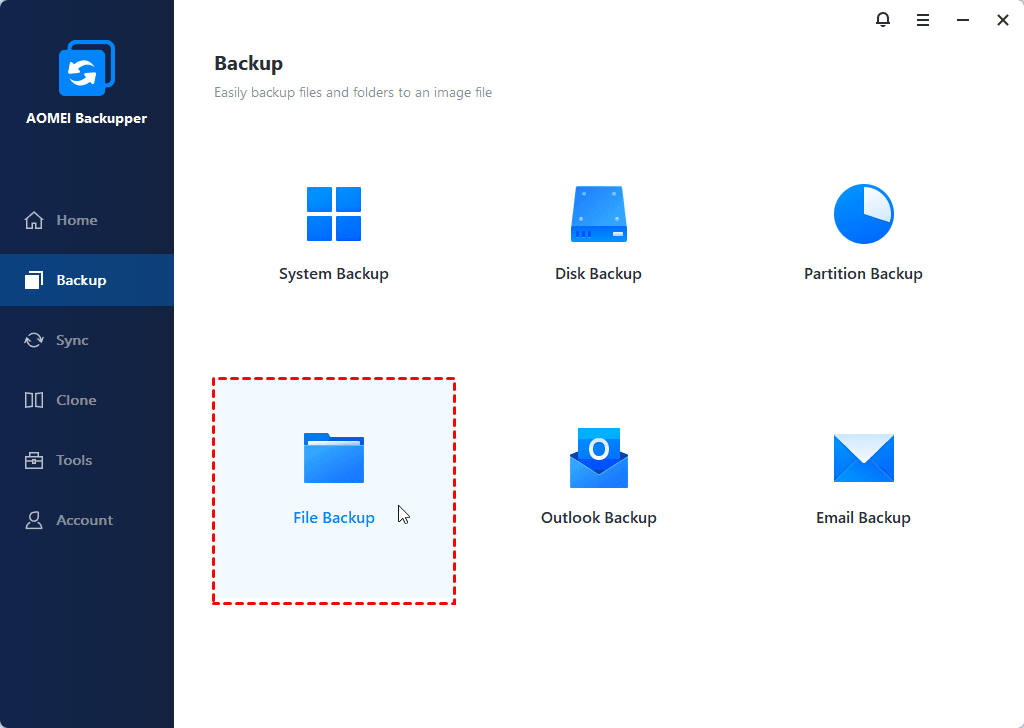
Note: You can also choose to backup Server 2012 system, the whole hard drive, and individual partitions as per your needs.
Step 2. Click Add File or Add Folder to select the files/folders you want to backup.
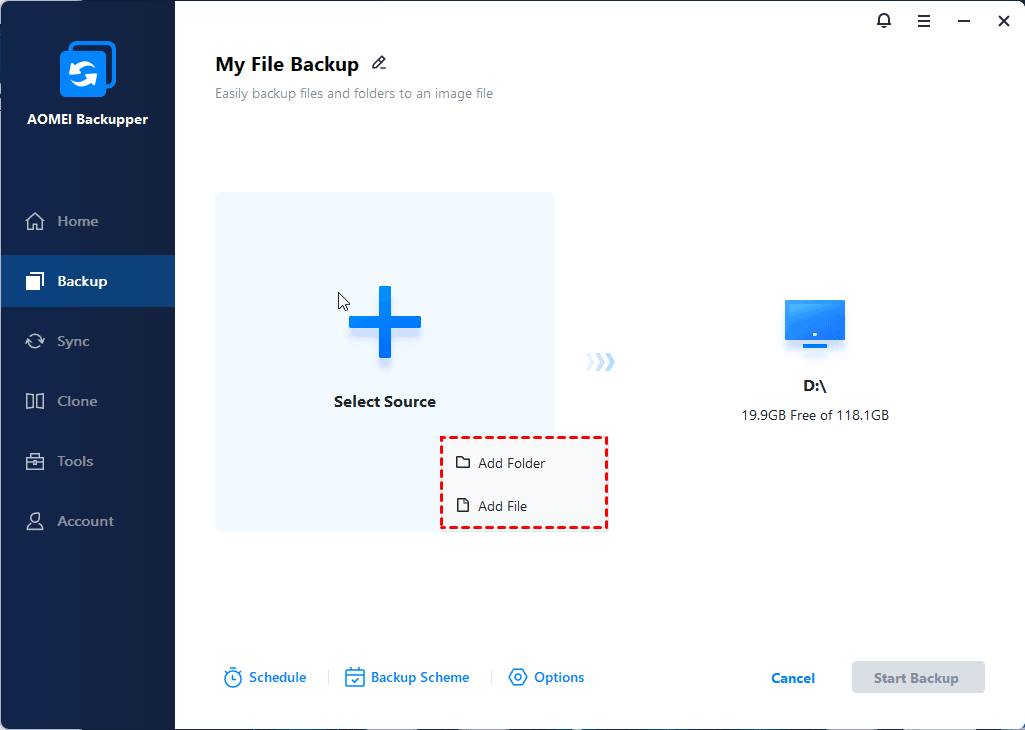
Step 3. Select a destination location to store the image file.
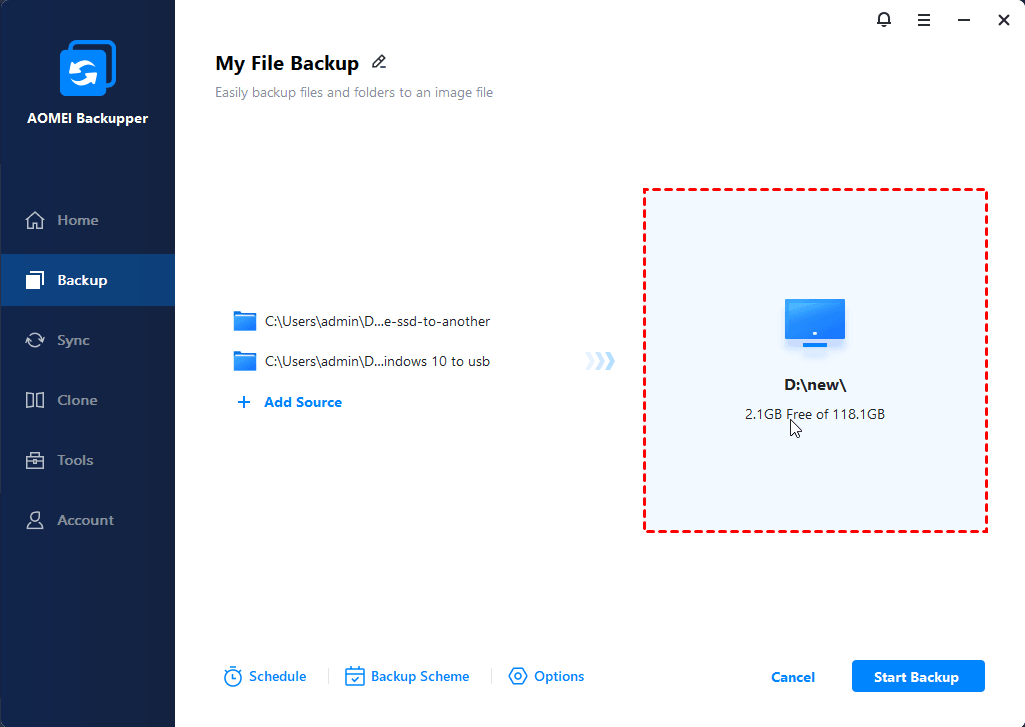
Step 4. Click Schedule Backup to set automatic backup, you have 5 options, such as Daily, Weekly, Monthly, Event triggers, or USB plug in.

Note: If you are worried that you will forget to insert the backup disk, it's suggested to enable the Wake the computer to run scheduled tasks option or automatically backup your files to USB with the plug-and-pull method - USB plug-in.
Step 5. Click Backup Scheme, you can choose to keep incremental backup as backup method or change it to differential backup, and set a cleanup method (By quantity, By time, and By daily/weekly/monthly) to delete file backup regularly. Then, confirm the operation and click Start Backup to backup files in Windows Server 2012.
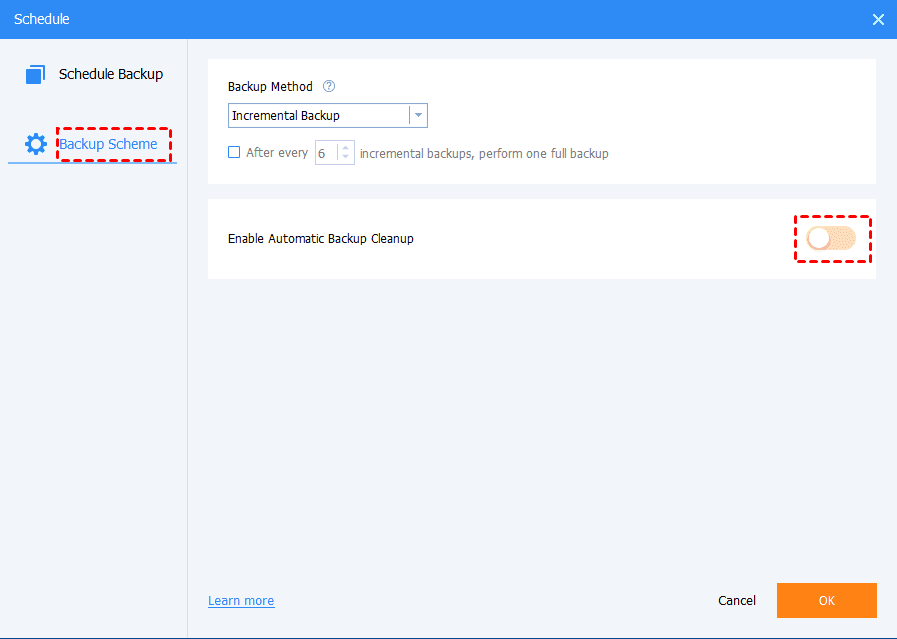
Note: By comparison, differential backup is relatively independent. So when you want to restore files from backup, you just need one full backup plus one differential backup instead of one full backup and all the linked incremental backup.
When you want to restore deleted files, you can simply click Restore to make it. If you don't have a file backup, you still can try its selective file restore to recover specific files instead of the entire backup image.
Verdict
To recover deleted files in Windows Server 2012 R2, you can turn to Windows Server Backup or Previous Versions in File Explorer. However, to protect important files in all-round, it is highly recommended to perform file backup on a regular basis.
Besides, AOMEI Backupper Server can not only backup files but also can backup system, disk, or partition. In a word, it’s one comprehensive Server backup software that keeps your data safe all the time.
If you want to protect unlimited PCs and servers within your company, AOMEI Backupper Technician Plus is applicable. It offers unlimited billable technical services to clients. It also enables you to copy the installation directory for portable version creation.
