


5 Proven Ways to Fix SQL Server Database Stuck in Restoring
If you find your SQL Server database stuck in restoring, there could be plenty reasons. The most common reason is that you wrongly used No Recovery option. Here I summarized 5 ways to solve this problem.
By Crystal / Updated on June 14, 2024
Case: SQL Server Database Stuck in "Restoring" State
I backed up a database:
BACKUP DATABASE MyDatabase
TO DISK = 'MyDatabase.bak'
WITH INIT --overwrite existing
And then tried to restore it:
RESTORE DATABASE MyDatabase
FROM DISK = 'MyDatabase.bak'
WITH REPLACE --force restore over specified database
And now the database is stuck in the restoring state.
——stackoverflow.com
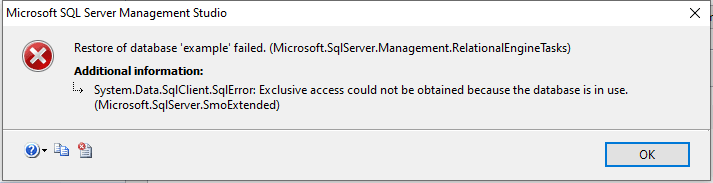
Have you also found your SQL database stuck in restoring? With this annoying “restoring” sign attached behind your database, you cannot operate it anymore, and sometimes receive an “Exclusive access could not be obtained because the database is in use” alert.
Here I will list the reasons that may cause your SQL Server database in restoring state, and provide you 5 proved ways to solve this problem.
Reasons Why SQL Database Stuck in Restoring
Before troubleshooting, some users may wonder "How long does it normally take to recover a database".
This question is not really definitive as it involves many variables such as the size of your database, the hardware of your computer, whether you are recovering from a local disk, an external device or a network location.
Anyway, when you find your SQL database stuck in restoring state and thus not accessible, you can consider some common causes:
✎ For example:
You didn’t stop restore process correctly
Disk space not enough
Others are using this database
Users didn’t close Query window after use
You wrongly used "No Recovery" option to restore database (most common)
5 solutions to fix SQL Server database stuck in restoring
Here I summarized 5 ways to fix SQL Server 2014, 2016, 2019, etc. database stuck in restoring. You can try them one by one or directly turn to an efficient SQL Server backup solution.
*Before trying the following methods, please check whether the stuck database has a Query window that you forgot to close, and if so, close it first. This may solve the problem directly.
Solution 1. Add WITH RECOVERY to Restore Statements
Normally, SQL Server database restoring uses With Recovery by default, and the No Recovery option is used when you want to restore more databases or logs together - it’s telling SQL Server to wait for more operations. Therefore, you need to use With Recovery to finish the restore:
1. Launch SSMS and connect to your instance, click New Query on the upper bar. And then input following statements in the blank:
RESTORE DATABASE databasename WITH RECOVERY
Note: if you want to overwrite this database without backing up tail of transaction log first when restoring, you can add REPLACE before RECOVERY. But be careful, it may cause data loss. You can do this when you have a full backup.
2. Then click Execute. When you receive the success result, Refresh the database list and you can see the database is out of restoring.

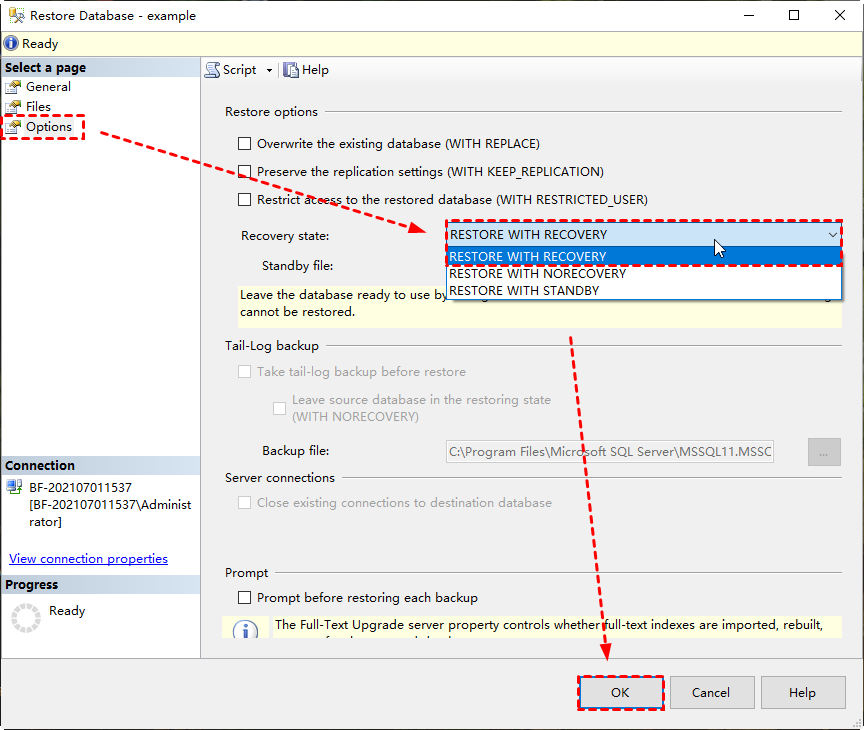
Solution 2. Select RESTORE WITH RECOVERY in Options
1. Launch SSMS and connect to your instance, right-click the SQL Server database in restoring state, select Tasks > Restore > Database…

2. Turn to Options page in the right tab, select RESTORE WITH RECOVERY in Recovery state section.
3. Then click OK. When it’s successfully restored, right-click Databases to Refresh the list, and you can see the database is out of restoring state.
Solution 3. Uncheck Transaction Log in SSMS Restore
1. Launch SSMS and connect to your instance, right-click the database which stuck in restoring, select Tasks > Restore > Transaction Log…

2. In the prompt window, General page, uncheck all log backups in Select the transaction log backups to restore section, then click OK.

3. Refresh your database list, and you can see that your database is back to normal.
Solution 4. Close Existing Connections to Destination Database
1. Launch SSMS and connect to your instance, right-click the database which stuck in restoring, select Tasks > Restore > Database…
2. Turn to Options page, tick the option Close existing connections of destination database. You will see a notice below telling you that This may leave the destination database in single-user mode.
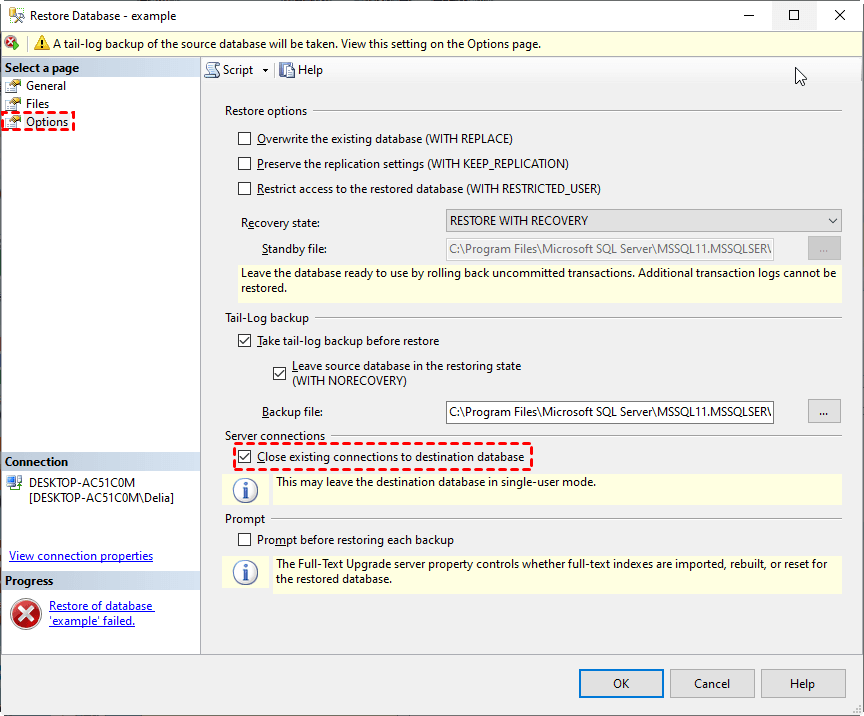
3. Then click OK, and the database-in-use error won’t happen again.
Solution 5. Switch SQL Server into Single User Mode to Close Connections
1. Launch SSMS and connect to your instance, click New Query on the upper bar, and input following statements:
USE master;
GO
ALTER DATABASE databasename
SET SINGLE_USER
WITH ROLLBACK IMMEDIATE;
ALTER DATABASE databasename
SET MULTI_USER;
GO

2. Then click Execute, and you will close existing connections before restore.
Note: If you have a full back up, you can also delete the database, then restore database from bak file directly.
One Safer Way to Backup and Restore SQL Server Database
I found that for most times, SQL database stuck in restoring is because users wrongly used No Recovery in script. Except for this problem, incorrectly using scripts could also lead to many other errors, even data loss.
Therefore, if you are not familiar with T-SQL, or you want to backup and restore SQL database with less error, I recommend you a professional enterprise endpoints backup software AOMEI Cyber Backup.
- ✤ Advantages:
- It has an easy-to-use GUI that enables you to operate without any script.
- It allows one single specialist to create & manage multiple SQL backups from a central console, which can reduce manual errors while increasing efficiency.
- It supports Microsoft SQL 2005-2022 including SQL Express.
- Besides SQL databases, it also supports VMware and Hyper-V virtual machine backups.
You can download the 30-day free trial below and get a time-limited discount:
Create a SQL Server Database Backup Task
To properly use AOMEI Cyber Backup, you should note these prerequisites for Microsoft SQL backup:
♦ Computer with both AOMEI Cyber Backup Agent and Microsoft SQL Server installed
♦ Local disk or network share to store backup files
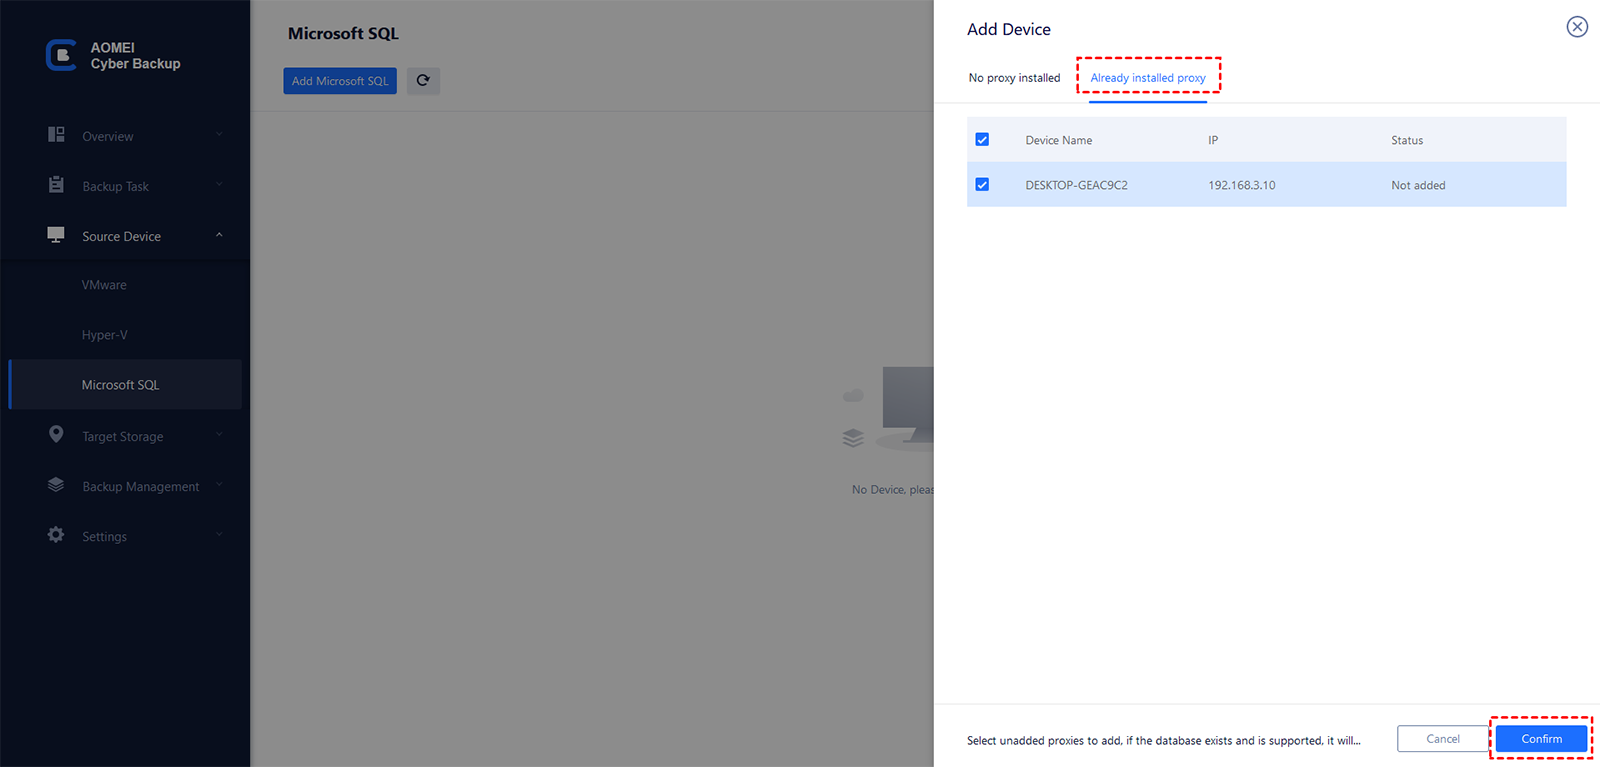
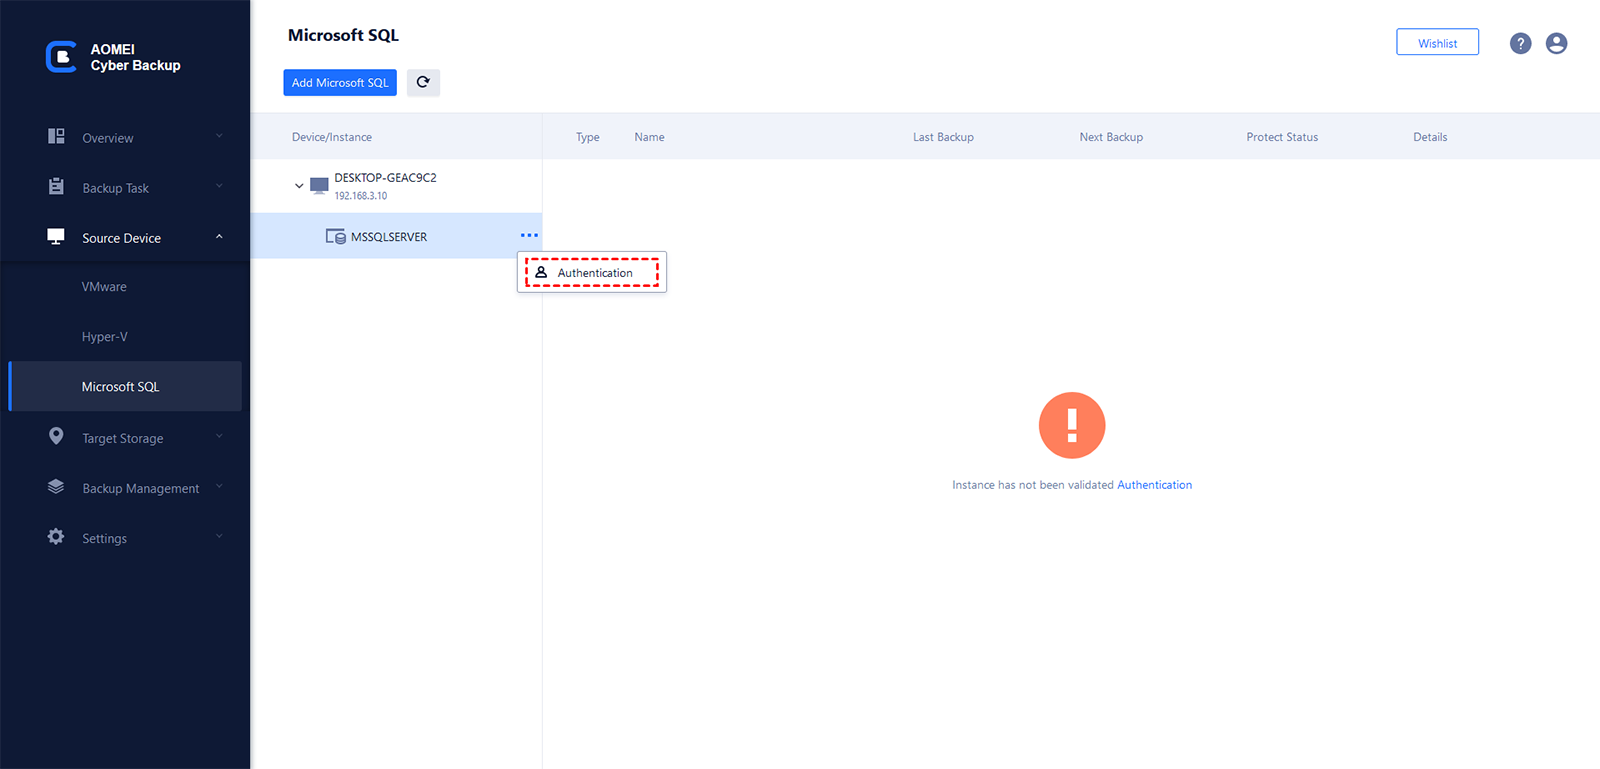
1. Access to Source Device > Add Microsoft SQL. If the database exists and the version is supported, it will appear automatically. Otherwise, you can click Add Microsoft SQL > Download proxy program, and install the program on the device with SQL Server installed. Then click Already installed proxy and select the proxies you want to add.
2. Click "..."-->Authentication to validate the database instance. You can choose Windows Authentication or SQL Authentication. Enter the credentials and click Verify.
3. Go to schedule your SQL database backup as follows:
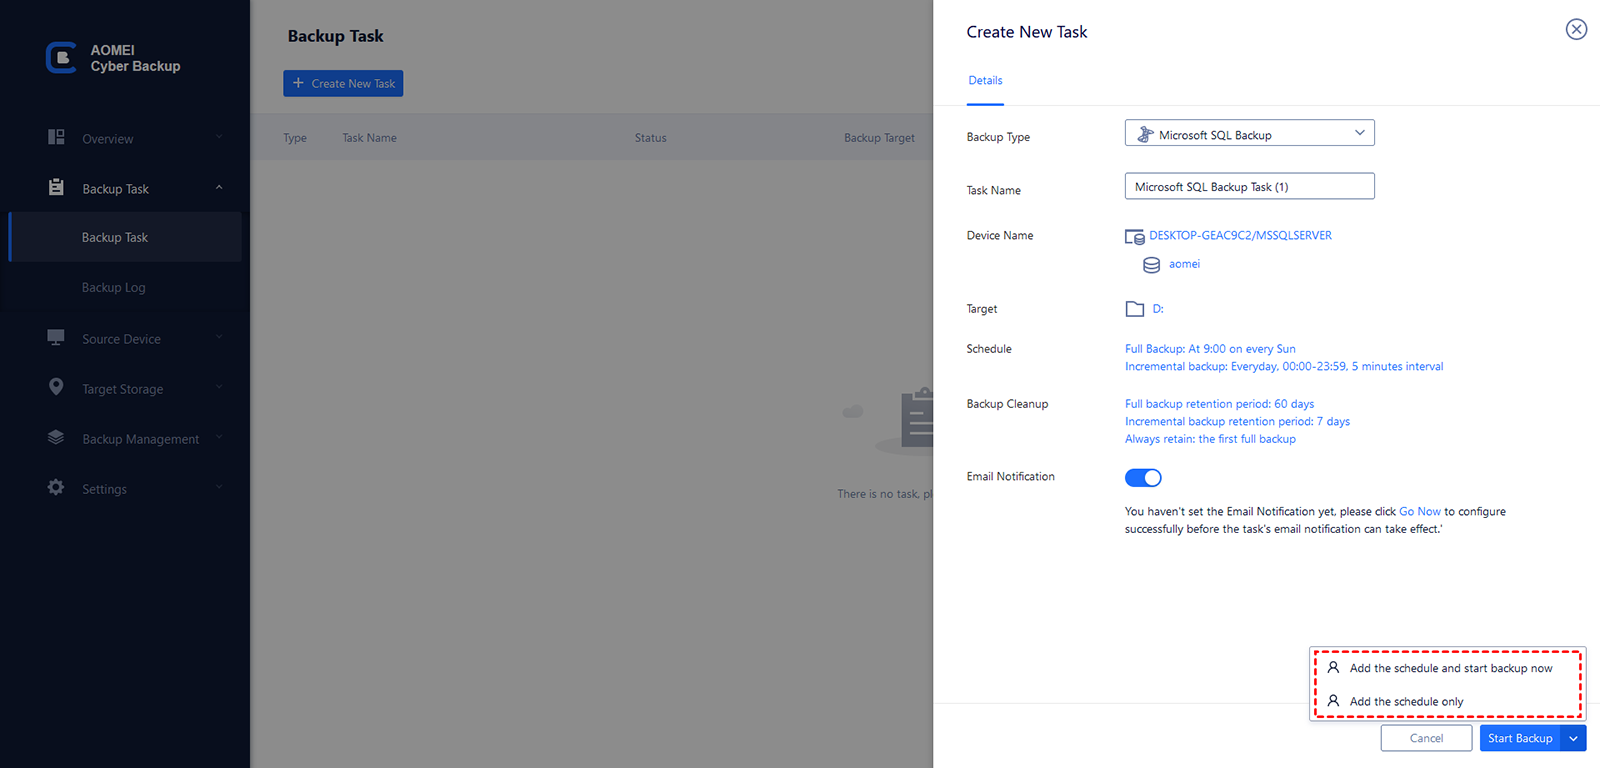
▪ Click Backup Task > Create New Task to backup your SQL databases.
▪ Choose backup type as Microsoft SQL Backup, and you could also try virtual machine Backup.
▪ Enter a name for the backup task, then go to select the databases you want to backup and specify a location as a storage end.
▪ Select backup methods as full/incremental/differential and specify the backup time as daily/weekly/monthly. Your SQL databases will be backed up automatically and regularly.
▪ If you want to save your SQL backup on cloud storage, you can choose "Archiving backup to Amazon S3" and add a S3 bucket. When the backup task is completed, it will archived in Amazon S3 storage meanwhile.
4. Enable Backup Cleanup to automatically remove history backup versions based on rule to save storage space. You will receive email notifications by enabling Email Notification feature when the task is abnormal or successful.
Restore SQL Server database from backup
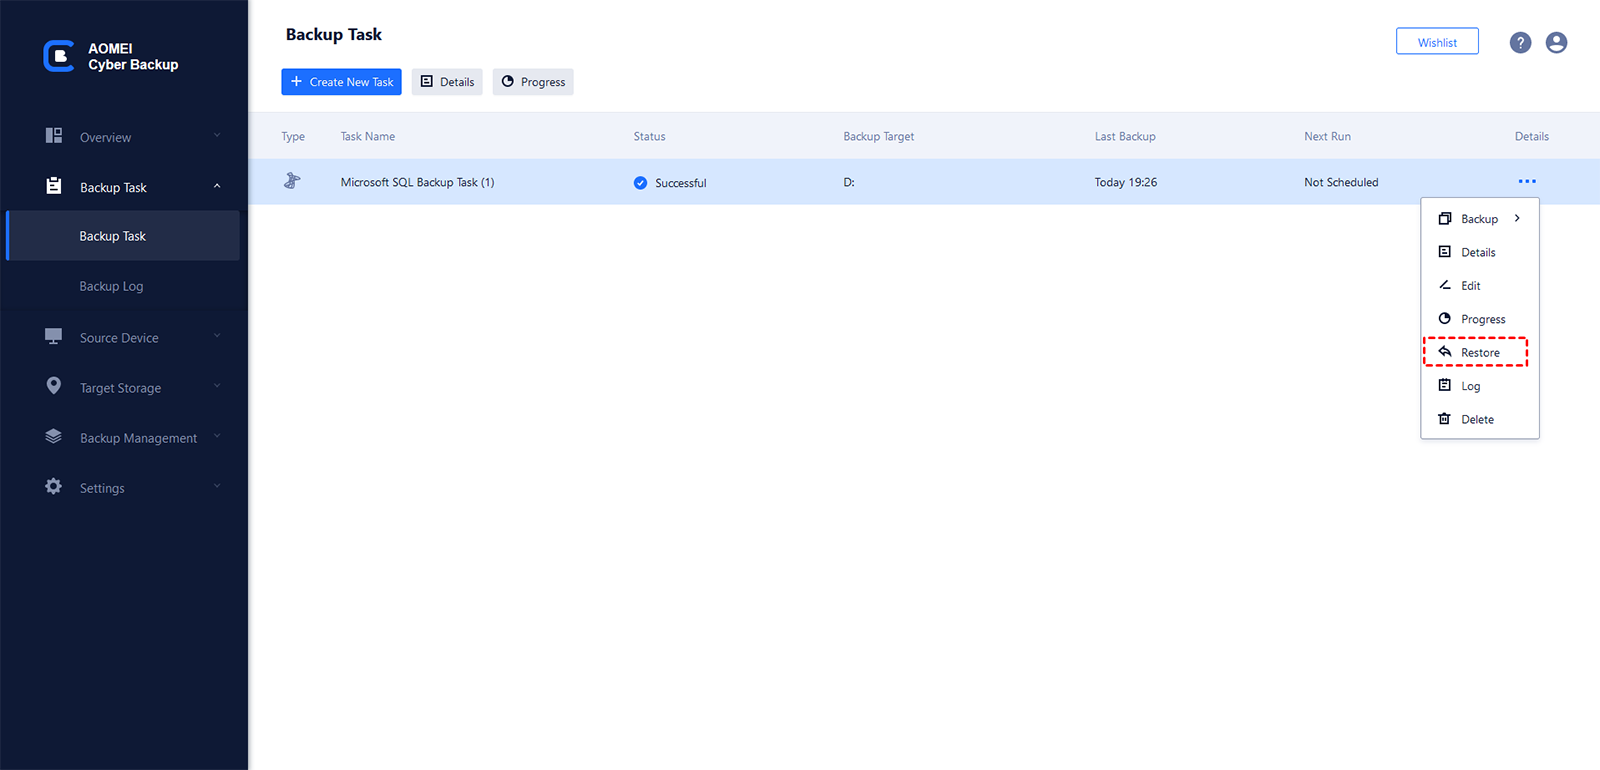
1. Go to Backup Task page, find the task you want to restore database from, and click ![]() -> Restore.
-> Restore.
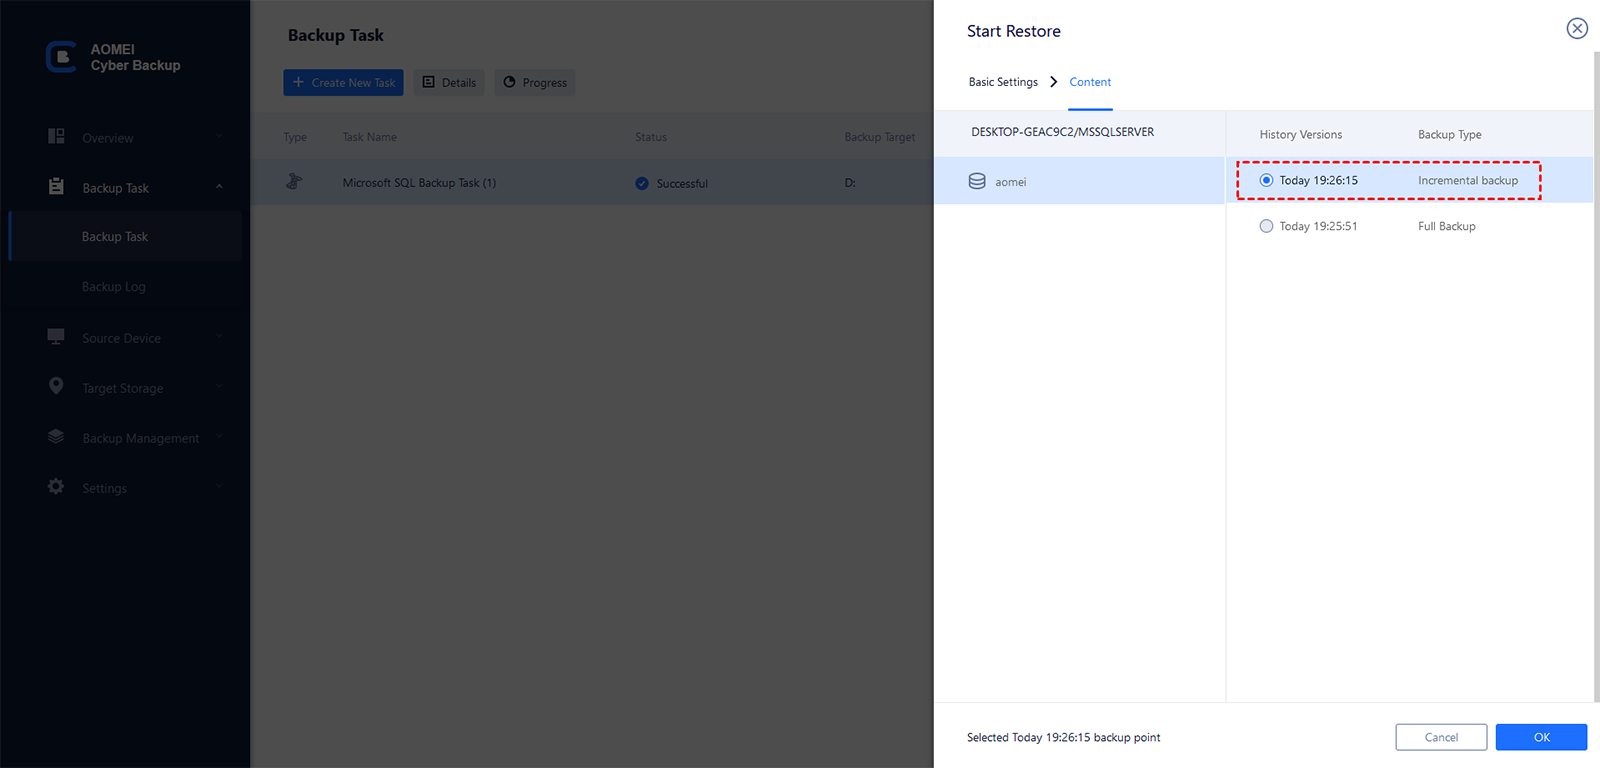
2. Select the specific database backup version that you want to restore, and click OK.
3. Select the target location that you want to restore to. By default, it will Restore to original location.
If you want to Restore to new location, you need to select target and specify the name of the new database. You can also modify the storage location.
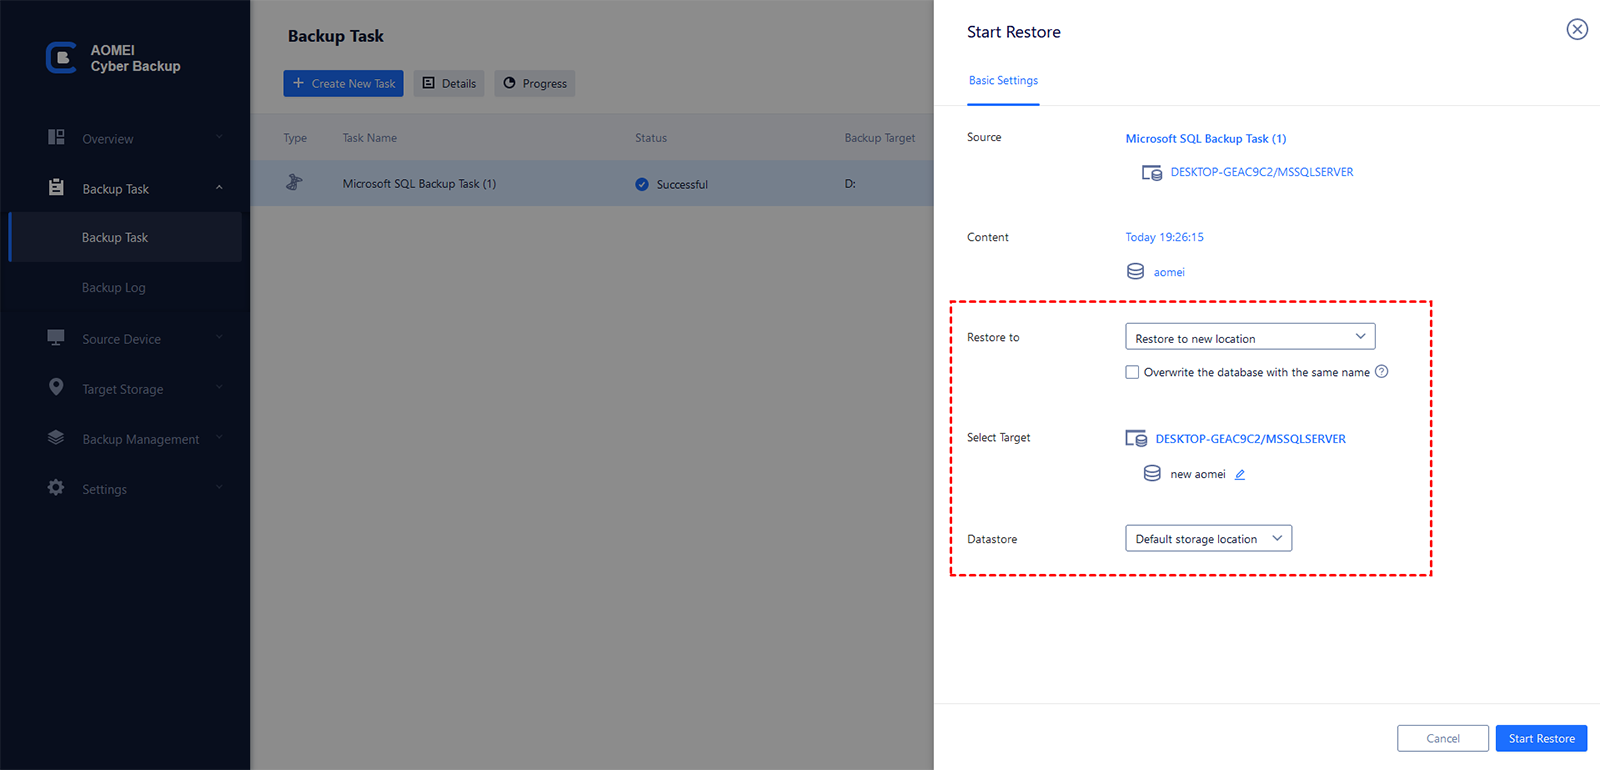
✍ Overwrite the database with the same name: If you tick this option, the backed up databases will overwrite the target databases of the same names. If you leave it unchecked, the target databases with same names will be omitted during restoring.
4. After all the settings, click Start Restore to begin the restore progress, and wait patiently for it to complete. You can click on the ![]() button to see restore details or cancel it.
button to see restore details or cancel it.

When the restore is complete, you can see the restored database in Microsoft SQL Server Management Studio.
✍ Notes:
- "Restore to original location" must confirm the original location exist. Or else, you can only select "Restore to new location".
- "Restore to original location" will overwrite or delete the original database data, if the original database has important data, it is recommended to choose "Restore to new location".
Summary
In this article, I introduced 5 proved ways to solve SQL database stuck in restoring state. If you encountered other errors, you can view this article to find a solution: SQL Server Backup Failed | Solutions and Alternative
However, if you want an easier and safer way to backup and restore databases without error, I recommend you to use AOMEI Cyber Backup. It has a simple and intuitive interface, for you to centrally operate and manage backups and restores of multiple SQL database backups within LAN.

