


Use Batch File to Restore SQL Server Database from Backup
Among the methods to restore SQL Server database from backup, using batch file can simplify the process to the greatest extent, especially for users who need to perform recovery operations frequently. Here is a quick guide.
By Delia / Updated on June 13, 2023
Restore SQL Server database using batch file with script
Hi. I want to restore a MSSQL DB using a script. Is this possible? My need is to restore a single database from its previous backup. If you can provide the way with an example it is much appreciated.
Benefits of using batch file to restore SQL Server database
A batch file is an executable file consisting of a series of commands that can invoke other programs. Usually you can use text editor like Windows Notepad to create and modify it. In the practical application of SQL database recovery, for example, you will need to enter restore script in a text file, and save it with .bat format.
With such a batch file, you can simply execute it by double-clicking to restore database without logging into SSMS. And since the script in the file is entered by you, the specific recovery settings is also customizable. For users who need to recover the same database frequently, or perform some more advanced operations, this eliminates the hassles of setting it up each time.

How to create a batch file for SQL Server recovery
1. First, right-click your desktop and choose New > Text Document to create a text file, and open it.
2. In the text editor window, enter the restore command of SQL database:
SqlCmd -E -S Sever\Instance -Q "RESTORE DATABASE DatabaseName FROM DISK ='FilePath\Name.bak'"
This is the basic command to restore SQL database from bak file, you just need to fill in your own information. Here’s my example:
SqlCmd -E -S .\MSSQLSERVER_01 -Q “RESTORE DATABASE databasename FROM DISK='D:\Backup\example.bak'”
If you want to restore database from a differential backup, please restore the full backup WITH NORECOVERY first, then restore the differential backup WITH RECOVERY. The commands will be like:
SqlCmd -E -S Sever\Instance -Q “RESTORE DATABASE DatabaseName FROM DISK='Path\Fullbackup.bak ' WITH NORECOVERY”
SqlCmd -E -S Sever\Instance -Q “RESTORE DATABASE DatabaseName FROM DISK='Path\Diffbackup.bak' WITH RECOVERY”
3. After completing the script, click File > Save As to give the text file a name, and change its extension into .bat. Thus it will become an executable file. You can double-click the file to execute the script in it, or even automate it with Windows Task Scheduler.
Note:
The "SQLCMD" required in the script is shipped with SQL Server 2014 and lower versions. In higher versions, you may need to download it from this page.
What if the batch file fails to restore database
If you are worried that the batch file will fail, you can add "PAUSE" at the end of the script, so that the CMD window will suspend and you will see the failure message returned.
For example, a common error is "The tail of the log for the database has not been backed up", and you can follow the instructions to BACKUP LOG WITH NORECOVERY in advance, or restore the database WITH REPLACE or WITH STOPAT.

How to restore multiple databases for backup files at once
If you have only a few specific databases to restore, then just repeat the above commands and fill in the database names & corresponding backup files separately. However, if you need to restore a large number of databases and want to simplify the operation to the maximum extent, you can consider using another way of SQL Server backup and recovery.
Easy way to restore multiple SQL databases at once
If you have a large number of databases to backup & restore and don't want to go through the complicated setup every time, compared with batch file, using the professional centralized SQL backup tool AOMEI Cyber Backup would be a much easier solution.
It allows you to select multiple databases or even multiple instances of SQL Server to backup at once, and restore them directly from the backup task with a few clicks. Everything is very easy and intuitive to operate.
Also, as an enterprise-level backup software, it supports not only SQL Server, but also VMware & Hyper-V virtual machines within LAN.
Download the 30-day free trial to try it out:
- Run the downloaded .exe file to install AOMEI Cyber Backup, and launch its main interface. Click Source Device -> Microsoft SQL -> Add Microsoft SQL.

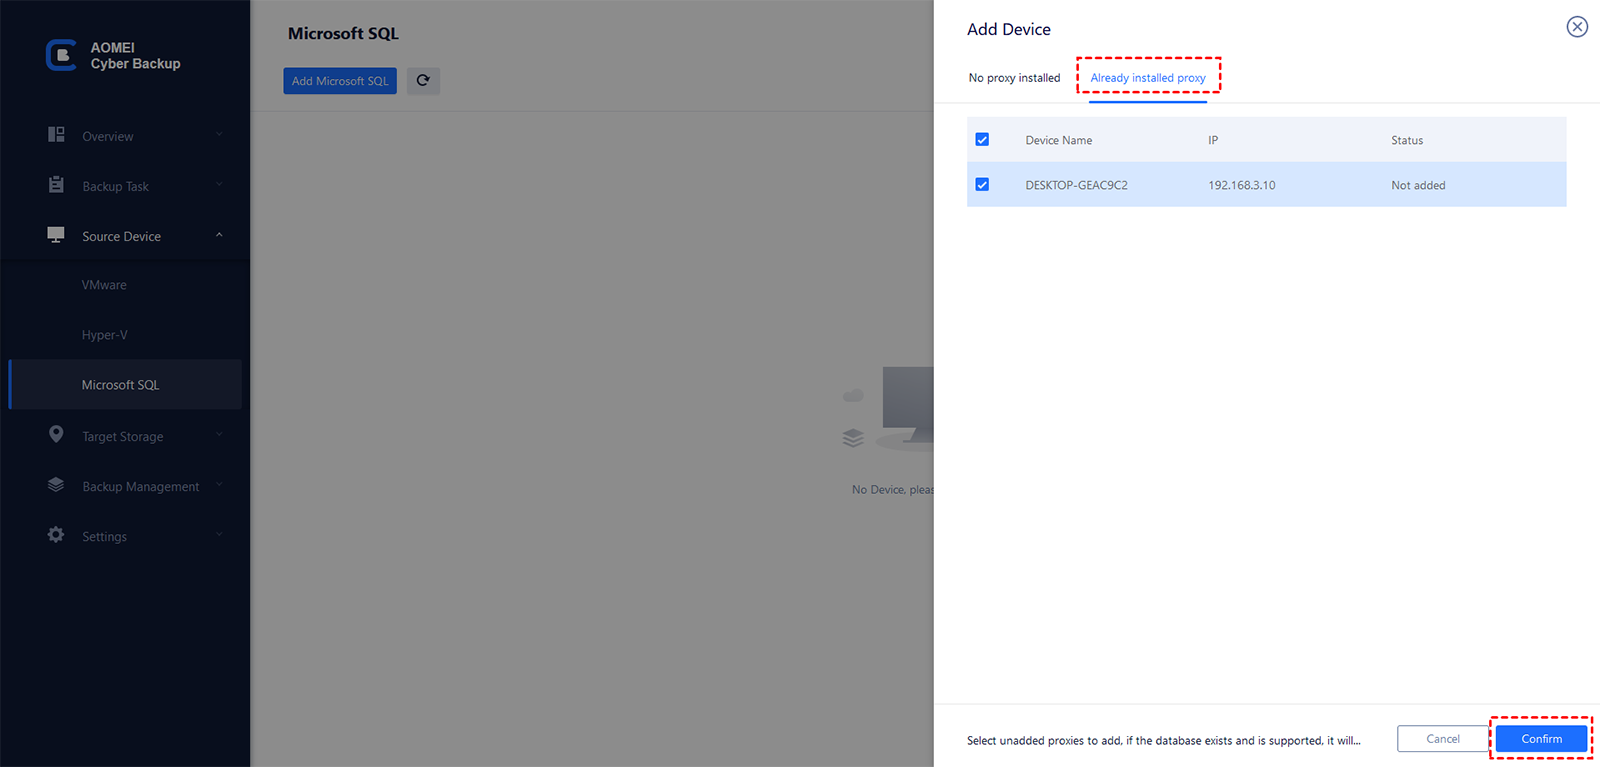
- Choose Download proxy program or Copy link to download the Agent program and install it on the device with SQL Server installed. Then, switch to Already installed proxy to select the device.
- Next, click
 -> Authentication to validate the database instance. You can choose Windows Authentication or SQL Authentication.
How to backup SQL Server via AOMEI Cyber Backup
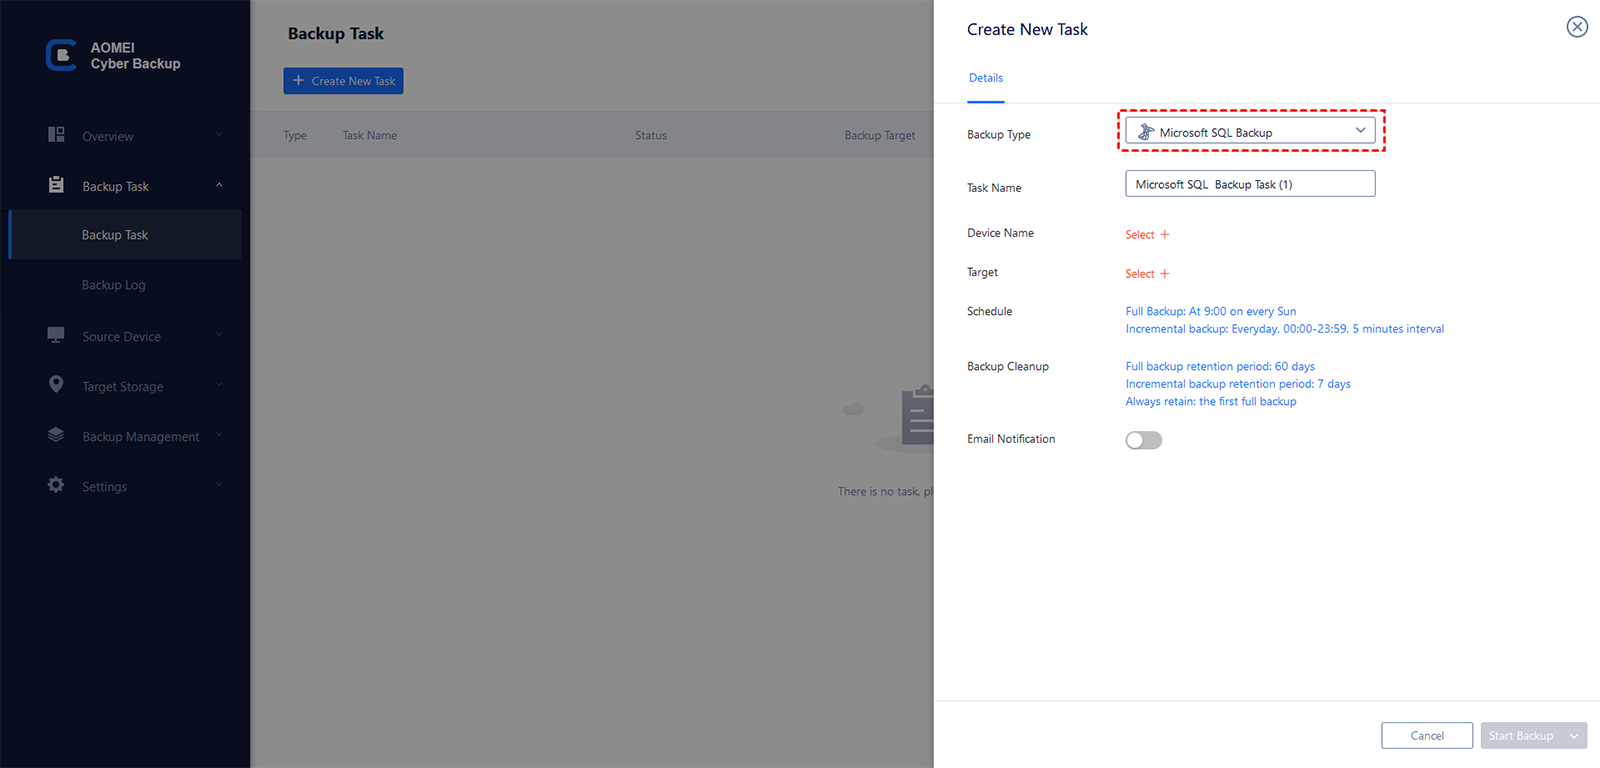
1. Click Backup Task -> Create New Task, and choose the Backup Type as Microsoft SQL Backup.
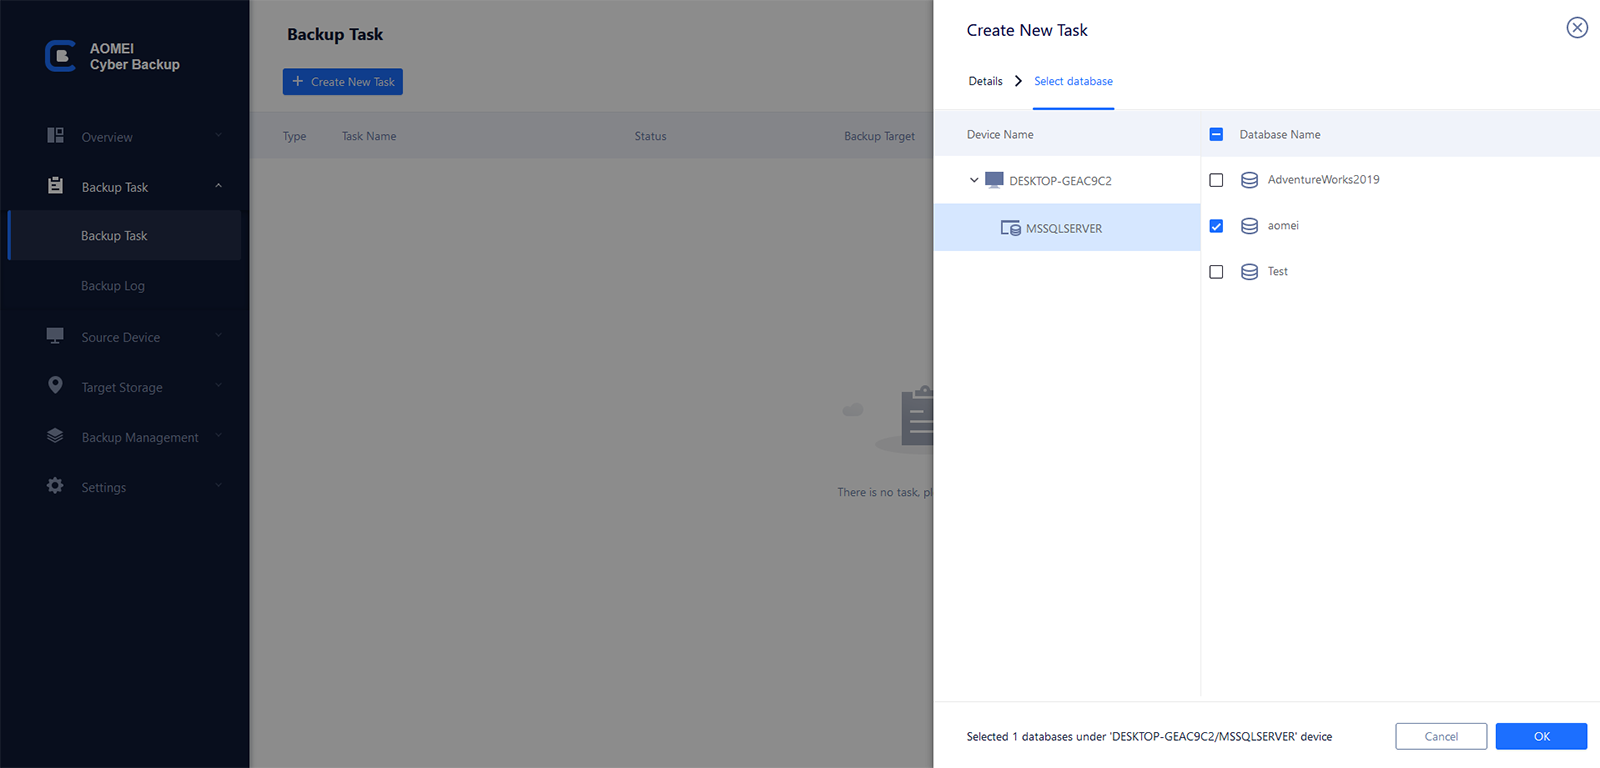
2. Click on Device Name to specify the SQL instance and databases for backup. You can select one or multiple databases as you need.
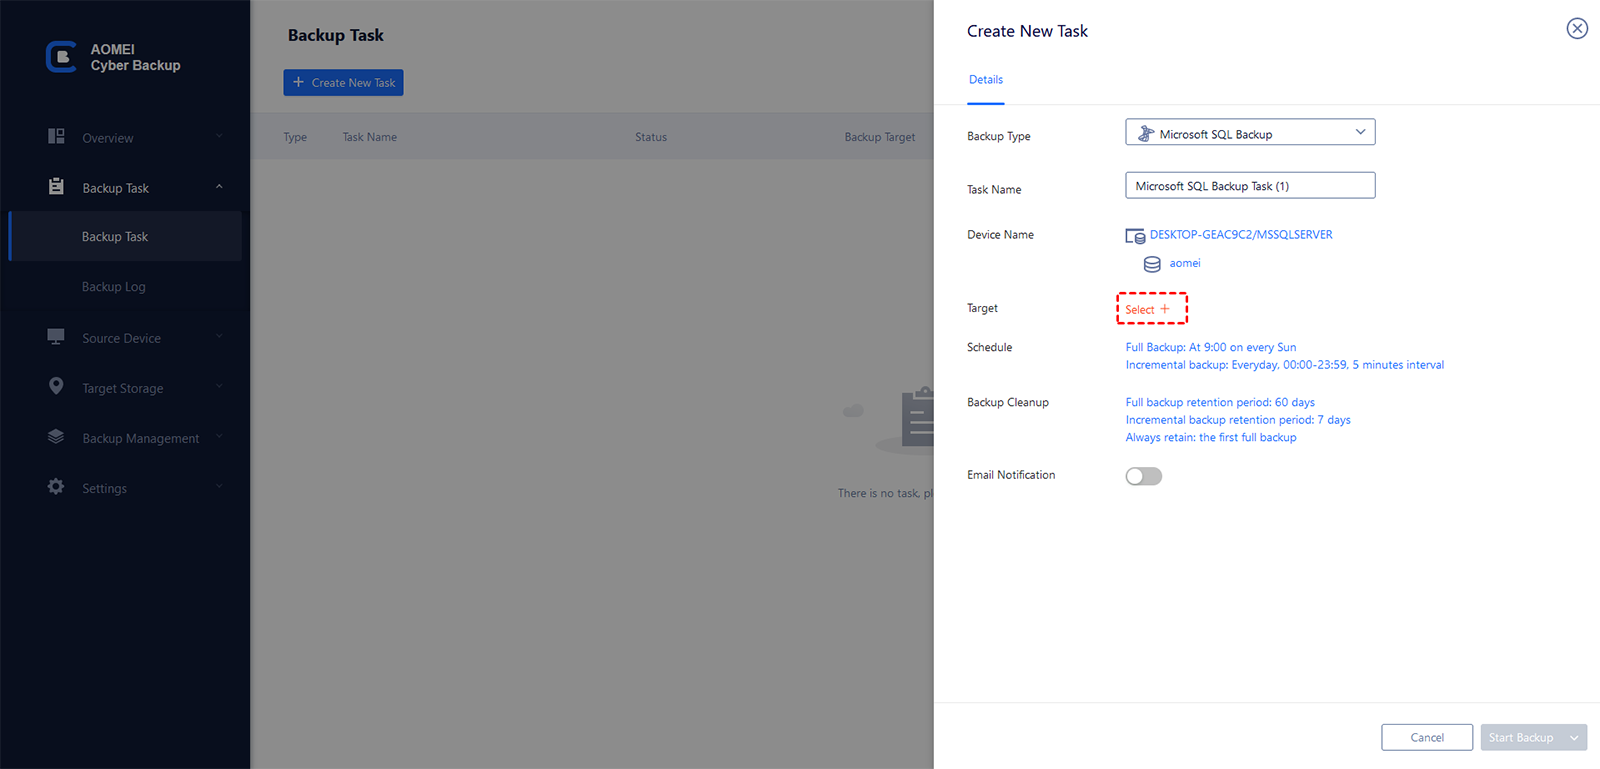
3. Select a Target storage to save your SQL backups. You can speicfy a local path or network path.
4. Configure the Schedule to execute the SQL database backup daily, weekly or monthly, and choose the backup method as Full, Incremental or Differential Backup.
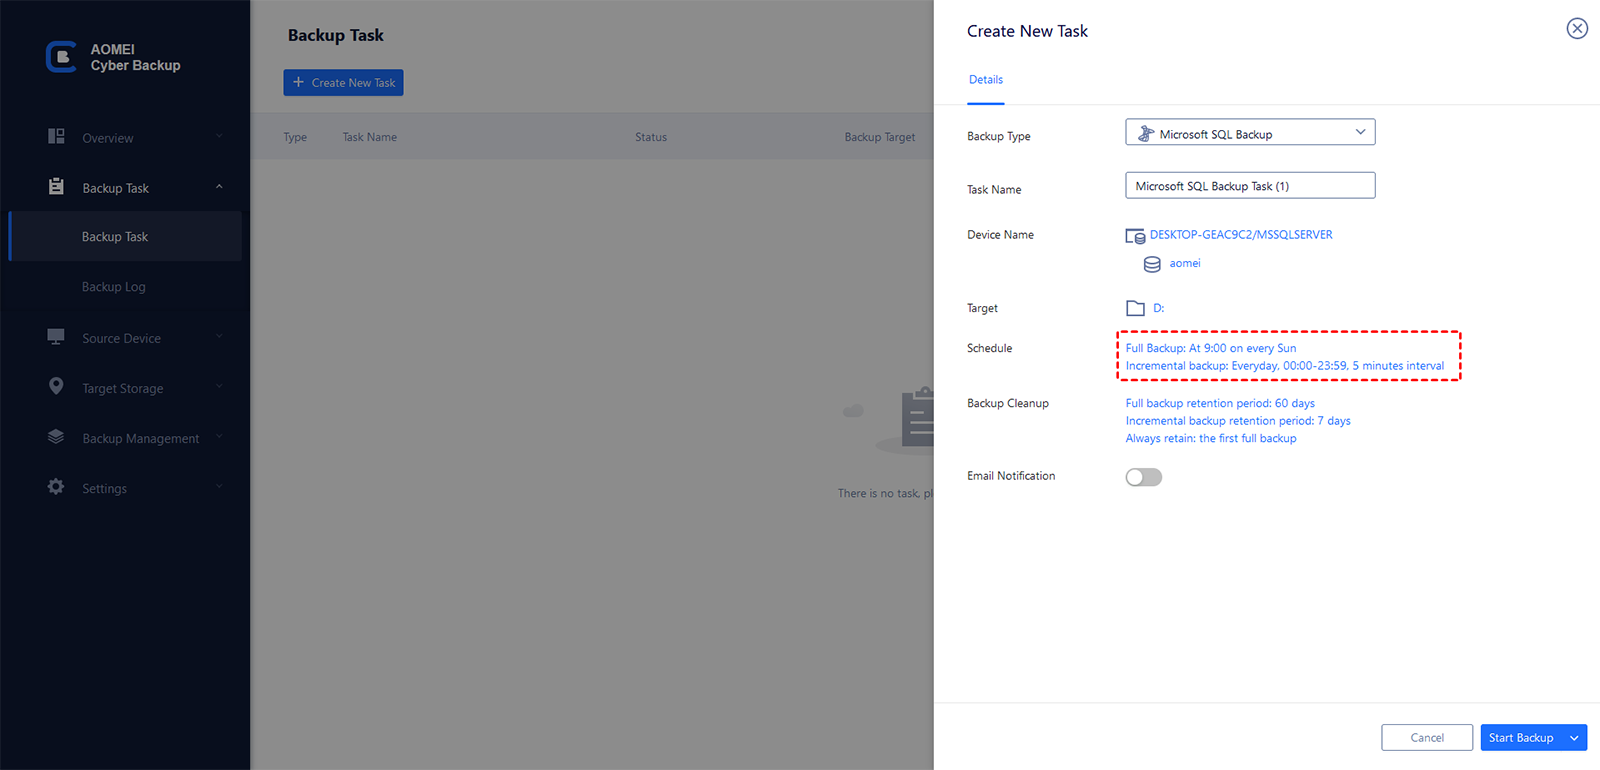
Click Start Backup to create and execute the task. Once it's finished, you will find it in the Backup Task tab.
✍More useful features:
- Backup Cleanup helps you to delete older backup version automatically and therefore save storage space.
- Email Notification enables you to receive email notifications when the task is abnormal or successful.
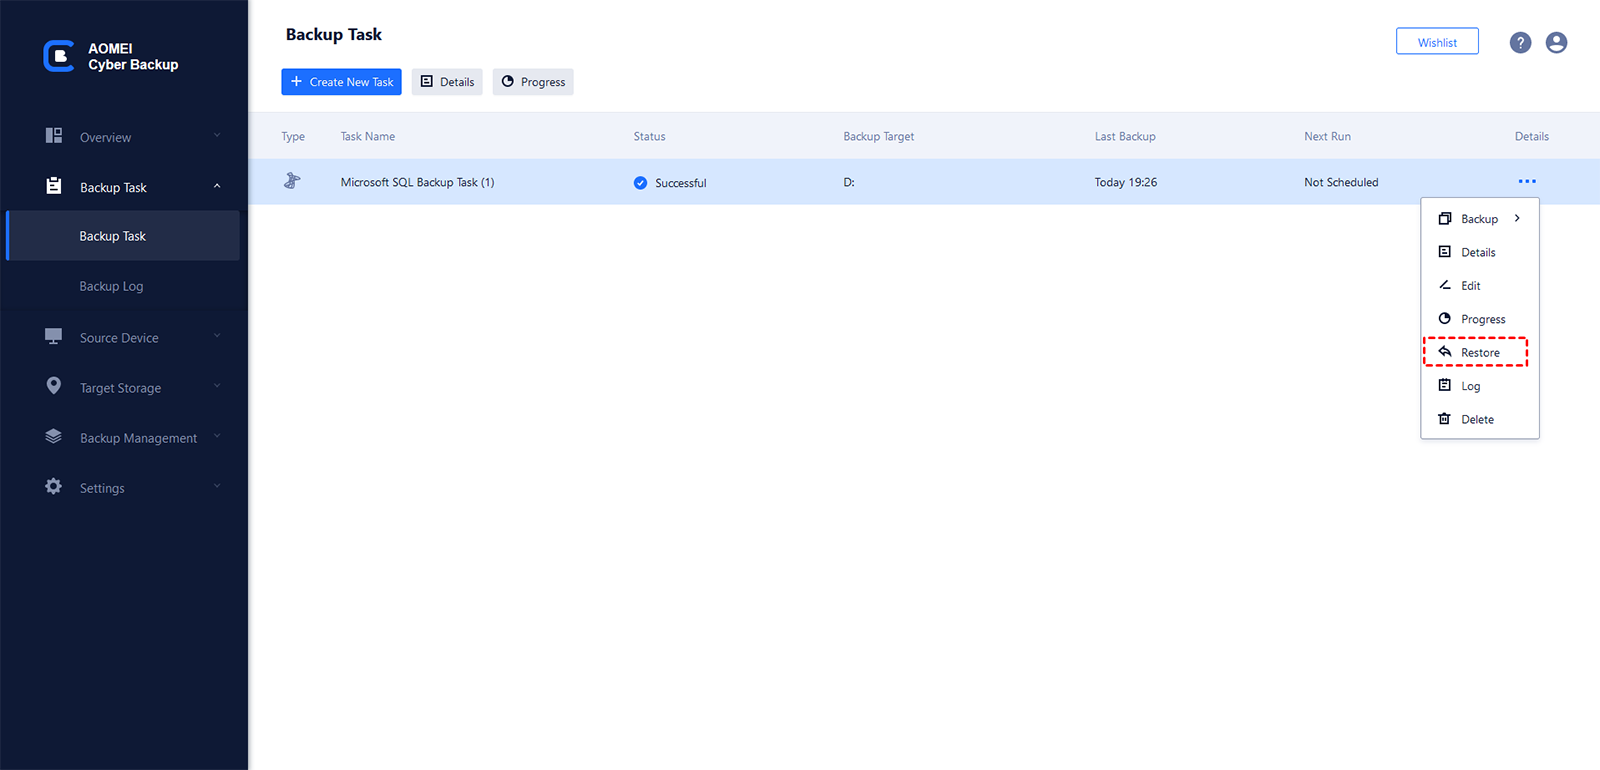
How to restore SQL databases from backup
1. Click Backup Task on the left menu bar, locate the task you want to restore, and click ![]() -> Restore.
-> Restore.
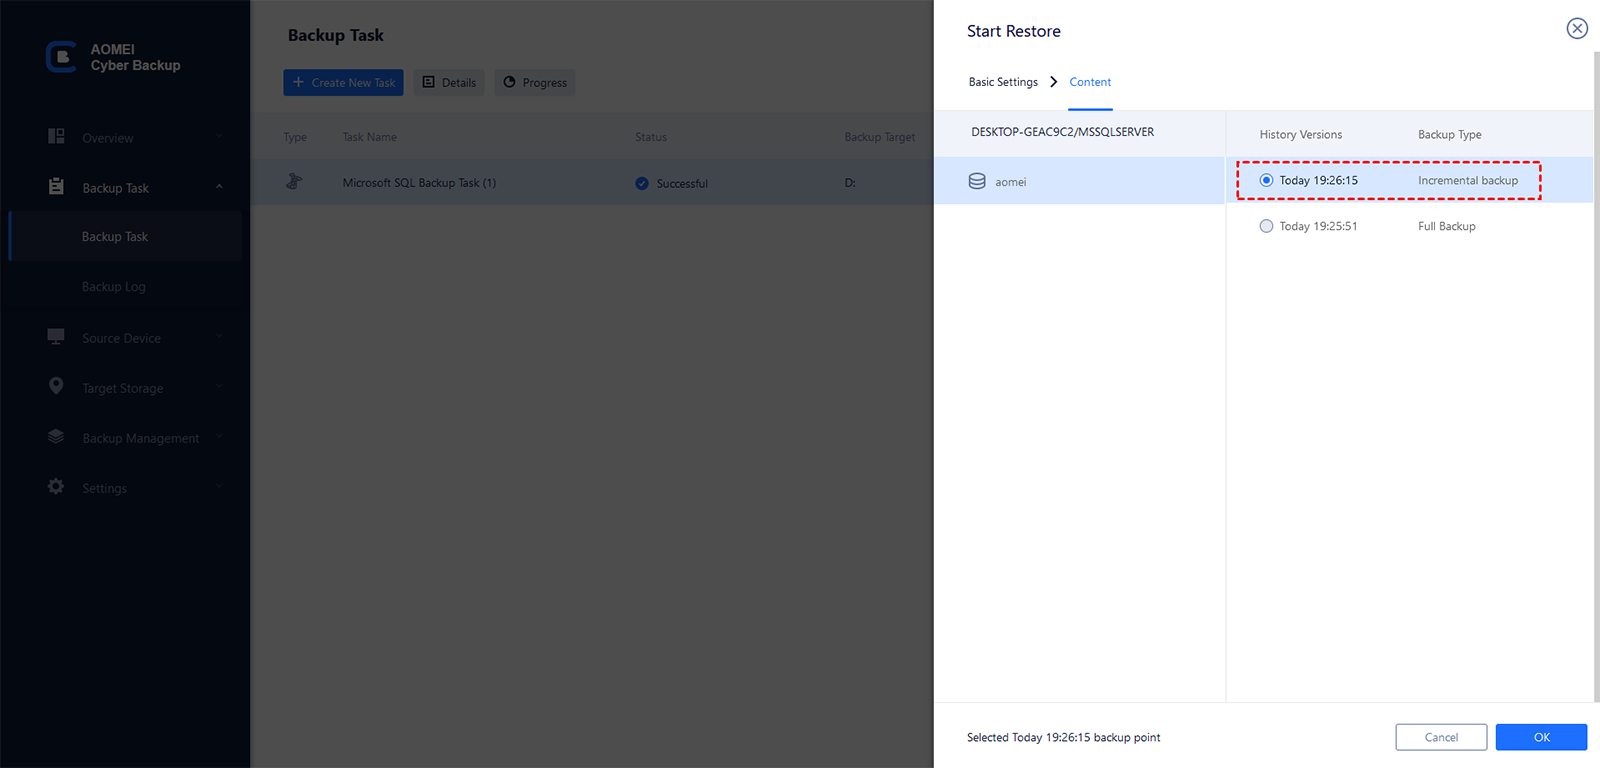
2. Select a backup version that you want to restore SQL databases from.
3. Next, select the target location that you want to restore to. There are 2 options:
- Restore to original location (by default): in-place recovery that can revert SQL databases to an older verison.
- Restore to new location: select another target to perform the out-of-space recovery. You can specify the name of the new database and modify the storage location.
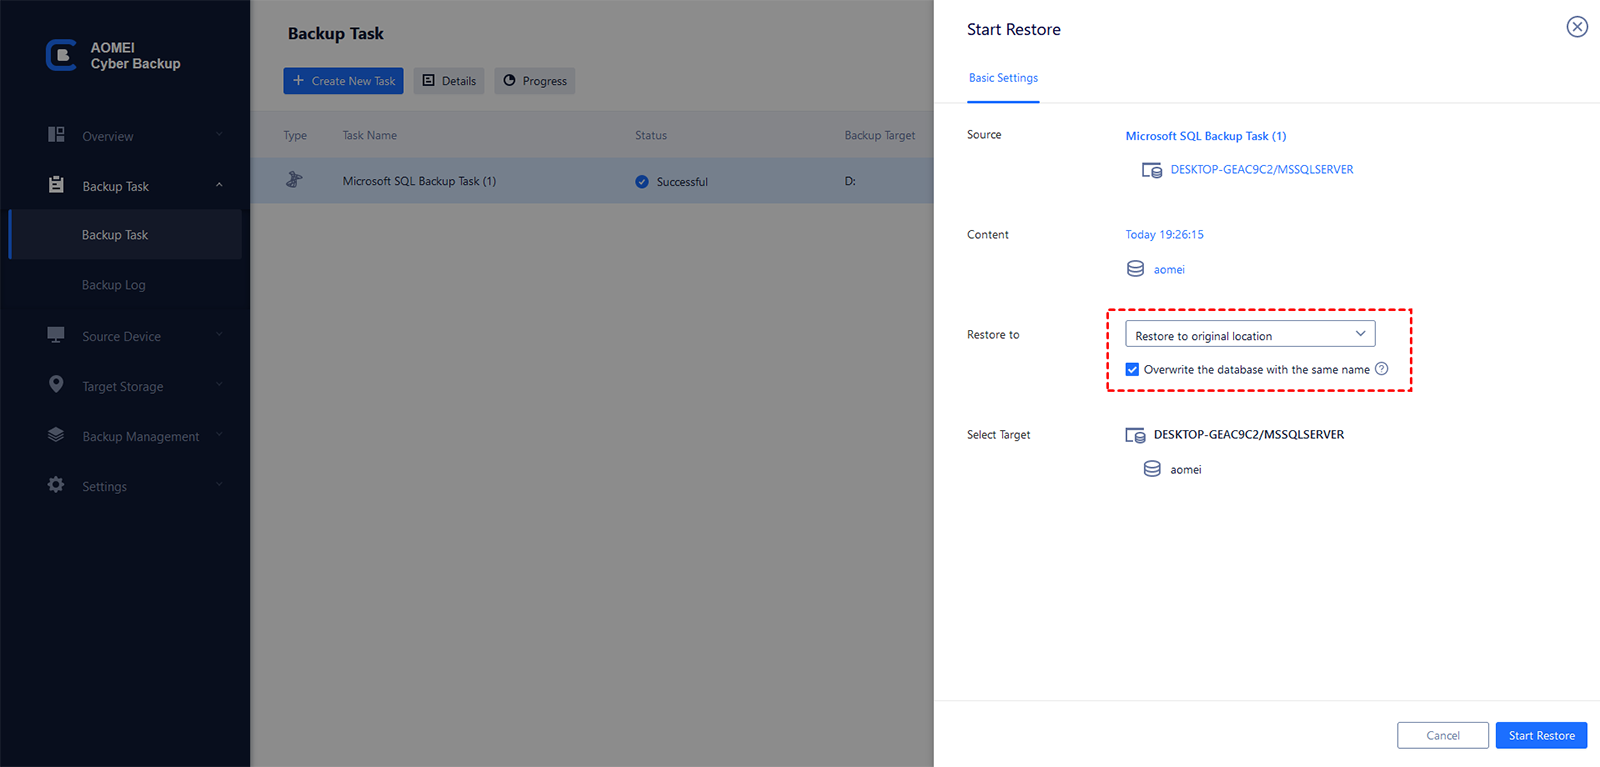
4. After all the settings, click Start Restore to begin the restore progress, and wait patiently for it to complete. You can click on the ![]() button to see restore details or cancel it.
button to see restore details or cancel it.

✍Notes:
- "Restore to original location" must confirm the original location exist. Or else, you can only select "Restore to new location".
- "Restore to original location" will overwrite or delete the original database data, if the original database has important data, it is recommended to choose "Restore to new location".
Conclusion
There are many ways to restore a SQL Server database. In terms of flexibility and the ease of execution, you can use batch file to restore SQL Server database. But the complexity of scripts can easily make a restoration fail due to a small syntax or spelling error.
Fortunately, AOMEI Cyber Backup provides an intuitive GUI to help you backup and restore multiple databases, automatically perform tasks, restore database to another computer, etc. without using complex scripts.

