


How to Repair Damaged VMware Virtual Machine [2 Ways]
Virtual machines are easy to get damaged. Do you know how to repair VMware VMs if you cannot open them properly? In this article, I will introduce 2 common ways to repair damaged VMware virtual machines.
By Crystal / Updated on June 28, 2024
Case: The specified virtual disk needs repair
As virtual machines are convenient when testing or deploying applications affected by virus, they can easily get damaged. Have you ever encountered an error like this:
- Cannot open the disk or one of the snapshot disks it depends on.
- The specified virtual disk needs repair.

It means that the VMDK file of your VMware VM is corrupted. To deal with this error, you can either repair VMDK file VMware or restore from a backup copy of this disk as it is mentioned.
Next, this article will explain the possible causes of this error and present 3 effective ways to repair damaged VMware virtual machines.
Possible causes of VMDK file corruption
In fact, not just VMDK files, other virtual machine files like VHDs are also prone to corruption. In general, there are 3 common causes that could lead to a corrupt VMDK file:
- Virus or malware: Virus or malware present in your system or enter through external sources can severely damage your VM.
- Unexpected file termination: Immediate termination of VMDK files without saving it properly may result in failure to open VMDK in VMware again.
- Forced system shutdown: Immediate system shutdown during saving process often damages opened files.
In a worst case, a corrupted VMDK file can lead to permanent data loss and significant financial loss. Next, I will share 3 effective ways of how to fix VMware virtual machines from this situation.
Way 1. Repair VMDK file of Workstation via VMware vdiskmanager
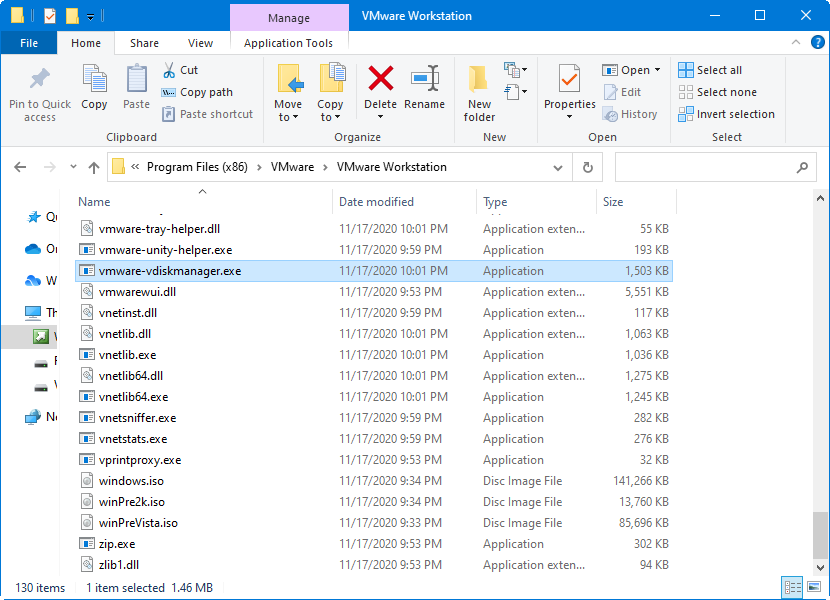
VMware Virtual Disk Manager (vmware-vdiskmanager.exe) is a command-line utility included in VMware Workstation or Fusion that you can use to create, manage, and modify virtual disk files.
It can also be used to repair a VMDK file of a Workstation virtual machine. Here are the specific steps:
1. Open Command Prompt by pressing Win + R and type cmd.
2. Navigate to the folder path where you installed VMware Workstation.
By default, the directory is located at:
Windows XP – C:\Program Files\VMware\VMware Workstation
Windows Vista/Windows 7/8 32bit – C:\Program Files\VMware\VMware Workstation
Windows Vista/Windows 7/8/10 64bit – C:\Program Files (x86)\VMware\VMware Workstation
Windows Server 2008 R2 – C:\Program Files (x86)\VMware\VMware Workstation
Note: VMware Player do not come with VMware vdiskmanager, you need to download it additionally from VMware’s official page.
3. Run the following command:
vmware-vdiskmanager -R "complete path of the corrupted vmdk file"
Example: vmware-vdiskmanager -R "E:\Virtual Machines\Windows 10\virtualdisk.vmdk"
These are the steps of how to repair VMware Workstation VM via vmware-vdiskmanager. However, the utility is not included in the server virtualization suite VMware vSphere.
If you want repair a VMware ESXi virtual machine, you can use the vmkfstools command.
Way 2. Use vmkfstools repair VMDK of a ESXi VM
vmkfstools is one of the ESXi Shell commands for managing VMFS volumes, storage devices, and virtual disks. You can perform many storage operations using the vmkfstools command.
You can also use the vmkfstools command to check or recover corrupted VMDK of ESXi VM if it gets corrupted. The basic syntax is like:
-x|--fix [check|repair]
For example:
vmkfstools -x repair VMDK1.vmdk

Way 3. Repair damaged VMware virtual machine from backups
For users who are not familiar with command line, the above ways may be complicated and error-prone. Therefore, it is recommended to repair damaged virtual machine by restoring from backups, as mentioned in the error description.
In fact, this is also the most efficient and commonly accepted way to deal with VM problems, whether it is VMware Workstation, ESXi or Hyper-V.
Here I recommend you a professional and free VMware backup software - AOMEI Cyber Backup. It has the following benefits.
✦ Schedule backup: with 2 easy steps you can create a complete automatic backup task of multiple VMs on the host. With multiple restore points you can roll back your VM to any past time you like.
✦ Role assignment: allows one administrator to create sub-accounts with limited privileges, effectively avoid errors caused by others’ mis-operations.
✦ Perpetual free edition: you can use this freeware to backup and restore your VMs with no time limit.
✦ Supported versions: both paid and free versions of VMware ESXi 6.0 and all later versions, Windows Server 2012 and all later versions.
By restoring VM from backups you will gain independent and instant usable VMs. The more often you back up, the more recent data you can restore.
Next, I will demonstrate how to create a complete backup task of multiple ESXi VMs. You can click the following button to download the free edition:
*You can choose to install this VM backup software on either Windows or Linux system.
How to backup and restore VMware virtual machine using AOMEI Cyber Backup
1. Bind device: Access AOMEI Cyber Backup web client, and navigate to Source Device > VMware > + Add VMware Device to add vCenter or Standalone ESXi host as the source device, provide authentication credentials and then click … > Bind Device.

Note: You only need to do this step the first time you bind this device, don’t need to repeat it later.
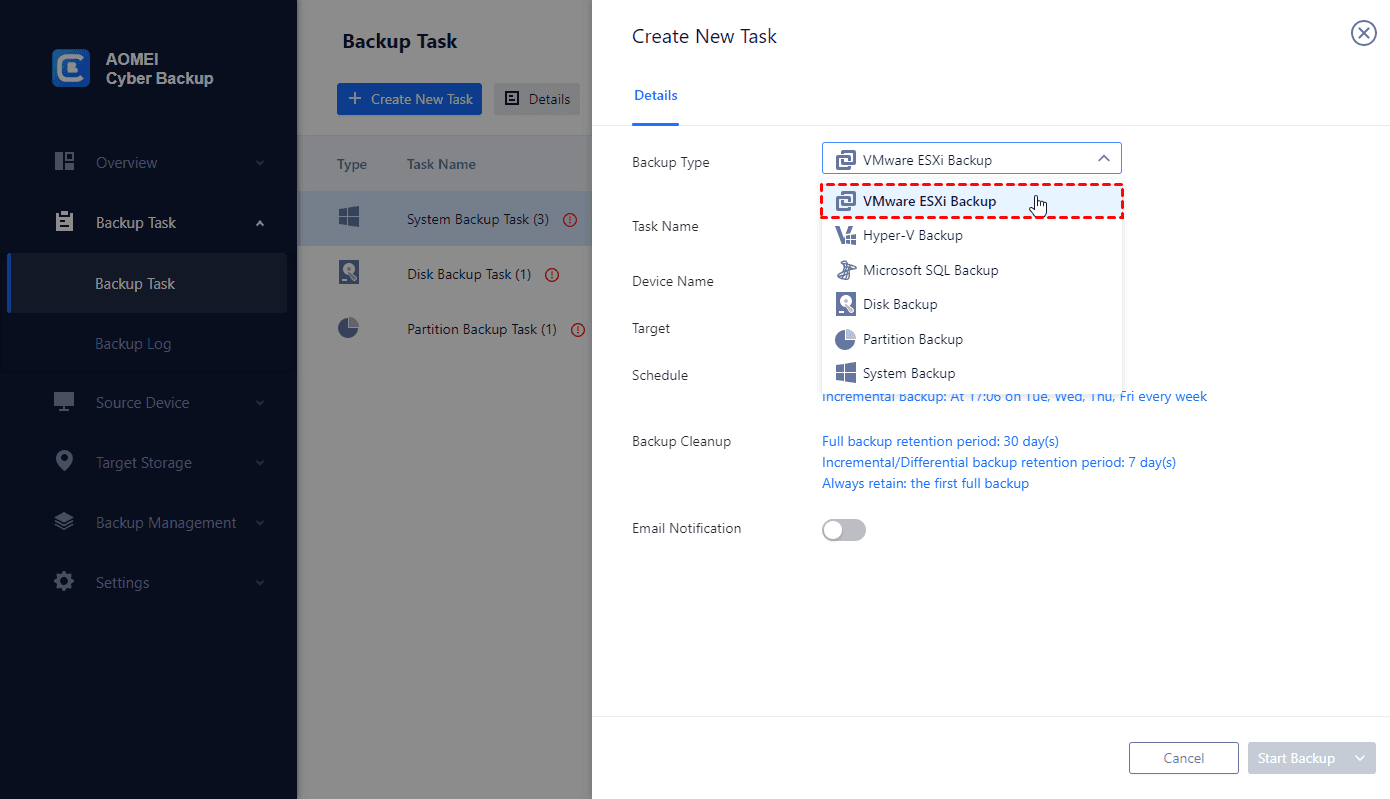
2. Create backup task: Navigate to Backup Task and click + Create New Task, set up Task Name, Device Type, Device Name, Target, Schedule according to your need.
- Device: select the VMs on the host to back up.
- Target: select to back up to a local path, or to a network path.
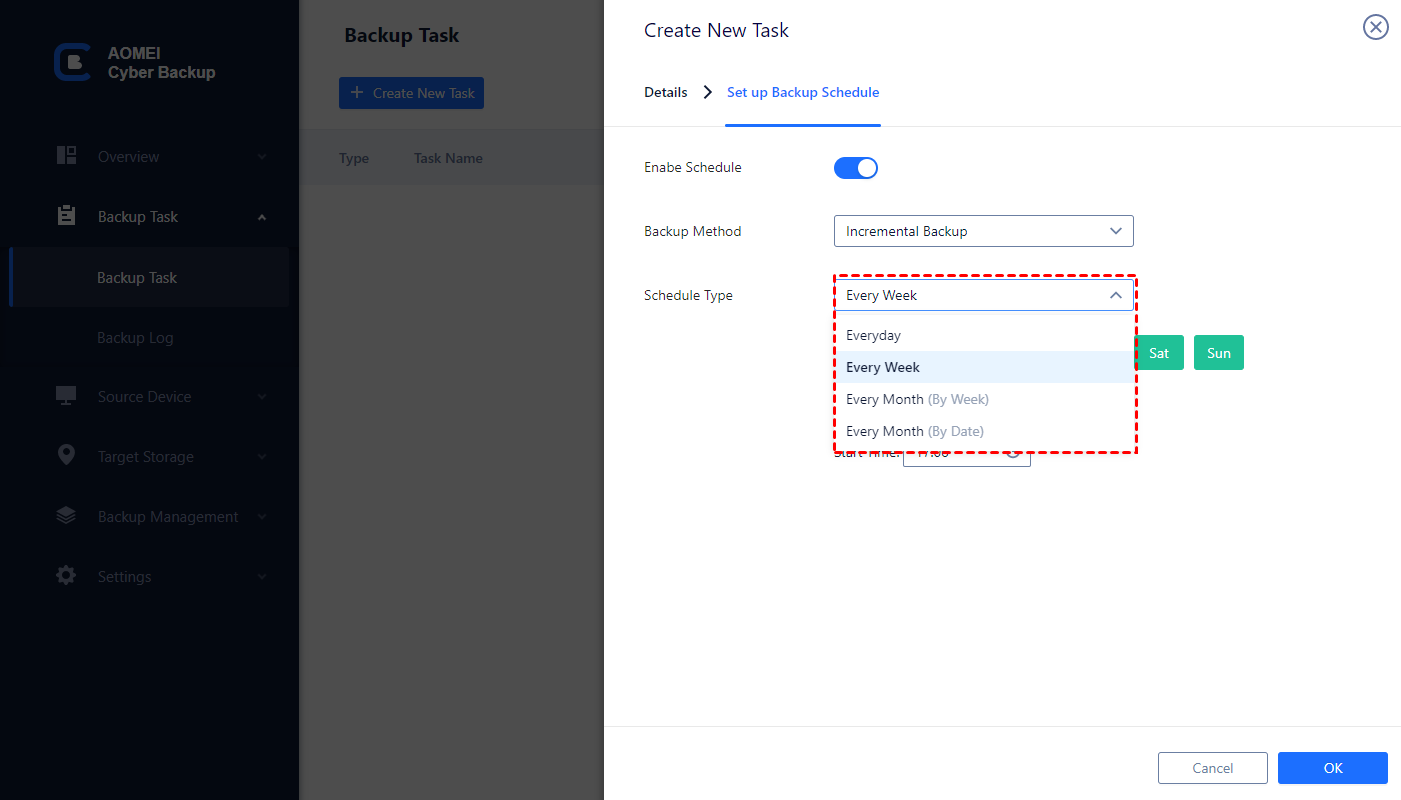
- Schedule: choose to perform full, differential or incremental backup, and automate execution daily, weekly or monthly according to the frequency you specified. More restore points can better protect your VM data from being lost.
- Archive: You can add an AWS S3 cloud storage and archive your backup files to it.
Then you can click Start Backup. The completed backup tasks will be listed separately.
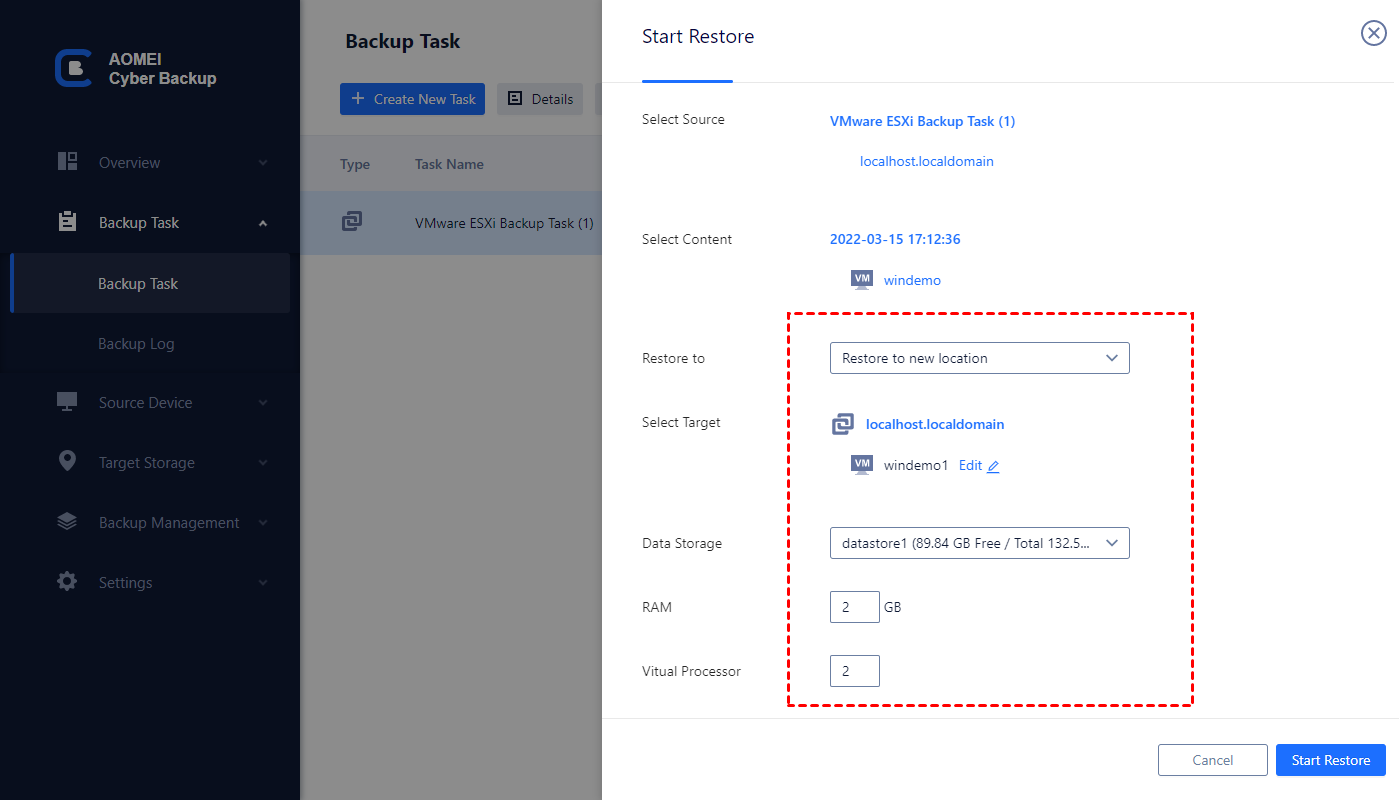
3. Restore from backup: Navigate to Backup Management > History Versions, select the VM and the restore point you want to restore, click Operation > … > Restore. Select to Restore to original location, and click Start Restore.
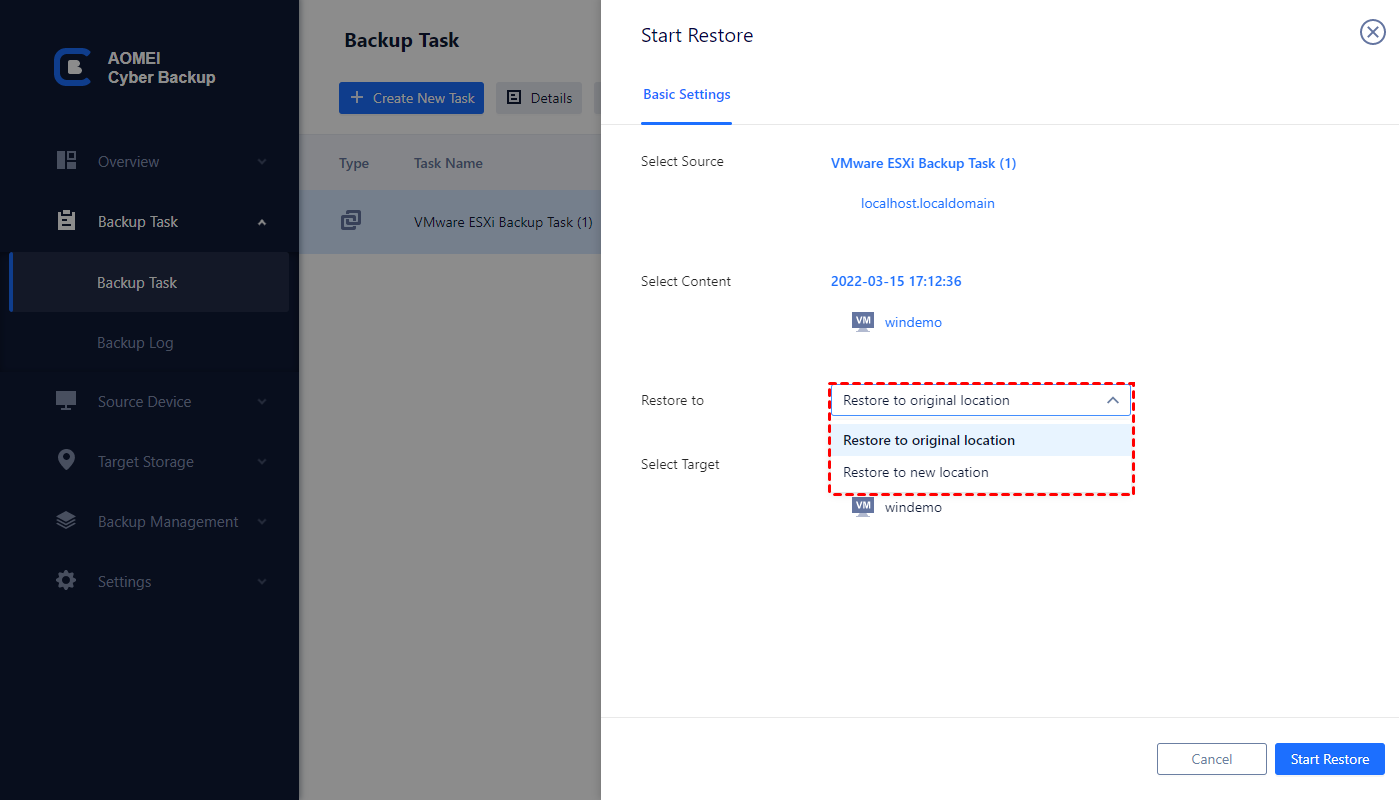
✎Tips: You can also upgrade to Premium Edition to enjoy batch VM backup on vCenter, Backup cleanup, and the Restore to new location option, which can help you restore the VM to another datastore or host by creating an identical new VM with customizable RAM and Vital Processor.
Summary
If your VMware virtual machine cannot be open properly, it is likely that its VMDK file is corrupted. In this article, I introduced 3 effective ways to repair damaged VMware virtual machines.
Among them, regular virtual machine backup is the most common way to protect VM data. If you want an easy tool to manage the backup tasks centrally, I recommend you AOMEI Cyber Backup. In addition, it also allows you to bind multiple hosts and clone VMs remotely. Definitely worth a try.

