


How to Enable SSH for VMware vCenter | 3 Easiest Ways
ESXi shell via SSH offers administrators the ability to maintain, troubleshoot, and remediate issues by using a Secure Shell client such as PuTTY. So today we will focus on how to enable SSH on ESXi host from vCenter.
By Crystal / Updated on June 28, 2024
Enable Secure Shell (SSH) in vCenter
SSH, also known as Secure Shell, is a network protocol that gives users, particularly system administrators, a secure way to access a computer over an unsecured network. There may be scenarios you might enable SSH in VMware.
Administering your VMware environment often requires remote access to your ESXi hosts. Access to the ESXi shell via SSH offers administrators the ability to maintain, troubleshoot, and remediate issues by using a Secure Shell client such as PuTTY. For security purposes, SSH is disabled by default. However, you can enable it for remote command execution in multiple ways.
This guide will show you different processes of enabling SSH on VMware ESXi hosts.
- Enable SSH via vCenter
- Enable SSH via vSphere Web Client
- Enable SSH via Direct Console User Interface (DCUI)
How to enable Secure Shell (SSH) on an ESXi host (3 ways)
When you deploy and setup VCSA for the first time, you can enable SSH while setting up and deploy install VCSA (vCenter server appliance 7.0).
Here, this article offers you 3 ways to enable SSH. This process of enabling SSH on VMware ESXi hosts is a straightforward task.
Way 1. Enable SSH via vCenter
For those with a VMware vCenter environment, you can enable SSH for each ESXi host by performing the following steps.
How to enable SSH on ESXi host from vCenter 7.0:
1. Login to vSphere Web Client and access to vCenter.
2. Select a host and click Configure, then select Security Profile under the System section.

3. Scroll down and look for Services further to the right and select Edit.
4. Locate and click the SSH >> Start to enable SSH for vCenter.
If you want to disable SSH, you just select Stop tab.
Way 2. Enable SSH via vSphere Web Client
1. Select a host on vSphere Web Client.
2. Select Manage in the navigator pane >> Services on the right side.
3. Select the TSM-SSH entry on the list. The service status shows Stopped.
4. Click Start to enable the SSH service.
Alternatively, you can enable SSH by selecting Host in the left navigator pane. Then do as followings.
1. Click Actions.
2. Select Services.
3. Click Enable Secure Shell (SSH). Also you can Disable Secure Shell.
Way 3. Enable SSH on ESXi via the DCUI
To enable SSH access on an ESXi server using Direct Console User Interface.
1. Press F2 and login with your root credentials.
2. Navigate to Troubleshooting Options and hit Enter.
3. Select Enable SSH.
The above methods take effect immediately, no need to reboot. In VMware vCenter environment, enabling SSH is a simple task. This process is straightforward but enables remote ESXi management, so caution should be at a high level. If you do not plan on using SSH for some time, you might want to disable the service following the same steps as when enabling it.
At the same time, to create a secure virtual environment, it’s recommended to backup VMware virtual machines in case of sudden failure. Can you imagine what a catastrophic data loss scenario would look like at your business? An absolute worst nightmare, for example, might consist of entire data sets getting wiped from the company’s primary backup storage. Depending on how much data is lost during this scenario, a business may have to start working from the ground up.
An VMware backup solution is one of the best ways to protect your company’s data from falling victim to chance.
VM data protection: Best practices of VM data backup in vCenter
If you are searching for the premier backup solution for your enterprise, you will not find a better option than AOMEI Cyber Backup paired with your organization.
AOMEI Cyber Backup is a VM backup solution and offers centralized backups for your VM protections. It can easily manage backups of virtual machines with one console and accommodate different virtual environment scales. With it, you don’t have to install Agent on each virtual machine, which saves time and simplifies the VM backup process.
It supports VMware ESXi 6.0 and later versions, as well as Hyper-V in Windows 8/8.1/10/11, Windows Server/Microsoft Hyper-V Server 2012 R2 and later versions.
With AOMEI Cyber Backup, you can enjoy these features.
✦ Auto Centralized Backup: Automatically backup virtual machines on regular basis - daily, weekly, monthly from a central console.
✦ Multiple VM Backup: batch backup large numbers of VMs managed by vCenter Server, or multiple VMs on a standalone ESXi host.
✦ Easy-to-use: Manage VM backup and recovery from central console without complicated reinstallation and complication.
✦ Multiple Storage Destinations: Easily backup to local or network destinations, NAS drive, and Cloud storage (Amazon S3 storage).
✦ Restore from Any Point: Restore VM from any backup point directly, eliminating the need to restore a full backup plus each subsequent backup point.
In the next section, I will demonstrate how to create an automatic ESXi backup or Hyper-V VM backup task using this enterprise backup software.
5 Steps to create virtual machine backups for enterprise
1. Bind Devices: Access to AOMEI Cyber Backup web client, navigate to Source Device > VMware > + Add VMware Device to Add vCenter or Standalone ESXi host. And then click … > Bind Device.

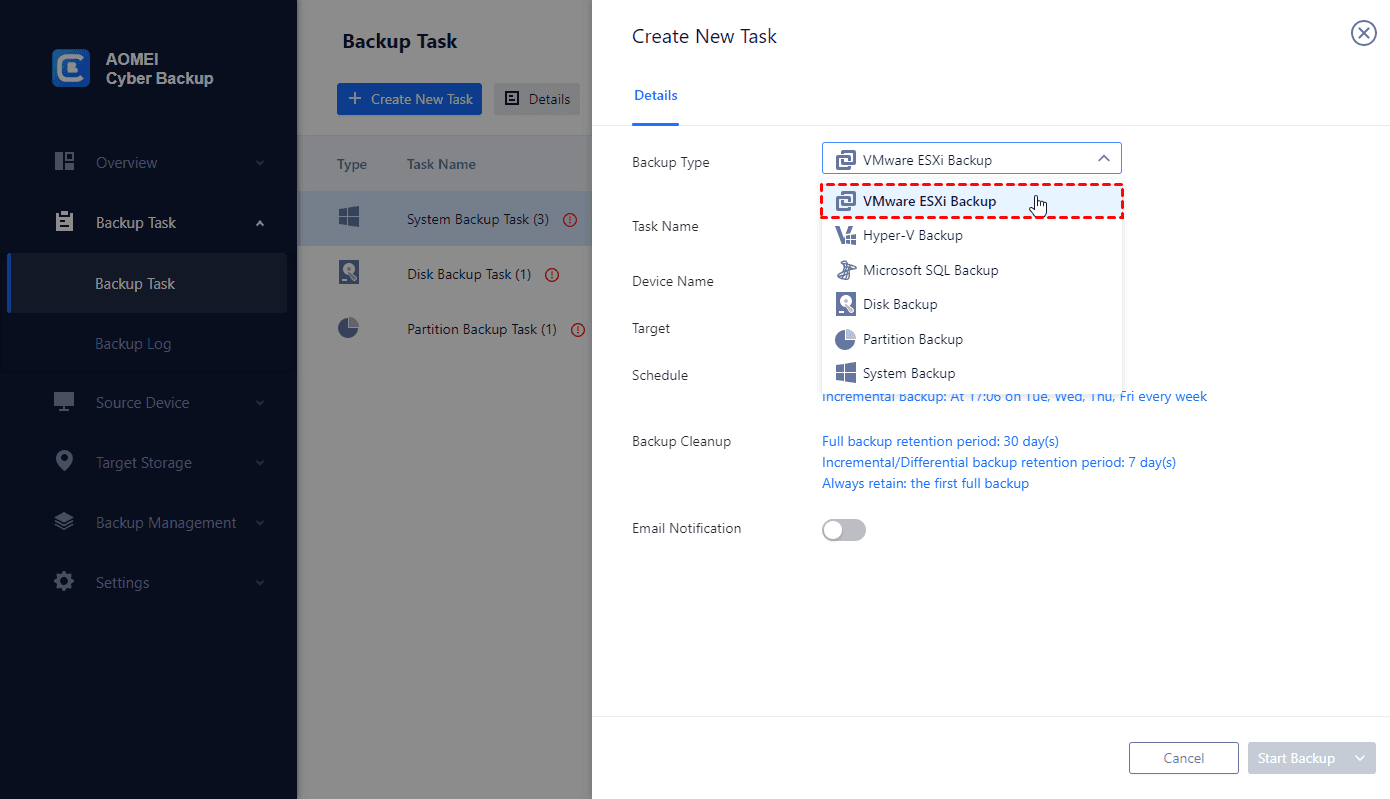
2. Create Backup Task: Navigate to Backup Task > + Create New Task, and select VMware ESXi Backup as the Backup Type.
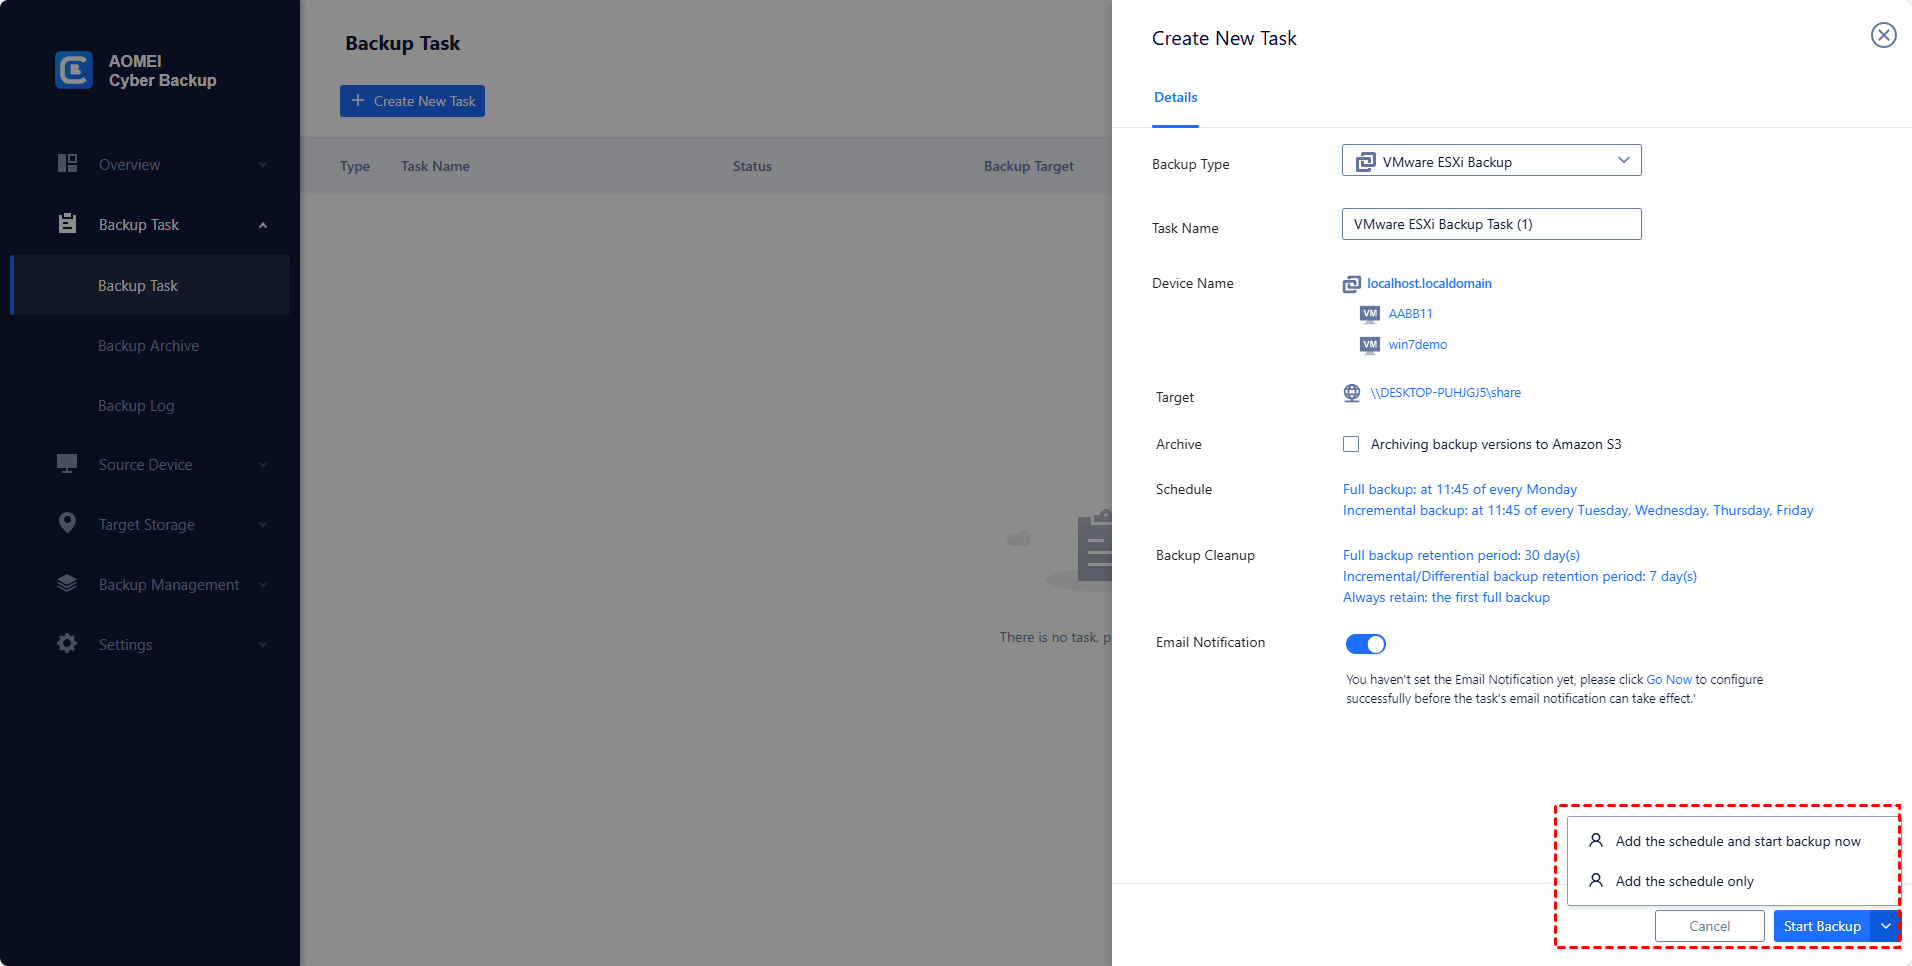
3. Set Task Name, Device, Target, Schedule, and Cleanup as needed.
- Task Name: you can change the task name or use the default name with an ordinal.
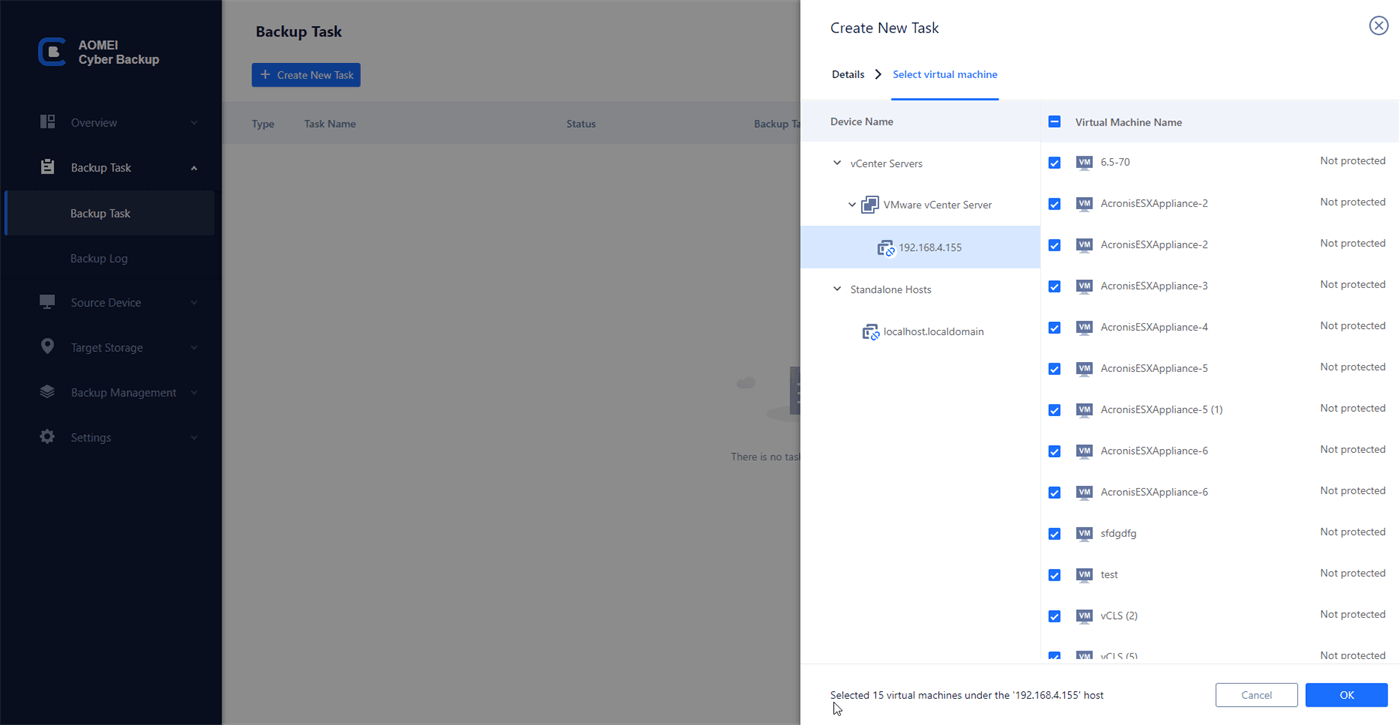
- On Device Name page, batch select large numbers of VMs managed by vCenter Server for centralized backup.
- On Target page, select backup destination as local or network. You are able to backup VM to different places according to 3-2-1 backup rule.
- (optional) On Schedule page, select full / incremental /differential backup, and specify the backup frequency as daily/weekly/monthly (by date)/monthly (by week).
- (optional) On Cleanup page, select to automatically delete the old backup copies that exceed the retention period you specified.
4. Click Start Backup to complete the auto enterprise backup task for virtual machines.
5. Click Restore to perform instant disaster recovery when your VM fails suddenly. It’s easy to restore an entire VM to its previous status from any selected backup versions. Then whole process is based on clicks and without any complicated reinstallation and configuration.
With AOMEI Cyber Backup, you can easily make an ideal enterprise backup solution that protects your virtual machines comprehensively.
Summary
In some cases, you may need to enable SSH on ESXi. This post describes how to enable SSH on ESXi host from vCenter step by step. There are 3 methods to enable SSH via vCenter, vSphere Web Client and the DCUI. Meanwhile, if you do not plan on using SSH for some time, you should disable the service.

