How to Perform Windows Server 2016 File History Backup
You can learn how to perform Windows Server 2016 File History backup and another way to perform Windows Server 2016 File History backup. Keep reading and scroll down for more details.
By Maggie Updated on October 23, 2023
Troubleshoot File History on Windows Server
Recently, some users have reported problems running File History on Windows Server 2016. Microsoft's official answer is that when you are managing file history backups of users or computers that have been added to a server running Windows Server Essentials, the following issues may arise.
✍File History data is not automatically deleted: In this case, you can manually delete the user's or computer's File History backup.
✍Unable to apply file history settings to new users: For this issue, you can first look up the user file history on the server before troubleshooting the file history for the new user with the name conflict.
In addition to the corresponding solutions, you also need to choose a more secure method to protect your data security. That is to perform Windows Server 2016 File Backup. You can read on for more details.
How to Perform Windows Server 2016 File History Backup
If you want to enable Windows Server 2016 file history, it requires all client computers to be domain-joined. If you don't have a domain, you can simply choose an easier and more convenient alternative.
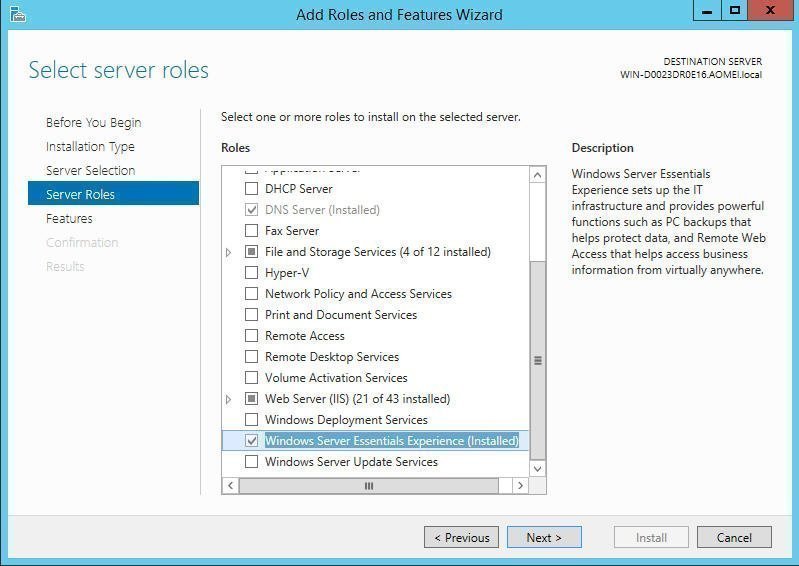
Step 1: Install Windows Server Essentials.
Just launch Server Manager and click Add Roles and Features, then in the wizard, click Next, select installation type and server, tick Windows Server Essentials Experience and follow the wizard to complete the installation.
Step 2. Configure the Essentials feature
Next, go to Server Manager again and configure the Essentials feature. click the flag shaped icon and Configure Windows Server Essentials, then click Next until the Create a network administrator account, type company name, Administrator account, password and click Configure to start this operation.

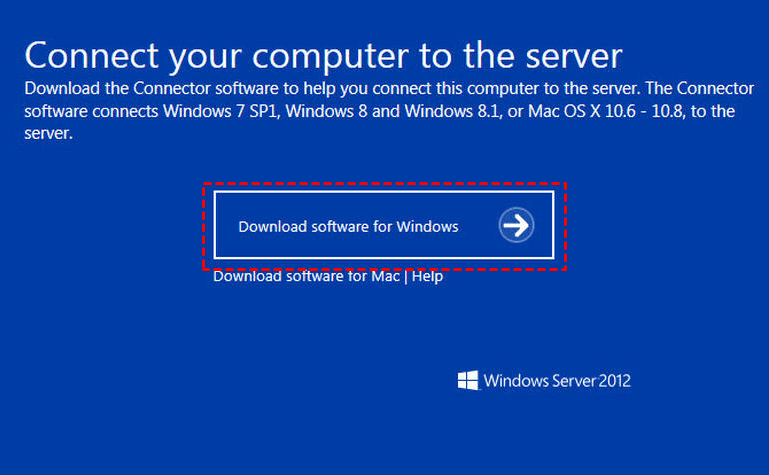
Step 3. Connect all the clients computers to server
Thirdly, connect all the clients computers to server. Log on to the client computer and make sure it has a valid connection to the internet, open internet browser (eg: Internet Explorer), type http:///Connect or http:///connect andpress Enter, click Download software for Windows, then run this application to join domain by following its prompt.
Step 4. Create file backup for client computers
Last and the most important part, create file backup for client computers. Launch Windows Server Essentials Dashboard, click DEVICES, select Client computer backup tasks, set up Client computer backup settings, include schedule and its retention policy, click Apply at last.

Another way to Perform Windows Server 2016 File History Backup
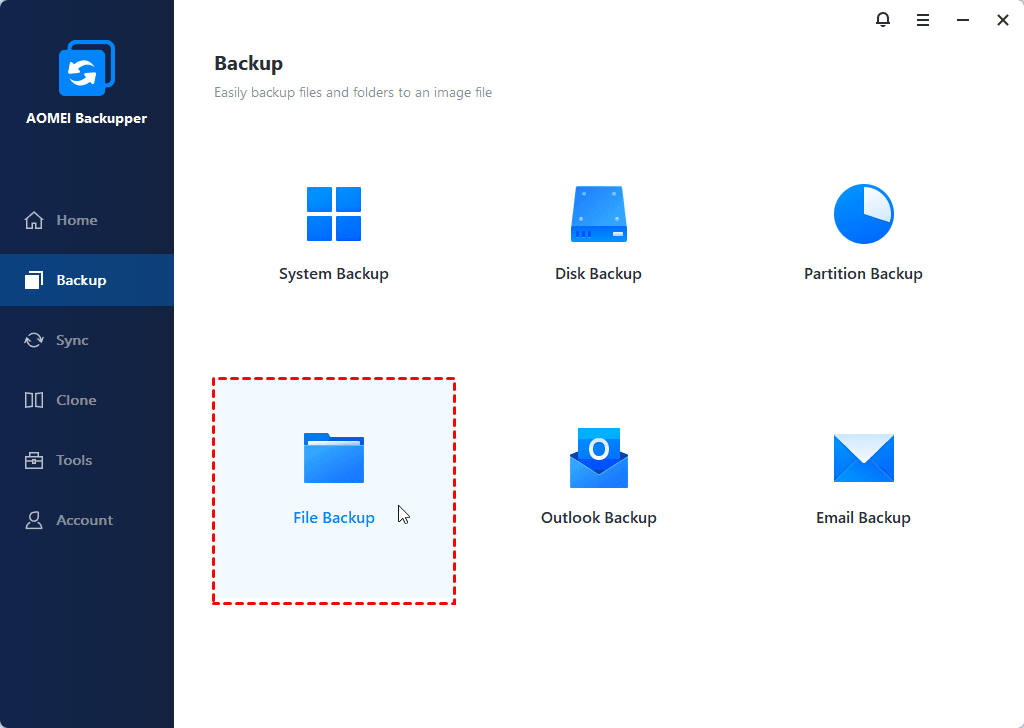
This method is cumbersome, and if the operation is not done properly, it may cause data loss or even a system crash. You can choose an alternative that is simpler and more effective. That is to use the professional file backup software for Windows Server - AOMEI Backupper Server to help you backup any files you want to backup.
✧It supports backing up specific files with different frequencies, such as, daily, weekly, monthly schedule backup. And you can further set backup date, time and interval.
✧It is usually used with incremental backup, which backup only changed files in a scheduled task.
✧It is capable of compressing (normal or high compression) or splitting backup image into smaller one automatically.
✧It allows you to backup files to multiple storage devices, such as local drive, external drive, USB, HDD, SSD, etc. If you have an AOMEI account, you are able to backup files to AOMEI Cloud.
Step 1. Download and install AOMEI Backupper Server. Launch this software and click Backup > File Backup.
Step 2. Click Add File or Add Folder, then select the files or folders you want to backup, even if it's outside the user account.
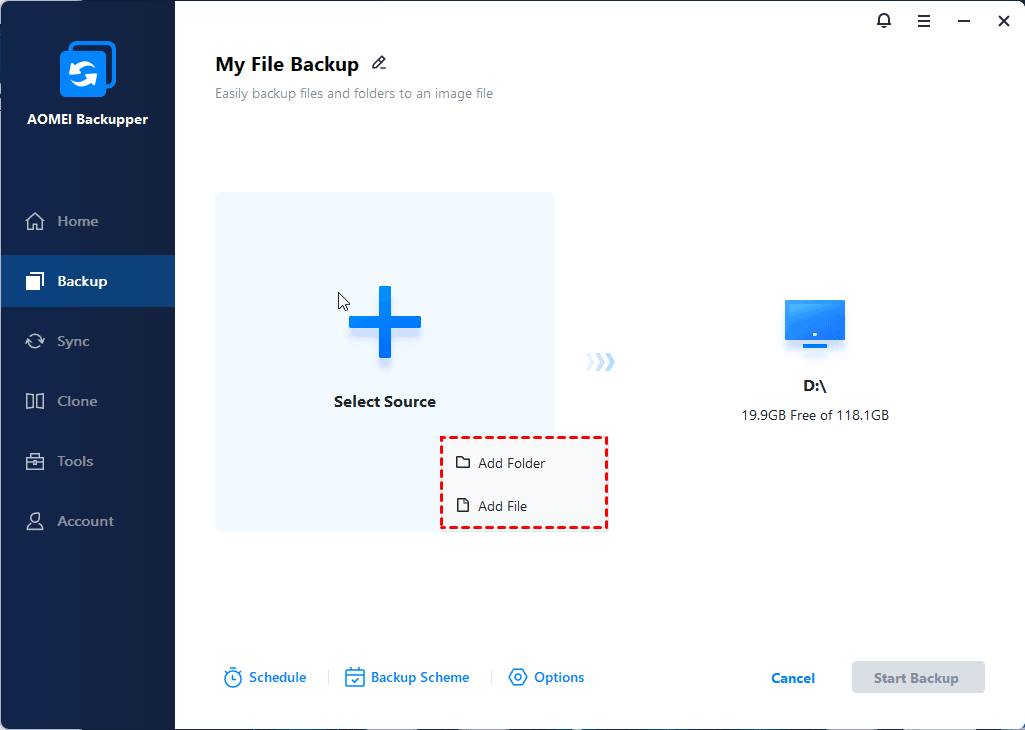
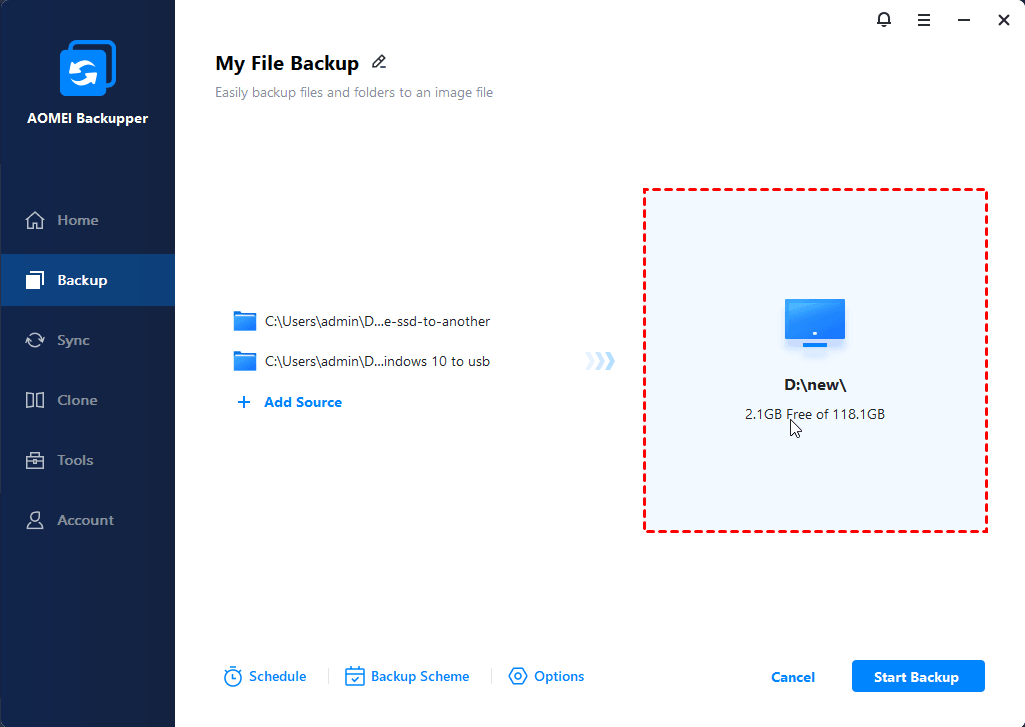
Step 3. Choose a destination path for your backup. You can choose to backup files to external hard drive, network location or NAS, cloud drive, etc.
Step 4. Click Schedule Backup to set daily, weekly or monthly backup for your files. To avoid the backup disk full issue at the beginning, you still need to set the compression level (normal or high), splitting, incremental backup, etc.
✈✈The incremental backup is more demanding on file recovery. It requires one full backup and all the linked incremental backups. To simplify the recovery process, try the differential backup method directly. It still allows you to delete old backup images on a regular basis with different cleanup methods, such as, By quality, By time, and By daily/weekly/monthly.

Step 5. Confirm all your operations and then click Start Backup of Windows Server File History.
Summary
This article describes how to use Windows Server 2016 users often encounter problems and how to enable Windows Server 2016 file history backup. However, this method is more complicated and may easily cause data loss and system crash. You can use a simpler and safer method, which is to use the professional Server file backup software AOMEI Backupper Serverl to help you achieve your goal.
In addition to file backup, this software also provides system backup, partition backup and disk backup functions to protect your data in an all-around way. When your data is accidentally lost, you can also use the backup file to restore it. You can download this software to explore more.

