How to Upgrade Windows Server 2016 to 2019: Stepwise Guide
In this article, we will guide you through how to upgrade Windows Server 2016 to 2019 step by step. For data security, we also offer server backup software to backup files before the upgrade.
By Jonna Updated on July 7, 2023
Can I upgrade Windows Server 2016 to 2019?
Windows Server 2016 and 2019 are both operating systems within the Windows Server family. Server 2016 was released in 2016, while Server 2019 was released in late 2018. Due to the advancements in application platform and security features present in Server 2019, many users may consider upgrading Windows Server 2016 to 2019. However, a common question arises: Can you upgrade from Server 2016 to Server 2019?
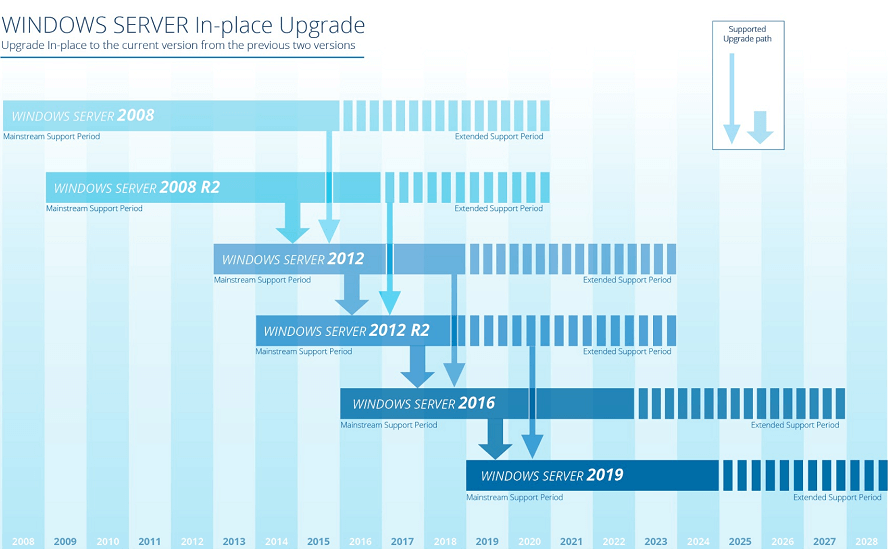
Certainly! Upgrading to a newer version of Windows Server is indeed possible, allowing for a transition of up to two versions at a time. For instance, Windows Server 2016 can be upgraded to either Windows Server 2019 or Windows Server 2022. However, if you are utilizing the Cluster OS Rolling Upgrade feature, you can only upgrade one version at a time.
Windows Server in-place upgrade vs clean install
The process of upgrading to a newer version of Windows Server can vary significantly depending on the starting operating system and the chosen upgrade pathway. There are two common upgrade paths: in-place upgrade and clean installation. These paths differ in terms of the actions involved and their respective outcomes.
In-place upgrade involves updating the operating system while retaining existing applications, settings, and data. This option is convenient as it minimizes disruptions and ensures compatibility. However, there is a possibility of encountering compatibility issues or carrying over accumulated system clutter.
While a clean installation involves starting afresh by formatting the server's hard drive and reinstalling applications, settings, and data. This approach provides a clean and optimized environment, eliminating potential upgrade issues and outdated configurations. It ensures a fresh start and can result in improved performance.
In this blog, we will provide a comprehensive guide on performing an in-place upgrade from Server 2016 to 2019.
Prerequisites before upgrading Windows Server 2016 to 2019
To prevent Windows Server 2019 installation failed during the upgrade, before you begin the practice of upgrading Server 2016 to 2019, it is important to verify that your computer meets the following requirements:
- Make sure that your hardware meets or surpasses the hardware requirements for Windows Server.
- Have the install media ready for use. Ensure that you have a reliable source of the Windows Server 2019 installation files or DVD.
- Ensure you have a valid product key and an appropriate activation method available.
- Confirm that your server is not running within the Azure cloud platform.
- Set up a location separate from your computer to backup your server files, so to prevent accidental loss of data during the upgrade process.
- Apply the latest updates to your Windows Server 2016.
Stepwise guide on in-place upgrade Windows Server 2016 to 2019
To upgrade your Windows Server 2016 to Windows Server 2019, follow these steps:
Step 1. Start by logging in to the server as an administrator. Locate the setup media for Windows Server 2019 and run the setup.exe file. When prompted, click Yes to confirm the setup process.
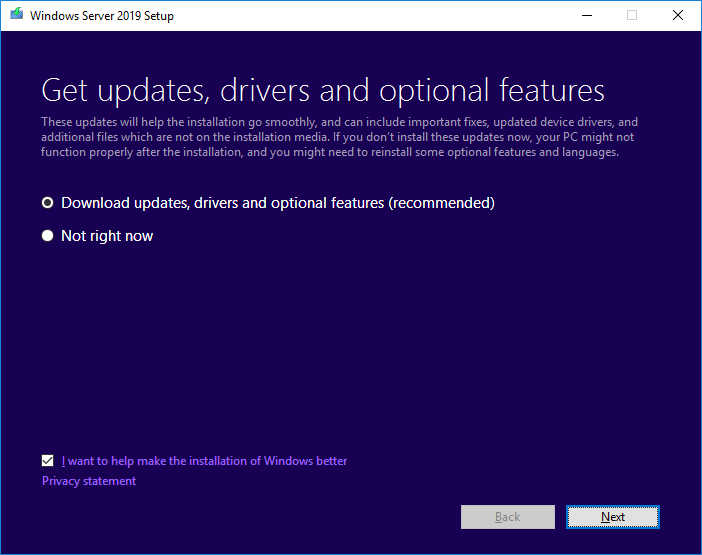
Step 2. On the setup screen, choose the option Download updates, drivers, and optional features (recommended) and click Next.
Step 3. Wait for the setup to check the device configuration. Once the check is complete, click Next.
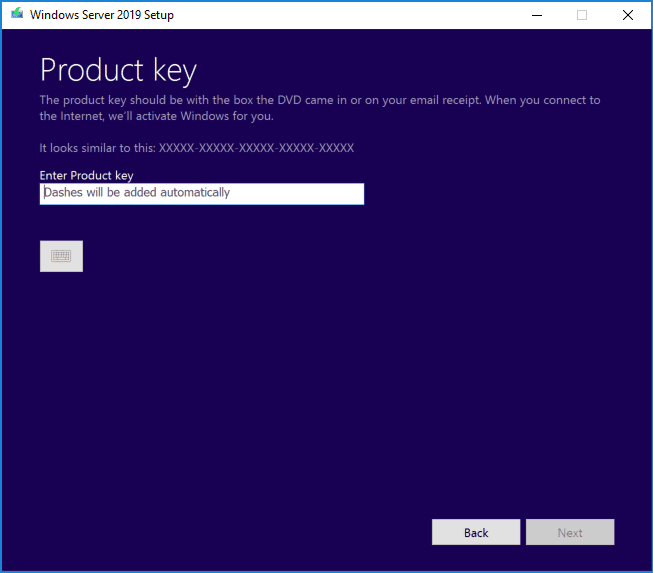
Step 4. Enter the license key for your Windows Server 2019 to proceed with the upgrade.
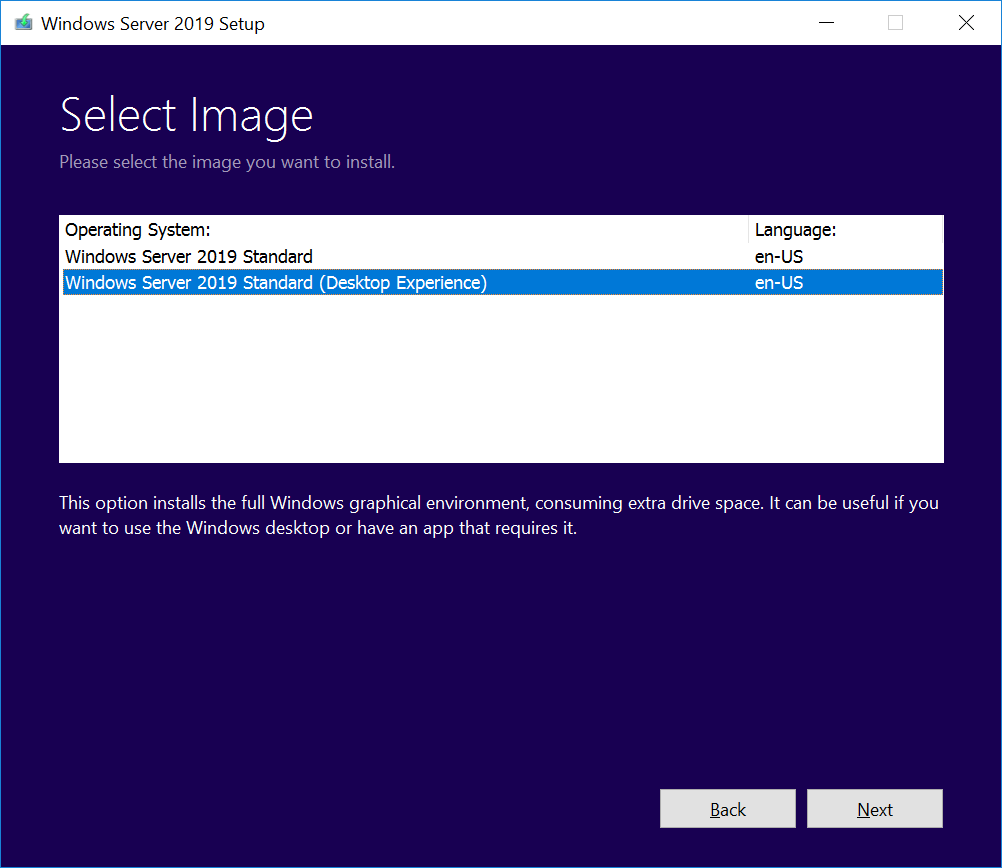
Step 5. Select the edition of Windows Server 2019 that you want to install and click Next.
Step 6. Review the applicable notices and license terms and click Accept to agree to them.
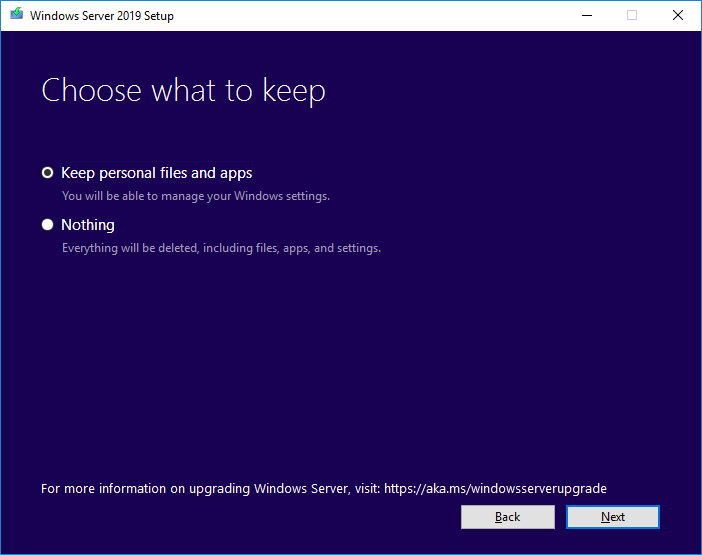
Step 7. On the Choose what to keep page, select Keep personal files and apps to retain all your data during the upgrade process. Then click Next.
Step 8. Once the analysis is complete, click Install to start the upgrade process. Your server will automatically restart after the installation finishes.
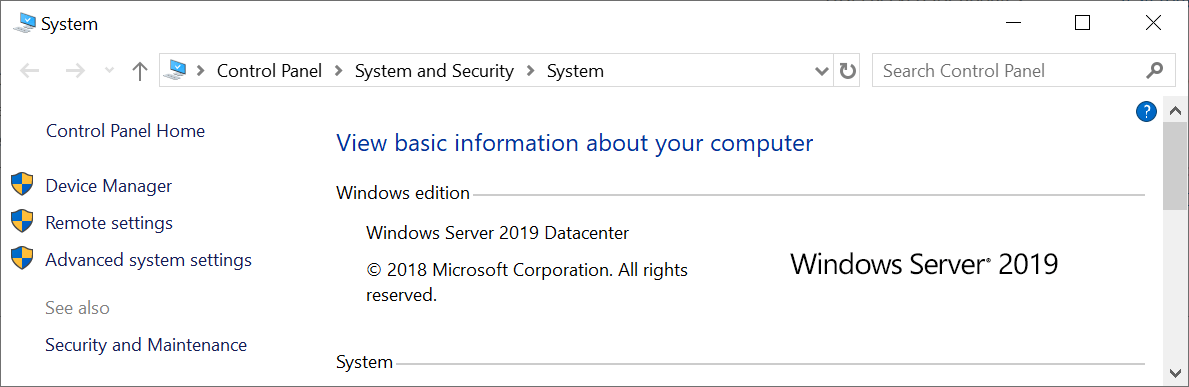
When the process of Windows Server 2016 upgrade to 2019 is completed, you can verify its success by accessing the System Properties on your server. This will confirm that your server is now running Windows Server 2019.
Further tip: How to backup computer before upgrading to Server 2019
As you can see, the process of Windows Server 2016 to 2019 upgrade is complex and can encounter unexpected issues along the way. To safeguard your data integrity during the upgrade, it is highly recommended to create a backup before proceeding.
While Windows Server does provide a built-in backup utility called Windows Server Backup, it has limitations such as include a 2 TB backup size limit, restrictions on the number of backups that can be retained, and the lack of single file backup functionality. To overcome these limitations, it is worth considering AOMEI Backupper Server, a user-friendly server backup software that offers comprehensive backup and recovery features.
- It provides various backup options, including file backup, system backup, disk backup, and partition backup.
- It supports creating file image backups to a wide range of storage devices such as internal/external hard drives, NAS, network shares, and cloud services.
- It offers three backup methods: full, incremental, and differential backup, allowing you to save storage space by choosing the last two methods.
- It is compatible with all versions of Windows Servers, including Server 2003, 2008, 2012, 2016, 2019, and 2022 (including R2).
- It can create a bootable USB flash drive, which can be used for system recovery in case your PC encounters issues after upgrading from Windows Server 2016 to 2019.
To backup your PC before upgrading Windows Server 2016 to 2019, you can perform the following steps:
Step 1. Download and install AOMEI Backupper Server. Once installed, launch the software.
Step 2. Click on Backup and choose the backup type that suits your needs. For individual file backup, select File Backup; or you can use System Backup in case of an upgrade failure. Here we take System Backup as an example.

Step 3. The system partitions and boot-related partitions will be selected by default. Choose the destination path where you want to store the backup.

Step 4. Review your backup settings and click Start Backup to initiate the backup process for Windows Server 2019.
➯Tip: If you want to create auto backups for your server files, by enabling Schedule Backup, you can schedule the backup task at a custom frequency. For example, you can schedule Windows Server backup once a week, as well as have the flexibility to choose from other options such as daily, monthly, event trigger, and even USB plug in.

Conclusion
If you are considering upgrading Windows Server 2016 to 2019, it is important to have a thorough understanding of the upgrade process. This guide provides you with the complete tutorial to perform the upgrade. However, it is always recommended to backup your server before any major updates or changes.
AOMEI Backupper is a reliable backup software that can assist you in creating backups of personal files, folders, entire hard drives, and even system images backup. With its user-friendly interface and various destination options, you can easily create backups and ensure the safety of your data.

