Configure Group Policy for Auto Windows Updates on Server 2016 & Disable It
On this page, you will learn a full guide on configuring Group Policy for Windows updates on Server 2016 and how to disable it. Also, an easy-to-use tool is introduced to back up your Server for auto update errors.
By Jonna Updated on December 1, 2023
What is Group Policy in Windows Server 2016?
Group Policy is a feature in Microsoft Windows operating systems, including Windows Server 2016, that allows administrators to manage the configuration of users and computers in a network environment. It provides a centralized way to define and enforce settings for users and computers within an Active Directory(AD) environment. Here are some key aspects of Group Policy in Windows Server 2016:
✔ Centralized Management: It allows administrators to define and manage configurations for multiple users and computers from a central location. This is typically done on a Windows Server using the Group Policy Management Console (GPMC).
✔ Active Directory Integration: It is tightly integrated with Active Directory. Policies can be linked to sites, domains, or organizational units (OUs) within the Active Directory structure. This allows administrators to apply different policies to different parts of the network.
✔ Policy Settings: Group Policy settings, usually defined in Group Policy Objects (GPOs), cover a lot of configurations, including security settings, desktop configurations, software deployment, scripts, and more.
Are you looking for a guide on how to configure Group Policy for Windows updates on Server 2016 automatically? Read on to learn how you can use it to deploy your Windows update via group policy settings.
Part 1. How to Configure Group Policy for Automatic Windows Updates on Server 2016
Here is a step-by-step guide on how to enable Windows Server 2016 automatic updates using Group Policy.
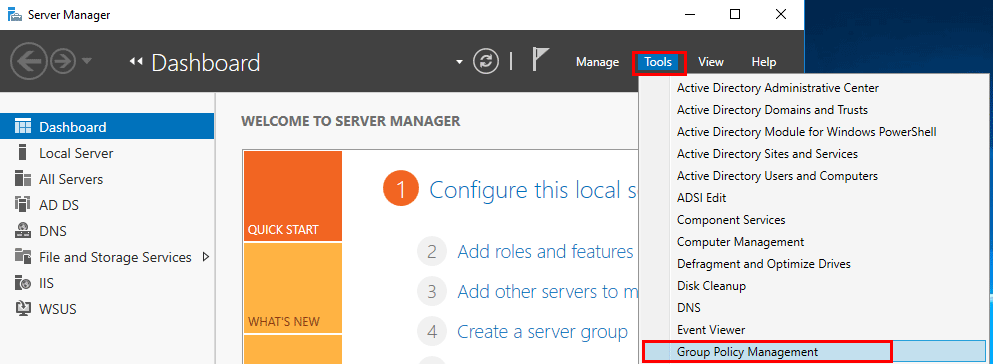
Step 1. Open Group Policy Management console.
On the start screen, click Server Manager. Then, select Group Policy Management console from within the Tools menu.
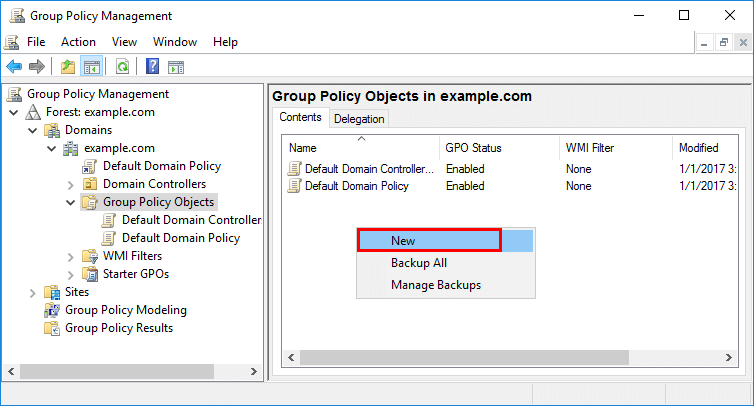
Step 2. Create a new GPO to apply changes.
1. Head to Group Policy Objects, right-click on the blank space, and click New.
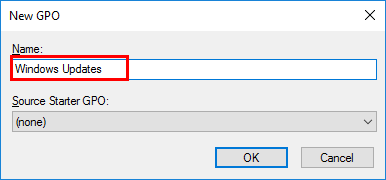
2. Give it a distinguishable name, like Windows Update, so that you can identify in the future.
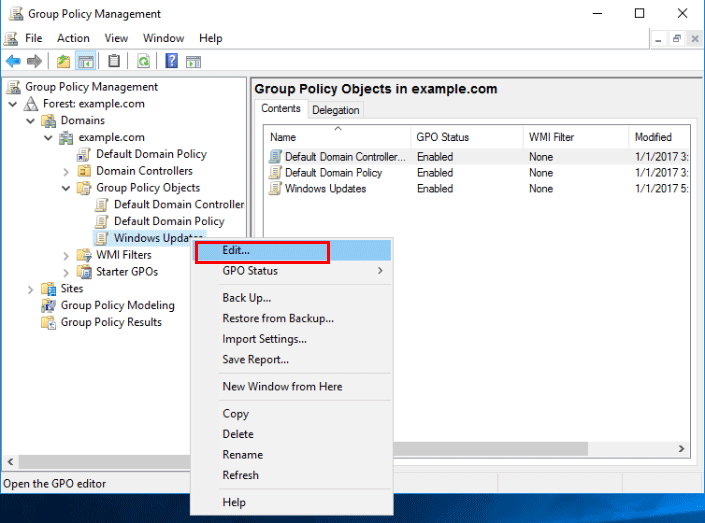
3. Right-click your newly created GPO and select Edit.
Step 3. Configure Automatic Windows Updates
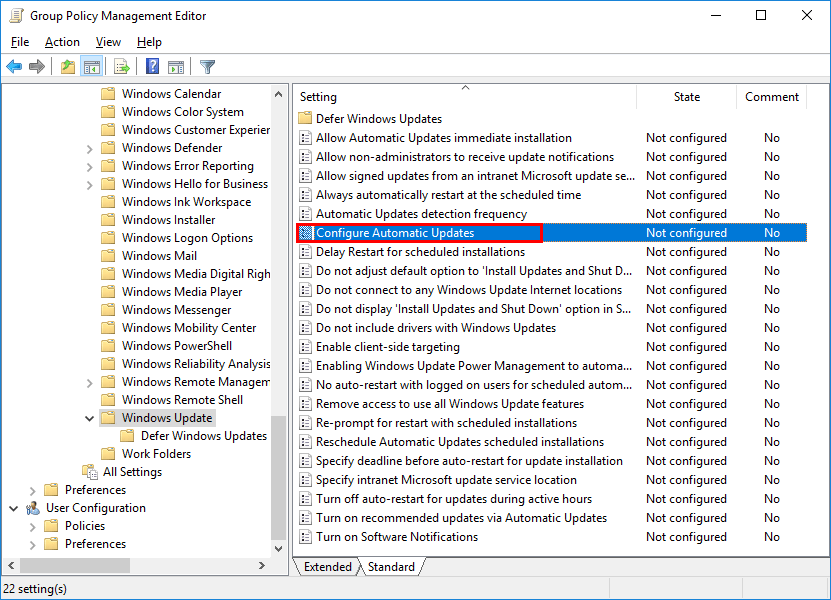
1. On the Group Policy Management Editor (GPME) windows, navigate to Computer Configuration -> Policies -> Administrative Templates -> Windows Components -> Windows Update. Double-click Configure Automatic Updates on the right to open the configuration window.
2. Select Enabled under Configure Automatic Updates. Under Options, open the drop-down menu of Configure automatic updating and select one desired update method. Four update methods you can apply:
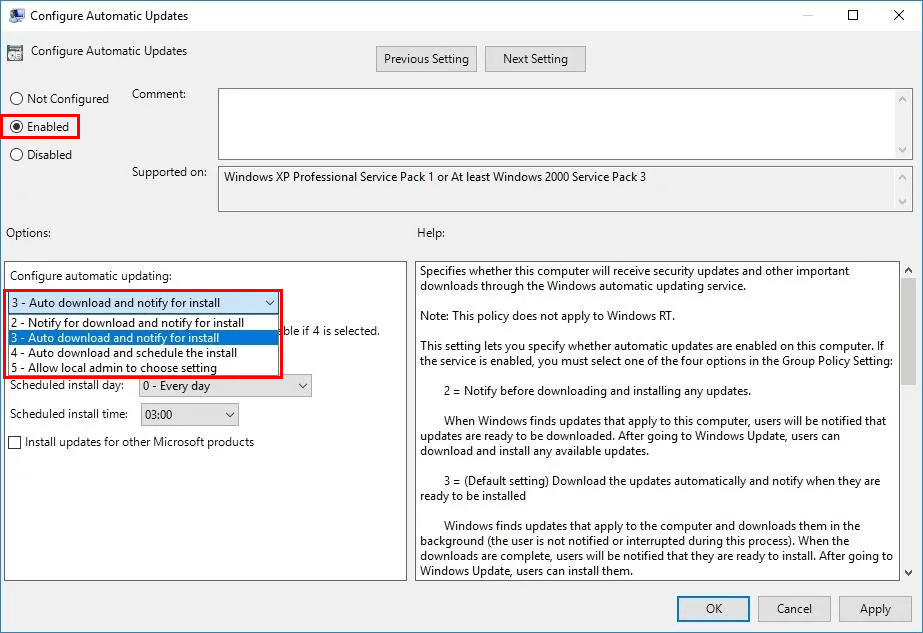
- 2 - Notify for download and notify for install: Windows will inform you when updates are ready for download, and you can manually download and install them at your convenience from Windows Updates.
- 3 - Auto download and notify for install: This is the default update setting. Windows will automatically download updates in the background and notify you when they are ready for installation. The installation won't interrupt your ongoing activities.
- 4 - Auto download and schedule for install: Updates are automatically downloaded, and you can schedule when the installation takes place. Note that if a restart is required, Windows will perform it automatically, providing a warning and an option to delay it if you're logged in.
- 5 - Allow local admin to choose setting: This option allows local administrators to use the Windows Update feature to configure it according to their own needs. However, there’s one option they won’t be able to set, and that’s disabling Automatic Updates.
3. You can also configure other updating settings if you opt for the 4 method, like install during automatic maintenance, schedule install day/time, select to automatically update other Microsoft products, etc. Then, click OK to save the changes.
▪ To further configure automatic maintenance, use the Maintenance Scheduler by navigating to Computer Configuration -> Administrative Templates -> Windows Components.
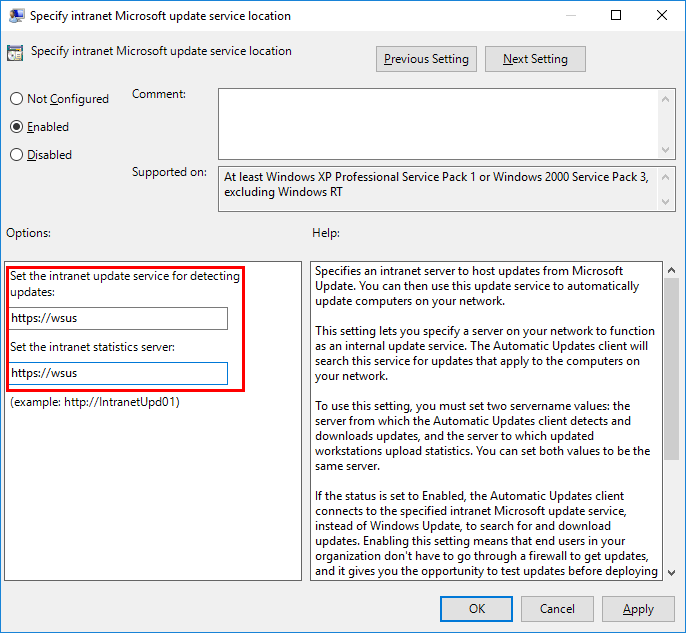
▪ Optionally, if you're using a WSUS server, set the "Specify Intranet Microsoft update service location" policy to point to the WSUS server for both updates and statistics. Enable the policy and specify your WSUS server accordingly.
Step 4. Link the Policy
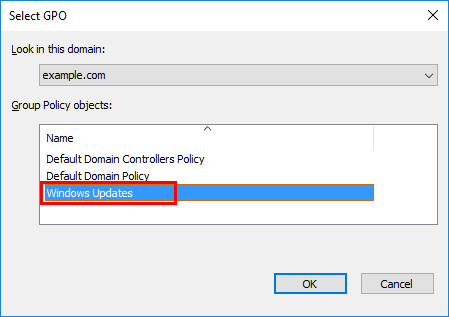
1. After you have configured the GPO, close the Group Policy Management Editor and return back to the Group Policy Management window. Right-click the container or OU to which you want to link the policy and select "Link an Existing GPO...".
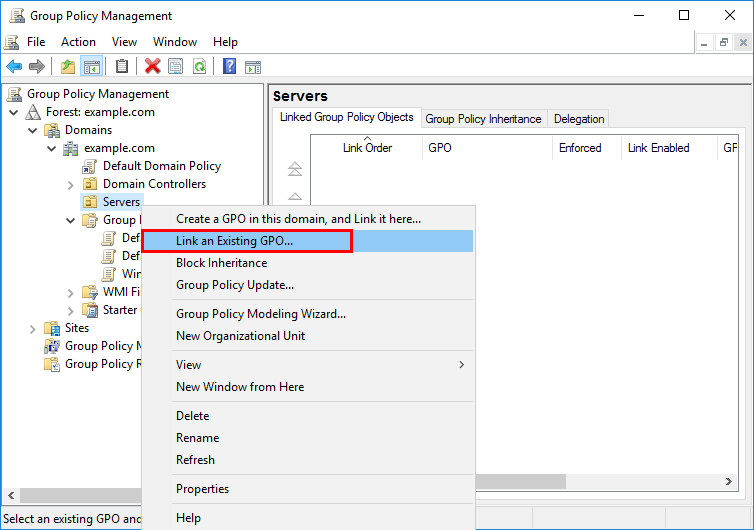
2. On the pop-up screen, pick the Group Policy object that you have just created. Here is Windows Updates.
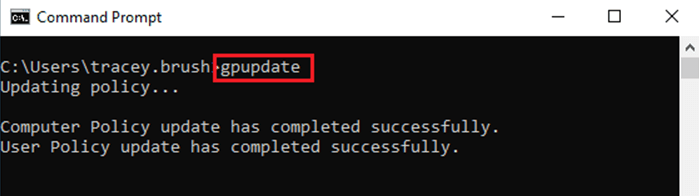
Step 5. Update Group Policy
It may take up to 90 minutes for the GPO to apply to the computers within the linked OU. If you wish to apply it immediately, run the gpupdate command in Command Prompt to enforce Group Policy for Windows Updates on Server 2016 now.
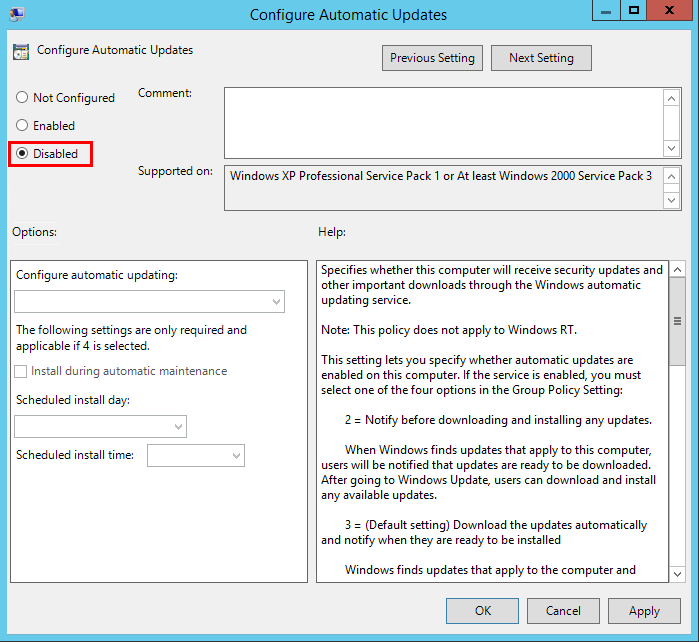
Part 2. How to Let Windows Server 2016 Disable Automatic Updates via Group Policy
That’s all about how to configure Windows Updates on Server 2016 using Group Policy. If you wish to disable Windows Update with Group Policy on Server 2016, you can navigate to the Configure Automatic Updates directory likewise, and choose Disabled to turn it off. Then, click OK.
Backup Windows Server Automatically to Prevent Automatic Update Issues
It is not quite complicated to configure Group Policy for Windows Updates on Server 2016. However, it is strongly suggested to create regular system backups to avoid incompatibilities or system damage caused by automatic updates. AOMEI Backupper Server is an excellent option. It is widely compatible with Windows Server 2022/2019/2016/2012/2011/2008, including R2.
This software can help you create system backup and quickly perform system restore in Windows Server 2016 to a previous state in the event of a problem with the automatic update.
💦It supports a wide range of storage devices, including internal/external hard drives, NAS, network shares, cloud services, etc.
💦Apart from system backup and restore, it extends its functionality to files & folders, partitions, and disks.
💦It enables you to create a recovery drive for Server 2016 and perform system restoration in WinPE to rescue a malfunctioning machine.
Get this tool installed on your computer, and learn how to take an image backup of Windows Server 2016 with the following steps. For unlimited servers and PCs, please try its Technician Plus edition.
Step 1. Run AOMEI Backupper Server, select Backup, and choose System Backup to backup your Windows Server OS. You can also use Disk Backup to backup entire disks.

Step 2. All the system files, settings, applications, and personal data in system partitions will be automatically selected as the source, you just need to select a destination path.

Step 3. (Optional) Create an automatic system backup by clicking Schedule Backup and choose a backup frequency like Daily/Weekly/Monthly/Event triggers/USB plug in.

Step 4. Click Start Backup to create a Windows Server image backup now.
Summary
On this page, how to configure Group Policy for Windows Updates on Server 2016 is presented in detail. Also, it covers how to let Windows Server 2016 disable automatic updates via Group Policy as well. You can navigate to the corresponding chapter and then find useful information.
For system security, you can use reliable backup software like AOMEI Backupper Server to back up server system or other data regularly. What’s more, you can use this tool to migrate data and use SSD for OS and HDD for storage with just a few clicks.

