How to Transfer Photos from iPhone to iPhone without iCloud
This post shows 4 ways about how to transfer photos from iPhone to iPhone without iCloud. You can partially or fully transfer photos from iPhone without iCloud.
By Clara / Updated on May 14, 2026
I'm curious about how to transfer photos from iPhone to iPhone without iCloud. Any way to transfer photos between iPhones without relying on iCloud? Looking for a direct method.
- Question from Reddit
When you get a new iPhone, you might need the photos from the old iPhone. iPhone could take high-quality photos, which might eat much storage on the iPhone. And you might have also saved many beautiful pictures from apps. To copy photos to new iPhone, iCloud would be not so convenient for the free storage for iCloud is just 5GB. You may not trust iCloud, after all, it will upload your photos to the Server.
If you want to transfer photos from old iPhone to new iPhone without iCloud for iCloud storage is almost full, you could use the 4 methods in this passage to transfer your photos.

Method 1. [Easiest] Transfer Photos from iPhone to iPhone with FoneBackup
If you are looking for how to transfer photos from iPhone without iCloud, FoneBackup could be your solution. It's a professional iPhone backup software with a super simple interface. You could use it to save any/all iPhone photos to computer and then transfer them to another iPhone.
- ★ FoneTool combines more features in one:
- Quickly Transfer: FoneBackup could help you transfer 100 photos in 2 seconds.
- Preview and Select Photos: You might not want to transfer every picture you can preview and select the photos you want.
- Flexible Selection: You could not only transfer photos between iPhone with FoneBackup but also select photos from iPad or iPod Touch.
- Widely Compatible: It supports most iPhone models from iPhone 4 to the latest iPhone and would be perfectly compatible with the latest iOS.
- Completely Safe: It won't upload your photos to the Server. You will not lose any data and no one will access your data.
Steps to transfer photos from old iPhone to new iPhone
Now, you can download FoneTool and follow the guide to transfer photos to new iPhone without iCloud. This guide can also use for transferring music from one Apple ID to another.
Step 1. Connect the source iPhone to PC with USB cable > Select iPhone to PC at the bottom.
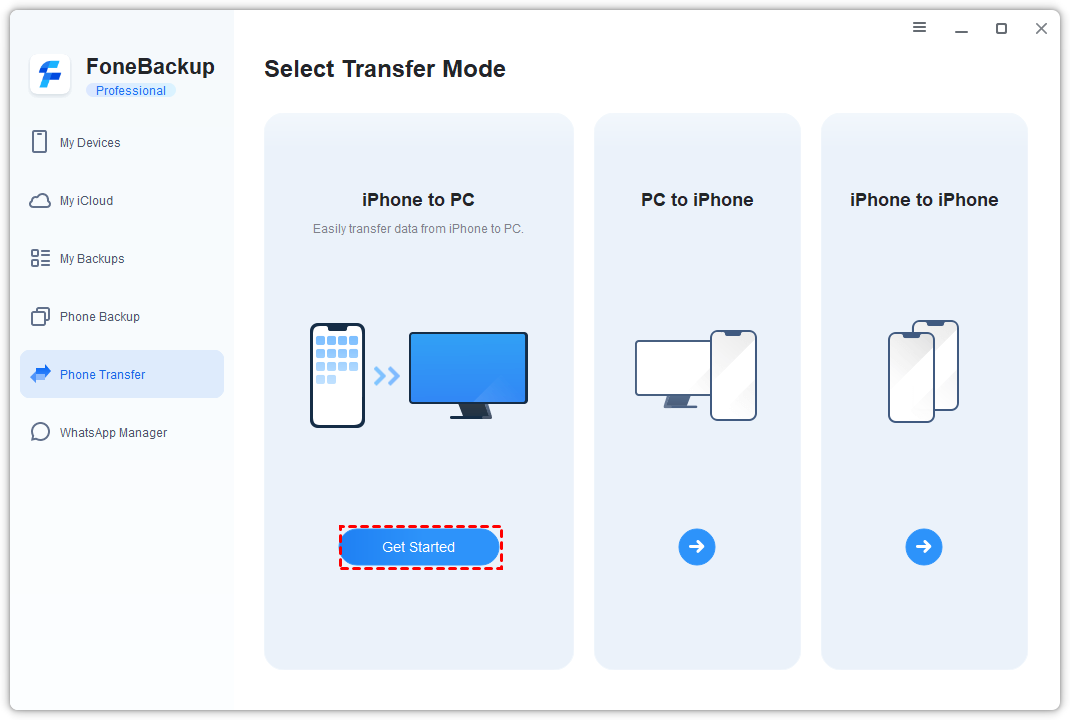
Note: As you can see from the picture, there is one option named iPhone to iPhone. It's a quick way to transfer all data from old iPhone to new iPhone.
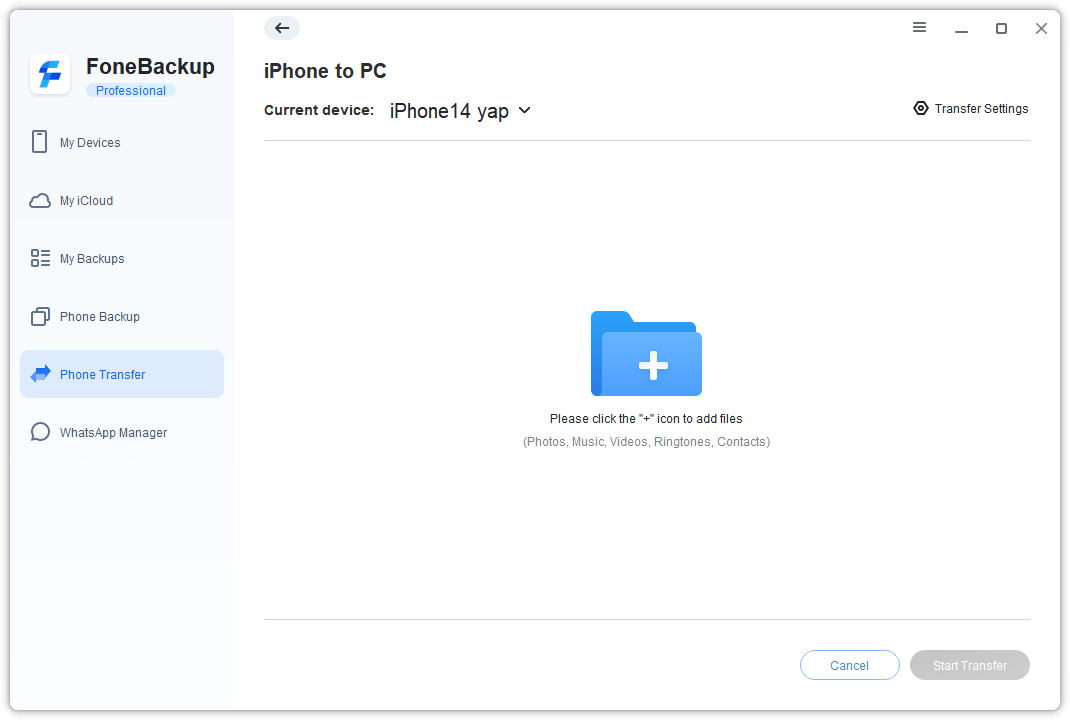
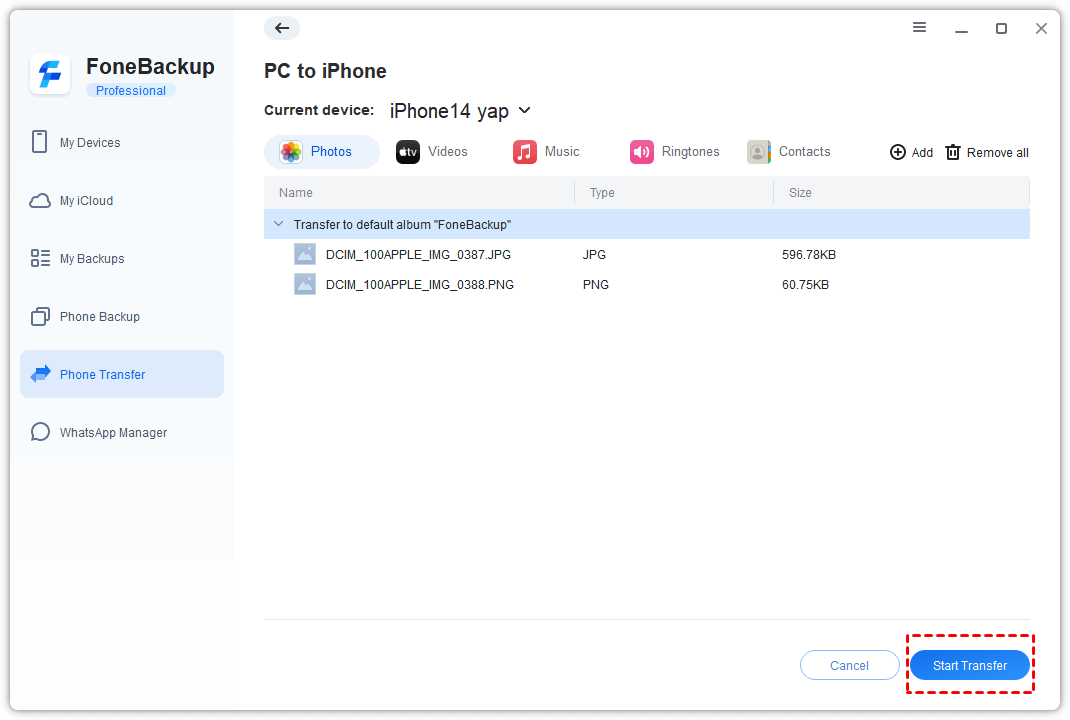
Step 2. Click the plus icon to select photos from the iPhone and then click OK.
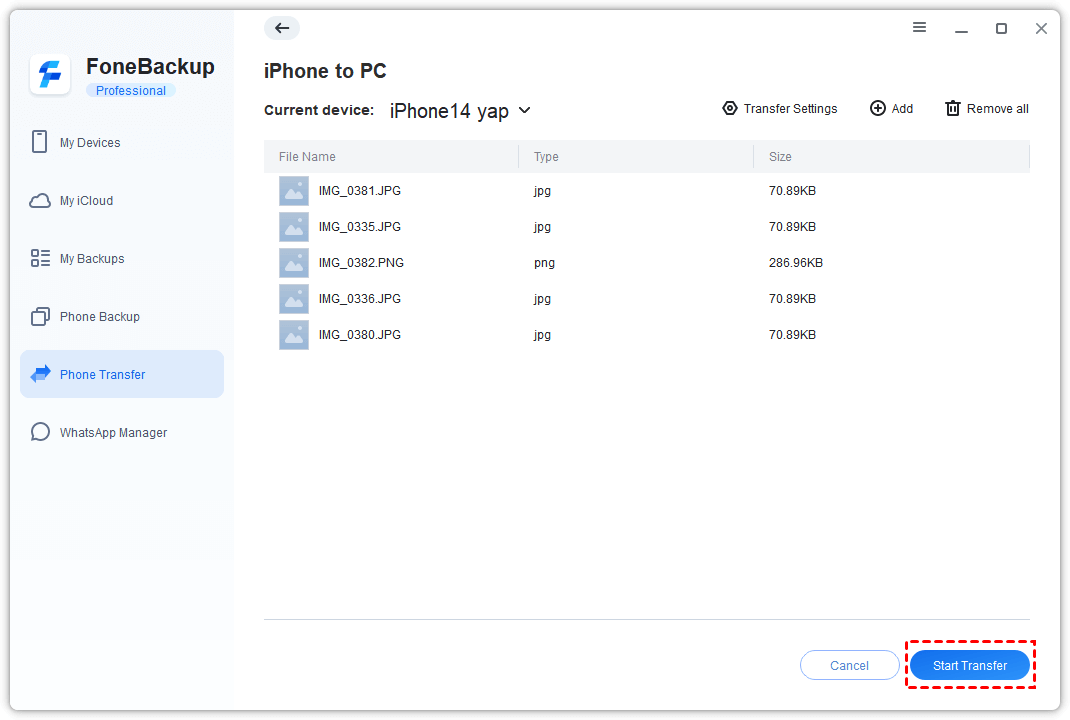
Step 3. Click Start Transfer. After the task is finished, disconnect the source iPhone. The photos could be saved on your computer.
Step 4. Connect the new iPhone to the computer and select PC to iPhone > Click the folder icon to select the photos you just exported to the computer and click OK.
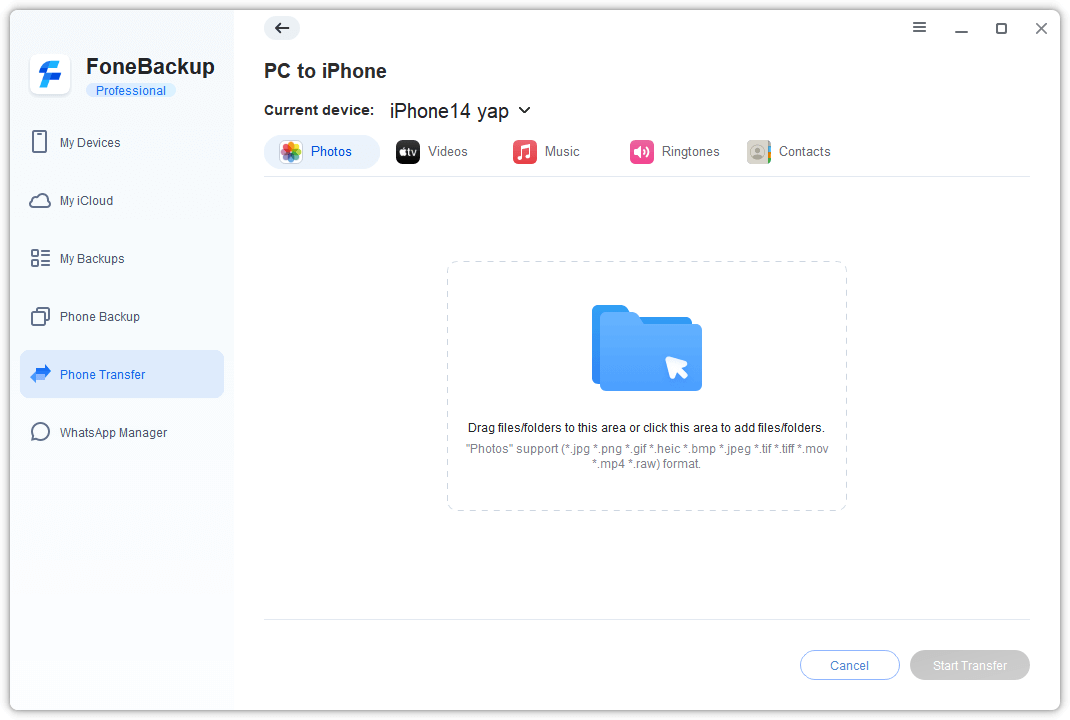
Step 5. Click Start Transfer to copy photos from iPhone to iPhone.
Tips: Saving iPhone photos to computer is important because now data disaster happens without warning. Information on your iPhone could be missing for physical damage or software harm so that you’d better keep the backup files on your PC. When you transfer the files to your iPhone with FoneBackup, these files would not cover the already existing data on your iPhone.
Method 2. Send Pictures from iPhone to iPhone with iTunes
How to transfer photos from iPhone to iPhone without iCloud? iTunes could not directly extract photos from iPhone but it could import photos from computer to iPhone. You could save iPhone photos to computer with Windows Photo first.
Step 1. Connect the source iPhone to computer running Windows 10.
Step 2. Click the Start Button to search and enter Windows Photos. Select Import from USB Device to export photos from iPhone.
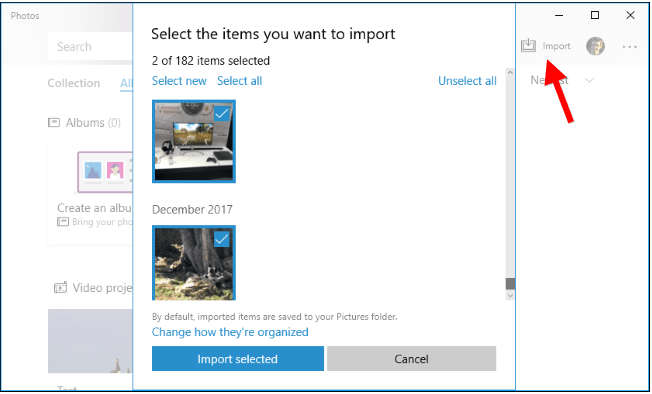
Step 3. Download iTunes. Click the Phone-shape icon in the upper-left corner to enter your iPhone Summary. Select Photos in the sidebar, find the folder of your saved photos, and click Apply.

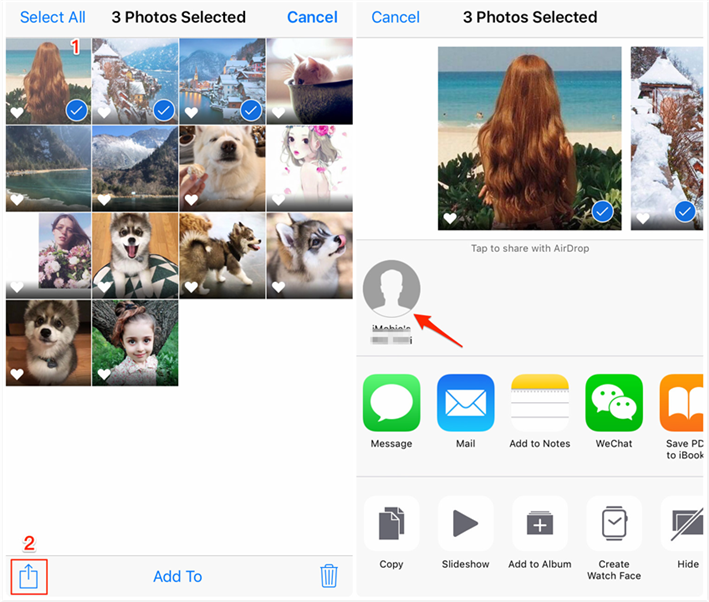
Method 3. Export iPhone Photos to iPhone via AirDrop
If you have just several photos to transfer, you could use the built-in application AirDrop to transfer photos face to face. So, how to transfer photos from old iPhone to new iPhone without iCloud or computer?
You need to enable AirDrop on the target iPhone by going to iPhone Settings > General > AirDrop and then turning on Wi-Fi and Bluetooth on both iPhones. After that, select multiple photos in Album and then tap Share. The target iPhone name would be displayed. You select the device and accept the request on the target iPhone.
Method 4. Share Photos between iPhones by Using Google Photos
Google Photos gives you 15GB of free storage for photos with original quality and unlimited free storage for high-quality photos. If you still want to use cloud tools, Google Photos would be a good choice, but you need to be aware that Google Photos shares 15GB of free storage with other Google products. Here is how to get photos from old iPhone with Google Photos:
Step 1. Open the Google Photos app > Sign in to your Google Account.
Step 2. At the top, tap Menu > Select Settings and then Back up & sync > Tap Back up & sync on or off.
If you see a message asking to allow the app to access your photos:
Open the iOS Settings app > Tap Privacy and then Photos > Select Google Photos > Select Read and Write.

Conclusion
This article introduces 4 methods about how to transfer photos from iPhone to iPhone without iCloud. Among these options, FoneBackup is a great choice for you. With the help of FoneBackup, you can transfer all iPhone data (including photos, videos, music, and more) between iOS devices, as well as iPhones and PCs. If you want to save photos to an external HDD, FoneBackup can also help you backup iPhone photos to external drive. Why not try it out?