How to Recover Deleted PNG Files [6 Free Solutions]
You are going to learn how to recover deleted PNG files on this page, including use Windows built-in tool and FastRecovery.
By Penny / Updated on March 9, 2026
Can delete PNG files still be recovered?
PNG (Portable Network Graphics) is a raster file format that supports lossless data compression. Most users usually save images and upload photos in PNG format because it’s specifically designed for high-quality image display output.
If you want to know "Can I recover deleted PNG files?", I can tell you: yes, you can. The deleted PNG file doesn't disappear immediately, you just can't access it. When you realize that the PNG file is lost, it is better to stop using the device. There are many reasons for PNG file loss you should know:
★ Deleted by accident: This is the most common reason, and most users face this problem.
★ Formatting: If the storage device is formatted without creating a backup, all data, including PNG files, will be deleted.
★ Device power failure: If the laptop is low on power, it can run out of power at any time, and you won't have time to save your files.
★ Physical damage: Physical damage can result in internal hard disk corruption and data loss.
★ Program crash: When you use Photo Editor, it may crash due to a software error and your PNG files will be lost.
How to recover deleted PNG files? Don't worry, we will provide 6 effective ways to recover PNG files easily and quickly.
How to recover PNG files on Windows 11, 10, 8, and 7
Now we can start to perform PNG file recovery, which includes Windows built-in tools and third-party professional data recovery software. Please choose the solution you need most according to your needs.
▶ Method 1. Recover the deleted PNG files from the Recycle Bin
Usually, deleted PNG files are transferred to the Recycle Bin. So before you empty it, you can recover the deleted files from your Recycle Bin, which is the easiest way to recover deleted files.
Step 1. Open the Recycle Bin.
Step 2. Then, locate the PNG image file you want to recover.
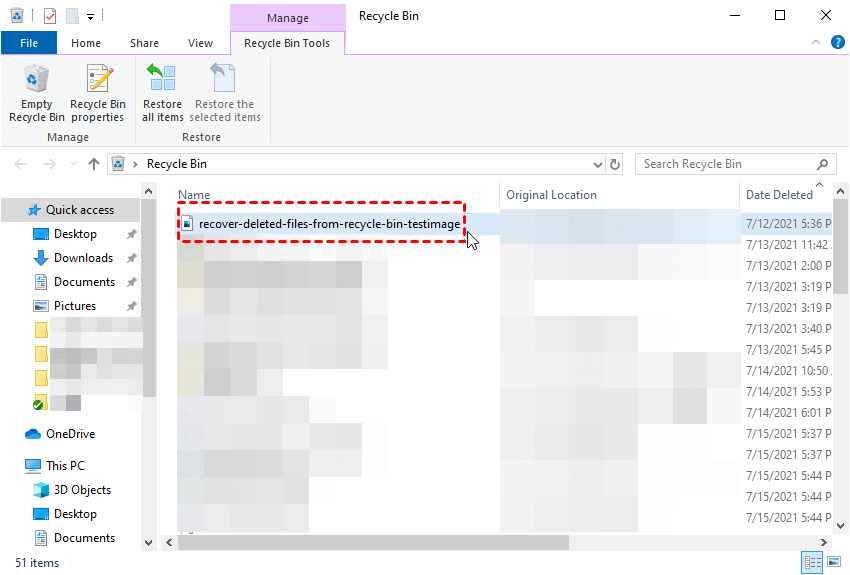
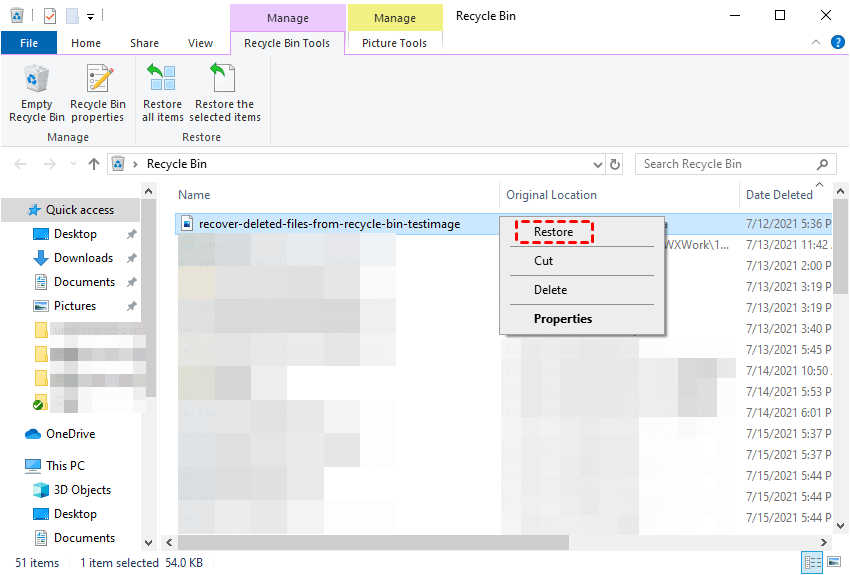
Step 3. Right-click on it and click the “Restore” button.
▶ Method 2. Try FastRecovery to recover deleted PNG files
Without a doubt, Windows File Recovery is powerful data recovery software. However, it’s not a well-designed tool for non-tech users. Aimed at recovering data on Windows, this well-designed photo recovery software, FastRecovery could help you recover deleted/lost files in HDD, SSD, USB, and other storage devices.
One of the most powerful features of this powerful photo recovery software is that you can get the original filename for the deleted PNG image files. Then there’s no need for you to open image files to check their contents.
✦ Keep the original saved path, filename, and format for the deleted files in Windows 7, 8, 10, 11, and Windows Server.
✦ Run Quick Scan and Deep Scan automatically to find all the deleted files and other lost files on your computer.
✦ Deal with deletion, disk formatting, system crashes, and other data loss scenarios. With the aid of this data recovery software, you don’t have to recover the formatted files from USB using CMD.
✦ Support NTFS, FAT32, exFAT, and ReFS file systems.
Step 1. Install and launch FastRecovery on the computer.
Step 2. Hover the mouse over the partition/disk that includes your PNG image files before deletion, then click Scan.

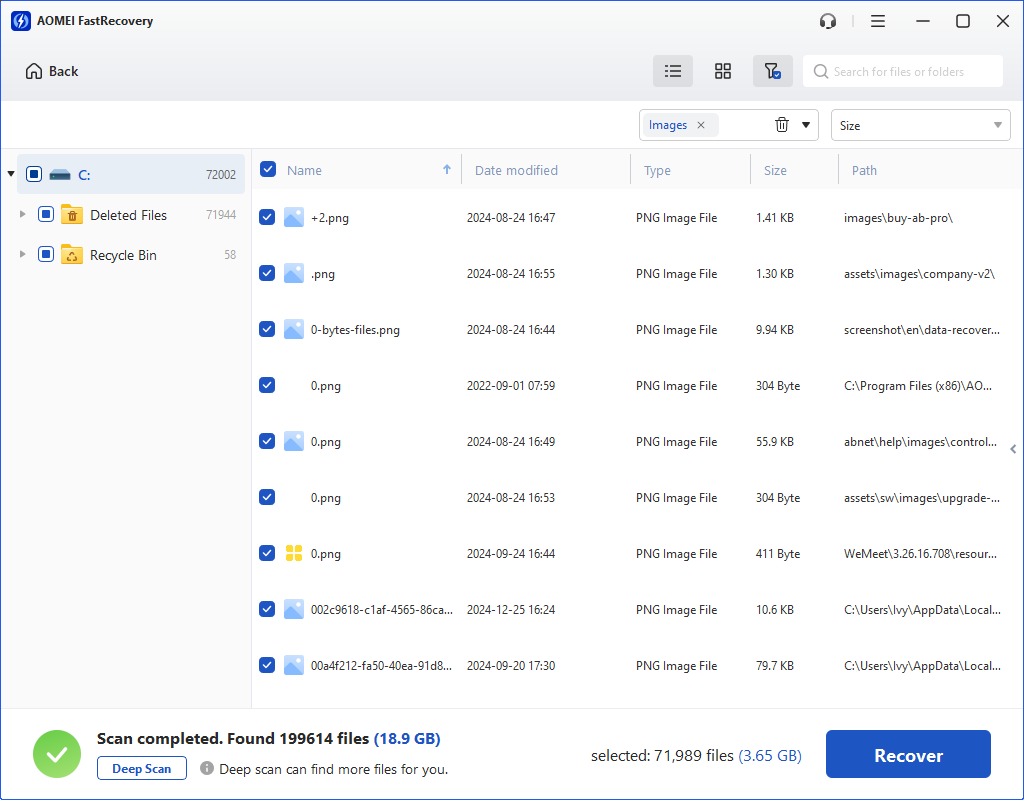
Step 3. This photo recovery software will run Quick Scan and Deep Scan automatically. Then you’ll see all the deleted PNG files and other missing files on the window.

Step 4. Confirm the scanning results and click the “Recover x files” button. If you fail to find your needed PNG files in the Deleted Files, go to Other missing files.
After the process, you’d better store these recovered PNG files in your destination path. At the same time, this excellent photo recovery software enables you to recover deleted photos from USB.
▶ Method 3. Recover lost PNG files through Windows File Recovery
So how to recover PNG files without activating File History? At the moment, seeking help from professional data recovery software like Windows File Recovery is another choice for computer-savvy individuals. Let’s take a closer look at this command-line software.
Pros:
- Recover the lost files from the local storage devices (internal and external hard drives, USB flash drives, and SD cards.)
- Recover the deleted Word, Excel, PPT, ZIP, PDF, JPG, JPEG, PNG files, etc.
Cons:
- Recover files using CMD because Microsoft hasn’t offered a graphical user interface (GUI) with you.
- Resemble the following basic command format with designated mode and switches.
- winfr source-drive: destination-drive: [/mode] [/switches]
- Windows File Recovery is only compatible with Windows 10 and above.
Notes:
- The source drive (where to store your PNG files before deletion) is different from the destination drive (where to store recovered deleted PNG images files).
- The Extensive, Regular, Segment, and Signature modes could support NTFS, FAT, exFAT, and ReFS file systems.
These steps describe how to recover deleted PNG files with CMD.
Step 1. Click “This PC” > right-click on the source drive > “Properties.”
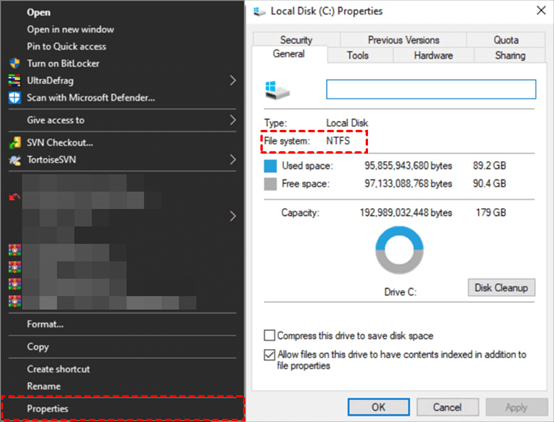
Step 2. Select a recommended mode according to the file system of your source drive and data loss scenarios.
|
File system |
Scenarios |
mode |
|
NTFS |
Deleted recently |
Regular |
|
NTFS |
Deleted for a while |
Extensive |
|
NTFS |
Formatted disk |
Extensive |
|
NTFS |
corrupted disk |
Extensive |
|
FAT and exFAT |
Any |
Extensive |
Step 3. Select your needed switches from the following form.
|
Switch |
Description |
Supported modes |
|
/y: |
Recover specific extension groups, comma-separated |
Signature |
|
/p: |
Saves a log file of the recovery operation in a different location than the default location on the recovery drive (for example, D:\logfile). |
All |
|
/a |
Overrides user prompts, which is useful in a script file. |
All |
|
/u |
Recovers undeleted files, for example, from the Recycle Bin. |
NTFS Segment |
|
/k |
Recovers system files. |
NTFS Segment |
|
/g |
Recovers files without primary data streams. |
NTFS Segment |
|
/e |
To keep your results manageable and focus on user files, some file types are filtered by default, but this switch removes that filter. |
NTFS Segment |
|
/e: |
Specifies which file types are filtered. |
NTFS Segment |
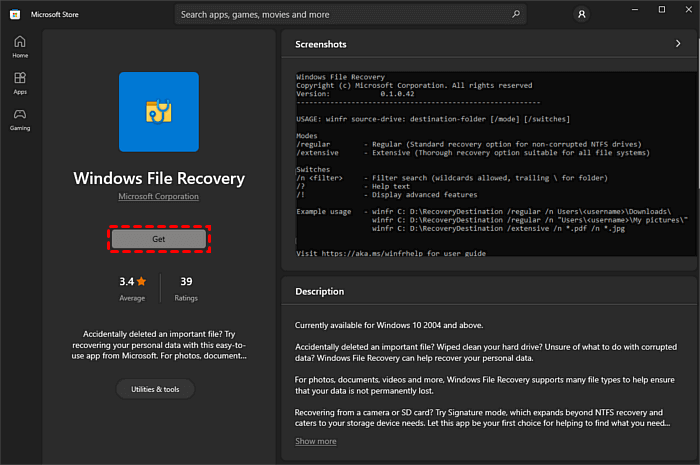
Step 4. “Get” Windows File Recovery from the Microsoft Store and install it on your PC. Then “Open” it.
Step 5. Supposed that your source drive is the C drive, the destination drive is the E drive.
❥ the basic format command line: winfr source-drive: destination-drive: [/mode] [/switches]
❥ the adjusted command line: winfr C: E: /x /y :PNG
Step 6. After copying the adjusted command line in the command prompt window, you can hit “Enter” or press “y” to continue the recovery process. You can also press the “Ctrl + C” keys to stop it.
▶ Method 4. Recover deleted PNG files from File History
The above method cannot work for those users who have emptied the Recycle Bin or pressed the “Shift + Delete” keys. This method closely links to a usable backup using File History.
File History replaced Backup and Restore in the Win 8 operating system. This feature can help you backup files in the Documents, Pictures, Music, Videos, Desktop folders, and OneDrive offline files saved on the computer.
If you needed files are deleted, lost, or damaged, you can still restore the original files from the backup. You can store backups in the external hard drive or network using File History.
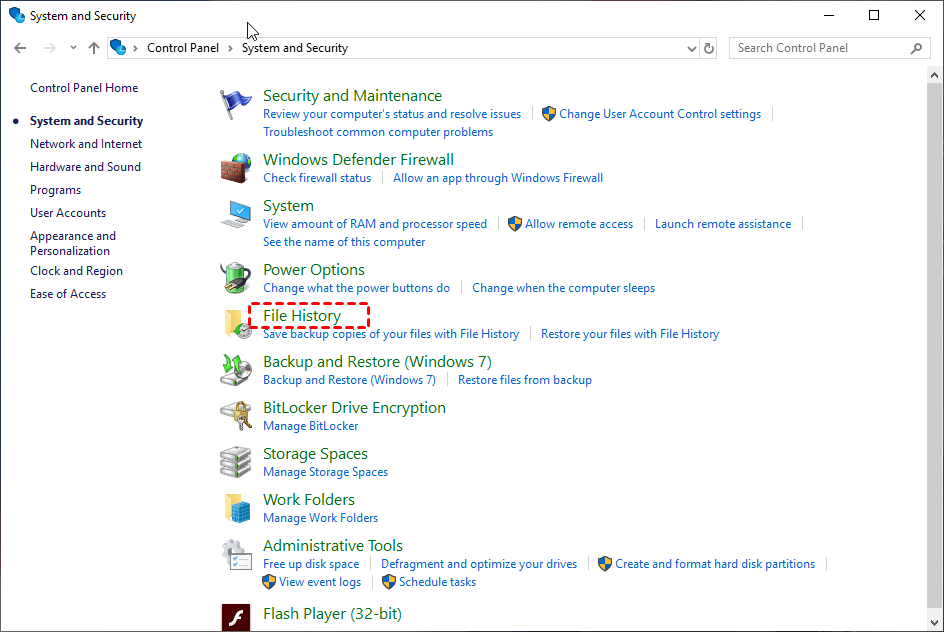
Step 1. Search “Control Panel” on your PC. After opening it, click the “System and Security” option.

Step 2. Click “File History” and select the “Restore your files with File History” option.
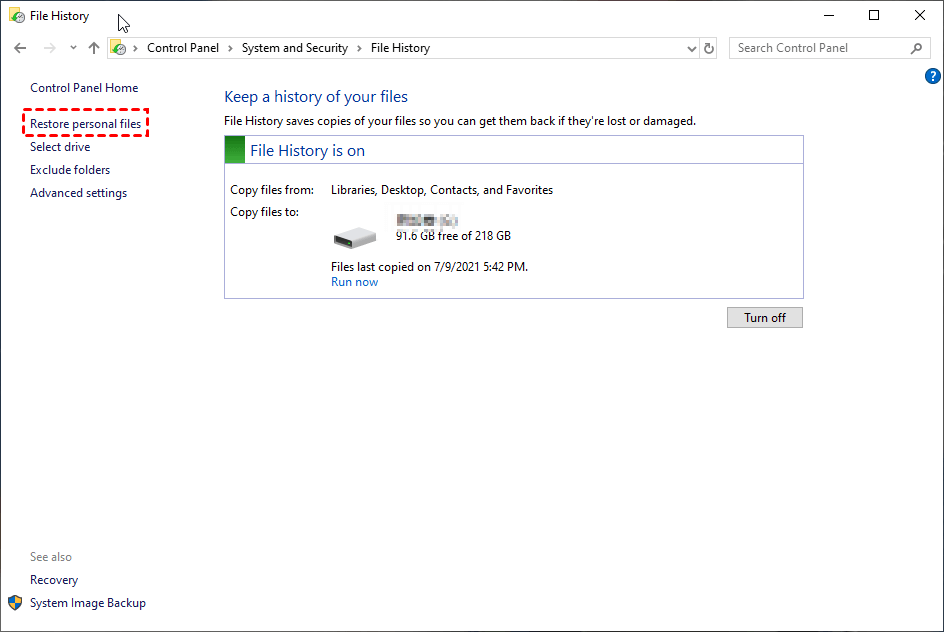
Step 3. Click the “Restore personal files” button.
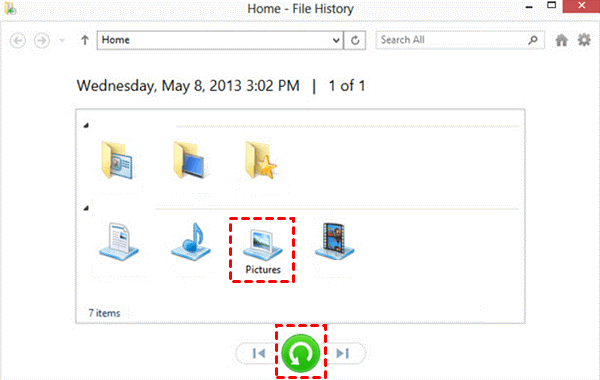
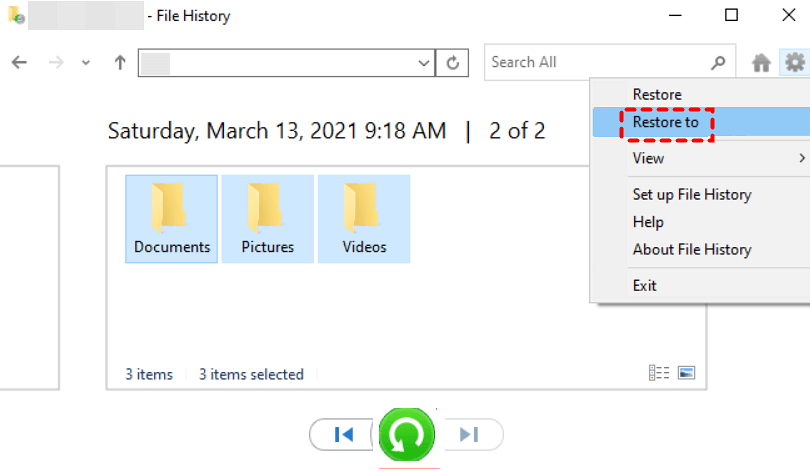
Step 4. Locate your needed PNG files by browsing these files or entering the specified filename. If you want to get them back to the original location, click the “Restore” button.
If you want to change the destination saved path, right-click “Restore” > “Restore to” to store these retrieved PNG image files.
▶ Method 5. Restore deleted PNG files by Backup and Restore
Backup and Restore is still a way to recover lost files, and you can refer to the following steps:
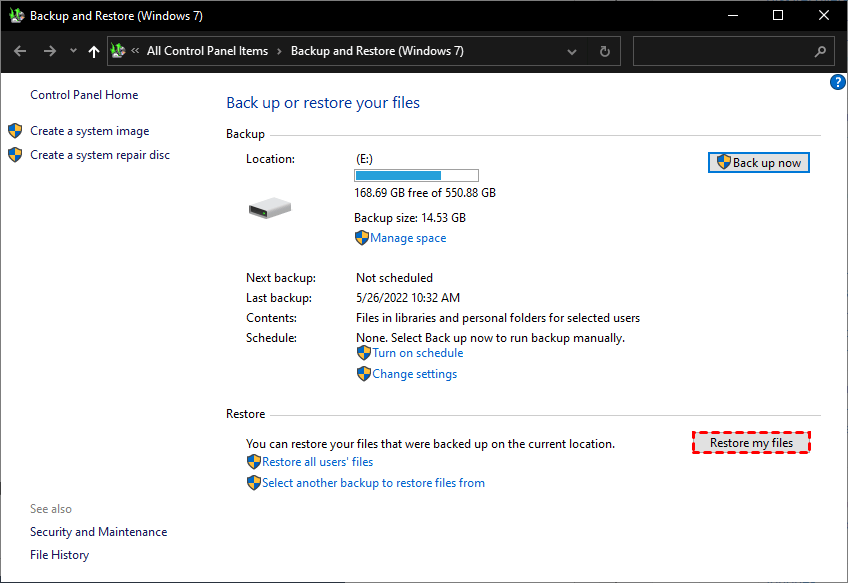
Step 1. Go to Control Panel > System and Security > Backup and Restore (Windows 7).

Step 2. Click Restore my files.
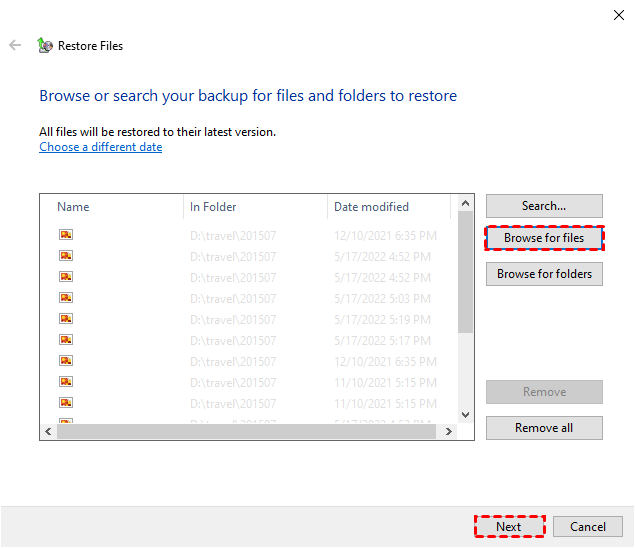
Step 3. Click Browse for files/folders > select the files you want > Next.
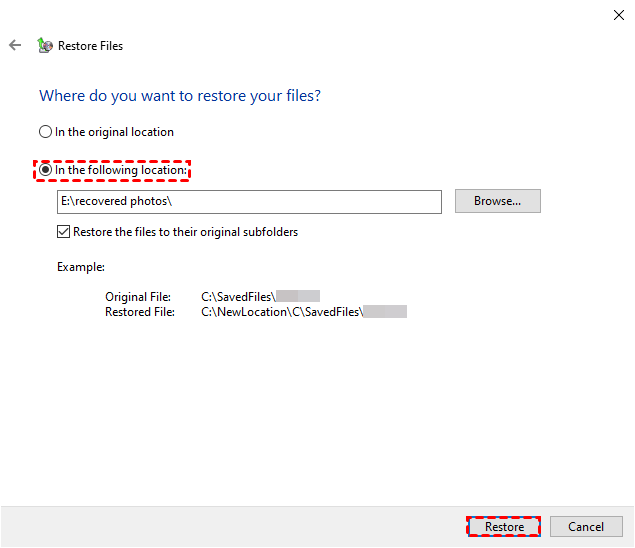
Step 4. Specify the destination to store your recovered data > click Restore. It is recommended to save the restored files on another drive but not in the original location.
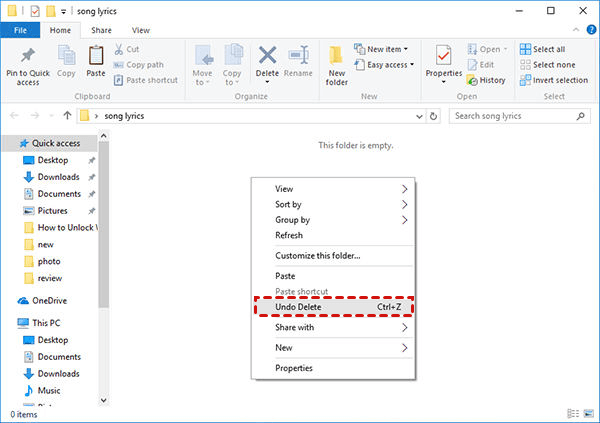
▶ Method 6. How to recover deleted PNG files via Undo Delete
In addition, you can make use of the Undo Delete option to undo a deletion in File Explorer. Navigate to the folder from where you deleted your files > Right-click anywhere inside the folder > Choose Undo Delete option.
Wrapping up
How to recover deleted PNG files? This post shares four efficient methods with you to perform PNG file recovery. To begin with, you can go to the Recycle Bin to check your deleted PNG files.
If you fail to recover pictures from Recycle Bin, please try another three solutions. All in all, FastRecovery seems like your second-to-none choice.
Please follow these practical tricks to prevent data loss in the future.
- Think twice before deleting your files or folders or emptying the Recycle Bin.
- To improve file recovery on Windows, you can store backups in portable devices or other partitions.
- Utilize the Windows features or free backup software-AOMEI Backupper to make backups in time.
FAQs about how to recover deleted PNG files
Here are some FAQs about recovering deleted PNG files that you can refer:
Q: How to recover PNG files from Recycle Bin?
First, go to the Recycle Bin. Then, select the PNG file you want to recover. Next, right-click on the PNG file and select Recover.
-
Q: Are deleted PNG files gone forever?
-
When you delete PNG files on Windows and empty the Recycle Bin, the files are not deleted immediately. The deletion simply removes a "path" to the file, and the data can be found using FastRecovery.
-
Q: What should I do immediately after realizing the files are deleted?
-
Stop using the device to prevent overwriting deleted data. The more you use the storage, the higher the chance that new data will overwrite the deleted PNG files.
-
Q: How can I prevent accidental deletion in the future?
-
Schedule automatic back up your important files. Additionally, double-check before deleting files, and consider using cloud storage services that provide version history.