3 Ways: How to Solve Windows Server 2019 Memory Leak
You can learn about three ways to find and fix Windows Server 2019 memory leak issues and a complete backup strategy is recommended to you.
By Miya Updated on December 5, 2023
How Do I Find A Memory Leak In Windows Server 2019?
In computer programming, a Windows Server 2019 memory leak occurs when a program or system fails to release memory that is no longer needed, resulting in a gradual depletion of available memory resources. This can lead to performance issues, system slowdowns, and ultimately, system crashes or instability.
If you encounter a memory leak issue in Windows Server 2019, it is advisable to diagnose and address the problem by applying any available updates or patches from Microsoft, checking for known issues or hotfixes related to memory leaks, and potentially seeking assistance from technical support or the Windows Server community for further troubleshooting.
Here are some ways to get how to check memory leak in Windows Server 2019.
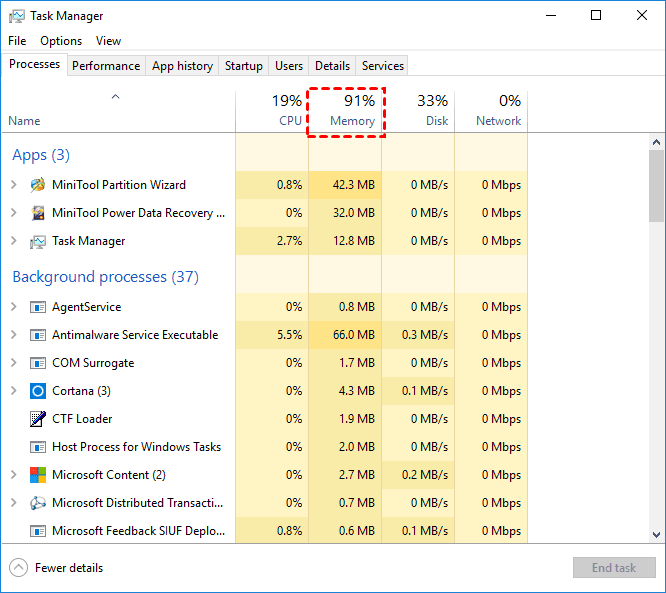
Way 1. Use Task Manager
Step 1. Open Task Manager (Ctrl + Shift + Esc).
Step 2. Go to the Processes tab.
Step 3. Click on the Memory column to sort processes by memory usage.
Step 4. Identify any process with continuously increasing memory usage.
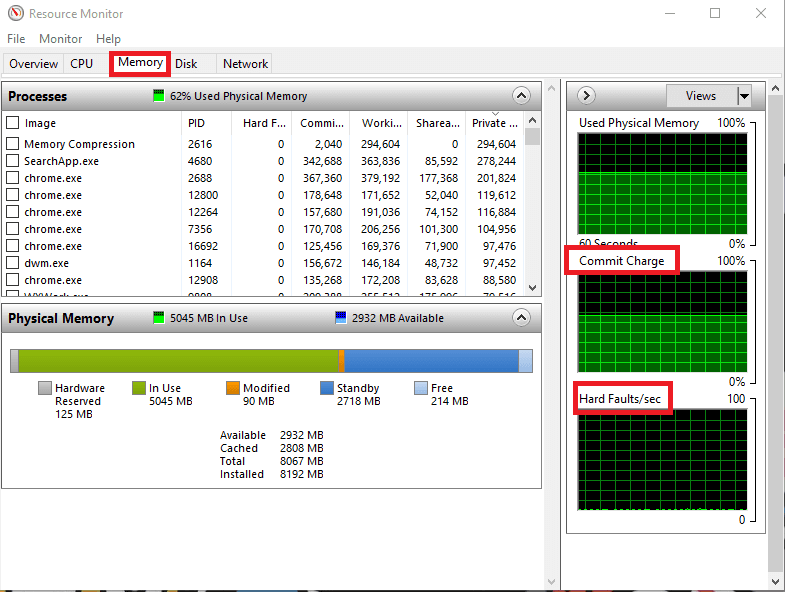
Way 2. Check Resource Monitor
Step 1. Open Resource Monitor (resmon.exe).
Step 2. Go to the Memory tab.
Step 3. Look for processes with high Commit (KB) or Working Set (KB) values.
Step 4. Pay attention to the Hard Faults/sec column.
Way 3. Review Event Viewer
Step 1. Open Event Viewer (eventvwr.msc).
Step 2. Navigate to Windows Logs> System.
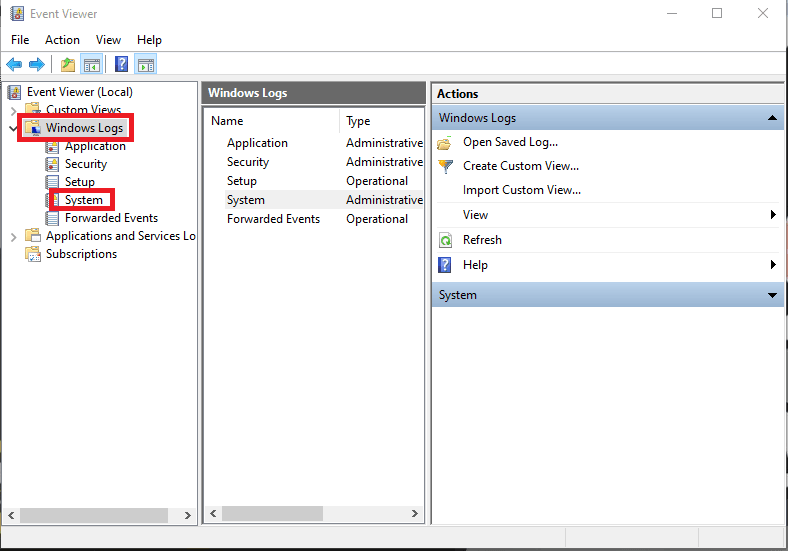
Step 3. Look for events with Memory or Resource-Exhaustion-Detector as the source.
Way 4. Use Performance Monitor
Step 1. Open Performance Monitor (perfmon).
Step 2. Add counters related to memory usage:
- Memory\Available MBytes
- Memory\Pages/sec
- Memory\Pool Nonpaged Bytes
Step 3. Observe trends and spikes in these counters.

Document your observations during each step to help identify patterns or correlations
How to Solve Windows Server 2019 Memory Leak?
Okay, after understanding the four methods to know how to find Windows Server 2019 memory leak, let us take a look at how to solve this problem. You can usually solve it through the following methods, please read carefully and try them respectively until your problem is solved.
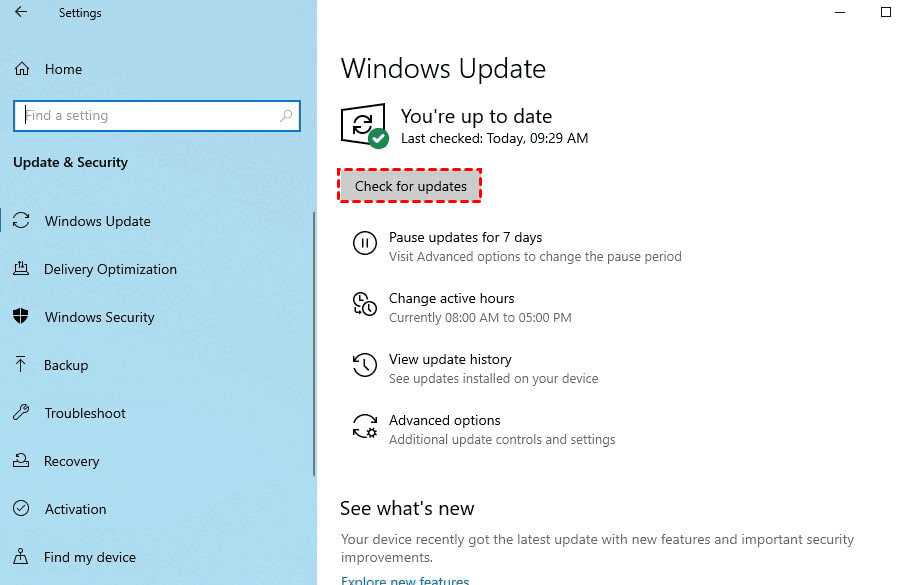
Way 1. Update Windows Server 2019
Ensure your Windows Server 2019 is up-to-date with the latest updates and patches.
- Open Settings> Update & Security> Windows Update and check for updates.
Way2. Check for System File Corruption
- Open Command Prompt as Administrator and run sfc /scannow to check for and repair system file corruption.
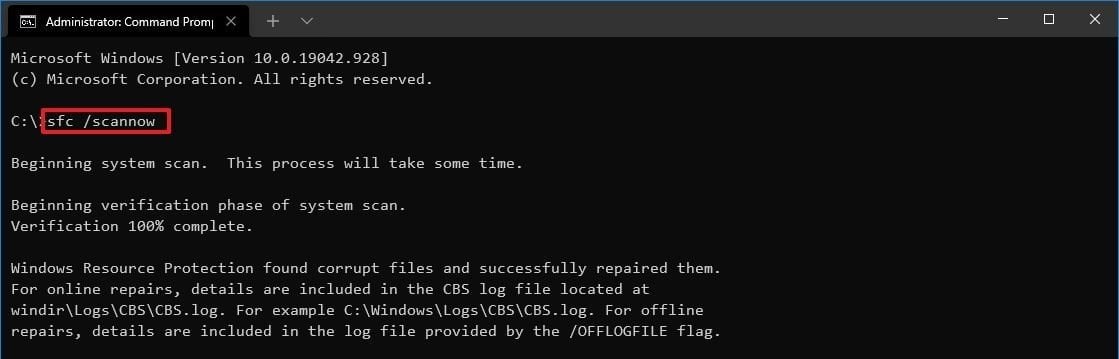
You can also click here to find out more about the usage of this command line.
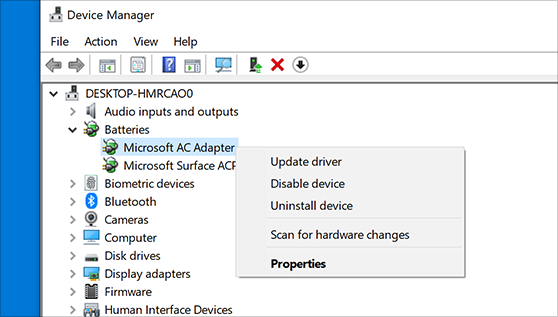
Way 3. Update Your Drive
While numerous tools are available to check for outdated drivers, it is advisable to review them sequentially, one at a time, to guarantee that each component is thoroughly updated.
Step 1. Type Device Manager into the Windows search bar and click Open when the results appear.
Step 2. Expand the relevant hardware section.
Step 3. Right-click on a specific device and choose the option Update driver.
You can also seek help from IT communities and forums to seek advice and insights from others who may be facing similar issues.
Record observations at each step to help identify patterns or correlations. If the problem persists, consider seeking professional help or contact Microsoft Support for further guidance.
Backup Your Windows Server 2019 to Prevent Such Issues
In fact, we strongly recommend that you use professional backup software to back up your Windows Server 2019. Doing so can effectively protect your data and quickly roll back to the previous normal version when a system problem occurs.
AOMEI Backupper Server excels in efficiently backing up entire disks, systems, partitions, or specific files, offering flexibility based on your backup preferences and the available disk space. Let’s take a look at the core features of this excellent backup software:
✍Automated Image Backup for Windows Server and PC:
- Compatible with Windows Server versions 2003 through 2022 (including R2) and Windows 11/10/8/7/XP/Vista.
- Schedule server backups with options such as Daily, Weekly, Monthly, Event triggers, or USB plug-ins.
✍Backup of Only Changed Files:
- Supports Incremental and Differential backup methods, capturing only changes instead of duplicating the entire content.
- Significantly reduces backup time and optimizes disk space usage, with Incremental backup having lower recovery requirements.
✍Automatic Deletion of Old Backup Images:
- Offers four cleanup methods – By quantity, By time, By daily/weekly/monthly, and By space – depending on the chosen backup strategy.
- Ensures your backup disk maintains sufficient space by automatically removing outdated backup images.
To experience the robust features of AOMEI Backupper Server, download the Windows server backup software. For comprehensive coverage across unlimited servers and PCs, consider exploring its TechPlus edition.
Best Windows Server backup software.
The trial version is active for 30 days, but for ongoing image backups on Windows Server, upgrading from the trial to the official version is recommended, providing access to a substantial discount.
After installation, follow these steps to learn how to create an image backup for Windows Server 2012 R2. The same process applies to other systems such as Windows Server 2012, 2016, 2019, and more.
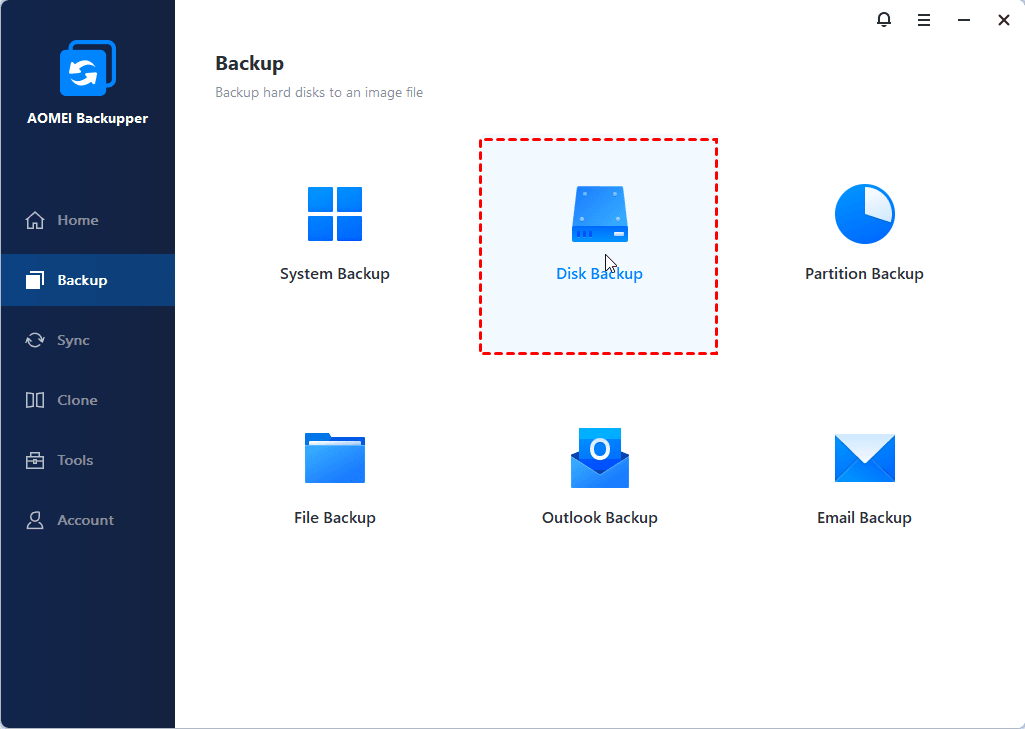
Step 1. Open the software after installation and navigate to Backup> Disk Backup on the main window. For exclusive Windows Server OS backup, opt for System Backup instead.
Step 2. If needed, differentiate the Task Name for clarity among other backups. Select + Add Disk to designate your Windows Server hard disk for the backup.
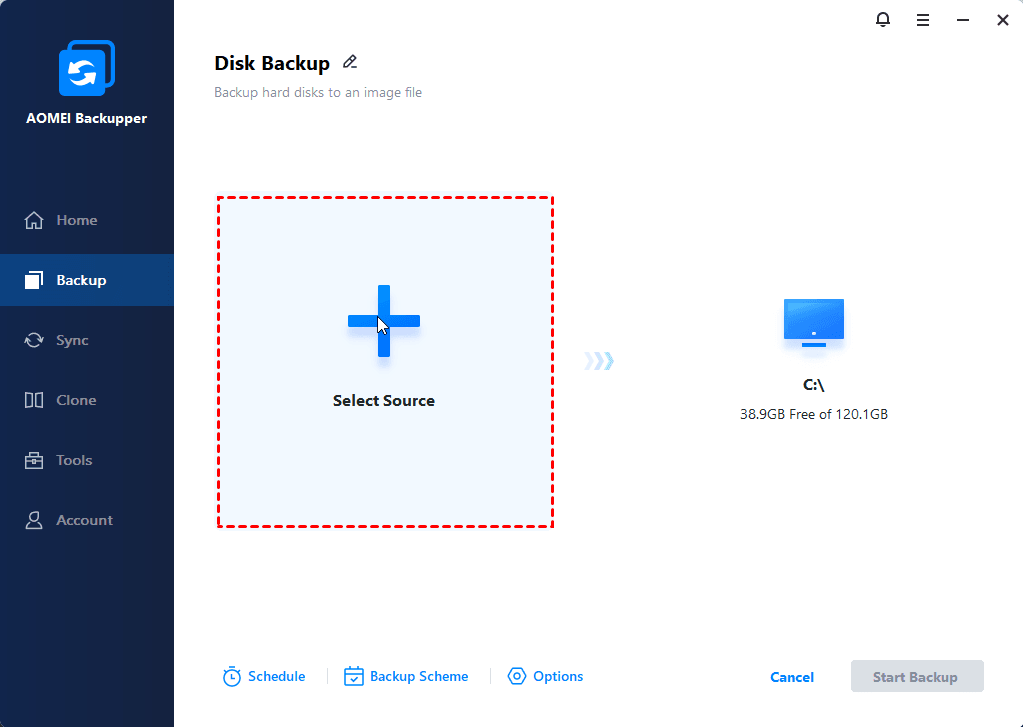
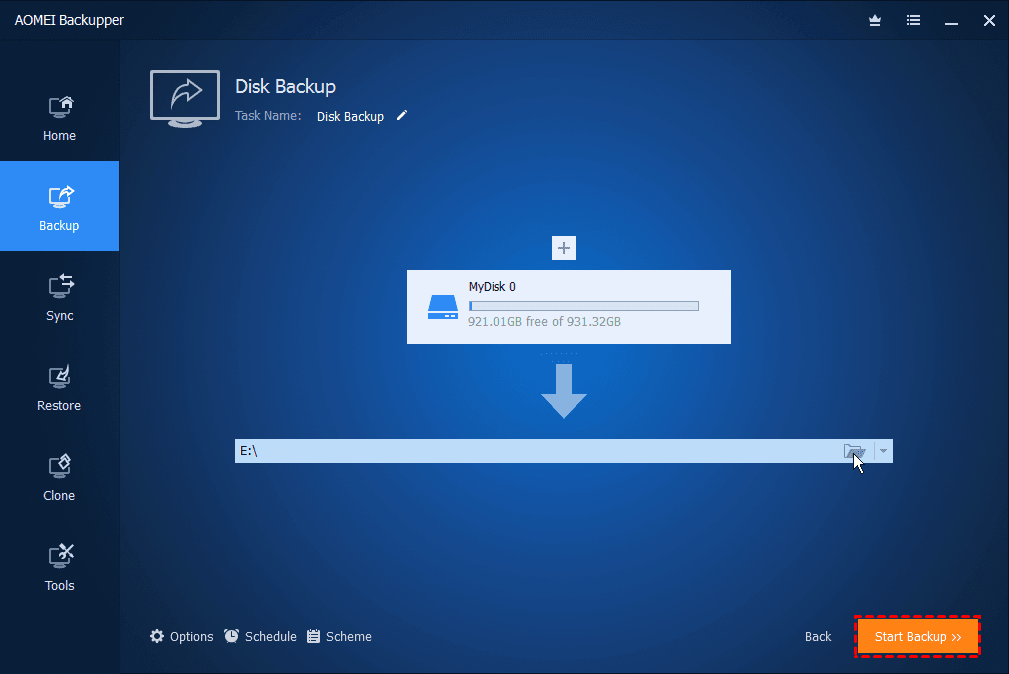
Step 3. Select a storage destination for preserving the Windows Server image backup. Options include an external disk, USB flash drive, CD/DVD, network share, or NAS device.
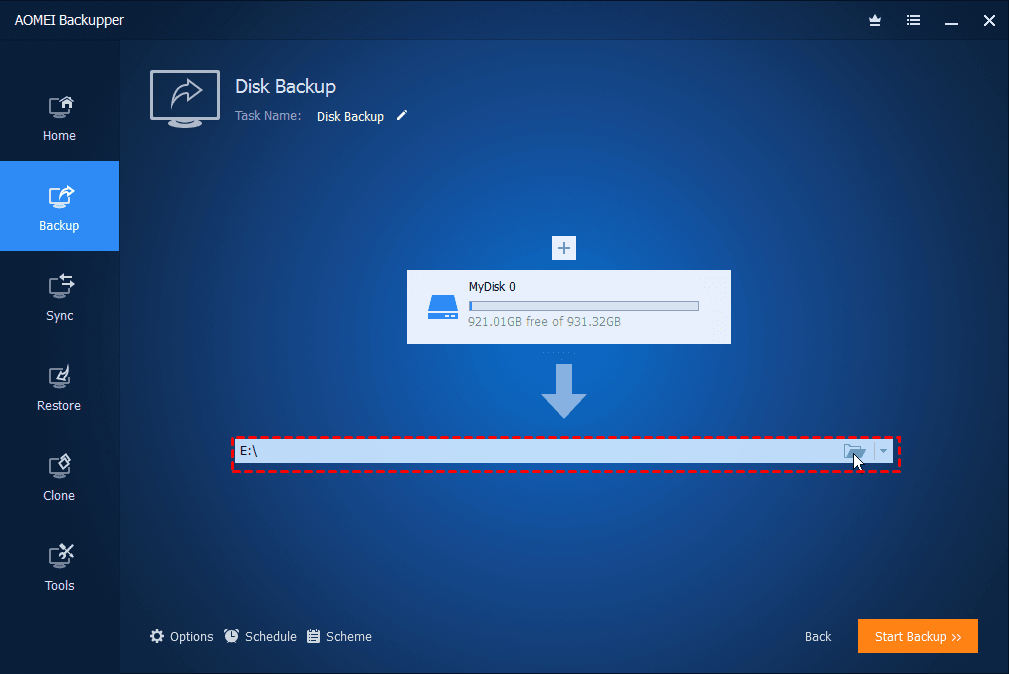
Step 4. Initiate the Windows Server image backup by clicking the Start Backup button.
ஐNotes:
Scheduled Backup: Choose from five options, including Daily, Weekly, Monthly, Event triggers, and USB plugin.
Backup Scheme: This is comprised of two components – the backup method (Full/Incremental/Differential) and the cleanup method (By time, by quantity, By daily/weekly/monthly, By space).
Additional Options: Customize this task by adding comments, compressing, splitting, encrypting (paid), and enabling email notifications. Receive email alerts or SMS notifications upon completion of the Windows Server image backup task.
Please wait patiently; the process will conclude swiftly. The duration is contingent upon the size of data on your source disk, with larger data sets resulting in longer backup times. Subsequently, you can effortlessly restore the Windows Server 2019 Image Backup from the Home tab. The following are the comprehensive steps:
Navigate to Home-> Disk Backup (using the specified task name) -> three bars icon-> Restore. (Alternatively, select Restore-> Choose Task/Image File to pick the server backup image) Opt for either Restoring the entire disk or Restoring a partition within the disk. Then, proceed by clicking Next>>. Select a destination path to store your backup image. Subsequently, click Next >>. Initiate the restoration process by clicking Start Restore>>. Check the box for Universal Restore if you intend to restore a Windows Server 2012 backup to a different machine.
Summary
This article provides three ways to find and fix Windows Server 2019 memory leak issues, please try them in order according to your needs. Finally please consider using AOMEI Backupper Server, a reliable Windows Server image backup software, to create your backup image for Windows Server 2019.
With its user-friendly interface and extensive features, it caters not only to diverse user preferences but also accommodates various needs.
Furthermore, AOMEI Backupper provides a real-time sync feature to promptly synchronize all modified files. Additionally, it offers capabilities such as backing up files to a cloud drive, transferring data between computers, cloning a Windows Server 2012 drive, and more.

