How to Enter Windows Server 2016 Recovery Mode (3 Ways)
Here are 3 different ways to boot Windows Server 2016 into recovery mode, let’s start to see the details.
By Maggie Updated on July 3, 2023
Why do you want to enter Server 2016 recovery mode?
Recovery Mode for Windows Server 2016 refers to a special boot mode that allows administrators to fix failures or problems with the operating system. When a Server encounters problems that prevent it from booting properly, recovery mode can be used to try to resolve them.

There are several reasons why you might want to boot Windows Server into recovery mode:
☛Fix Boot errors: such as blue screen errors or continuous restart loops.
☛Uninstall problematic Windows updates: incompatible or faulty device drivers can cause system instability or prevent proper booting.
☛Restore Server to a previous restore point: this can be helpful if recent changes or updates have caused problems.
☛Access Safe Mode boot options: you can perform tasks such as checking disk integrity, repairing the boot configuration, or resetting system settings.
☛Virus or malware removal
No matter whether you want to enter Server 2016 recover mode or want to boot into Windows Server 2012 recovery mode, here are some fixes for you.
How to boot Windows Server into recovery mode
Whatever your reason for needing to boot Windows Server 2016 Recovery Mode, you can use refer to the below common methods:
Option 1. Boot to Windows Server 2016 Recovery Mode Without Installation Media (DVD or USB)
Step 1. Press the power button to boot your Server. When the white circles start displaying, press the power button to power off the Server.
Step 2. Power up the Server again. Then turn it off when the boot circles show up.
Step 3. When you start the Server the third time, it will initiate Preparing Automatic Repair. This procedure may take between 2 to 5 minutes (depending on your Server).

Step 4. Then it will boot to another page to Choose an option, and click Troubleshoot.
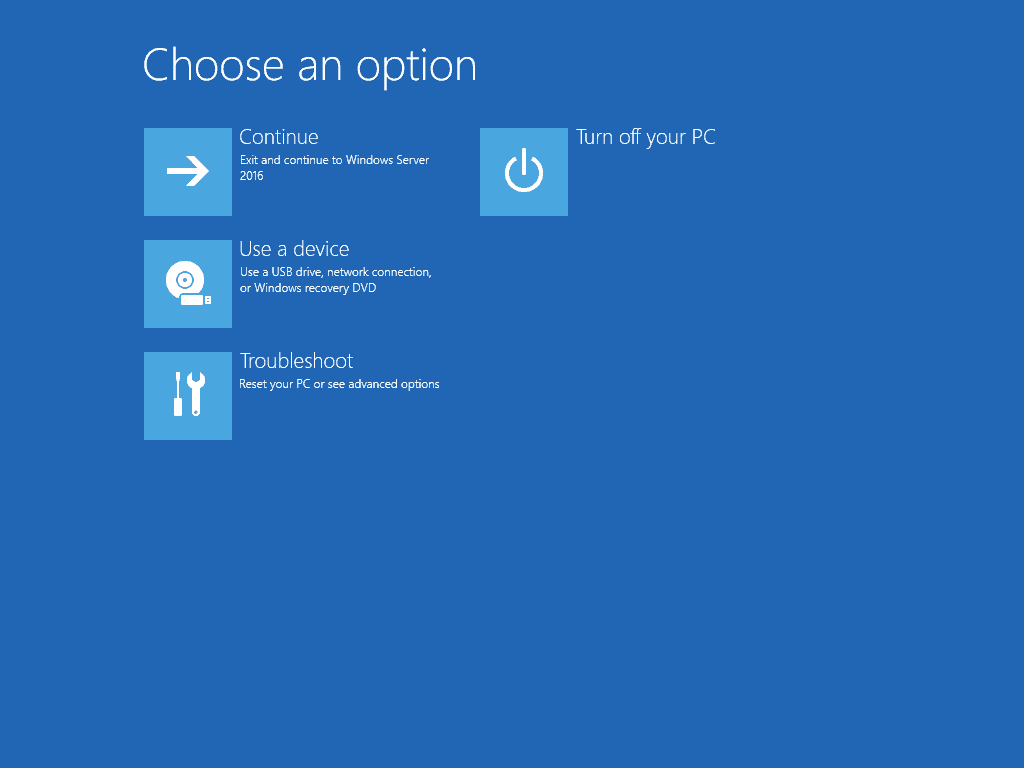
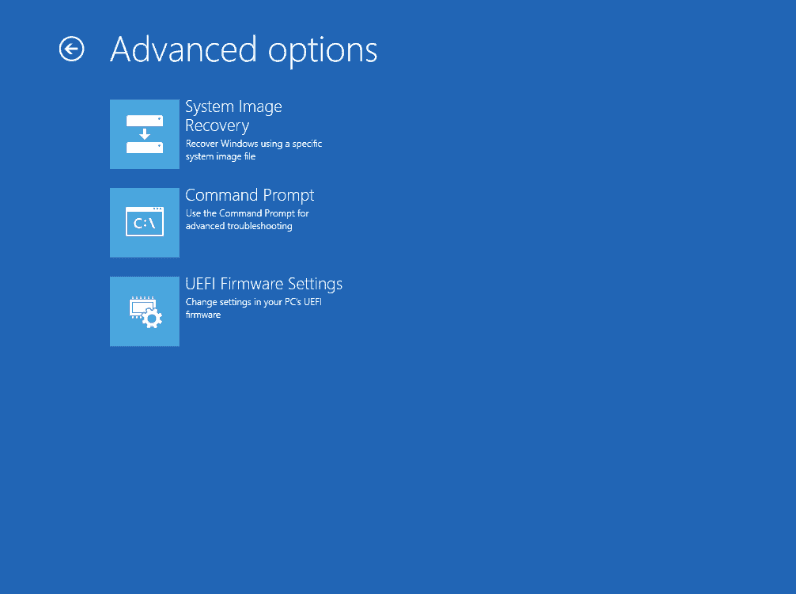
Step 5. When you click Troubleshoot, then Advanced options screen below will display.
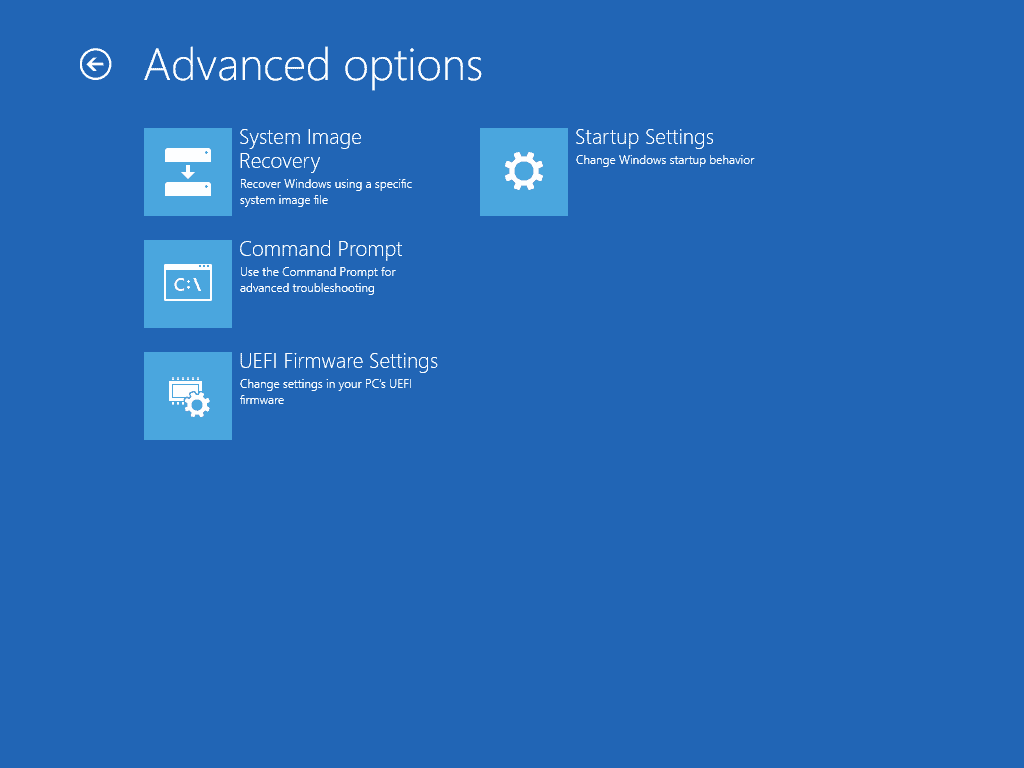
✍Warmly note: The options are explained below:
ºSystem Image Recovery: Click this option if you previously enabled system restore and have available restore points.
ºCommand Prompt: This will load a command prompt. You can then run cmd commands. One very useful command to fix most problems is DISM.exe /Online /Cleanup-Image /Restorehealth.
ºUEFI Firmware Settings: When you click this option, your Server will boot to UEFI BIOS.
ºStartup Settings: This gives you options to display Safe mode boot options.
Option 2. Boot to Windows Server 2016 Recovery Mode from Installation Media
Step 1. Insert the media into your Server (USB or DVD). Then modify your boot sequence to boot from the above media first.
Step 2. Power up your Server. Then make sure to boot from your inserted CD/ DVD. And then press any key to continue.
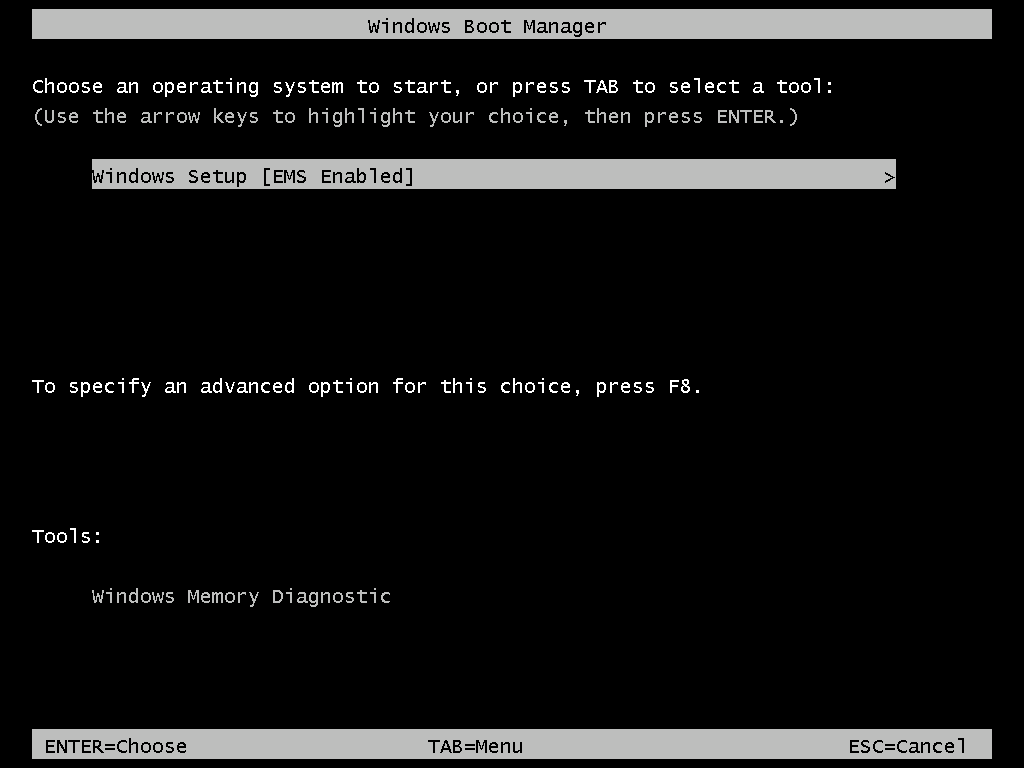
Step 3. At Windows Boot Manager window, select Windows Setup [EMS Enabled]. Then press Enter on your keyboard.
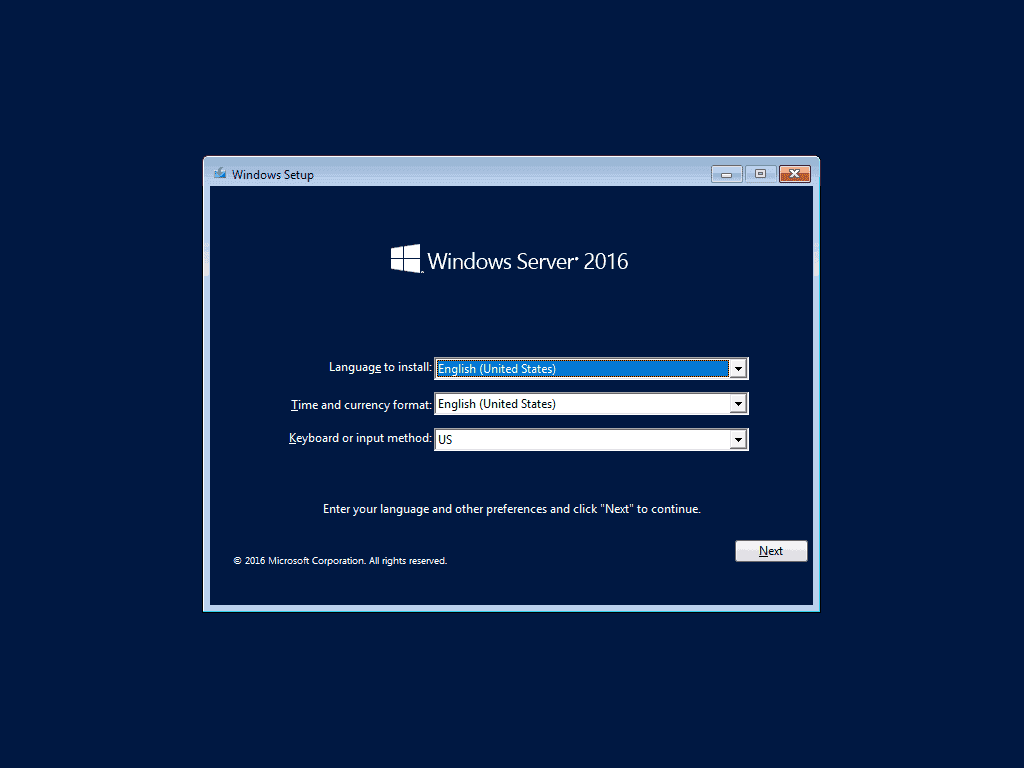
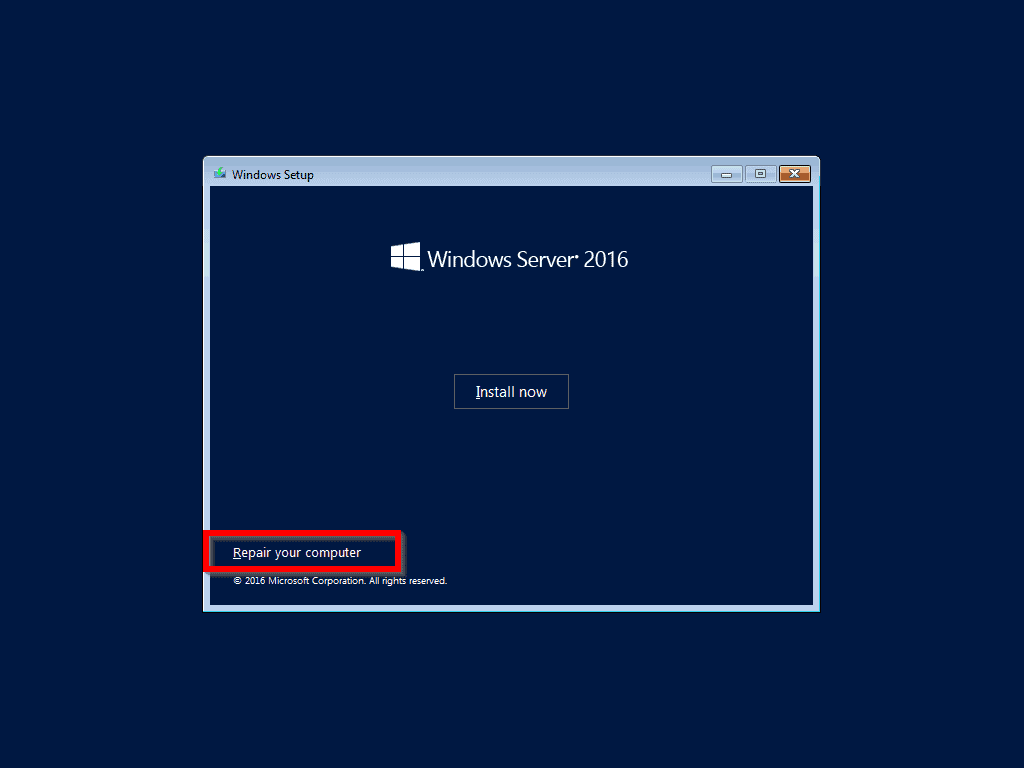
Step 4. At Windows Server 2016 installation screen, click Next.
Step 5. Then click Repair your computer button.
Step 6. After about a minute, Recovery Mode will be displayed. This is the same page from booting to Recovery Mode using the first method.
Step 7. Like in the first method, to display more Recovery Mode options, click Troubleshoot. It offers the 3 options same as option 1 but Startup Repair is not included.
Bonus tip: boot into recovery mode on Windows Server 2016 via recovery disk
Generally speaking, the above 2 options can help you boot into Server 2016 recovery mode. However, if you cannot boot your PC normally, or you want to restore your Windows Server 2016, you can turn to a more professional software----AOMEI Backupper Server. It is a full-featured backup and restore software that enables you to create a recovery drive and restore system in WinPE to rescue a malfunctioning machine.
✔It works on a wide range of Windows OS, including Windows Server 2003, 2008, 2011, 2012, 2016, 2019, 2022 (including R2), Windows SBS 2003, 2008, 2011 and Windows 10, 8.1, 8, 7, Vista, XP.
✔It supports various storage devices, not only internal/external hard drive, but also NAS, network share, cloud service, etc.
✔In addition to system backup and restore, it also applies to file & folders, partitions and disks. Also, it allows users to create a WinPE disk clone.
✍Note:
1. Before you start, please connect your USB drive to your computer and make sure it can be detected properly.
2. Download AOMEI Backupper and lauch it.
Part 1. Create a bootable disc media
Step 1. Click Tool and select Create Bootable Media.

Step 2. Choose the type of emergency bootable disc that you are trying to create. You are allowed to choose between Linux and Windows PE.
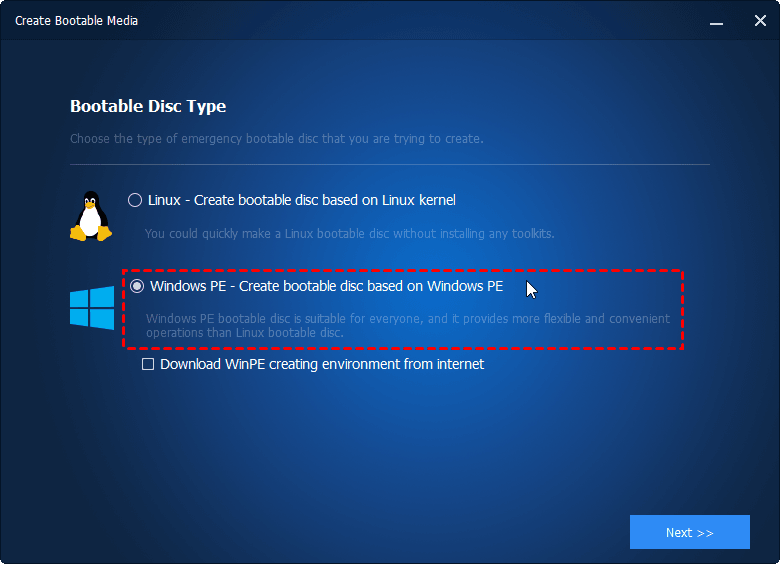
✍Note: It is recommended to create bootable disc based on Windows PE because it provides more flexible and convenient operations than Linux bootable disc, and enables you to boot from both legacy/MBR and UEFI/GPT modes.
Step 3. Specify storage media, and choose the middle one----USB Boot Device. Then, click Next to run the process.
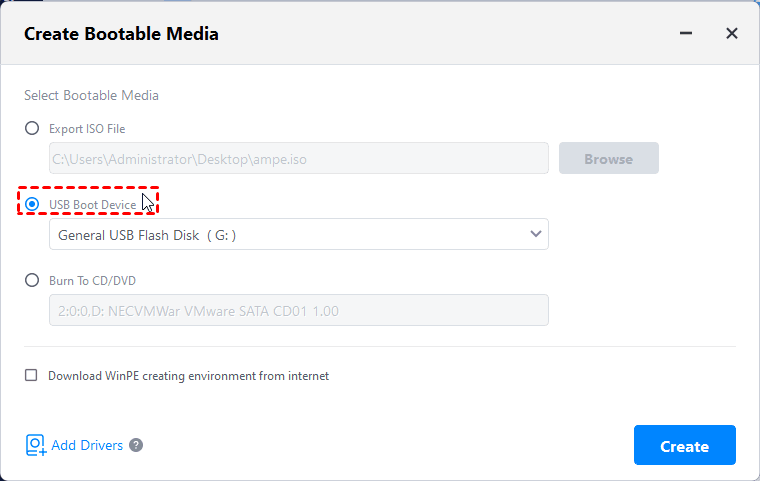
It only takes you a few clicks and several minutes to create bootable media. Then you have successfully created a WinPE bootable USB.
After creating a USB bootable media, you may wonder how to recover Windows Server 2016. Let’s take a look at how to restore your Windows Server 2016.
Part 2. Restore Windows Server 2016
✍Caution: In order to restore the Windows Server 2016 successfully, you need to create a backup image beforehand.
Step 1. Make sure if insert your USB recovery disk into your Windows Server 2016.
Step 2. Start your computer and press a specific key (usually F2, F10, Del or Esc key based on the specific PC brand) to boot into BIOS. Switch the bootable media as the first boot option.
Step 3. AOMEI Backupper will load up automatically. Find the system backup task you created before in the AOMEI Backupper Home tab. Expand its drop-down menu and select Restore.
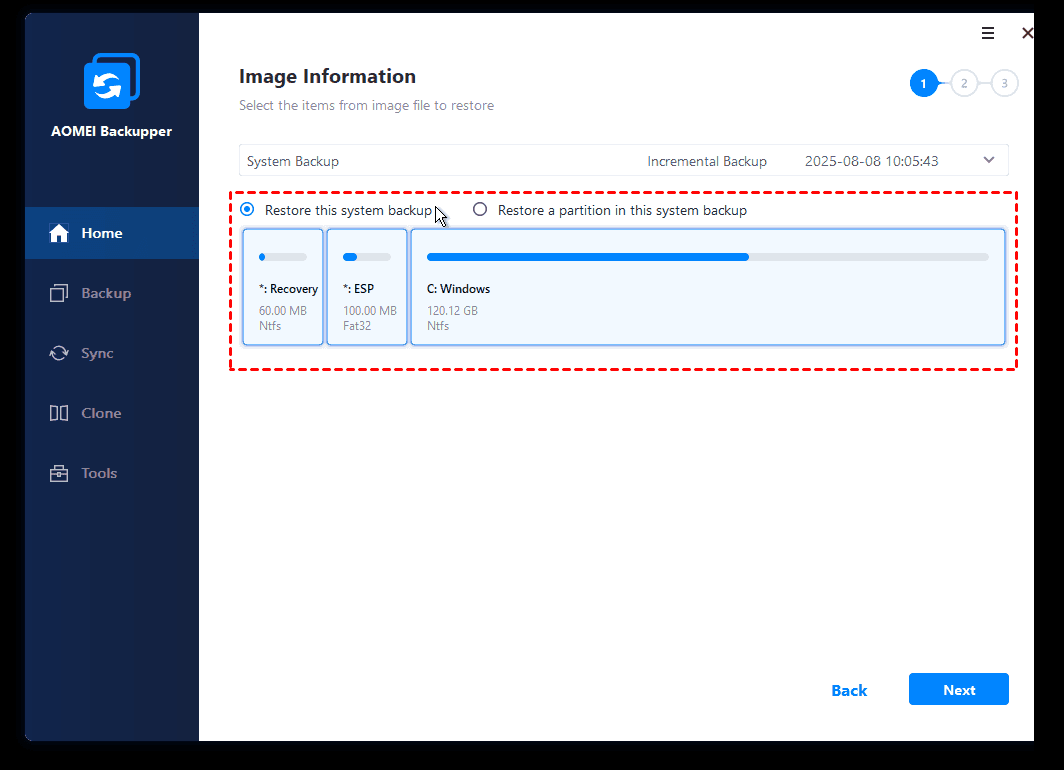
Step 4. In the next window, select Restore this system backup and click Next.
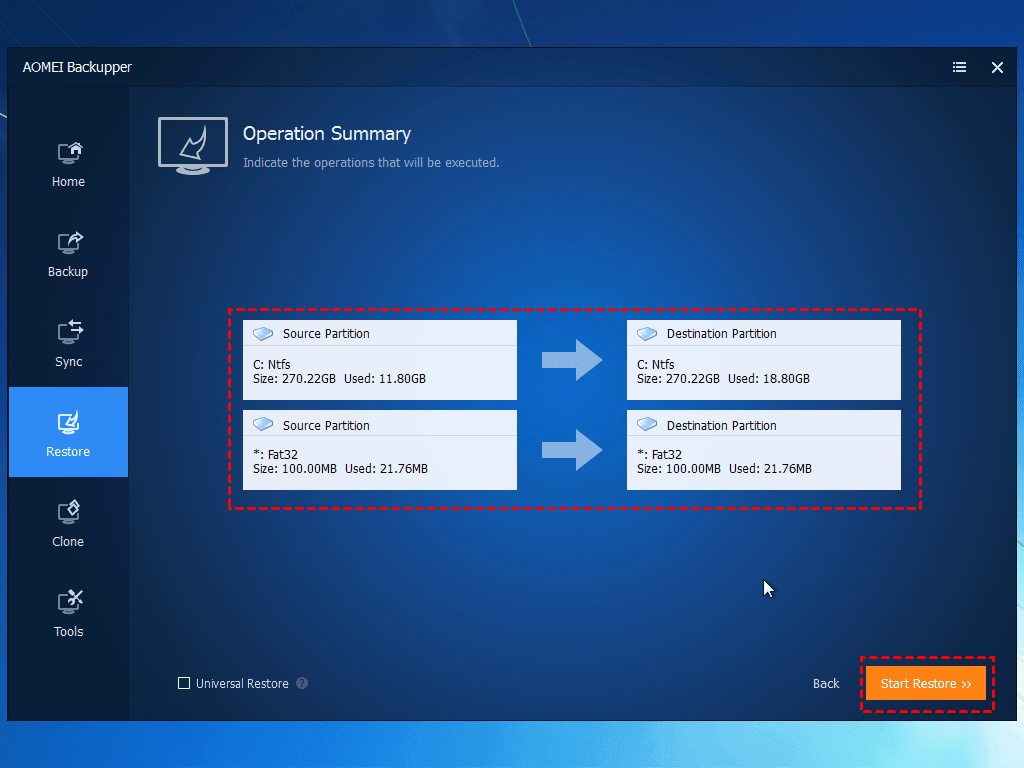
Step 5. Review your Source Partition and Destination Partition, then click Start Restore.
✍Tip: If you want to restore the system to different hardware, you need to tick universal restore to ensure a secure boot after restoration.
Sum up
After reading the article, you must understand there are 3 ways to boot into Windows Server 2016 recovery mode. What’s the easiest way? What’s more, in order to safeguard your data integrity and prevent any kind of data loss, you can backup your crucial files and systems like backup C drive Windows 11 to add one more protection lock on your PC.

