How to Use Rsync on Windows Server 2019: Step-by-Step Guide
You can know how to use Rsync on Windows Server 2019, but the method can be a bit complicated. So finally, a great Sync alternative to transfer files on server 2019 is recommended.
By Miya Updated on August 18, 2023
Does Windows Server Support Rsync?
Rsync (Remote Sync) is a powerful Linux/Unix-based tool that facilitates file sync and server-to-server file transfers without the need for FTP (File Transfer Protocol). With Rsync, you can effortlessly synchronize files and directories across various disks, directories, or networked computers. And you can also sync between two Windows servers.
While Rsync is primarily designed for Linux-based systems, many Windows users express a desire to utilize Rsync on Windows Servers2019. Although running Linux commands on a Windows system requires some preparation and can be a bit complex, this section will provide a detailed explanation of the process.
However, if you prefer a more streamlined approach to remote synchronization, you can explore alternative solutions to Rsync that simplify the process. These alternatives offer a user-friendly experience while providing similar functionality for efficient file synchronization. Next, we will provide you how to install Rsync on Windows Server.
How to Install and Use Rsync on Windows Server 2019?
To execute Linux commands on Windows Server 2019 for using Rsync to synchronize files and directories between two locations, you can set up the Windows Subsystem for Linux (WSL) tool on your computer. This tool enables you to run a Linux distribution in command line mode. Follow the steps outlined below:
Step 1. Consult the WSL Installation Guide provided by Microsoft for installing the Windows Subsystem for Linux on your Windows Server 2019 machine. The guide offers two options:
- Simplified Install: Simply run wsl --install as an administrator in a command window and restart your computer to start using WSL. Note that this method requires joining the Windows Insiders Program and installing the appropriate preview version of the system.
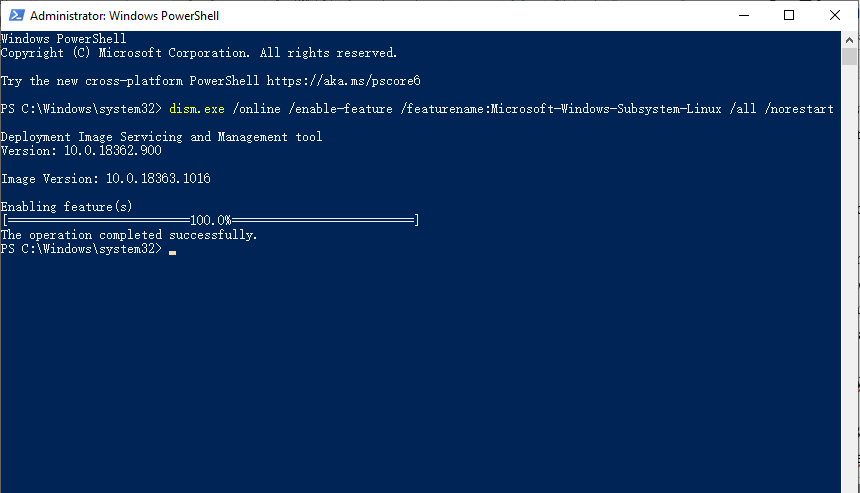
- Manual Install: The manual installation process is slightly more intricate. Begin by executing the following command in PowerShell as an administrator: dism.exe /online /enable-feature /featurename:Microsoft-Windows-Subsystem-Linux /all /norestart
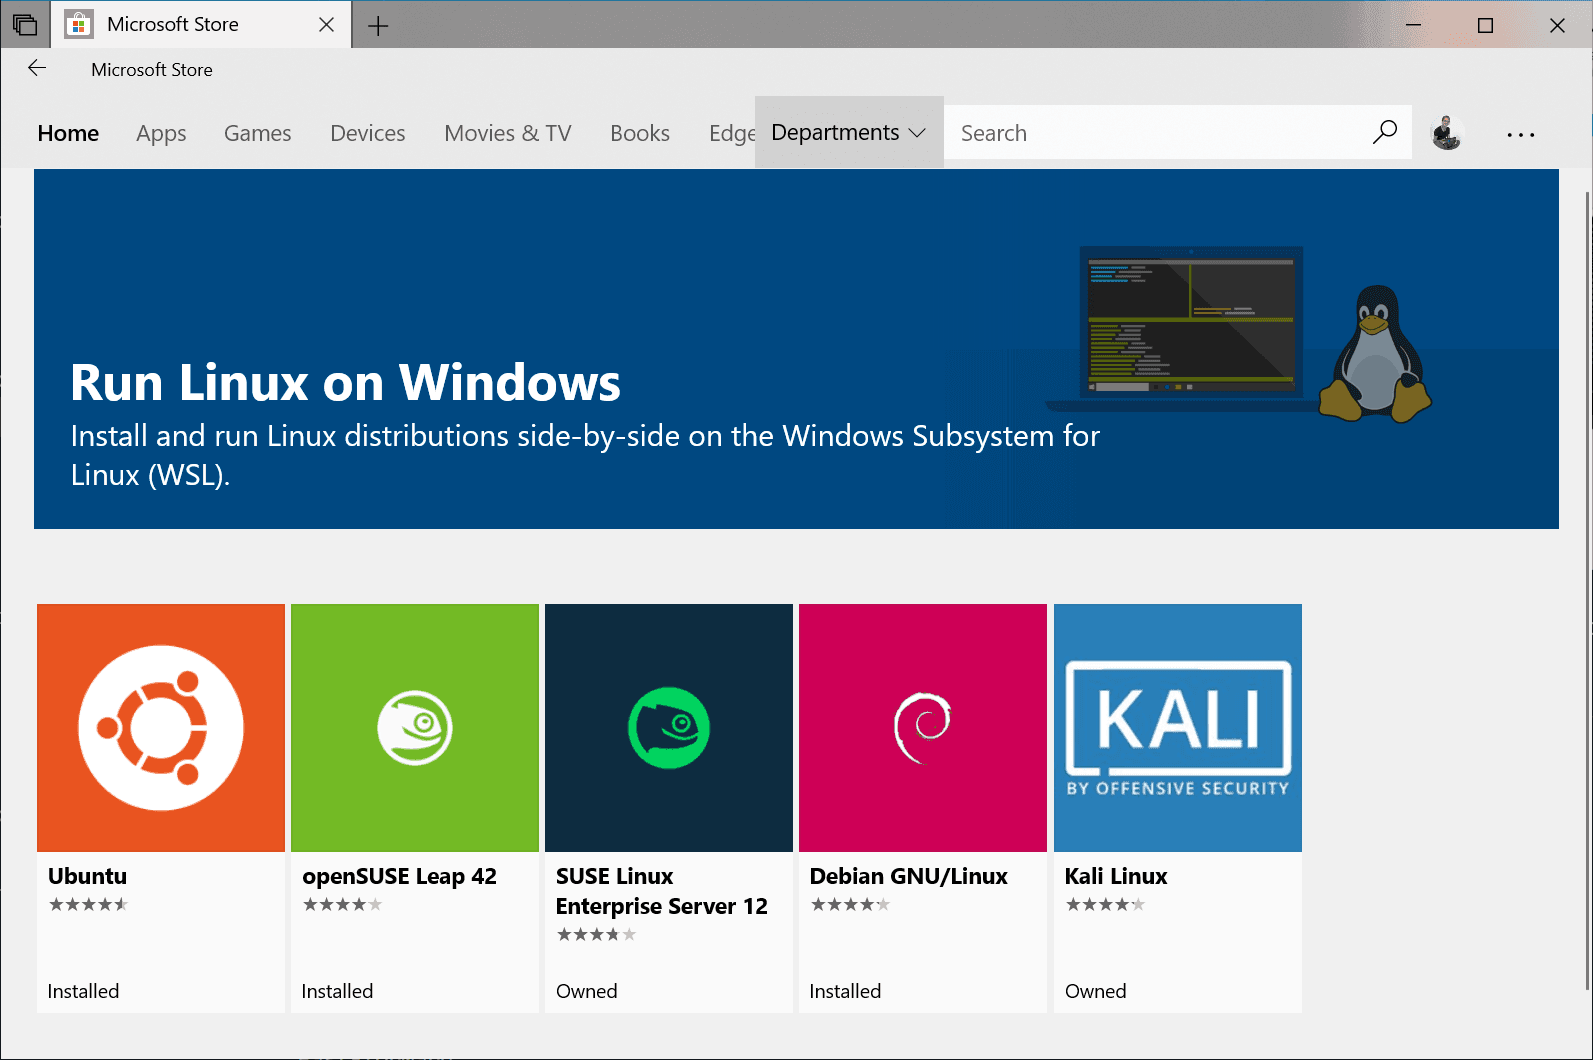
By following these instructions, you can leverage the power of Rsync and execute Linux commands on your Windows Server 2019 system using the Windows Subsystem for Linux. After completing the installation, you have the option to upgrade to WSL 2 or continue using WSL 1. If you choose to stick with WSL 1, you can proceed by selecting a Linux distribution from the Microsoft Store.
Note: Upon launching the Linux distribution for the first time, please be aware that there might be a brief waiting period while the files are stored on your computer. This is because the Rsync progress may not be exceptionally fast. Additionally, it is necessary to create a user account with a password for the Linux distribution during this setup process.
Step 2. Once the WSL and Linux distribution are successfully set up, proceed to install and utilize Rsync on Windows Server 2019. To achieve this, you will need to install Git for Windows Server, which enables you to run the Rsync command using Git Bash.
Step 3. Subsequently, proceed with the installation of Rsync on Windows Server2019. Begin by downloading Rsync, then utilize 7-zip to extract the contents. Move the rsync.exe file to the directory C:\Program Files\Git\usr\bin.
Step 4. After completing the installation, you can execute the following commands to copy and synchronize files in different scenarios:
- To copy files based on file type, use the following command: rsync /home/jon/Desktop/data/*.jpg /home/jon/Desktop/backupdata/
- To copy files based on file size, execute the following command: rsync --max-size=2k /home/jon/Desktop/data/ /home/jon/Desktop/backupdata/
- To copy entire folders, employ the following command: rsync --recursive /home/jon/Desktop/data /home/jon/Desktop/data2
Utilize these commands to efficiently copy and synchronize files in various situations after successfully installing Rsync on Windows Server2019. Then, you can transfer files on Windows Server 2019 via Rsync.
Top Alternative to Rsync for File Sync on Windows Server 2019
For many users, running Rsync on Windows Server 2019 can be complicated and prone to mistakes. If you are concerned about data loss, you can opt for the best alternative to Rsync, which is AOMEI Backupper Server. This software allows you to synchronize files between two Windows Servers in a straightforward manner, offering several advantages:
► Comprehensive synchronization solutions: AOMEI Backupper Server offers various synchronization methods, including Basic Sync, Mirror Sync, Real-Time Sync, and Two-Way Sync, enabling you to synchronize files from the source to the destination effectively.
►Schedule Sync feature: You can set up scheduled synchronization at fixed intervals such as daily, weekly, monthly, or event triggers or USB plug in. This allows for automatic synchronization between the two Servers without manual intervention.
► Support for multiple storage devices: It allows you to use different storage devices such as internal disks, external disks, USB disks, network locations, or cloud devices as the source or destination for synchronization tasks. This flexibility empowers you to choose your preferred device and create multiple backups, enhancing data security.
Preparations: Before initiating the synchronization between two Windows Servers, there are some preparations to be made:
❦ Ensure that both Windows Server computers are connected to the same network location.
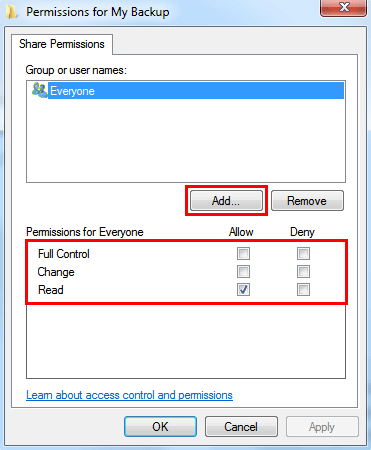
❦ Create a shared folder on the server computer where you intend to sync files and grant full permissions for everyone to access it.
By following these steps, you can simplify the process of synchronizing files between two Windows Servers using this software, providing a reliable and secure alternative to Rsync.
Step 1. Download AOMEI Backupper Server, and proceed with its installation on the primary server computer.
Tip: This software is compatible with a wide range of operating systems, including Windows Server 2022, 2019, 2016, 2012, 2011, 2008, as well as Windows 11, 10, 8, 7, XP, and Vista.
Step 2. Launch it and navigate to the Sync tab. From there, select Basic Sync.

Step 3. Next, click on Add Files or Add Folders to choose the data you wish to synchronize on the local server. Select Add Share or NAS Devices in the destination box.
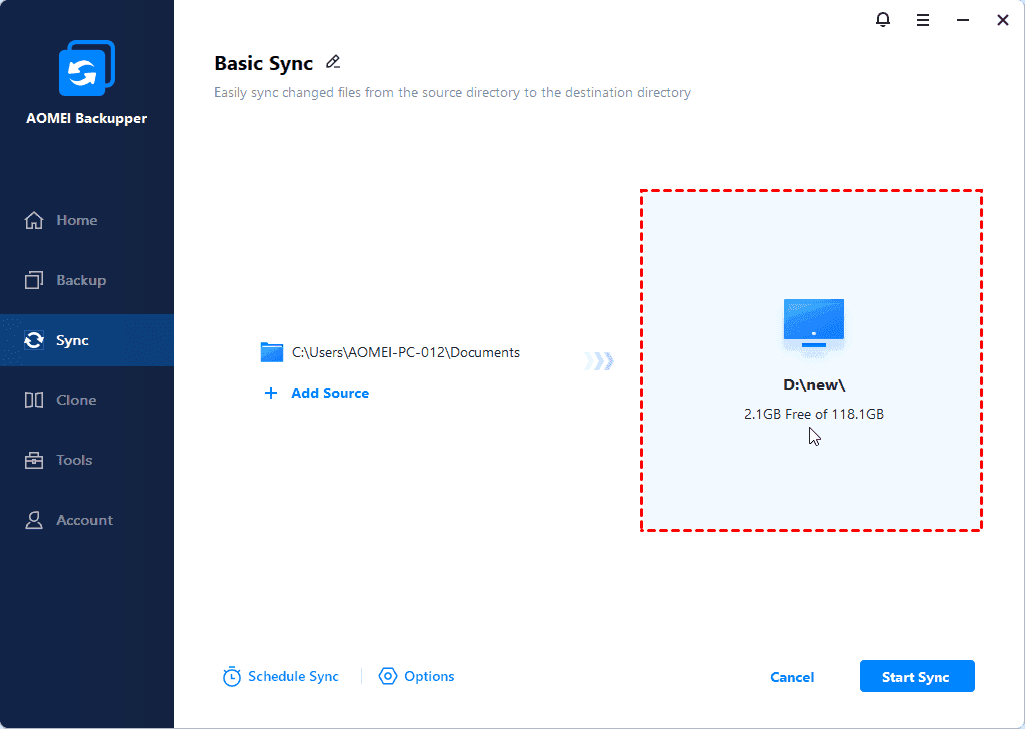
Step 4. Input the network path of the other server computer. In the subsequent window, select the desired shared folder and click OK.

Step 5. Double-check all your settings and operations, then click Start Sync to initiate the synchronization process between the two Windows Servers.
Summary
File synchronization using Rsync is a valuable method for safeguarding data and enhancing work efficiency. However, executing Rsync on Windows Server 2019 to transfer files can be complex for many users.
To simplify the process, you can leverage the capabilities of the top Rsync alternative tool, AOMEI Backupper Server. This software not only fulfills your file synchronization requirements within the Windows system but also offers a range of synchronization methods. Additionally, you can schedule automatic synchronization at fixed intervals. For comprehensive data protection across unlimited PCs and servers, consider exploring AOMEI Backupper Techplus.

