[Stepwise Guide] to Migrate DHCP from 2016 to 2019
Want to migrate DHCP server 2016 to 2019 to enjoy the same DHCP settings? Follow this guide to complete it easily.
By Lily Updated on June 26, 2023
What is DHCP server and why migrate it?
A DHCP (Dynamic Host Configuration Protocol) server is a network server that automatically assigns IP addresses, subnet masks, default gateways, and other network configuration parameters to devices on a network. It is helpful to simplify network administration by dynamically allocating and managing IP addresses, eliminating the need for manual configuration on each device.
As server hardware and operating systems reach end-of-life, the DHCP role is one of the Windows server roles that you may need to migrate. If you only have one or two scopes, you might be able to manually recreate them on the new server; however, if you have many scopes with many reservations, you might be better off exporting and importing the configuration. How to accomplish it? Continue reading.
How to migrate DHCP server 2016 to 2019 step by step
To move DHCP to new Server 2019 from old Server 2016, follow the guidance below:
Export the configuration
1. Log in with an administrator account to the Windows Server 2016 system.
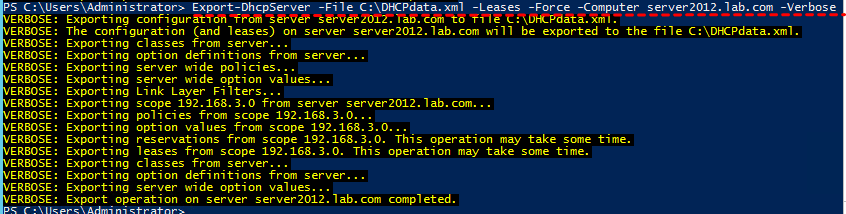
2. Open Powershell and then type in the following command:
Export-DhcpServer -File [string] -Leases -Force -ComputerName [servername.domainname.com] -Verbose
E.g.:
Export-DhcpServer -File C:\DHCPdata.xml -Leases -Force -ComputerName server2012.lab.com -Verbose
3. Copy the file C:\DHCPdata.xml to the Windows Server 2019 system.
Install the DHCP role
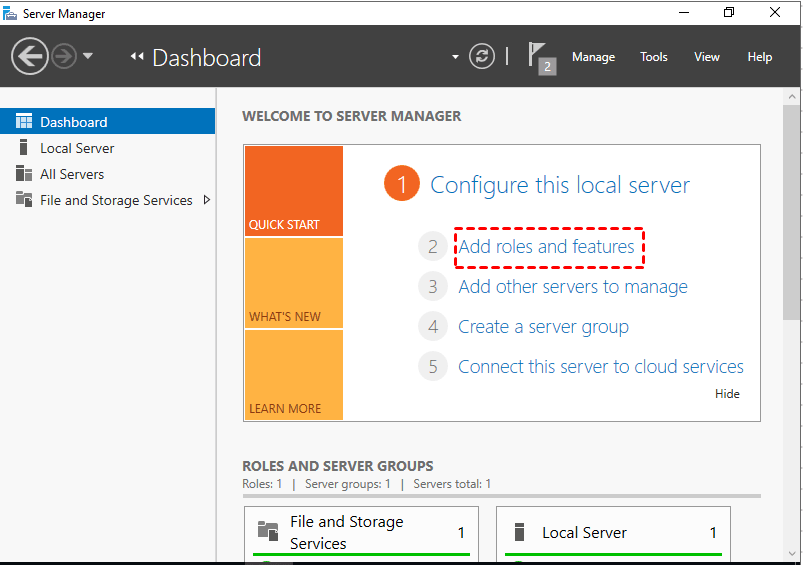
1. On Server 2019, open Server Manager, then choose Add Roles and Features.
2. When the Add Roles and Features wizard opens, click Next.
3. Select Role-based or feature-based installation and click Next.
4. Select a Host where you'd like to add services and click Next.
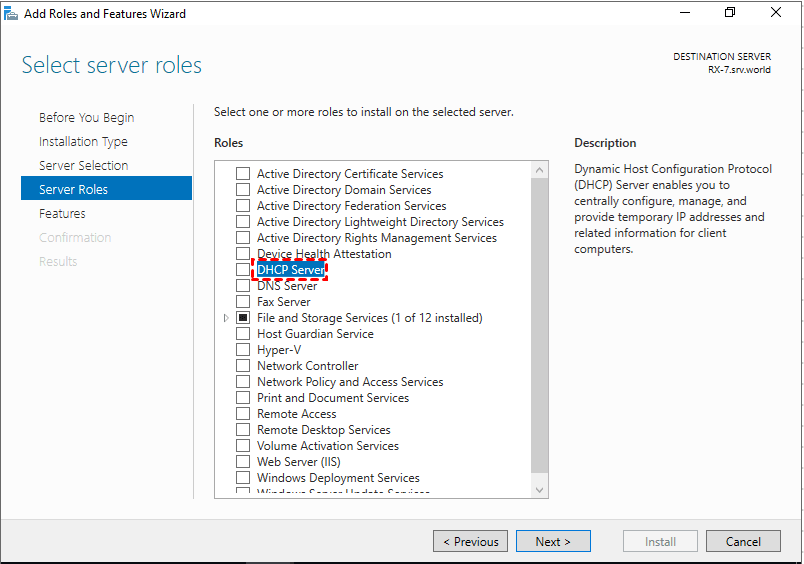
5. Select the DHCP Server role for installation. As soon as you choose DHCP, a new window appears. Click Add Features to add required features to manage DHCP server properly. Click on Next.
6. On the Features console, just click Next.
7. On the DHCP Server console, you can read brief information about DHCP server. When you are ready, click Next to continue.
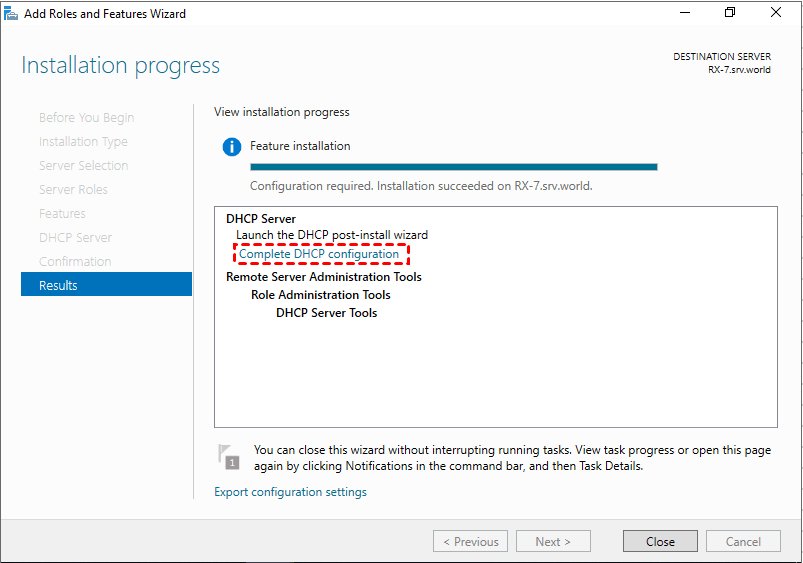
8. Click on Install to start the installation process.
9. Once installation completes, click on Complete DHCP configuration link to start the DHCP Post-Install wizard.
10. On the Description screen, click Next.
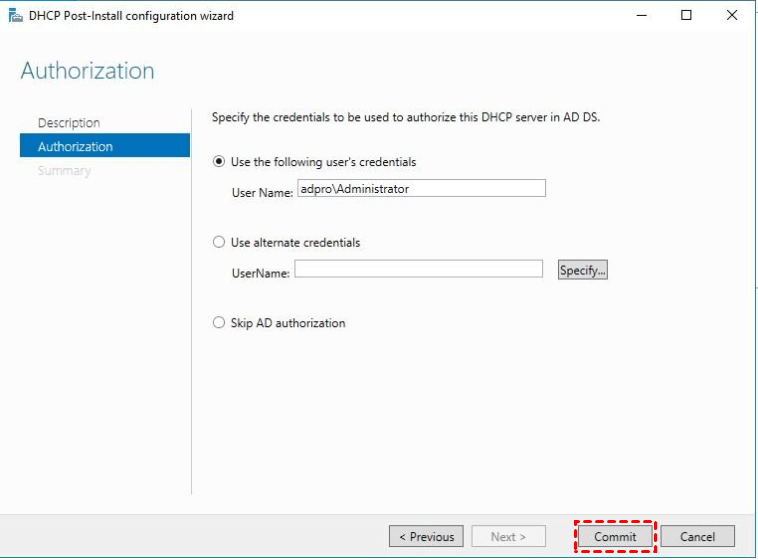
11. On the Authorization page, use AD credentials if the server is joined to the domain. Choose Skip AD authorization if the DHCP server is standalone and not joined to the domain. Then click Commit.
12. On the Summary page, click Close.
Import the configuration
1. Start the DHCP service on Server 2019.
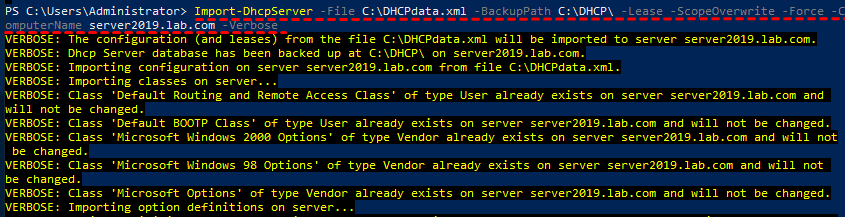
2. Open Powershell and then type in the following command:
Import-DhcpServer -File [string] -BackupPath [string] -Leases -ScopeOverwrite -Force -ComputerName [servername.domainname.com] -Verbose
E.g.:
Import-DhcpServer -File C:\DHCPdata.xml -BackupPath C:\DHCP\ -Leases -ScopeOverwrite -Force -ComputerName server2019.lab.com -Verbose
3. Restart the DHCP service.
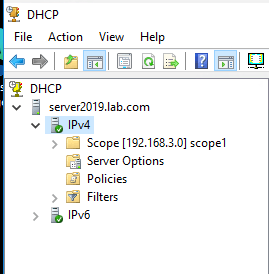
4. Verify your DHCP scope, IP leases, reservations etc and they should match with DHCP Server 2016.
Note: If you have VLANs set up in your network, make sure to check all your relay devices and update the DHCP relay address to the new server. Make sure to check all of your switches, routers, firewalls, and wireless access points.
Clean up
Once you authorize your new DHCP server, go back and stop the DHCP services on the old server. You can reboot a few workstations for testing and confirm they are receiving DHCP information from the new server by reviewing the updated lease information.
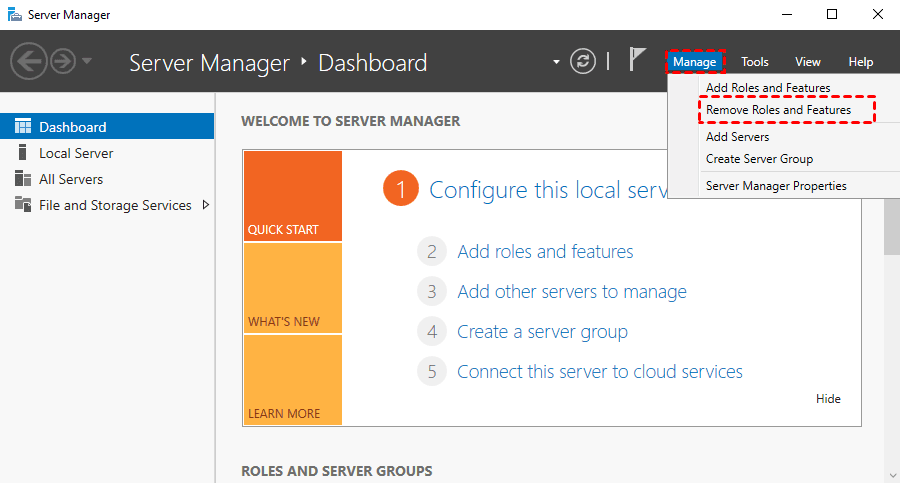
Once you confirm devices are successfully receiving leases from your new DHCP server, you can remove the role from the old server. In Server Manager, select Manage in the top right corner, then choose Remove Roles and Features. Uncheck the DHCP role, and it will be removed from the server.
Bonus tip: best server backup software for Windows Server 2022/2019/2016
Data, applications, configurations, and settings that are necessary for business operations are frequently stored on Windows Servers. You can shield the valuable data from ransomware attacks, accidental deletion, hardware failure, software corruption, and other disasters through regular backups.
AOMEI Backupper Server, the best server backup software for Windows Server 2022/2019/2016/2012 (R2)/2008 (R2)/2003, offers you full backup solutions:
- It supports various backup types, including system/disk/partition/file backup, schedule backup, incremental and differential backup.
- It offers flexible backup options. While you backup data, you can add comments for images, encrypt or split images. Also, you can set email notification to tell you the backup result.
- It enables you to create recovery environment or bootable USB to boot your server in case of boot failure.
Learn how to backup your server system with AOMEI Backupper below:
Step 1. Download and install AOMEI Backupper on Server 2022/2019/2016.
Step 2. Run this program, click Backup and then choose System Backup.

Step 3. The required system partitions are selected by default. You just need to select a destination path. It can be a local disk, external hard drive, network share or NAS device, etc.

Step 4. Set Options, Schedule Backup and Backup Scheme based on your need. Finally click Start Backup to launch the process.

Conclusion
That’s all about how to migrate DHCP from 2016 to 2019. These steps also apply to DHCP migration 2008 to 2019. To protect your valuable business data on Windows Servers, it is recommended to backup your server with AOMEI Backupper. It has all the backup solutions you need. What’s more, it is powerful cloning software that enables you to clone C drive in Server 2019. Just give it a shot!

