How to Create Restore Points in Windows Server 2019 Easily
Learn how to create restore points using Windows Server Backup and AOMEI Backupper Server from this page. Then you can easily restore your Windows Server with restore points, minimize downtime and data loss.
By Jonna Updated on February 6, 2024
Why Create Windows Server 2019 Restore Points?
Restore points act as snapshots of your Server 2019 system files and settings at a specific point in time. They provide a reliable way to revert to a previous state if system issues such as Windows Server 2019 task scheduler not working or errors occur.

By creating restore points, you can easily restore your Server to a known working condition, minimizing downtime and data loss. There are three main reasons for you to know:
✨ Offer rollback capability for undoing system changes that cause instability or compatibility issues.
✨ Enable quick recovery to a previous working state without restoring a full system.
✨ Provide a safe environment for system testing and experimentation, allowing easy reversion to a previous state if issues arise.
Next, I will provide two most commonly used ways to create restore points on Windows Server 2019. They are also suitable for creating on Windows Server 2022, 2016, 2012, etc. Let’s check them together.
How to create restore point in Windows Server 2019 (2 Ways)
In this part, you can master the top 2 ways to create Windows Server 2019 restore point easily with screenshots. Choose one that is most suitable for you.
Create Windows Server 2019 Restore Point via Windows Server Backup
Windows Server Backup is embedded backup utilities in Windows Server operating system. Creating restore points with this tool is a straightforward process. Just follow these steps to create system restore point for Windows Server 2019:
1. In Server Manager, go to "Manage" > "Add Roles and Features" > "Features" > "Windows Server Backup" and click Install.
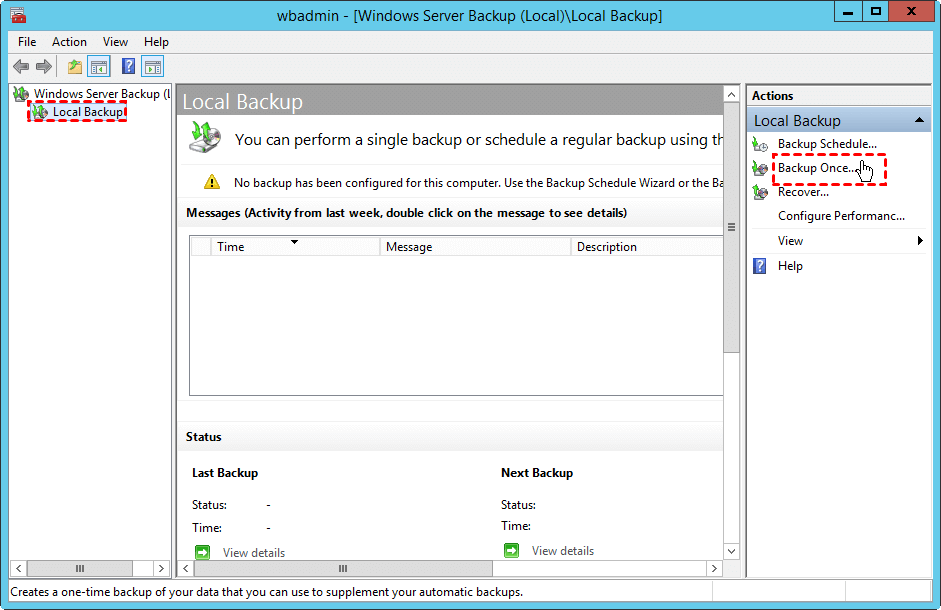
2. Open Windows Server Backup. On the right side, click Local Backup and select Backup Once to create Server 2019 image backup.
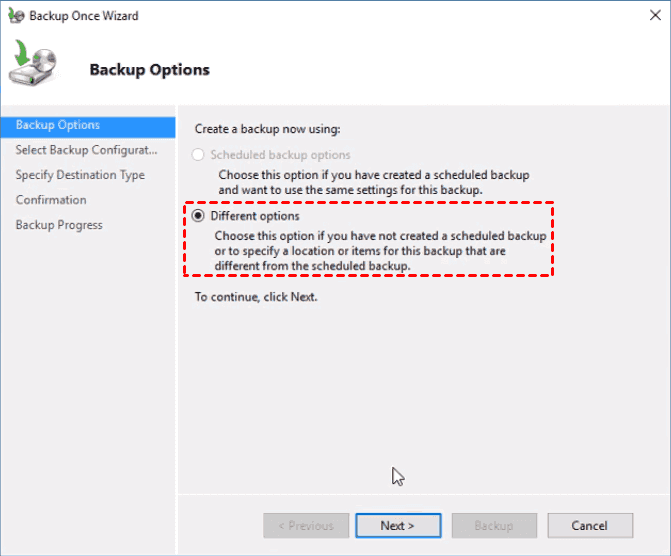
3. Choose the backup options: Different options, and hit Next.
4. Check Custom for backup configuration and click Next.

5. Click Add Items to select the volume(s) to be backed up, and then click OK.
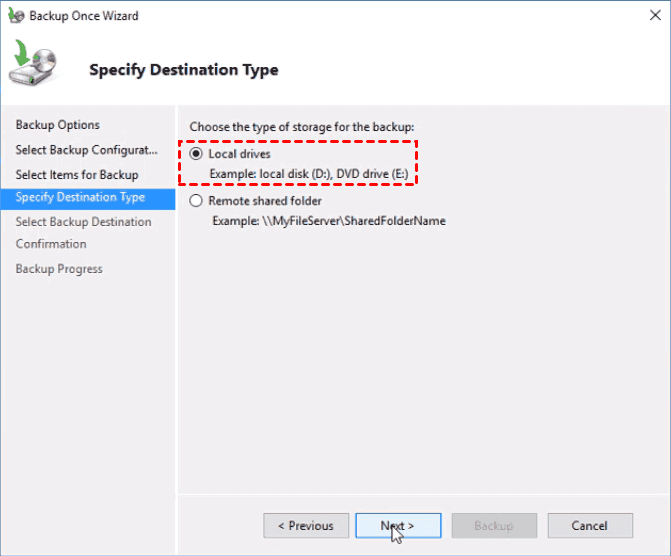
6. Specify the destination location to save the Windows Server 2019 system backup, you can choose Local drives or Remote shared folder according to your needs.
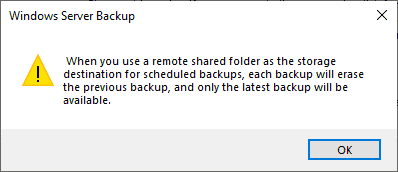
* Note: If you select backup to “Remote shared folder”, a popup window will warn you that each backup run will erase the previous backup, and only the latest backup will be available.
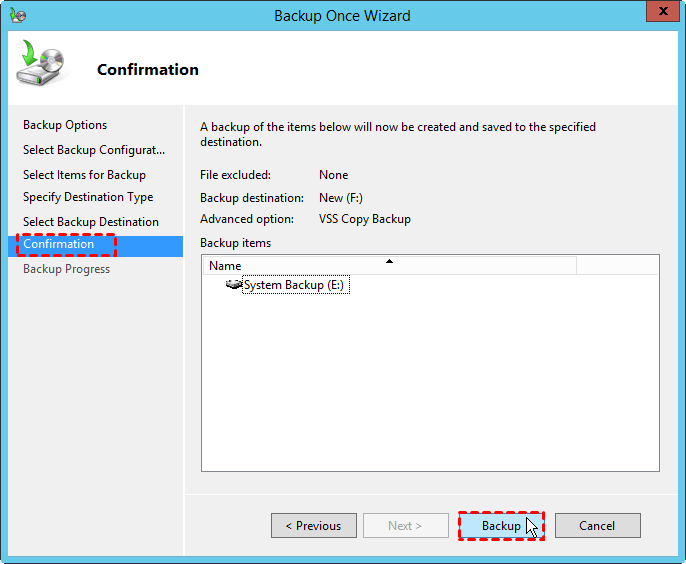
7. On the Confirmation window, click Backup to create system image backup for Windows Server 2019. When it is completed, close the Windows Server Backup app.
Create Windows Server 2019 Restore Point via AOMEI Backupper
AOMEI Backupper Server, a specialized backup software for Windows Server operating systems, can help you create restore points within a few clicks. It allows you to create system image backup easily and quickly. If any severe issues happen to your computer, you can perform a quick recovery to the previous state on your Server PC.
- It offers you four types of backups: System/Disk/Partition/File Backup. You can run system backup to backup the full Server OS in a scheduled manner such as daily, weekly, monthly, event triggers, and USB plug in.
- It enables you to backup your system to various locations, such as local disks, external hard drives, USB drives, SSDs, NAS, and network locations.
- It supports both Windows PC operating systems (Windows 11/10/8.1/8/7/Vista/XP) and Windows Server operating systems (Windows Server 2022/2019/2016/2012/2008/2003, etc.).
- It offers Create Bootable Media feature, which allows you to restore the system or troubleshoot without booting into Windows.
Download this software to enjoy a 30-day free trial on your Server PC to have a try.
To create restore points using AOMEI Backupper Server on Windows Server 2019, follow these steps:
Step 1. Launch AOMEI Backupper Server and go to the "Backup" tab then select "System Backup".

Step 2. The program will select the system related partitions automatically for you. You just need to choose a destination path for the backup image.

Step 3. Click "Start Backup" to begin the process of creating Windows Server 2019 restore point.

By following the above steps, you can utilize the advanced features and flexibility of AOMEI Backupper Server to create restore points effectively on your Windows Server 2019. Additionally, there are some other features for you to use:
🎨 Options: you can write comments for the backup task, encrypt, split and compress the server backup file, enable email or SMS notification, use VSS, etc.
🎨 Schedule Backup: you can change backup modes with Daily, Weekly, Monthly, Event triggers, USB plug in and backup types with full Backup, incremental and differential backup to save disk space.
🎨 Backup Scheme: it has the ability to automatically delete old backup images while the Server backups over the retained number that you specified before to solve the disk full issue.
Once you have created Server system restore point with the provided 2 methods, you can use these restore points to restore Windows Server backup in case of some emergency that prevents you from using your computer securely.
Possible Issues on Restore Point Creation
If you can't create restore point on Windows Server 2019, you can check the typical problems below to resolve them:
◐ Common issues with restore point creation:
◊ Insufficient disk space for creating restore points.
◊ Conflicts with third-party backup or security software.
◊ Corrupted system files affecting restore point creation.
◊ Disk errors or hardware issues affecting the creation process.
◑ To troubleshoot restore point creation issues, you can follow the quick solutions:
♦ Ensure that you have enough disk space available on the drive where restore points are stored.
♦Temporarily disable any third-party backup or security software that could interfere with the process.
♦ Run a disk check utility to identify and repair any disk errors.
♦ Perform a system file check using the "sfc /scannow" command in the Command Prompt to fix corrupted system files.
Centrally Backup All Windows Data with AOMEI Cyber Backup
For enterprise users, there may be more than one server that needs backing up. You may need to backup all Windows endpoints, virtual machines, and database. In this condition, AOMEI Cyber Backup can do the job. It is a professional business backup solution. With a user-friendly web console, you can centrally and remotely back up all Windows servers, PCs, VMware, and Hyper-V VMs.
This is rich-feature solution. Abundant functions ensure a seamless and error-free backup experience.
• Fast backup and recovery: Backup and recover data at an amazing speed to guarantee business continuity.
• All data are included: Support disk backup, system backup, and file backup. So all critical data can be protected with the different levels of data backup.
• Automatic backup: Set up a backup schedule to run a full backup, incremental backup, and differential backup daily, weekly, and monthly.
• Auto backup cleanup: To avoid redundant backup versions taking up too much storage, AOMEI Cyber Backup allows users to set backup retention to remove old backup versions automatically.
To explore more features, you can download the AOMEI Cyber Backup Trial.
Conclusion
To create restore point in Windows Server 2019, you can learn how to use both Windows Server Backup and AOMEI Backupper Server from this article with detailed steps. However, it's important to remember that creating and managing restore points should be just one part of a comprehensive backup and recovery strategy.
It is highly recommended to maintain regular backups of your critical data using reliable backup software like AOMEI Backupper. This will provide an additional layer of protection and ensure that your data is safe even in the event of a system failure or disaster. As a best file sync tool as well, AOMEI Backupper also can help you deal with Windows Server 2019 slow file sharing issues at a fast speed. Why not give it a try now?

