How to Fix Outlook Rules Not Working (Top 9 Ways)
You can learn 9 ways to fix Outlook rules not working, please read carefully and choose any one of them to solve your problem!
By Miya Updated on September 12, 2023
Overview of Outlook Rules Not Working
If you configure Outlook rules, you can optimize the app's performance in managing your inbox, leading to time savings and the automation of tasks that would otherwise require manual effort. However, encountering issues where these Outlook rules cease to function on your Windows computer can be frustrating. To assist you in resolving this problem, we have compiled nine helpful solutions that should restore the functionality of Outlook rules and solve your Outlook rules not working.
How to Fix Outlook Rules Not Working with Easy 9 Ways
The automatic execution of Outlook rules can be impacted by various issues. To assist you in restoring their functionality, we have compiled the top nine methods that you should try to solve Microsoft Outlook rules not working. Here are a few approaches you can take:
1. Ensuring Outlook Rules are Activated
To begin, it is important to confirm that none of your Outlook rules have been accidentally disabled. Follow these steps to check:
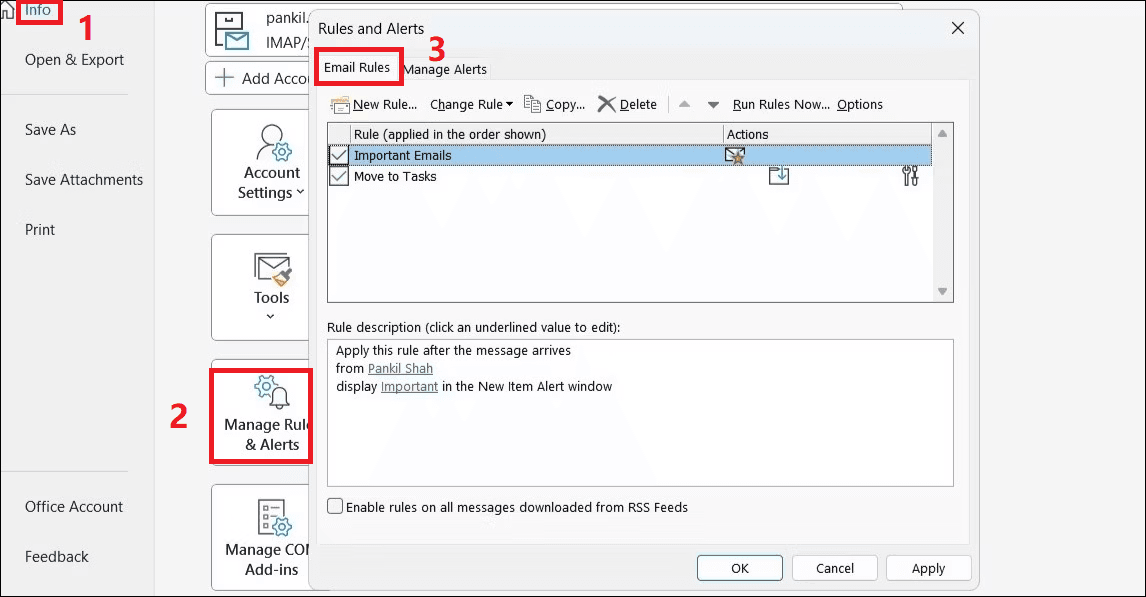
Step 1. Launch the Outlook application and click on the File menu located in the top left corner.
Step 2. In the info tab, locate and click on the Manage Rules & Alerts button.
Step 3. Within the Email Rules tab, ensure that the checkboxes next to your rules are selected.
2. Modifying Outlook Rule Names
Using lengthy names for your Outlook rules can result in larger file sizes and potentially lead to unexpected issues with their performance and may cause your Outlook rules not working. To address this, consider assigning shorter names to your Outlook rules, as it may help resolve any problems you're experiencing. To rename Outlook rules, follow these steps:
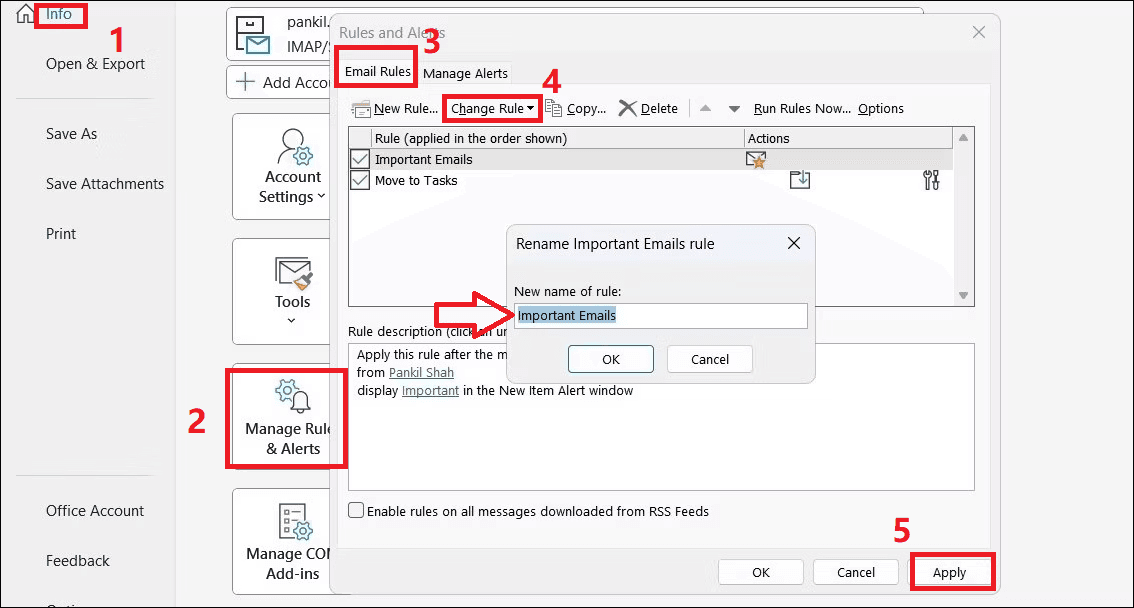
Step 1. Open the Outlook application and click on the File menu located in the top left corner.
Step 2. In the Info tab, find and click on the Manage Rules & Alerts button.
Step 3. Within the Email Rules tab, select the rule that you wish to rename.
Step 4. Click on Change Rule and choose Rename Rule from the options provided. Enter a shorter name for the rule and click OK.
Step 5. Finally, click Apply to save the changes and ensure the new name takes effect.
3. Removing Unnecessary Outlook Rules
In addition to renaming rules, it is advisable to remove any unnecessary rules to avoid conflicts or unexpected behavior. Follow these steps to delete unwanted rules in Outlook and solve Outlook rules not working:
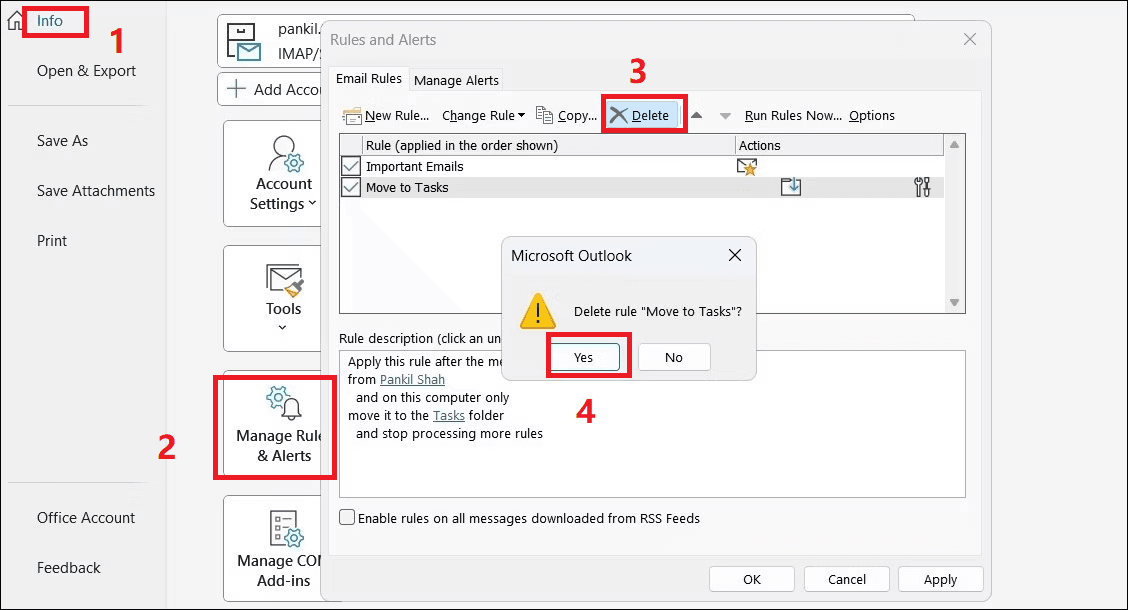
Step 1. Open the Outlook application and go to File > Info > Manage Rules & Alerts.
Step 2. Press and hold the Ctrl key on your keyboard and select the rules you wish to remove.
Step 3. Click on the Delete option located at the top.
Step 4. When prompted, confirm the deletion by selecting Yes.
4. Resetting the Outlook SRS File
Microsoft Outlook stores crucial account configuration information in an SRS (Send and Receive Settings) file on your computer. If this file becomes corrupted, it can lead to issues with Outlook rules not functioning properly. To resolve this, you can initiate the recreation of the SRS file by renaming the existing file. Here are the steps:
Step 1. Press the Win + R keys together to open the Run dialog box.
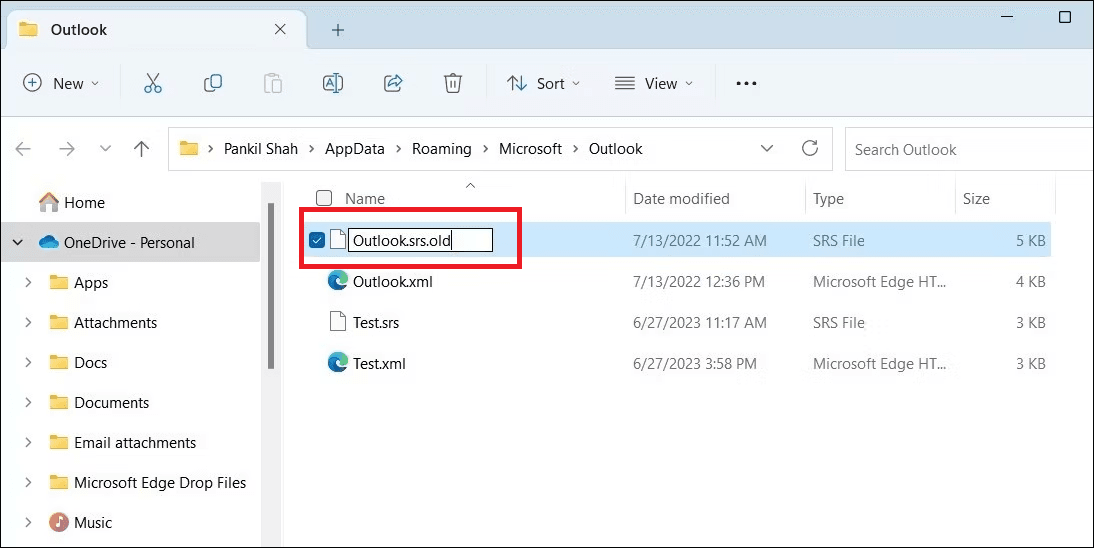
Step 2. Type %appdata%\Microsoft\Outlook in the Open field and press Enter.
Step 3. In the File Explorer window that opens, locate and select Outlook.srs file.
Step 4. Press the F2 key on your keyboard to initiate the renaming process. Rename the file to Outlook.srs.old.
By following these steps, you can reset the Outlook SRS file and potentially resolve any issues related to Outlook rules. After completing the aforementioned steps, it is important to restart Outlook to ensure the changes take effect. Once Outlook has restarted, test your rules to verify if they are functioning as expected.
5. Configuring Outlook to disable the Stop Processing More Rules Option
In the Outlook application, there is an option to instruct it to stop processing any additional rules after a specific rule has been executed. However, this can result in Outlook disregarding all subsequent rules, creating the false impression that your rules are not working correctly. To prevent this, it is necessary to disable the stop processing more rules option by following these steps:
Step 1. Open Outlook and navigate to File > Info > Manage Rules & Alerts.
Step 2. Select the specific rule from the list that you want to modify.
Step 3. Click on the Change Rule option and choose Edit Rule Settings from the dropdown menu.
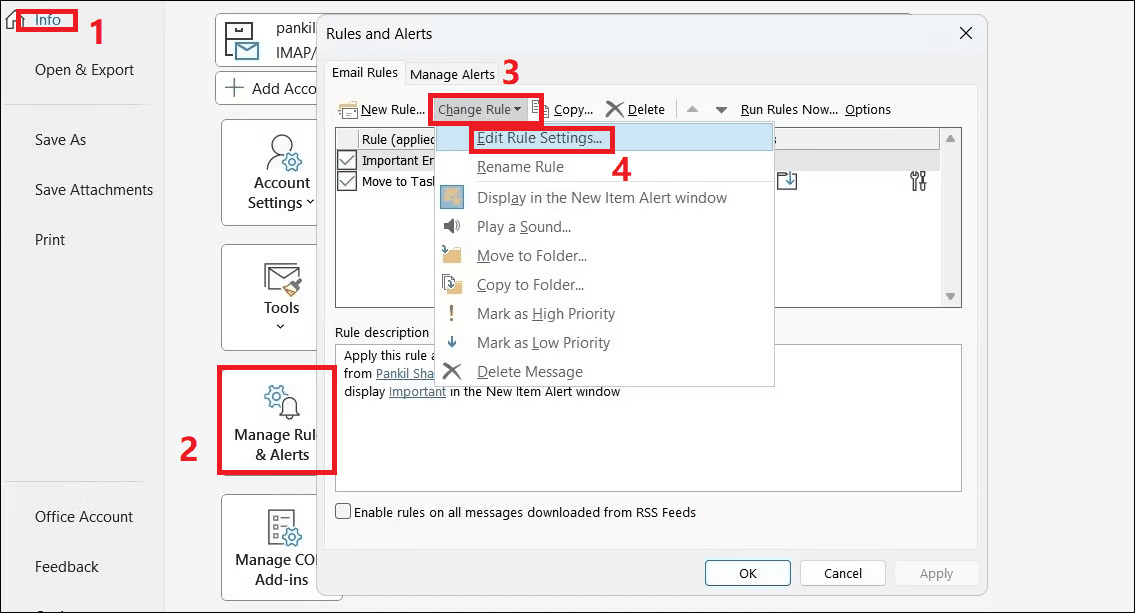
Step 4. Clear the Stop Processing More Rules checkbox, and then click Finish and Apply to check if the problem of Outlook rules not working has been solved.
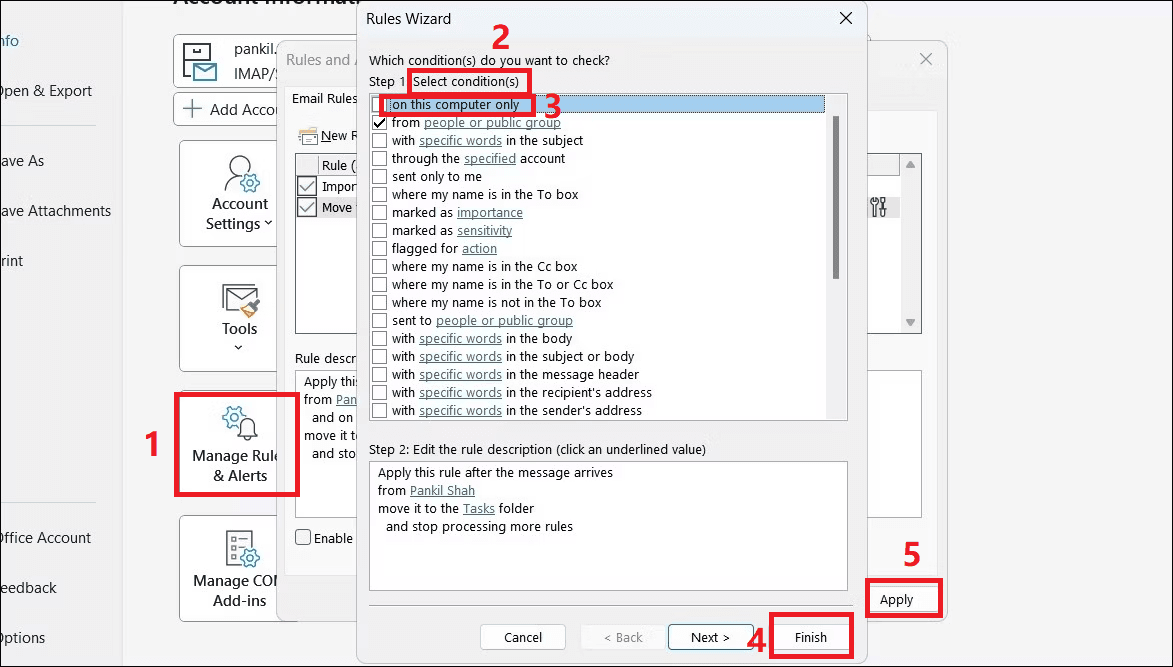
6. Enabling Outlook Rules to Run on Multiple Devices
If your Outlook rules are not functioning correctly, it could be due to them being configured to run exclusively on a specific device. To resolve this, follow these steps:
Step 1. Open Outlook and navigate to File > Info > Manage Rules & Alerts.
Step 2. Double-click on the rule that is causing issues.
Step 3. Under the Select conditions section, uncheck the on this computer only box.
Step 4. Click on Finish and then Apply to save the changes.
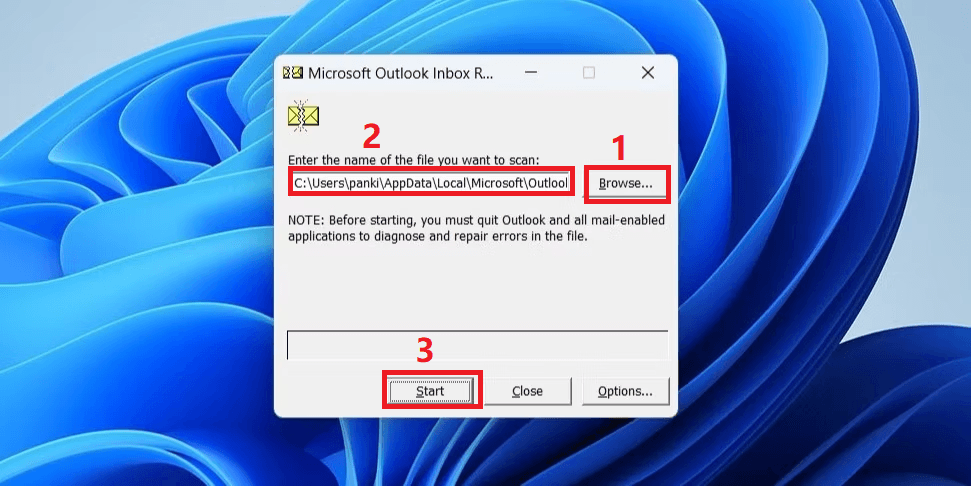
7. Using the Outlook Inbox Repair Tool (ScanPST)
When using Microsoft Outlook on your Windows PC, it generates OST and PST files to locally store your account data. If these data files become inaccessible, it can lead to Outlook rules ceasing to function. Fortunately, Outlook provides an inbox repair tool that simplifies the process of repairing these data files. Here's how to run it:
Step 1. Right-click on the Outlook shortcut and select Properties.
Step 2. In the Shortcut tab, click the Open File Location button.
Step 3. Double-click on SCANPST.EXE to launch the tool.
Step 4. In the Microsoft Outlook Inbox Repair Tool window, click the Browse button and navigate to the following directory:
- C:\Users*username*\AppData\Local\Microsoft\Outlook
Note: Please replace the user name in the above path with your actual username.
Step 5. Select the profile you want to repair and click Start.
After performing the above steps, it is important to restart Outlook to ensure that any changes take effect. Once Outlook has restarted, verify if the issue still persists by checking the functionality of your Outlook rulesand see if Outlook rules not working automatically has been solved.
8. Updating the Outlook Application
Experiencing problems with Outlook can sometimes arise from using an outdated version of the application. If you have disabled automatic updates for Office apps, you can manually update the Outlook app by following these steps:
Step 1. Open Outlook and select the File menu located in the top-left corner.
Step 2. Choose the Office Account tab from the left column.
Step 3. Click on Update Options, and then select Update Now.
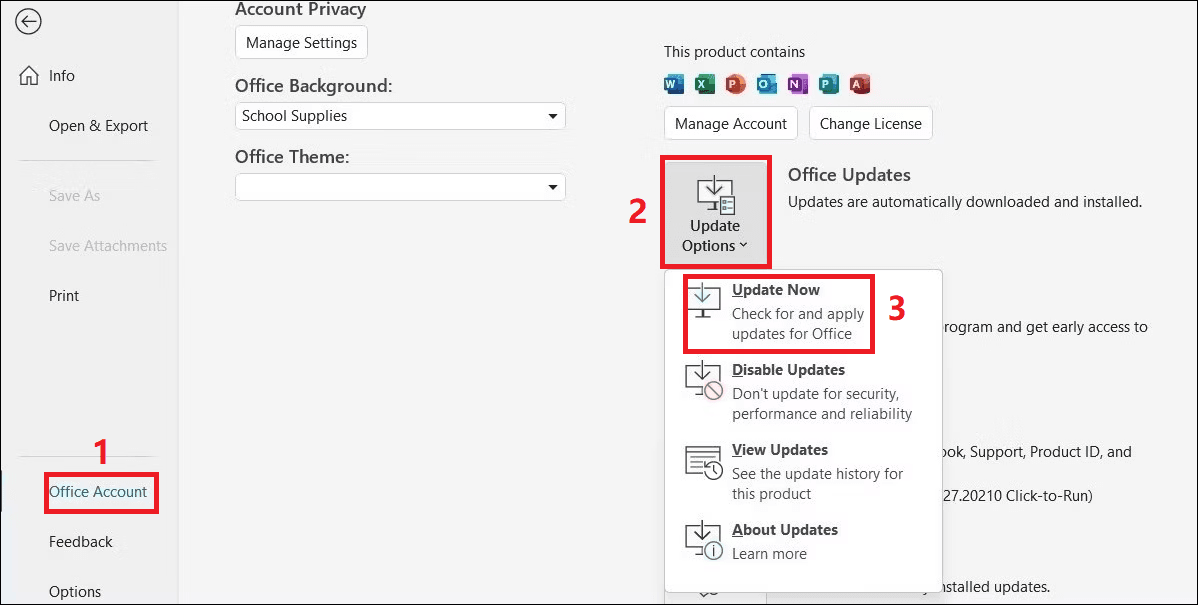
After initiating the update process, give Microsoft Office some time to check for new updates and install them. Once the updates are installed, your Outlook rules should begin functioning properly.
9. Performing a Complete Reset of All Rules
If you have exhausted all other troubleshooting options without success, you can opt to delete all your Outlook rules and then reconfigure them to solve Office 365 Outlook rules not working. This process can resolve issues stemming from incorrect configurations or corrupt data. To delete all Outlook rules simultaneously, follow these steps:
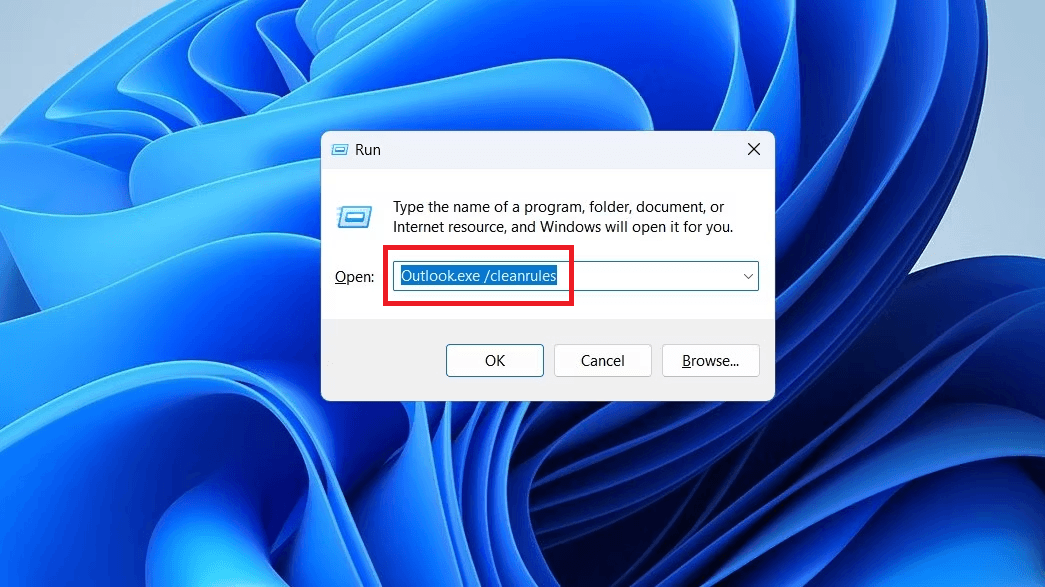
Step 1. Open the Run dialog box.
Step 2. Type Outlook.exe /cleanrules in the text box.
Step 3. Press Enter to execute the command.
Bonus Tip: Backup Your Outlook Emails for Total Protection
Above are the ways to fix Outlook rules not working, You can choose any one of them to try to solve this problem. To protect your Outlook data in all aspects, maybe you can use a professional backup software - AOMEI Backupper Pro to backup Outlook emails and attachments to prevent any accidental data loss.
AOMEI Backupper is a specialized email backup software designed to simplify and expedite the process of backing up your Outlook data. You can effortlessly create a comprehensive backup of Outlook emails and attachments with this software within several steps. Moreover, this software offers several advantages over the built-in backup tool.
☎ User-Friendly: It provides a user-friendly and intuitive interface, making it accessible for users of all levels, including beginners.
☎ Swift Performance: It ensures fast backup operations without compromising your computer's performance.
☎ Extensive Coverage: With this software, you can back up all your Outlook data, including emails, attachments, contacts, and settings, ensuring a comprehensive backup solution.
☎ Flexible Options: It enables you to schedule automatic backups, compress your backups to save space, and choose your preferred backup location.
Download and install AOMEI Backupper on your computer. If you are a server user, consider using AOMEI Backupper Server.
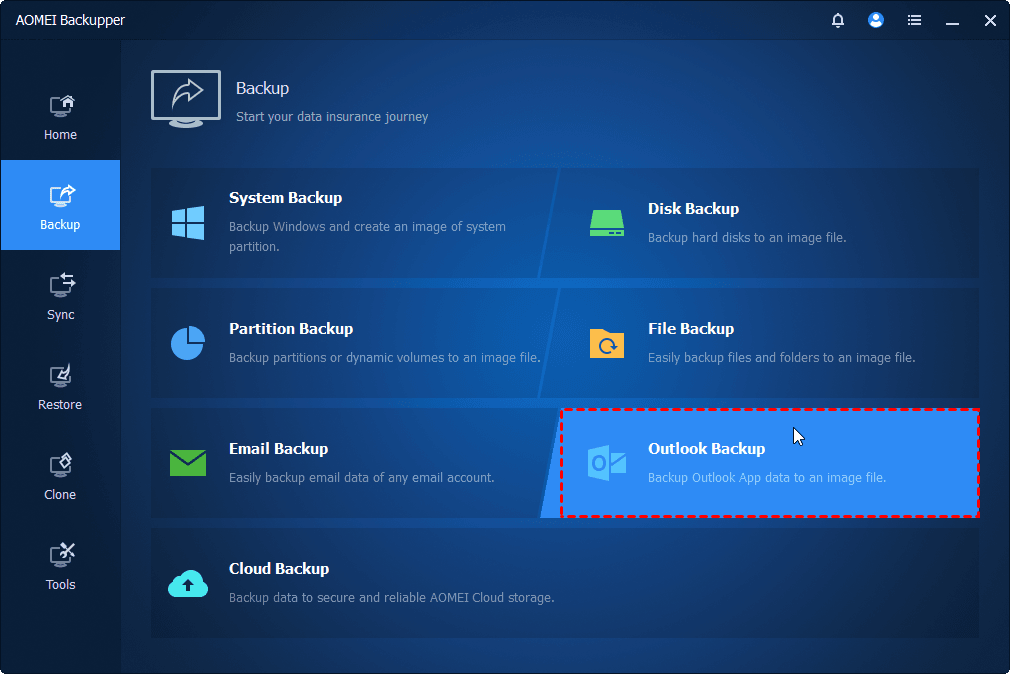
Step 1. Open Outlook and ensure that you are logged in with your account credentials. Next, launch AOMEI Backupper Professional and navigate to the Backup tab. From there, select Outlook Backup to initiate the backup process.
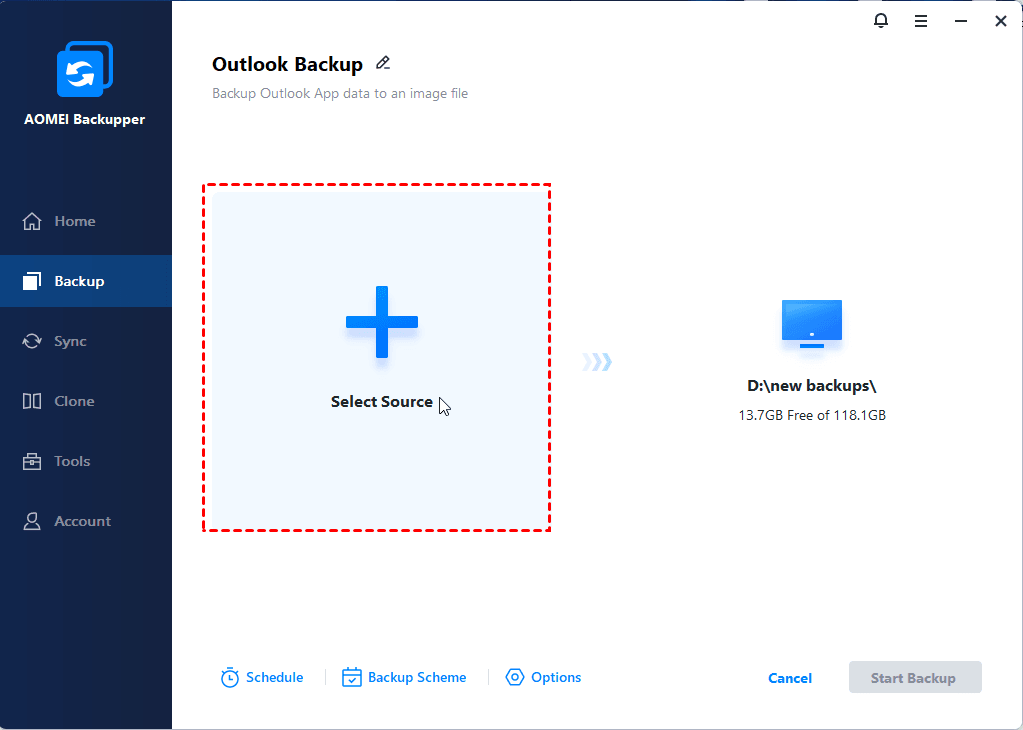
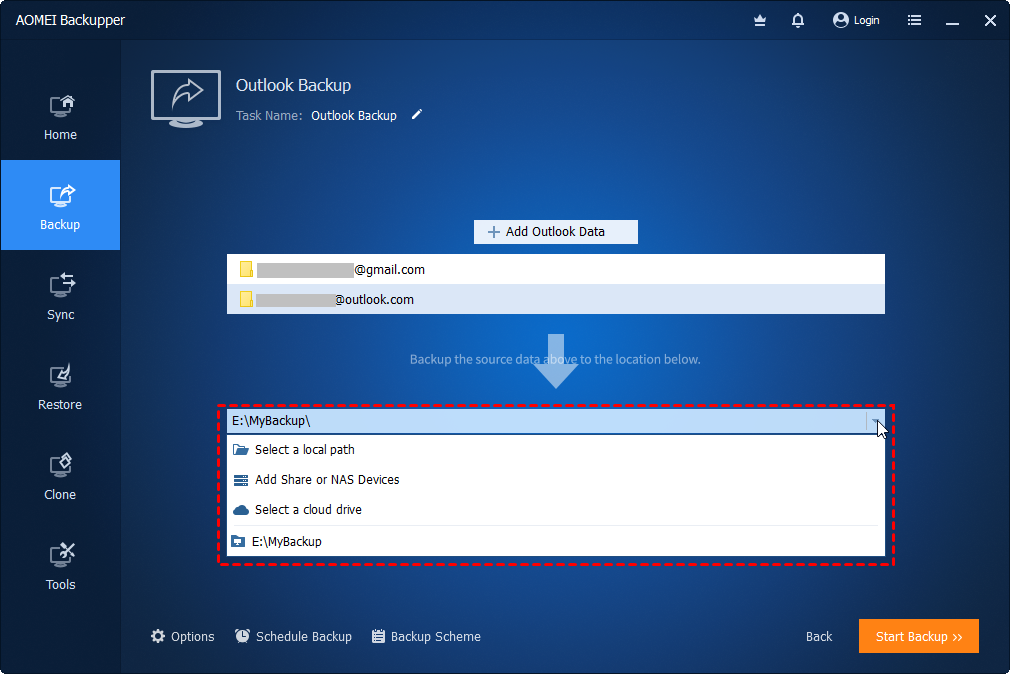
Step 2. Click on Add Outlook Data. Choose the account that contains the emails and attachments you wish to back up, and then click OK to confirm your selection.
Step 3. To specify the storage location for your Outlook emails and attachments, click on the second box. Here, you can choose a local path, network or NAS location, or even a cloud drive to store your backup files.
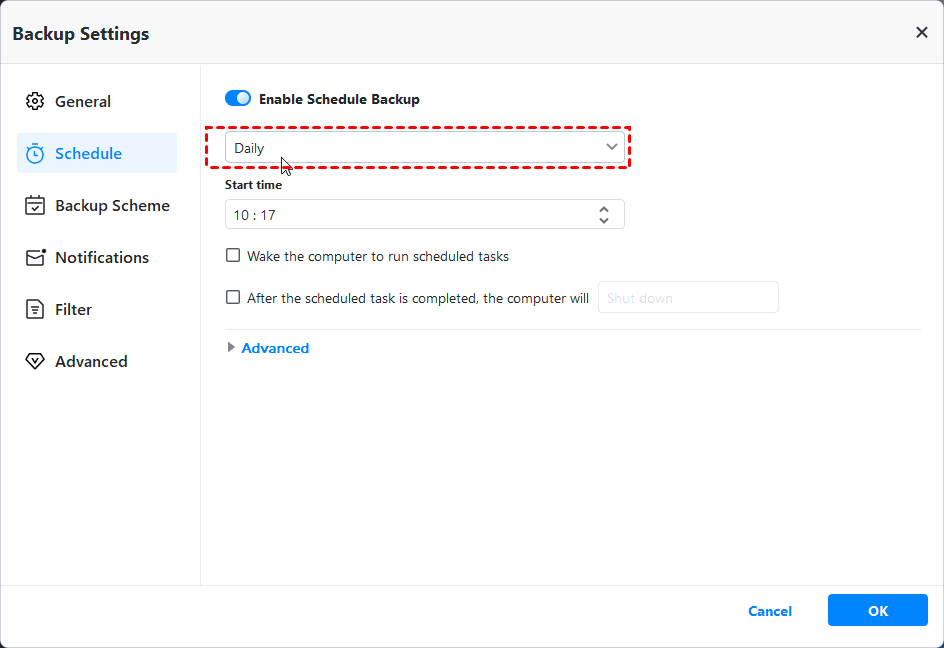
Step 4. To set up an automated backup for your Outlook emails and attachments, enable the desired schedule triggers such as Daily, Weekly, Monthly, and Event triggers or USB plug in. Once configured, click on Start Backup to initiate the automatic backup process. This will ensure that your Outlook data is backed up regularly without requiring manual intervention.
☞ Important Notes:
▶In the Backup Scheme settings, you have the option to switch from the default Incremental Backupto Differential Backup if desired.
▶Besides choosing the backup method, you can also enable automatic backup cleanup methods within the Backup Scheme. This feature is particularly useful for resolving backup disk issues efficiently.
Conclusion
This article graphically describes 9 useful ways to fix Outlook rules not working. You can choose any one of them to try to solve your problem. Meanwhile, in order to protect your Outlook data in all aspects, we recommend you use professional email backup software - AOMEI Backupper Pro to backup your Outlook data, so as to avoid data loss by any problems, such as system crashes, accidentally deleted emails, and other problems. This program not only can back up Outlook, but also can auto backup Gmail, download one now and try it!

