How to Transfer Photos/Videos from iPhone to PC Windows 7/8
How to import photos from iPhone to Windows 7/8? Find answers in this detailed guide and you can get safe, fast and easy way to make it!
By Kathy / Updated on May 14, 2026
Transferring photos from an iPhone to a Windows 7 PC.
I am struggling to transfer photos an iPhone to a Windows 7 PC laptop using iTunes. Can anyone give instructions that work please? How do I import photos into Windows 7? Or is there any way to transfer files from iPhone to PC without iTunes? Thanks!
- Question from Microsoft Community
For iPhone users, when you need to free up storage device space or back up data to avoid data loss, you may want to ask: "Can I transfer photos from iPhone directly to PC Windows 7?". The answer is Yes!
For people who are used to using iTunes to finish the process, you may find that iTunes' interface is illogical and its operation is complex. But don't worry, now you can read on to learn 6 solutions to this problem with detailed steps. And the free & fast & easy FoneBackup mentioned in Method 1 will be the most ideal choice.
Method 1. Best way to transfer photos/videos from iPhone to PC Windows 7/8🔥
To transfer pictures from iPhone/iPad to computer, FoneBackup may be the fastest way. This is a professional iPhone data transfer tool for Windows 7/8/10/11 PCs, which can help you easily move data from iPhone to PC and vice versa within only a few clicks and comes with various advantages.

- Transfer 1000+ full-resolutions photos in 10 minutes.
- Preview and select pictures to move as you like.
- Fully supports various iOS devices/versions(iPhone 16/iOS 18).
- Safe USB connections ensure no data leakage.
Now you can follow the guidance below to learn how to import photos from iPhone to Windows 8/7 laptop or desktop.
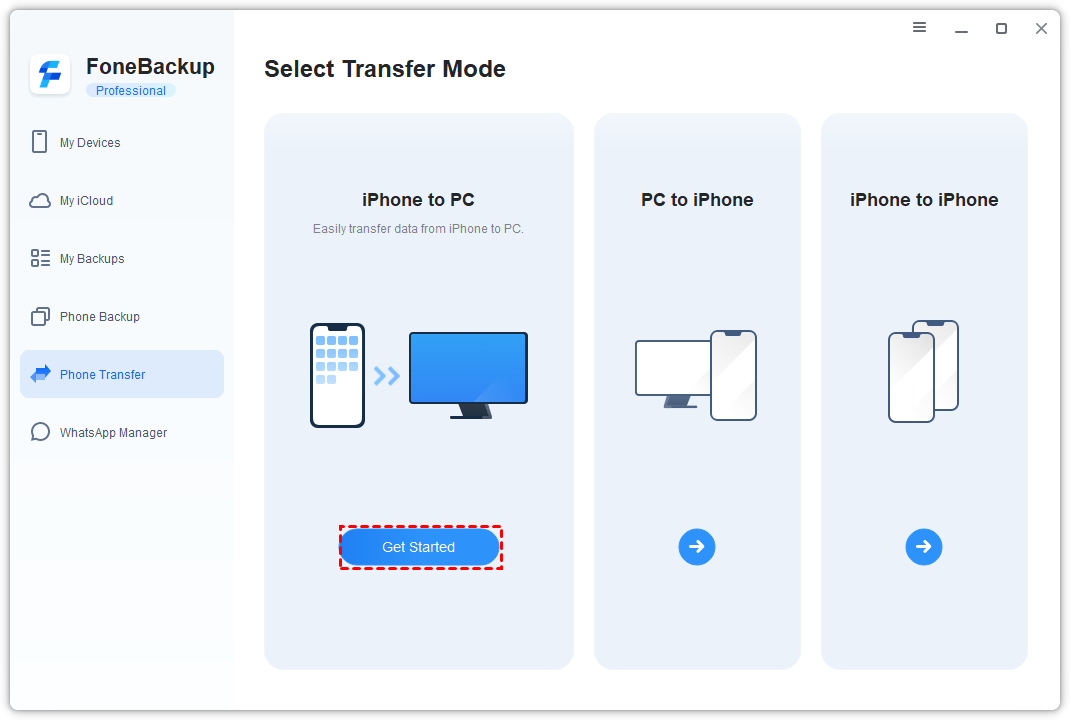
Step 1. Run FoneBackup and connect iPhone to Windows 7
Download and launch FoneBackup > Connect your iPhone to the PC with a USB cable > Go to Phone Transfer > iPhone to PC > Click the Get Started option.
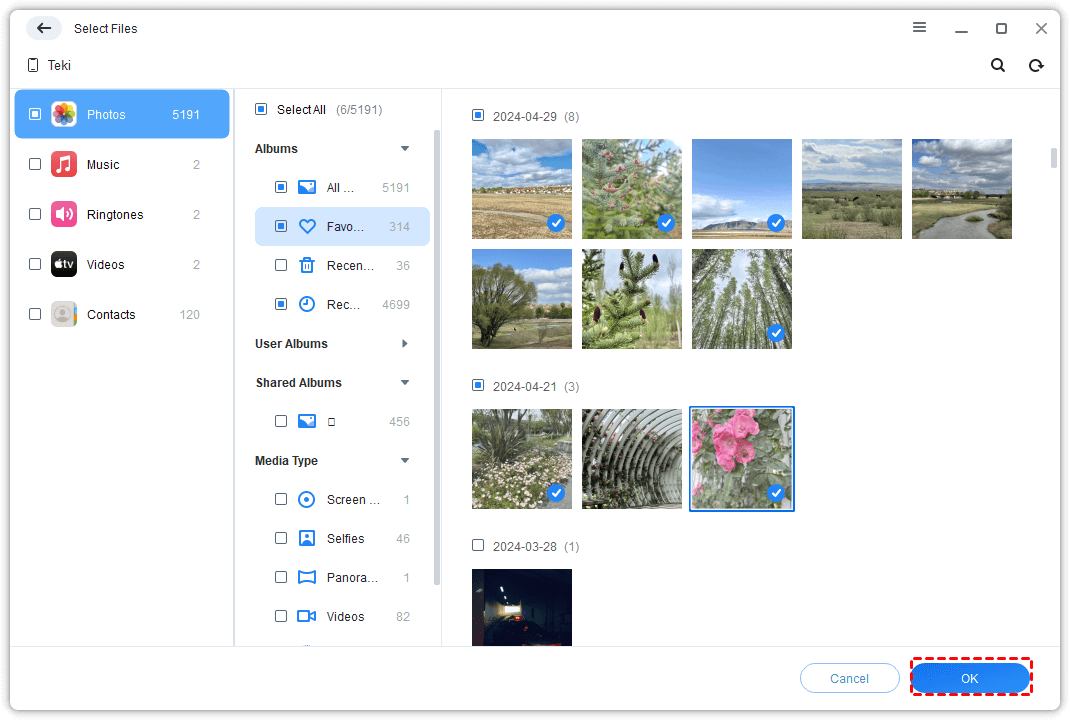
Step 2. Choose photos to transfer
Click the "+" icon and go to Photos to preview and select the pictures you need (You can also click the Videos icon to import videos from iPhone to PC) > Click OK to continue.
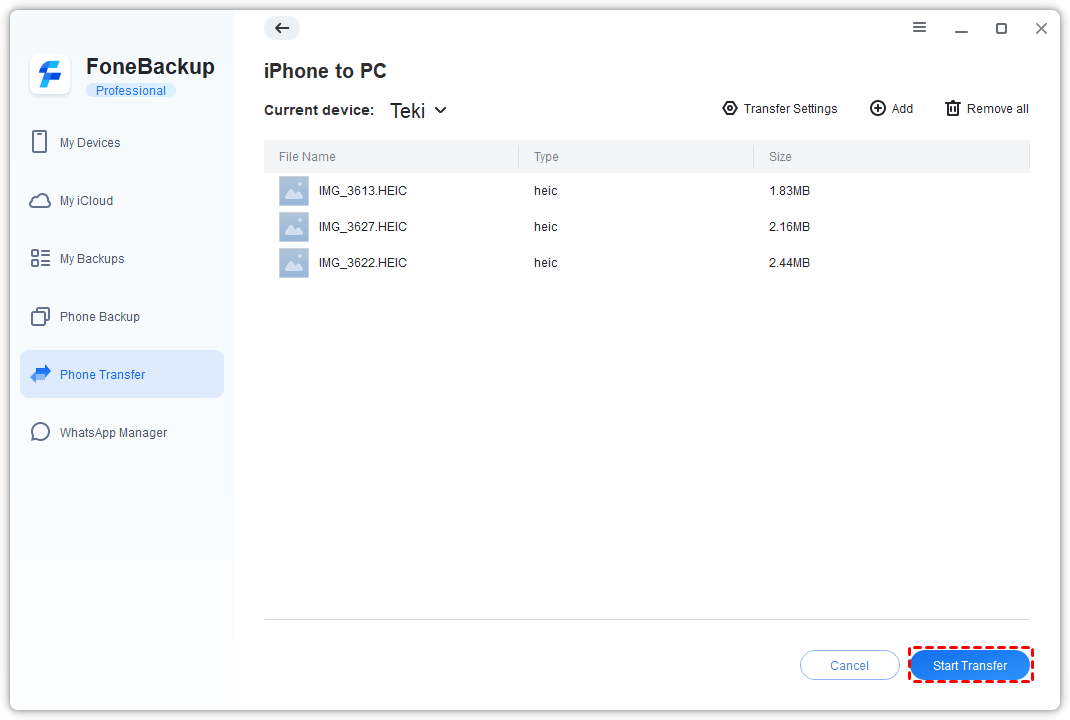
Step 3. Change settings and get photos off iPhone
Now all selected items will be listed here > You can change from Transfer Settings to transfer photos from iPhone to USB or other external hard drive > Now click Start Transfer to make it.
Method 2. How to copy photos from iPhone to Windows with AutoPlay
When an external storage device is connected to your Windows PC, you will get an AutoPlay window. Then you can use this feature to import pictures and videos to a Windows 7 laptop/PC.
1. Connect your iPhone to your PC with a USB cable and AutoPlay will show up automatically.
2. In the AutoPlay window, click on Import pictures and videos.

3. In the Import Settings, choose or create a folder to save the photos you’d like to transfer.
4. Select the photos you want to import. Then click Import to begin importing photos from your iPhone to PC.
Method 3. How to import photos from iPhone to Windows 8/7 with USB
If you don't want to rely on any extra software, then Windows File Explorer is also an available way. But with this method, you can only select photos from various folders one by one. And the transfer process might be a little hard.
1. Connect your iPhone to PC with a USB cable. Go to This PC, and find your iPhone.
2. Double-click it and you'll see the Internal Storage icon.
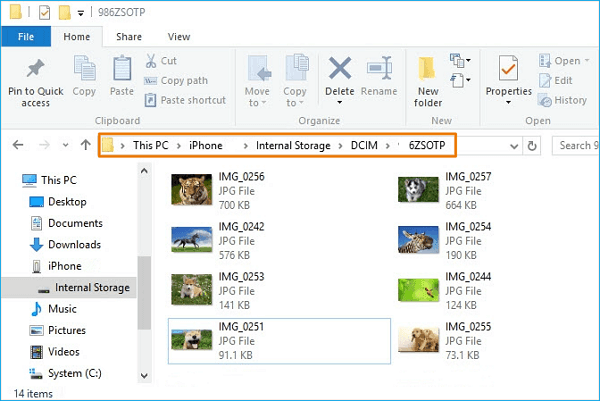
3. Double-click it to open it and you'll see the DCIM (Camera Roll) folder.
4. Open the folder and select the photos you'd like to transfer. Drag and drop to copy and paste photos from iPhone to Windows 7 PC.
-
When your iPhone is not importing photos, it may caused by empty internal storage folder, no new photos were found or something unknown went wrong. You can choose another reliable way like FoneBackup mentioned in Method 1 to make it.
Method 4. How to transfer photos from iPhone to PC Windows 7 wirelessly - iCloud
iCloud is Apple's official cloud service that allows you to upload data for backup or syncing. You can turn on your iCloud Photos. Then access your iCloud to download the photos you need.
-
Preparation for iPhone move photos to PC wirelessly
Connect your device to a stable Wi-Fi network. Enable iCloud Photos or iCloud Photos Library based on your iPhone: Tap Settings > Photos > iCloud Photos (or iCloud Photo Library).
Wait for a while and all your iPhone photos will be synced to iCloud, now you can choose the methods below to save pictures to your computer.
Option 1. Download iCloud photos via the official client
Apple offers an official client to help you download iCloud data to your PC, but it always crashes during the usage. If you need to download multiple from iCloud to your Windows 7 PC. It's better to use the professional iCloud manager mentioned in Option 2 to make it at a fast speed.
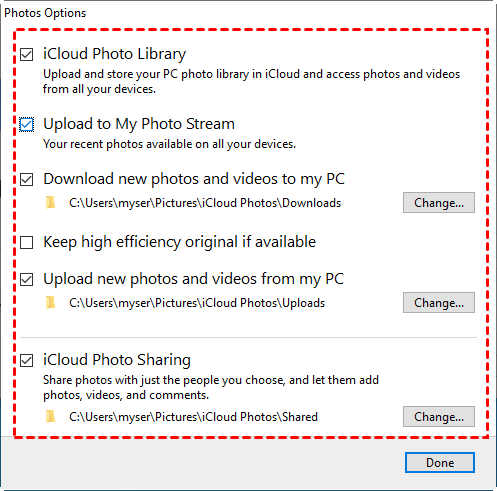
Step 1. Download the iCloud for Windows app onto your computer > Install it on your PC >Then sign in using your Apple ID the same as the one on your iPhone.
Step 2. Check Photos > Then select Download new photos and videos to my PC > Click Done > Choose Apply to download iPhone photos to Windows 7.
Step 3. New photos you take with your iPhone will be transferred to your PC automatically whenever you have Wi-Fi.
Option 2. Fast & professional way to download photos from iCloud to PC
For people who need a useful way to download iCloud photos/videos from a Windows PC, the handy iCloud manager - FoneBackup might help you a lot!
· Fast speed helps you to efficiently download, upload or delete iCloud data.
· FoneBackup uses two-factor authentication which is the same as the encryption used by Apple to protect your iCloud data.
· Easily sync iCloud data from one account to another when you need to switch a new Apple ID.
Now you can download FoneBackup on your Windows PC and learn from the detailed steps to get this useful tool's handy features!
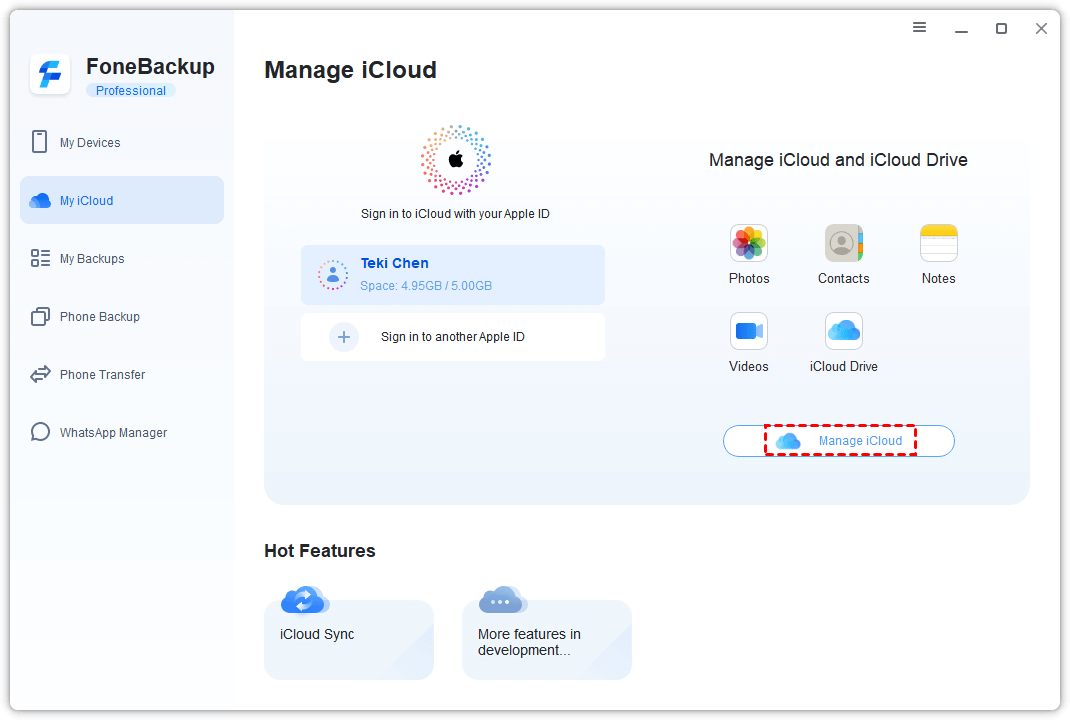
Step 1. Launch FoneBackup > Go to My iCloud > Log in with your Apple ID > Choose Manage iCloud.
Step 2. Go to Photos > Choose the pictures you need to download > Click the Download button to continue.

Step 3. Change the download settings from the pop-up window > Tap on Download to begin the task.

Method 5. How to upload photos from iPhone to PC with OneDrive
One drive is the Microsftware cloud backup tool. Just like iCloud, you can create a OneDrive accounts to store pictures. Then send these photos to your computer.
1. Install the OneDrive app on your iPhone and launch it. Create your OneDrive account and note the credentials.
2. Click on the Add button from the top of the screen and click on upload > select photos from iPhone > upload > Done to save photos on OneDrive.
3. Now, go to your computer and open the OneDrive site > Folder options > Download folder.
4. From the downloaded zip file, extract the photos on your PC.
Method 6. How to download photos from iPhone to computer with Dropbox
1. Install Dropbox iOS on your iPhone and log in using your existing Dropbox account if you have one. If you don’t have one, please create a Dropbox account first.
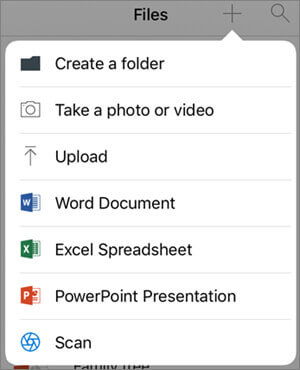
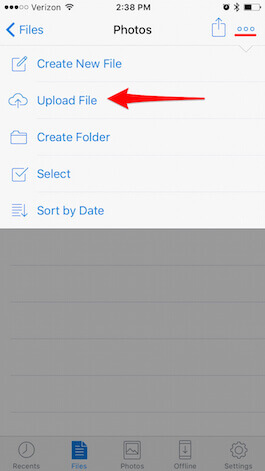
2. Select Files and then decide the destination folder. Click on the 3 dots from the top-right corner. Choose Upload File and tap Photos, and then select the desired photos.
3. On your PC, visit Dropbox or download the Dropbox app and then log in. Go to the folder you have synced photos in recently.
4. Open the folder and download the photos you like.
Conclusion
From the above, you know how to transfer photos from iPhone to PC Windows 7 and you can choose one to follow. But some ways may have shortcomings. For example, when you use AutoPlay to transfer iPhone photos, the images exported will be organized disorderly. Moreover, sometimes, your iPhone is not showing up in Windows Explorer.
Compared with other ways, FoneBackup would be the best choice. Because it can transfer photos in a fast and efficient way without missing any images. Besides, it can also help you transfer photos from computer to iPhone without data being erased. Just go and download FoneBackup.