7 Tips | Photos Taking Up Space on iPhone
Photos can easily take up much space on iPhone. To optimize iPhone space, you can try the seven tips in this guide to manage your iPhone photos.
By Demi / Updated on May 15, 2026
Photos taking up space on iPhone
I am paying for extra iCloud storage and assumed that having set up my iPhone to optimize storage - iCloud Photos is on and I just turned on upload to My Photo Stream. However, it is still showing 4.72 GB of storage used by photos. Help!
- Question from Apple Community
The outstanding iPhone camera makes it easy to take high-quality photos to record every meaningful fragment in your life. However, if you don’t organize photo library regularly, the mountainous photos can easily take up space on iPhone.
![]()
What can you do when you find photos taking up space on iPhone? How can you manage your photos on iPhone? The 7 tips in this guide can provide you with some inspirations.
5 Tips to Stop Photos Taking Up Much Space on iPhone
Here are the 5 tips you can try when you find photos taking up much space on iPhone. You may also keep these tips in mind to prevent photos from taking up much space on iPhone in the future.
Tip 1. Clear up Recently Deleted album in the Photos app
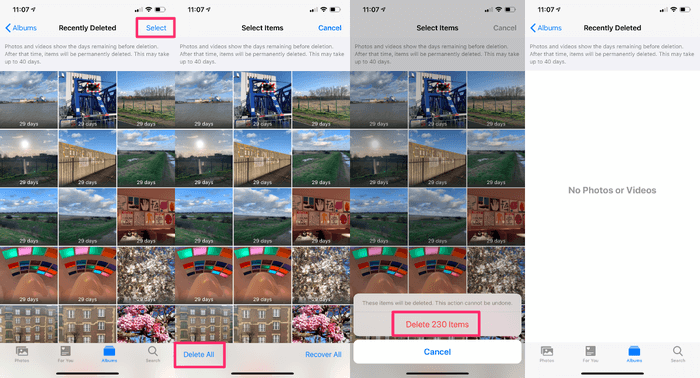
It’s commonplace to delete photos from the Photos app when you want to free up some storage space on iPhone. But please be noted that photos taking up space on iPhone after deleted. Instead, they are moved to the Recently Deleted album, and the photos will continually take up space on iPhone for 40 days after deleting.
Therefore, it is suggested to clear up the Recently Deleted album in time. You can go to the Photos app > Scroll down to locate and click Recently Deleted > Make sure you don’t need these photos anymore, then click Select > Tap Delete All to clear up the Recently Deleted album.
Tip 2. Turn off Keep Normal Photo
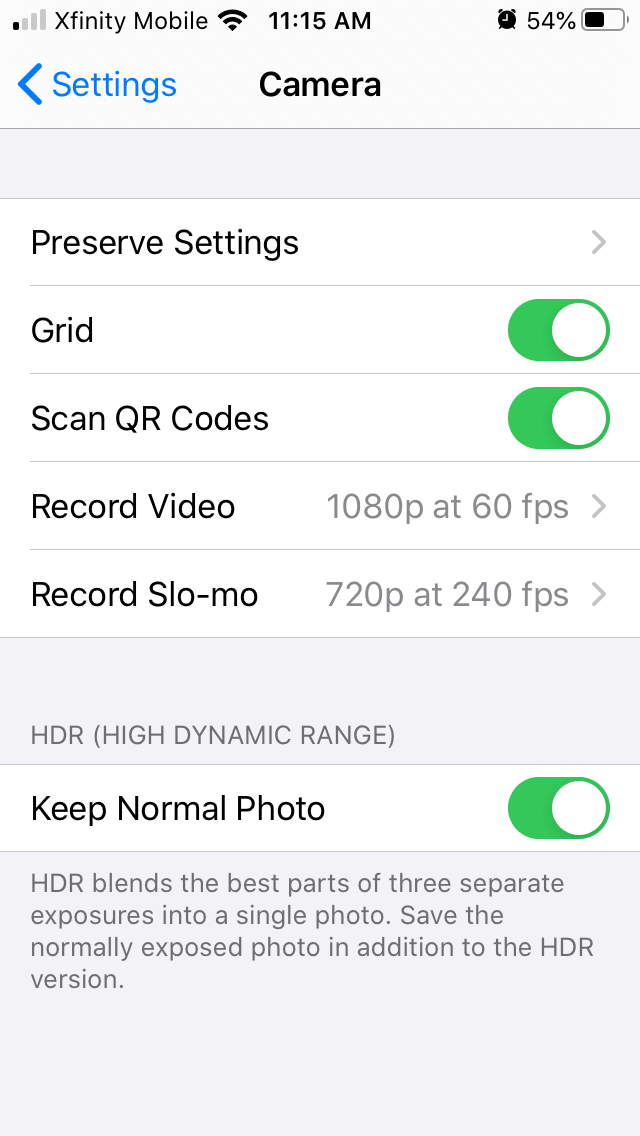
If you take photos in HDR (High Dynamic Range) mode, iPhone will save the normally exposed photos and the HDR version by default. That’s the main reason why Photos app takes up so much space.
You can turn off the feature to prevent photos from using up too much storage space. Just head to the Settings app > Choose Camera > Under HDR, toggle off Keep Normal Photo option.
Tip 3. Take photos in HEIC format
To save your iPhone photos in fewer sizes without reducing their quality, you can choose to take photos in HEIC format, which stands for high-efficiency image format.
You can enable it by going to Settings on your iPhone > Camera > Click Format > Choose High Efficiency.
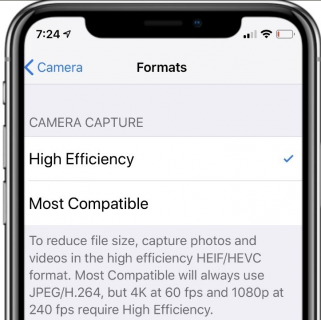
Tip: Although HEIC photo saves space, it brings some drawbacks. One of the biggest drawbacks is that HEIC photos are only compatible with iOS and macOS. Therefore, you have to convert HEIC to JPG/JPEG/PNG first if you want to browse them on Windows PC or any other platform.
Tip 4. Move photos and videos to iCloud Photos
Moving photos and videos to iCloud Photos is a nice try if you don’t want photos to take up much space on iPhone. It allows you to backup original photos and videos while keeping a smaller copy on your iPhone. Here’s how to move photos to iCloud.
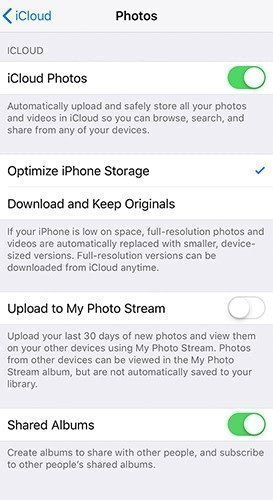
Step 1. Open Settings on your iPhone > [your name] > iCloud > Photos.
Step 2. Toggle on iCloud Photos > Tap Optimize iPhone Storage.
Chances are that photos are still taking up space on iPhone even with iCloud enabled. Since iCloud provides you limited storage space for free, which can be run out quickly, it’s more suggested you backup iPhone photos to PC without iCloud.
Tip 5. Turn off Photo Stream
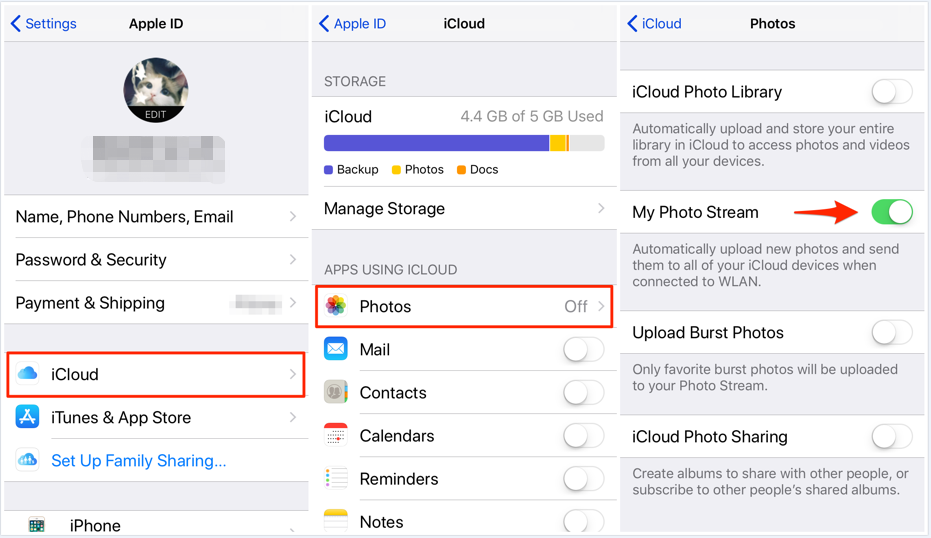
If you insist on backing up photos to iCloud, please make sure you have turned off Photo Stream, so that you can prevent your iPhone from automatically uploading new photos from other iCloud devices when connected to Wi-Fi.
Follow the steps below to check if you have turned off Photo Stream. Head to Settings on your iPhone> [your name] > iCloud > Photos > Toggle off My Photo Stream.
Advanced: Manage iPhone Photos with a Professional Tool
It may far from enough to optimize iPhone space by managing the Photos app with the five tips above. Now, you can do more with the help of professional software - FoneTool.
Tip 6. Automatically scan and delete duplicate photos
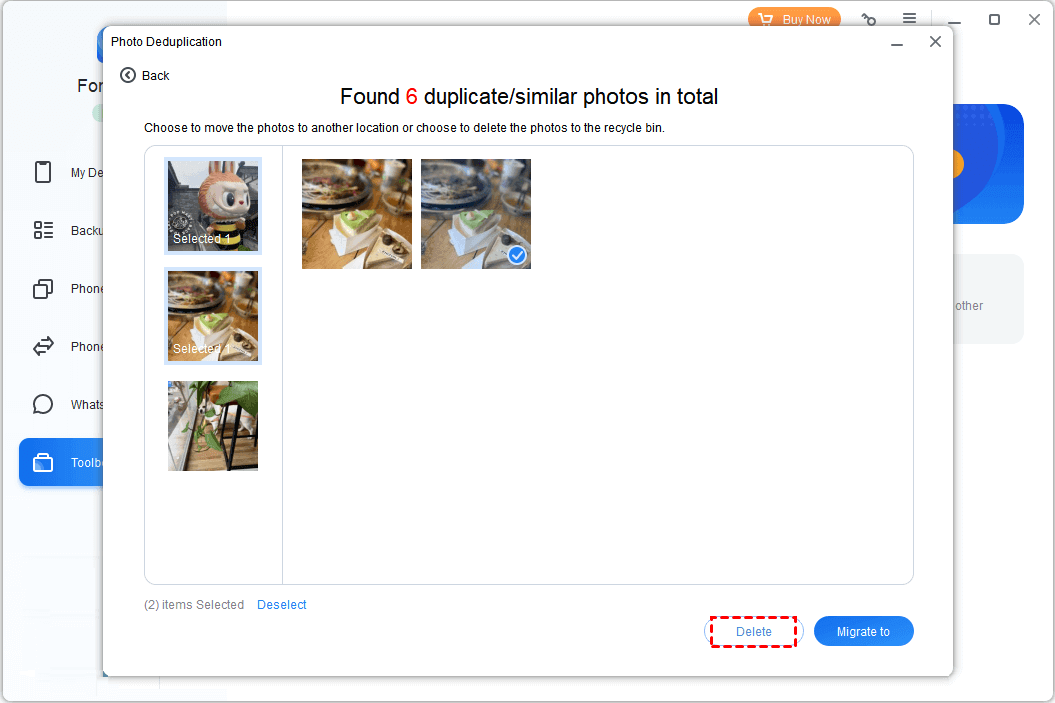
Multiple duplicate photos are such troublesome on iPhone. If you don’t want to waste time deleting them one by one, then try the Photos Deduplication function in FoneTool.
It can help you automatically scan and filter both duplicate and similar photos from your iPhone. Besides, you’re allowed to preview them and pick the best one saved on your iPhone.
Step 1. Download and install FoneTool on your computer > Connect your iPhone to computer with USB.
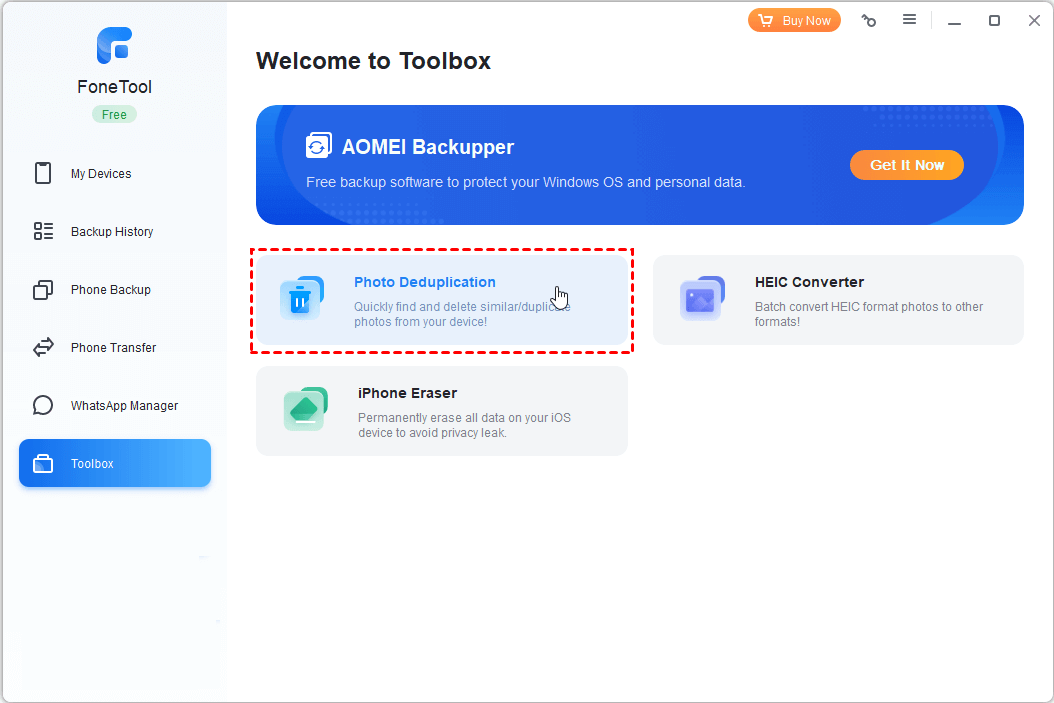
Step 2. Launch FoneTool and click Toolbox > Choose Photo Deduplication option.
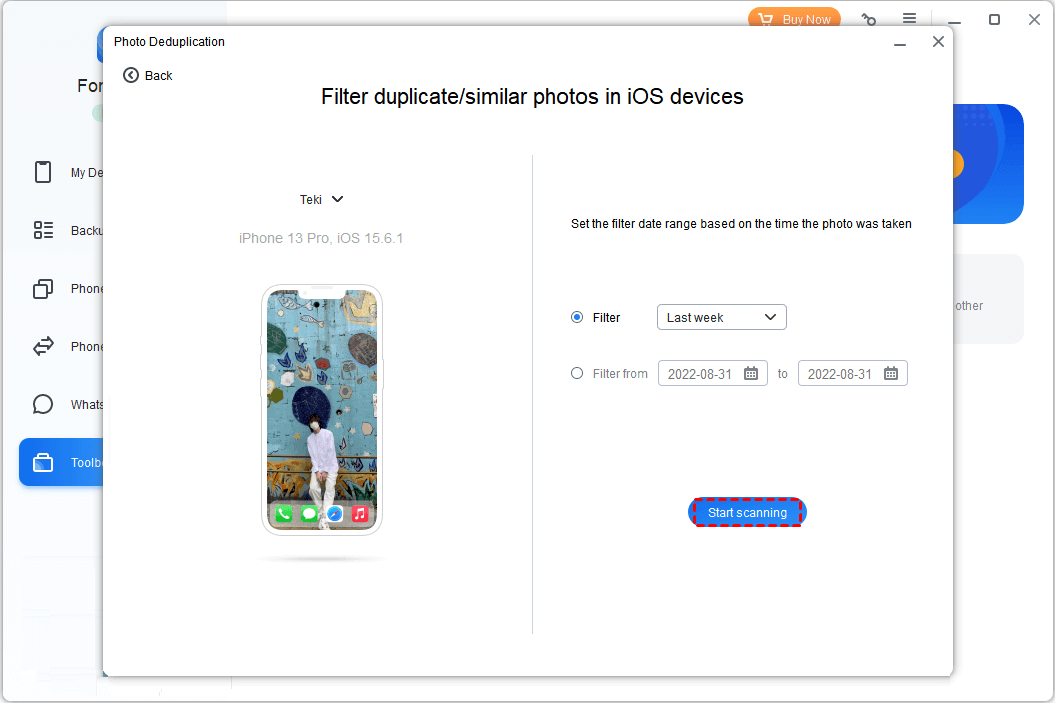
Step 3. Choose Scan iOS Device > Click Start Scanning and wait for it to filter all duplicate and similar photos.
Step 4. When all the duplicates are listed in the left pane, you can browse and click Delete to delete them as you like.
Tip 7. Transfer and browse iPhone photos on computer
FoneTool is a professional transfer and backup tool at the same time. If you wish, you can transfer less important photos that you don’t want to lose to PC and delete them from iPhone. On the one hand, they won’t take up limited storage on iPhone and iCloud. On the other hand, you are free to browse them on PC as per your need.
✓ Preview and fast transfer process. You’re allowed to preview the files and choose certain photos to transfer. You just need to spend 3 seconds transferring 100 photos to computer.
✓ Types of data supported. Besides photos, you can also transfer videos, music, etc. from iPhone to computer for further editing.
✓ No data loss. FoneTool will transfer iPhone data in its original format without compressing its quality.
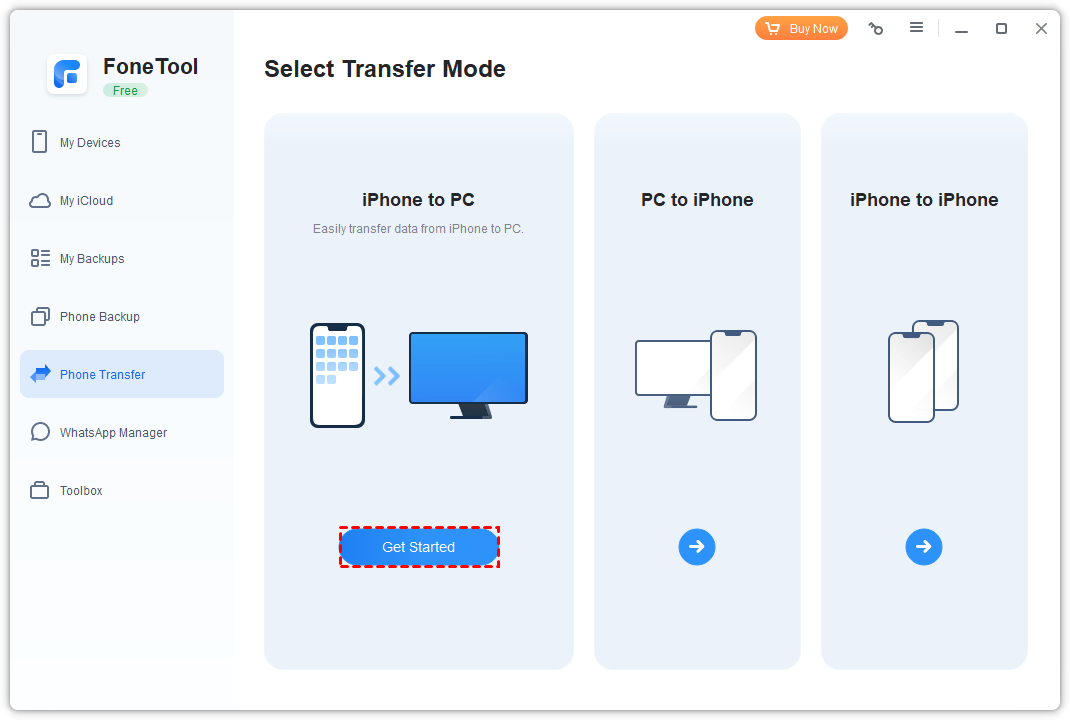
Step 1. Connect your iPhone to computer > Launch FoneTool and click Phone Transfer > Get to iPhone to PC and click Start Transfer.
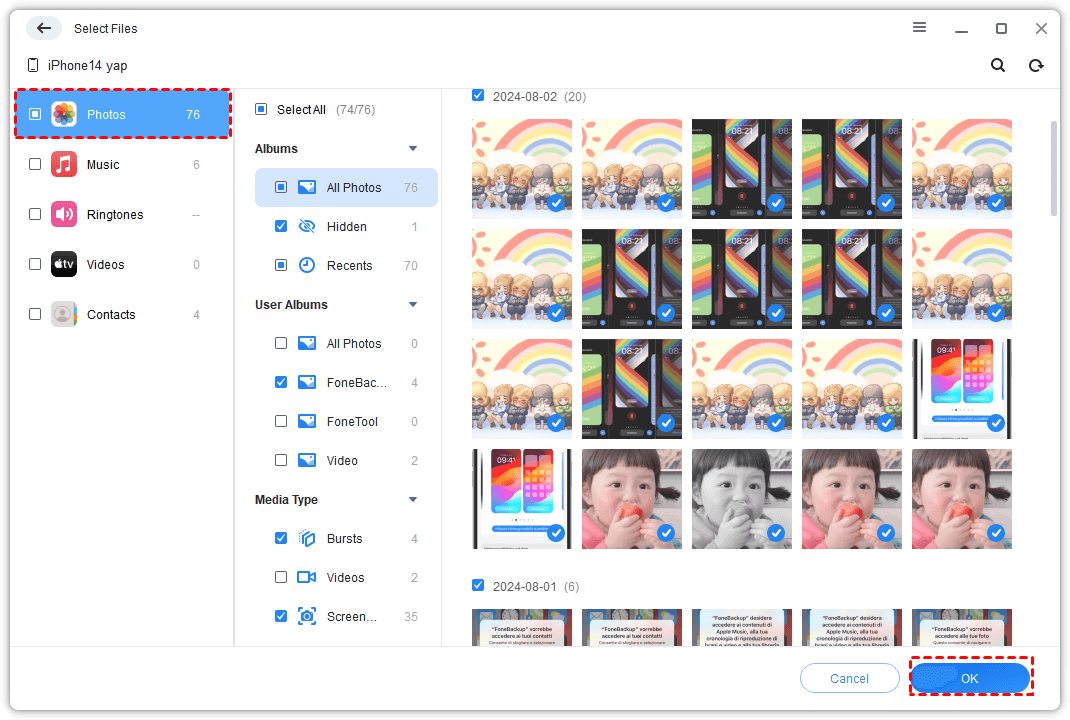
Step 2. Check the Photos icon > Preview and select photos you’d like to transfer to computer > Click OK to confirm.
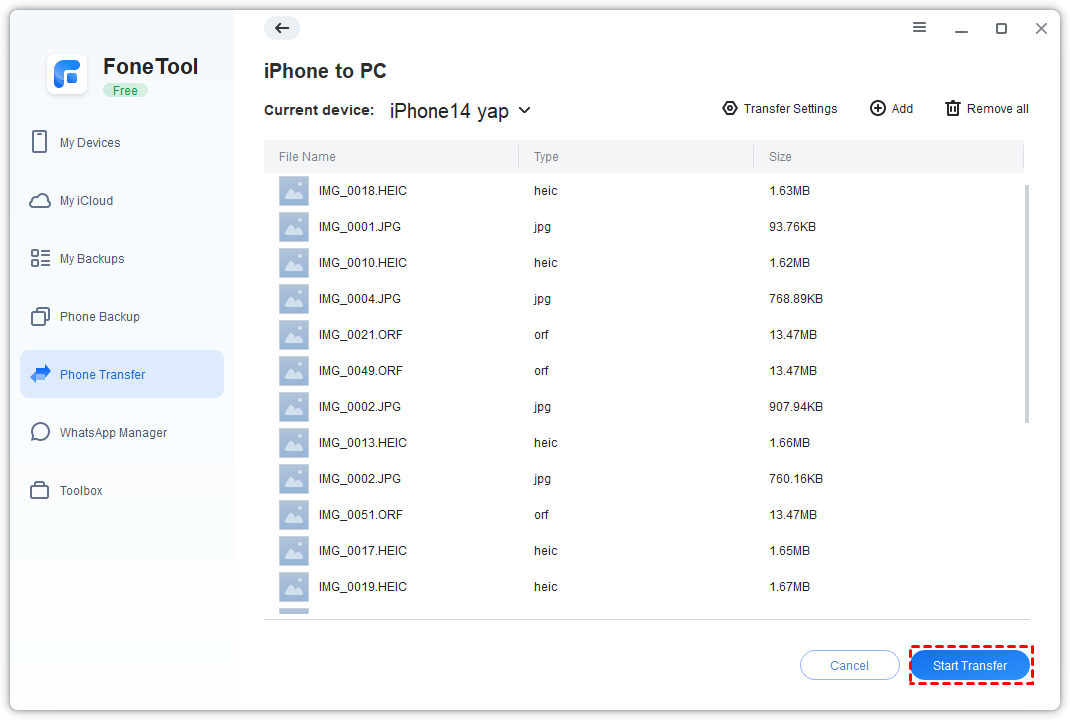
Step 3. Choose a storage path (A local folder on computer, USB, NAS are all allowed) from Transfer Settings > Click Start Transfer to begin the task.
Since FoneTool also supports iPad and iPod, you can transfer these photos or any other files on computer to iPad or iPod.
Conclusion
That’s all for the seven tips you can do when you find photos taking up much space on your iPhone. You can easily make it on iPhone. For better management, you can rely on the third-party tool - FoneTool does more for you.