Erase Data after 10 Failed Passcode Attempts | Everything
iPhone would erase data after 10 failed passcode attempts. Is it really scary? You would know what it means and how to safely use the feature in this guide.
By Dylan / Updated on May 15, 2026
Erase data after 10 failed passcode attempts
I have enabled this on my iPhone but I am not sure whether it is wise to do so. I am afraid that my data would be deleted by the child or for some tricks. What happens after 10 failed passcode attempts?
- Question from iPhone user
>You could ask iPhone to protect the data after wrong passcode is attempted.
>The more wrong passcodes were tried, the longer time iPhone would lock the screen.
>After 10 wrong passcodes were tried, iPhone would be permanently locked.
Some users choose iPhone for the security of iOS. Compared with Android, privacy is well protected even when the device is not at hand. To prevent your data from being stolen, you could ask the iPhone to erase the data if the bad guys try to unlock the screen.
It seems to be a very brilliant feature to protect iPhone data, but what if it is triggered on another occasion? It is common for a naughty child to try unlocking the screen like playing with toys so that is it unsafe to use this feature?
Your questions would be answered in this guide. If you have any misgivings about this feature, the following sections would tell you how this feature works, how to disable erase data after 10 failed passcode attempts, and how to safely use it.
Section 1. What happens after 10 failed passcode attempts?
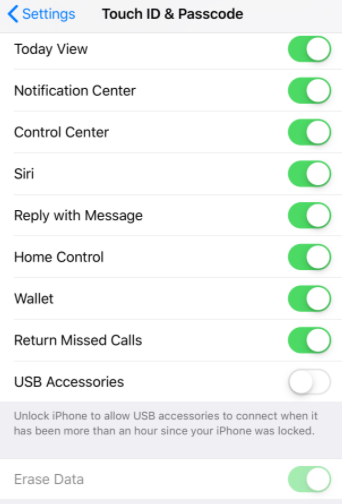
In iPhone Settings, you could find this option in General > Touch ID & Passcode > Erase Data.
You might think that everything on your iPhone would suddenly disappear after 10 wrong passcodes are tried in 10 seconds. In fact, it is not so easy to trigger.
First, nothing would happen if you continuously enter 4 wrong passcodes. You would just be warned that this passcode is wrong.
Note: If you continuously enter the same wrong passcode for 4 times, it would be regarded as just 1 failed attempt.
iPhone wrong passcode lockout time:
The 5th wrong passcode: There would be a message on the screen that iPhone has is disabled. try again in 1 minute.
The 6th wrong passcode: try again in 5 minutes.
The 7th wrong passcode: try again in 15 minutes.
The 8th wrong passcode: try again in 15 minutes.
The 9th wrong passcode: try again in 1 hour.
The 10th wrong passcode: iPhone disabled. connect to iTunes.
If you see connect to iTunes, iPhone data has been removed and the device is locked. You can go to section 3 to know how to make your iPhone alive again.
Section 2. How to safely enable iPhone protection mode?
Even if your device is lost, your data should always be your own. The biggest problem of enabling this feature is that you are afraid of losing data when it is necessary. That’s why data backup is important. It is suggested to regularly backup iPhone to computer so that you would never worry about data loss.
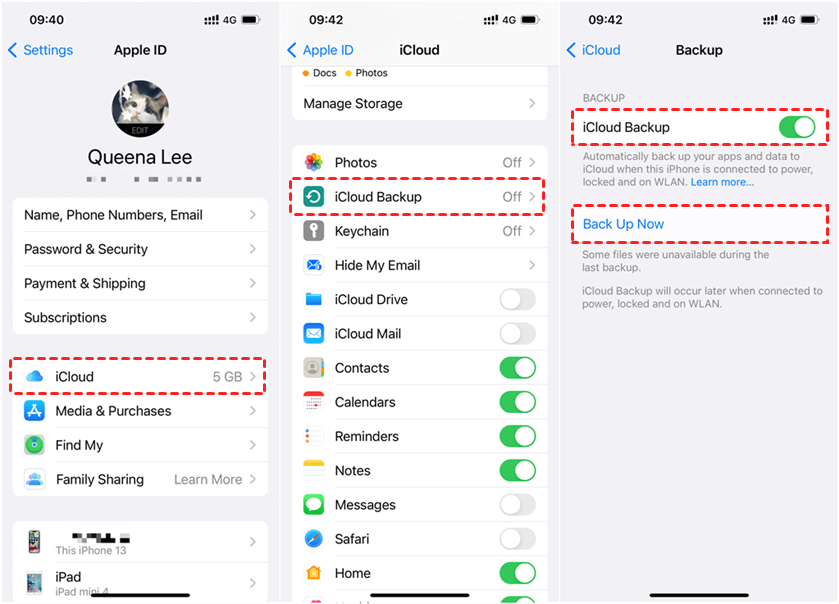
Want to backup iPhone automatically? You could also ask iPhone to do that. iPhone would automatically upload data to iCloud when the device is plugged to power, the screen is locked, Wi-Fi is connected at night.
You can enable iCloud Backup in iPhone Settings > your profile > iCloud > Backup > turn on iCloud Backup.
Section 3. How to use iPhone again after it is disabled?
Even if your iPhone is permanently disabled for some reason, you could still unlock the device but all the data would be removed. If you have an iPhone backup, you could recover iPhone data after unlocking iPhone.
You need iTunes to unlock iPhone with the following steps:
1. Disconnect iPhone from computer if you are doing that.
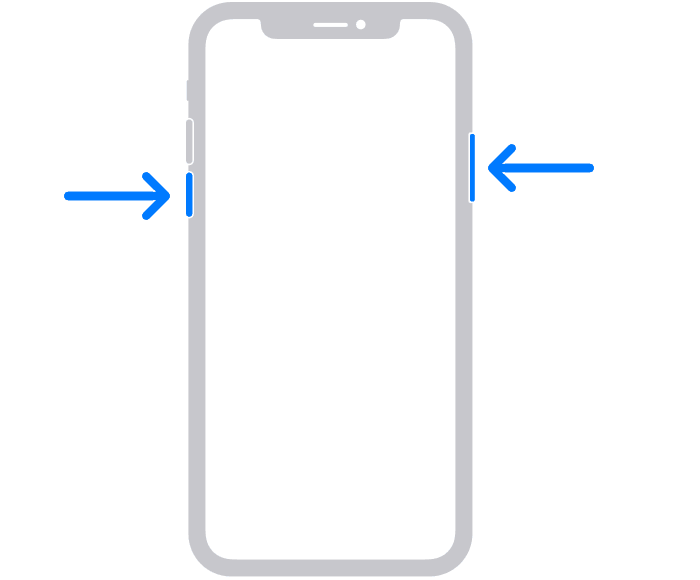
2. For iPhone 12/SE(2nd)11/XS/XR/X/:
Press and hold the power button and either of the volume button. Drag the slider to turn off the iPhone when it appears. Then you need to press and hold the power button again and plug iPhone into computer. You should not release the button before iTunes message pops up.
For iPhone 7 Plus and iPhone 7:
Press and hold the power button to drag to power off slider. Then you need to press and hold the volume – button this time and plug iPhone into computer. Finish the same process in iTunes.
For iPhone SE(1st)/6S/6/5S/5/4S/4:
Press and hold the power button to drag to power off slider. Then you need to press and hold the home button this time and plug iPhone into computer. Finish the same process in iTunes then.
Section 4. How to safely erase iPhone by yourself?
Sometimes you might need to clear iPhone data to obtain more storage. You can easily do this with professional software FoneTool.
It could let you easily backup and erase iPhone data for free so your important information won’t be lost. What’s more, FoneTool could help you activate iPhone automatically, saving your time to set up iPhone.
Steps to erase iPhone with FoneTool
Step 1. Download FoneTool and connect iPhone to computer with USB cable.
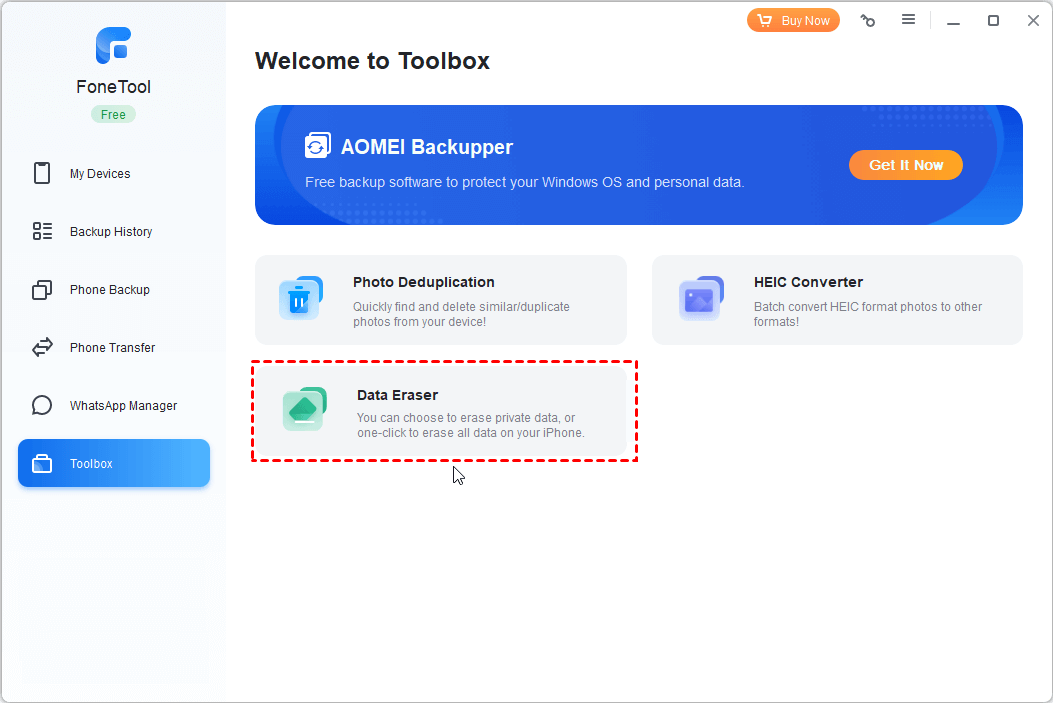
Step 2. Click Toolbox > Select Data Eraser.
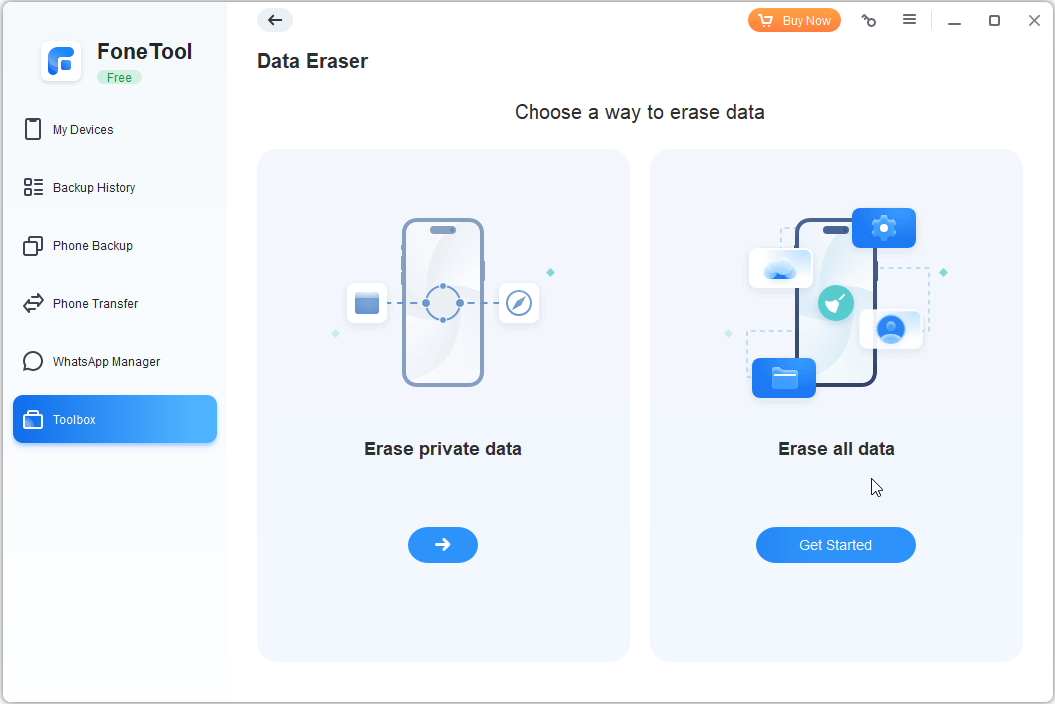
Step 3. Choose Erase all data and click Get Started.
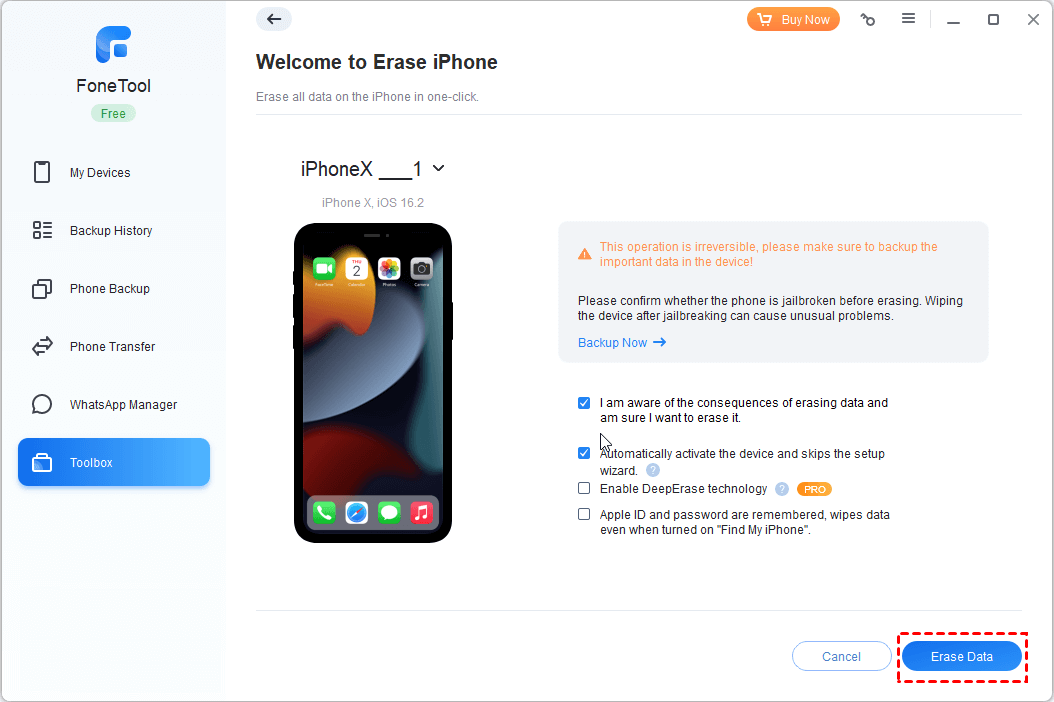
Step 4. Adjust the settings according to your situation.

Step 5. Click Erase Data to begin.
Conclusion
The option erase data after 10 failed passcode attempts is used to prevent iPhone data been stolen. Is it safe to use? The passage has told you everything about it.
If you need to erase iPhone for some reason, FoneTool is recommended because it could backup and erase data at the same time.
Share this passage and it would help more people.