


4 Ways to Backup Database in SQL Server Management Studio
Any loss or corruption of crucial SQL data could have severe consequences for businesses, ranging from financial loss to damage to reputation. Therefore, we introduce 5 efficient backup methods in SQL Server Management Studio to ensure data safety.
By Crystal / Updated on June 13, 2024
SQL Server Management Studio Backup Database Guide
As you probably know, there are multiple backup methods in Microsoft SSMS (SQL Server Management Studio), each with its own advantages and disadvantages. So before you start, I’d like to briefly introduce and compare them for your reference:
◉ Backup GUI: This feature is easy to operate without using scripts, but only one database can be backed up at a time, and the operation cannot be automated.
◉ T-SQL script: You need to know basic T-SQL commands beforehand, and any small mistake may lead to operation failure. But with effective scripts, you can perform some more advanced operations easily.
◉ Maintenance Plans: It allows you to backup multiple databases at once, and add a schedule to automate the task. However, it is only available for non-Express editions and is relatively cumbersome to operate.
◉ SQL Server Agent: It can also automate backups with high flexibility, but you need to fill in the backup script yourself as the core step. Also, it is not applicable to SQL Express editions either.
You can pick the way you like, or use another SQL backup software that can schedule backup multiple databases simply and intuitively.

Method 1. Create a SQL backup task with GUI
To use Microsoft SQL Server Management Studio backup database, the easiest way is using the backup GUI.
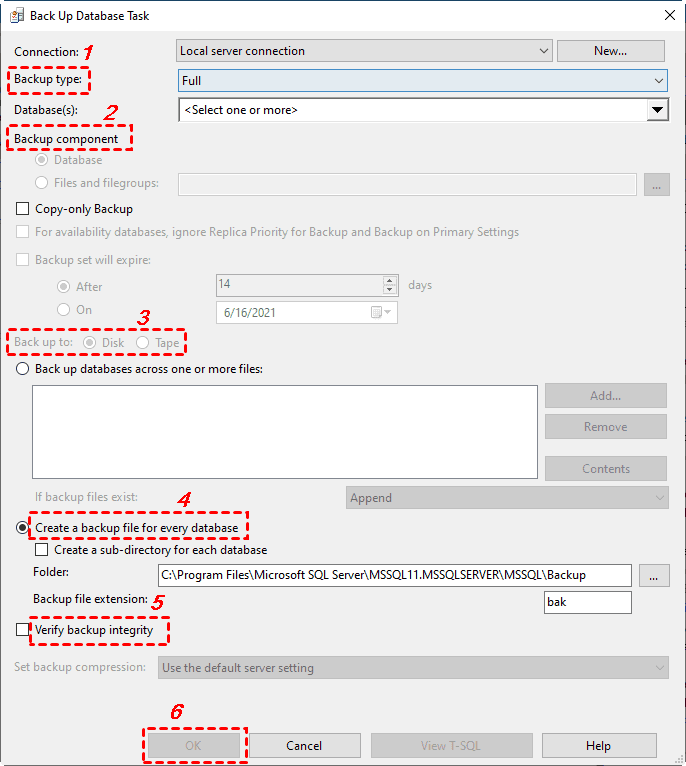
1. Launch SSMS and connect to your instance. Right-click the database you want to back up in Object Explorer, choose Tasks > Back Up.

2. Choose the backup type (full/differential/transaction log), and Add a path as you need.
It's recommended specify a easily accessible path so that the backup file can be easily found when you need to perform recovery. Then, enter the file name as you like and remember to add the .bak suffix.
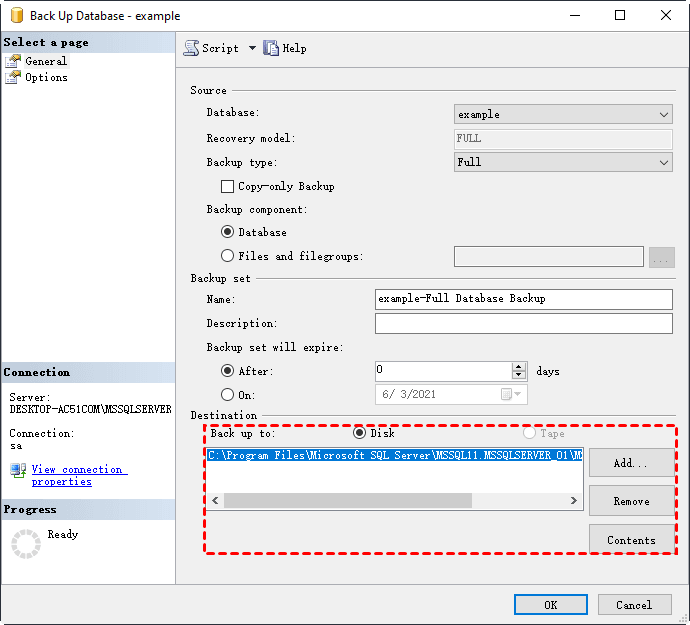
3. Click OK to execute the backup. It will prompt you a message once the operation is complete. Then you can find the backup file in the target folder.
Tip: In SQL management stutio, you can also restore SQL database from bak file. Click to learn more details.
Method 2. Backup database with T-SQL commands
The basic T-SQL backup statements is BACKUP DATABASE TO DISK. You can use it flexibly as you need.
Create a full backup:
USE master
GO
BACKUP DATABASE [database] TO DISK = 'filepath\fileaname.bak' WITH COMPRESSION, INIT, STATS = 5;
GO

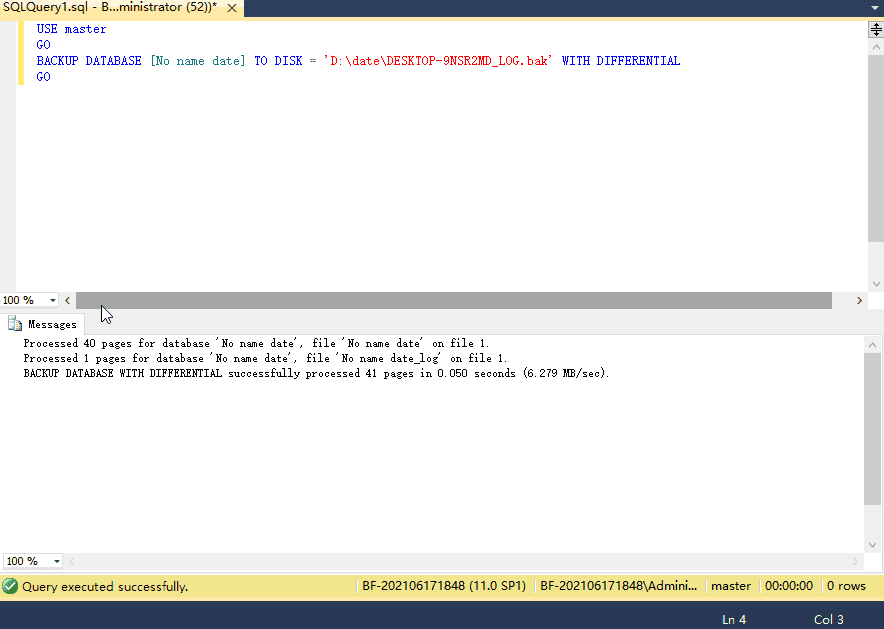
Create a differential backup:
USE master
GO
BACKUP DATABASE [database] TO DISK = 'filepath\filename.bak' WITH DIFFERENTIAL
GO

Create a transaction log backup:
USE master
GO
BACKUP LOG [database] TO DISK ='filepath\filename.trn' WITH NORECOVERY
GO
Method 3. Schedule backup with Maintenance Plans
This feature gives you options to create a plan manually, or complete the operation following a wizard. Here I will mainly introduce the first one.
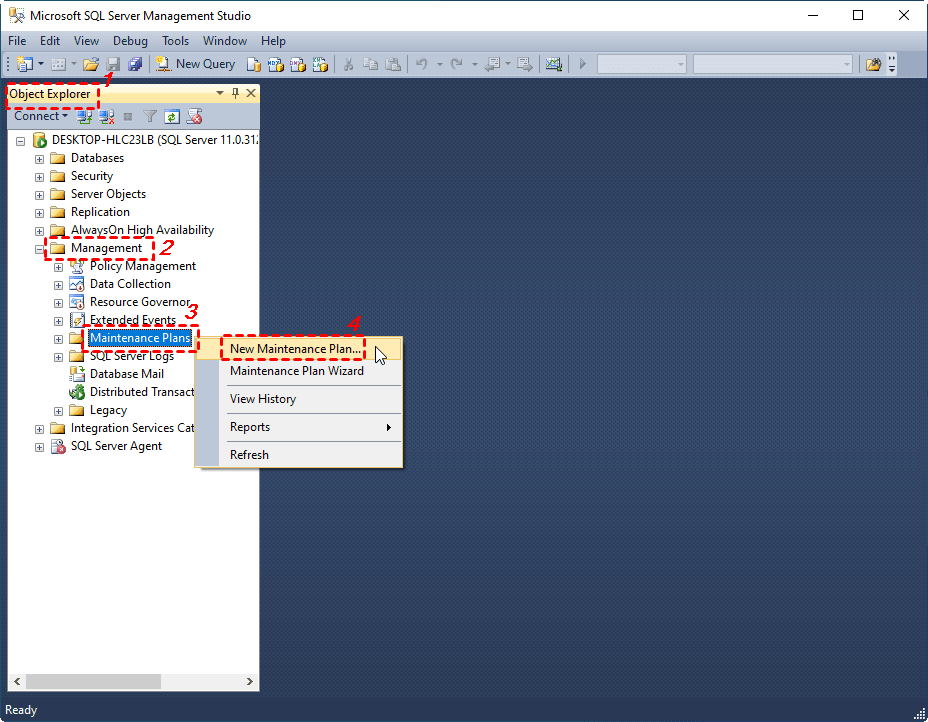
1. Make sure the SQL Server Agent is enabled, otherwise please Start it first.
2. Navigate to Management > Maintenance Plans. Right-click it and choose New Maintenance Plan. Give it a name to proceed.
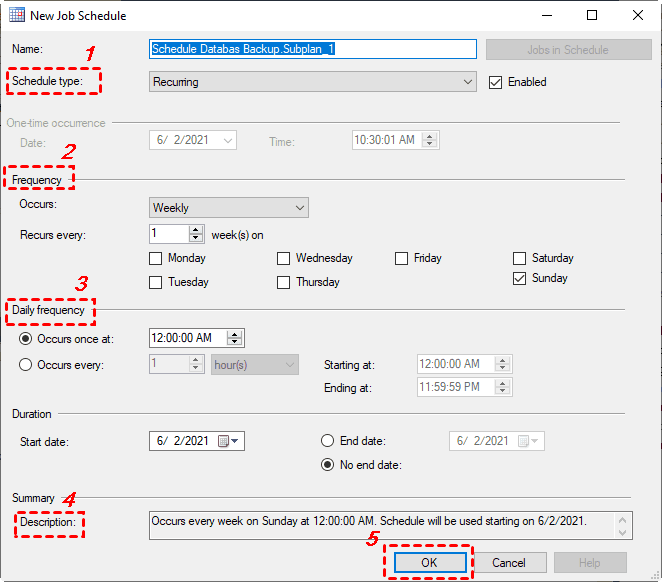
3. Click Subplan Schedule (calendar icon) to set up the backup schedule. Keep the schedule type as the default Recurring, and configure the frequency as you like. Click OK to confirm it.
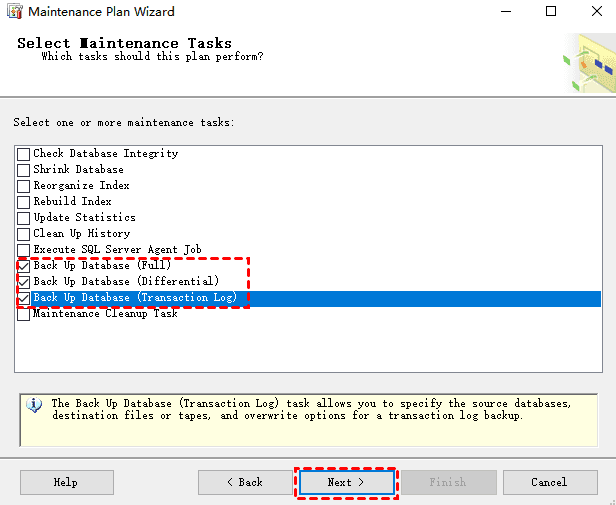
4. Hit Toolbox and drag the Back Up Database Task into the blank area on the right side.
5. Double-click the task to choose the backup type, and the databases to backup. Then specify a target folder.
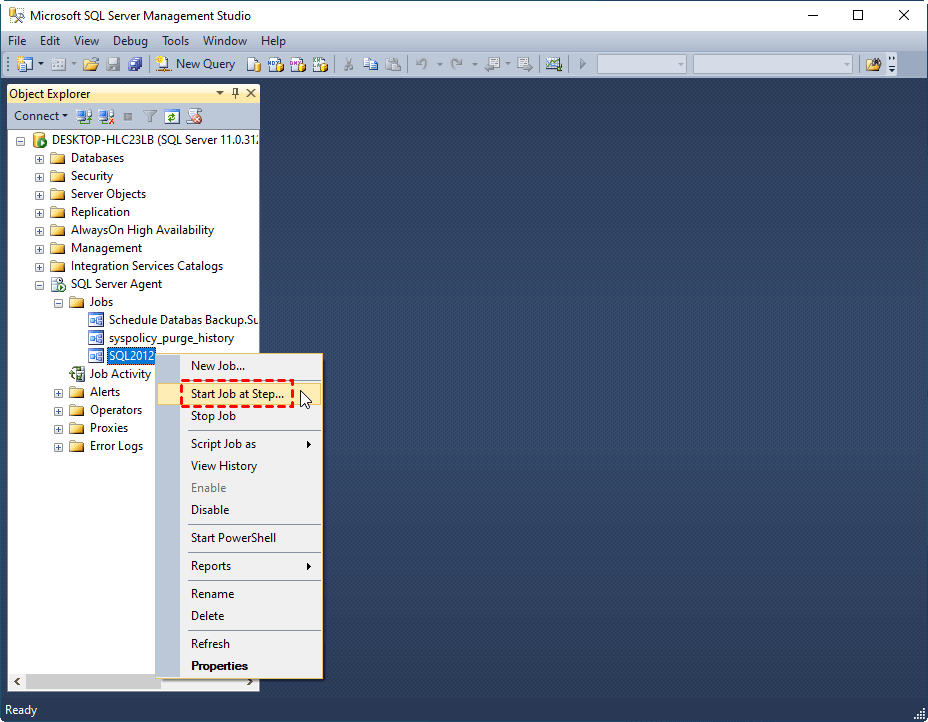
6. After saving the plan, you can find it under SQL Server Agent > Jobs. It will be executed automatically according to your schedule. You can also right-click it and choose Start Job at Step to test it immediately.
Tip: The procedure of creating a backup task with Maintenance Plan Wizard is largely the same. But it will walk you through all the steps, so it's more suitable for beginners.
Method 4. Create an auto backup job with SQL Server Agent
This method essentially uses T-SQL commands to perform database backup, but you can add a schedule to automate the task.
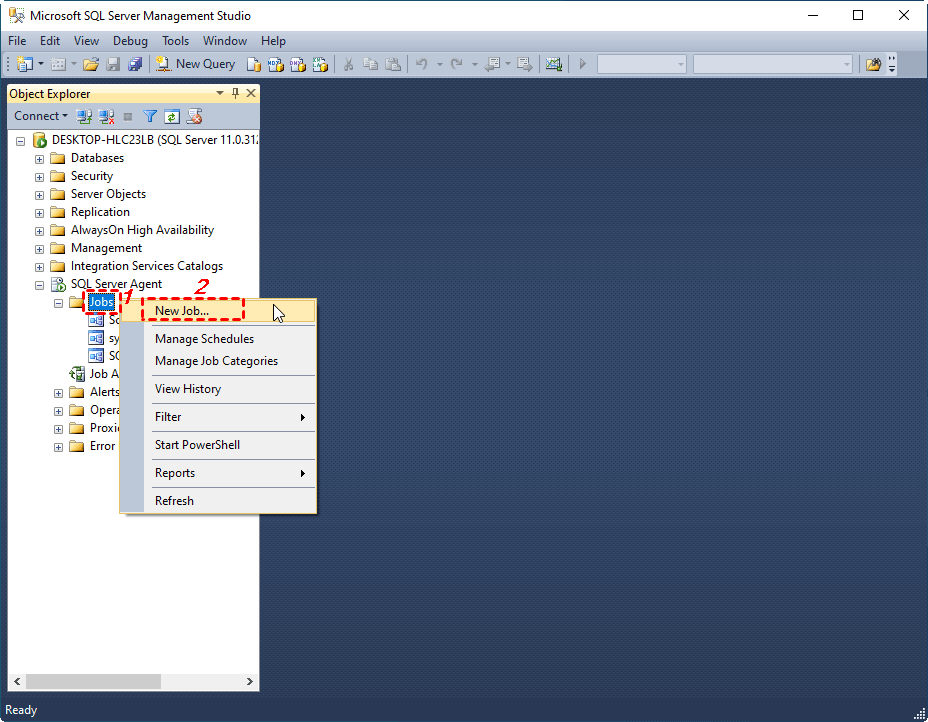
1. Right-click SQL Server Agent and choose New > Job.
2. Enter a name and description for the job. Then move to Steps tab.
3. Click New to add a step name and any T-SQL backup commands as you need. Here’s an example:
DECLARE @strPath NVARCHAR(200)
set @strPath = convert(NVARCHAR(19),getdate(),120)
set @strPath = REPLACE(@strPath, ':' , '.')
set @strPath = 'filepath' + @strPath + '.bak'
BACKUP DATABASE [database] TO DISK = @strPath WITH NOINIT , NOUNLOAD , NOSKIP , STATS = 10, NOFORMAT
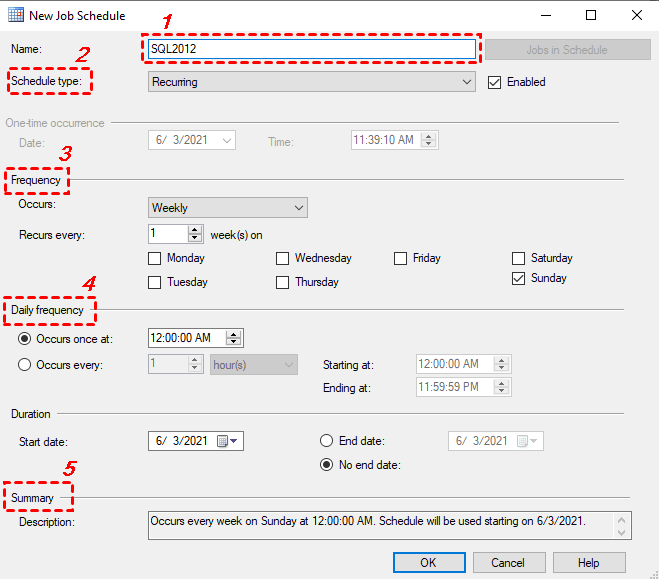
4. Move to Schedules tab and click New to set up the schedule type and frequency. Click OK to finish the setup.
5. Then you can find the created backup job under SQL Server Agent > Jobs, and choose Start job at Step to test it.
Easier way to backup multiple SQL databases with schedule
If you find the above 4 backup methods in SQL Server Management Studio complicated or not effective enough, you can also try the professional SQL backup software - AOMEI Cyber Backup to backup your MSSQL. It allows you to backup multiple databases or even all databases at once. Also, you can try the following features to ensure the safety and integrity of your SQL databases.
❀ Scheduled Backups: Set up regular backup schedules to automatically safeguard your SQL data without manual intervention.
❀ Flexible Backup Options: Choose full, incremental, or differential backup types to suit your specific backup needs and optimize storage usage.
❀ Intuitive Interface: Enjoy a user-friendly interface that simplifies the backup process, making it easy to configure and manage SQL backups efficiently.
❀ Centralized Management: Manage all your SQL backups from a centralized console, streamlining administration and monitoring tasks across multiple databases or servers.
❀ Archive backup to Amazon S3: AOMEI Cyber Backup supports saving backup to Amazon S3 cloud storage to implement a 3-2-1 backup strategy.
Download the 30-day free trial to proceed:
💡 Set up the MSSQL backup software
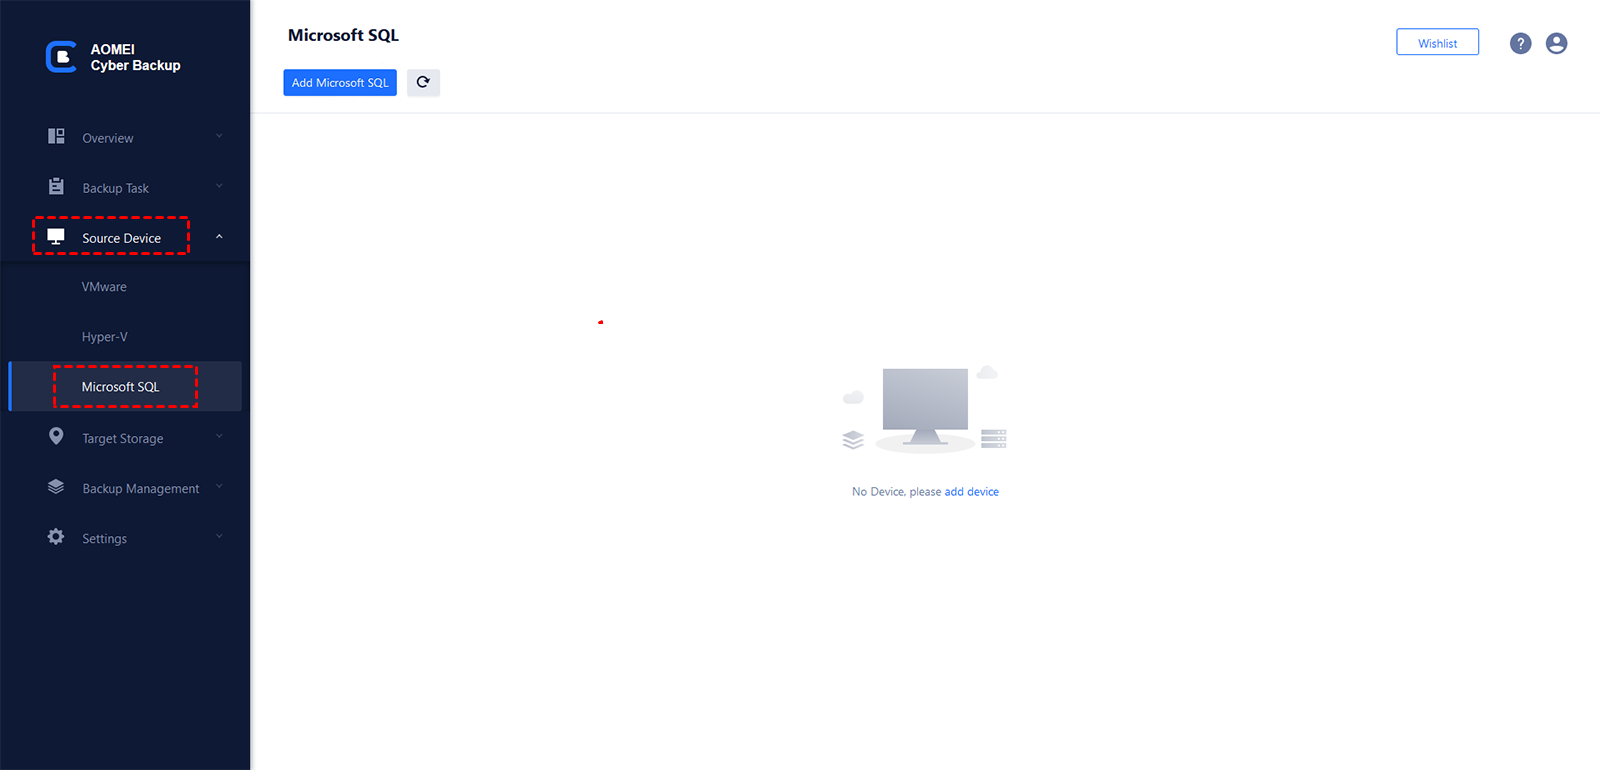
1. Run the installed AOMEI Cyber Backup on the server machine, navigate to Source Device -> Microsoft SQL -> Add Microsoft SQL.
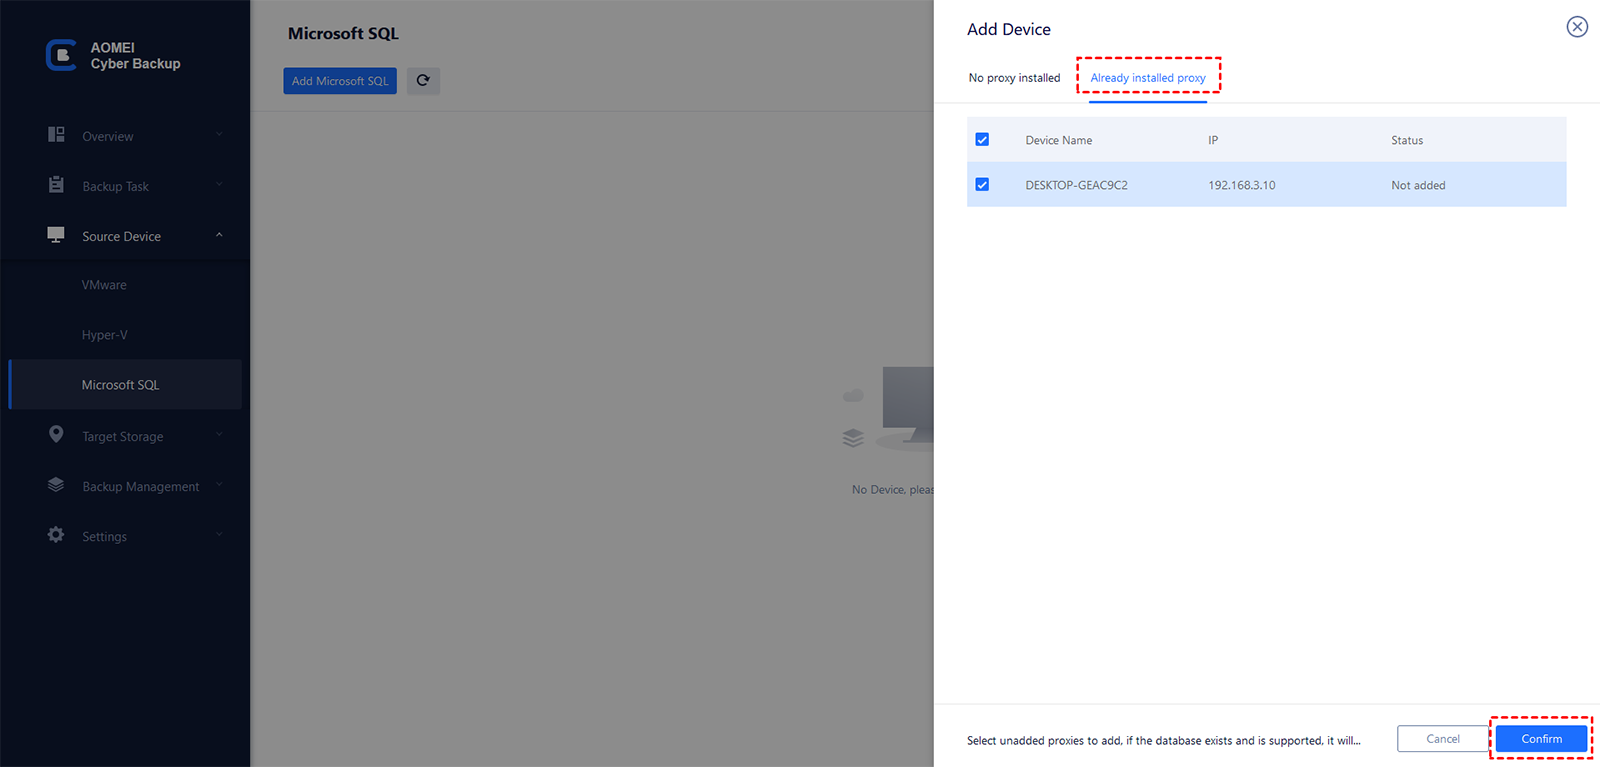
2. Choose Download proxy program (or Copy link) and install it on to the device with SQL Server installed. Then, click Already installed proxy and select the device.
Next, click ![]() -> Authentication to validate the database instance. You can choose Windows Authentication or SQL Authentication.
-> Authentication to validate the database instance. You can choose Windows Authentication or SQL Authentication.
💡 Create MSSQL backup task
1. Click Backup Task -> Create New Task to launch the task creating page. Choose backup type as Microsoft SQL Backup. If you want to store your SQL backup to an AWS S3 bucket, please check the "Archiving backup to Amazon S3" option.
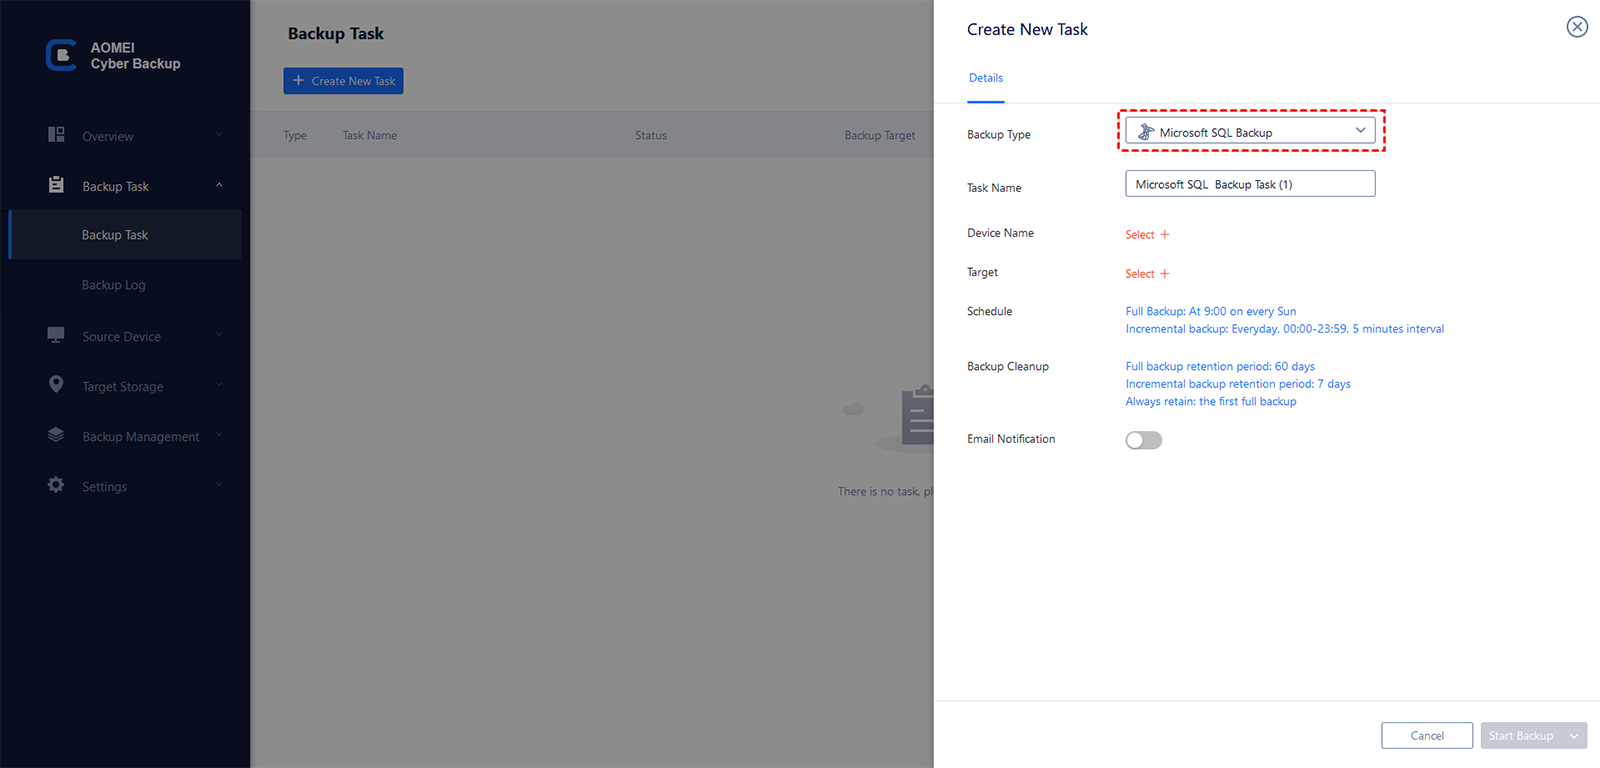
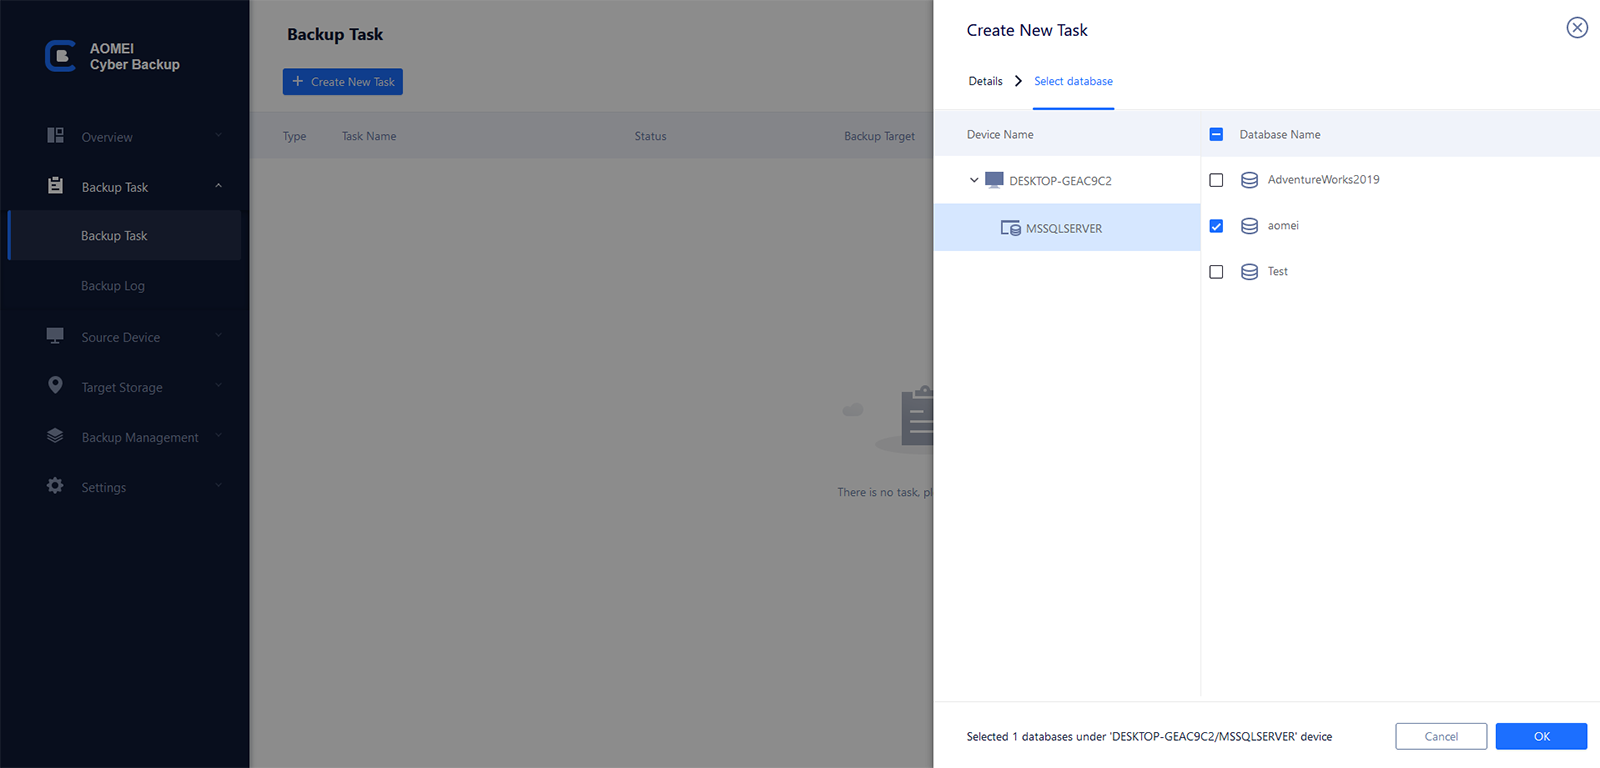
2. Click on Device Name to specify the SQL instances and databases for backup. You can select one or multiple databases as you need.
3. Select Target to save backups. You can either specify a local path or network path.
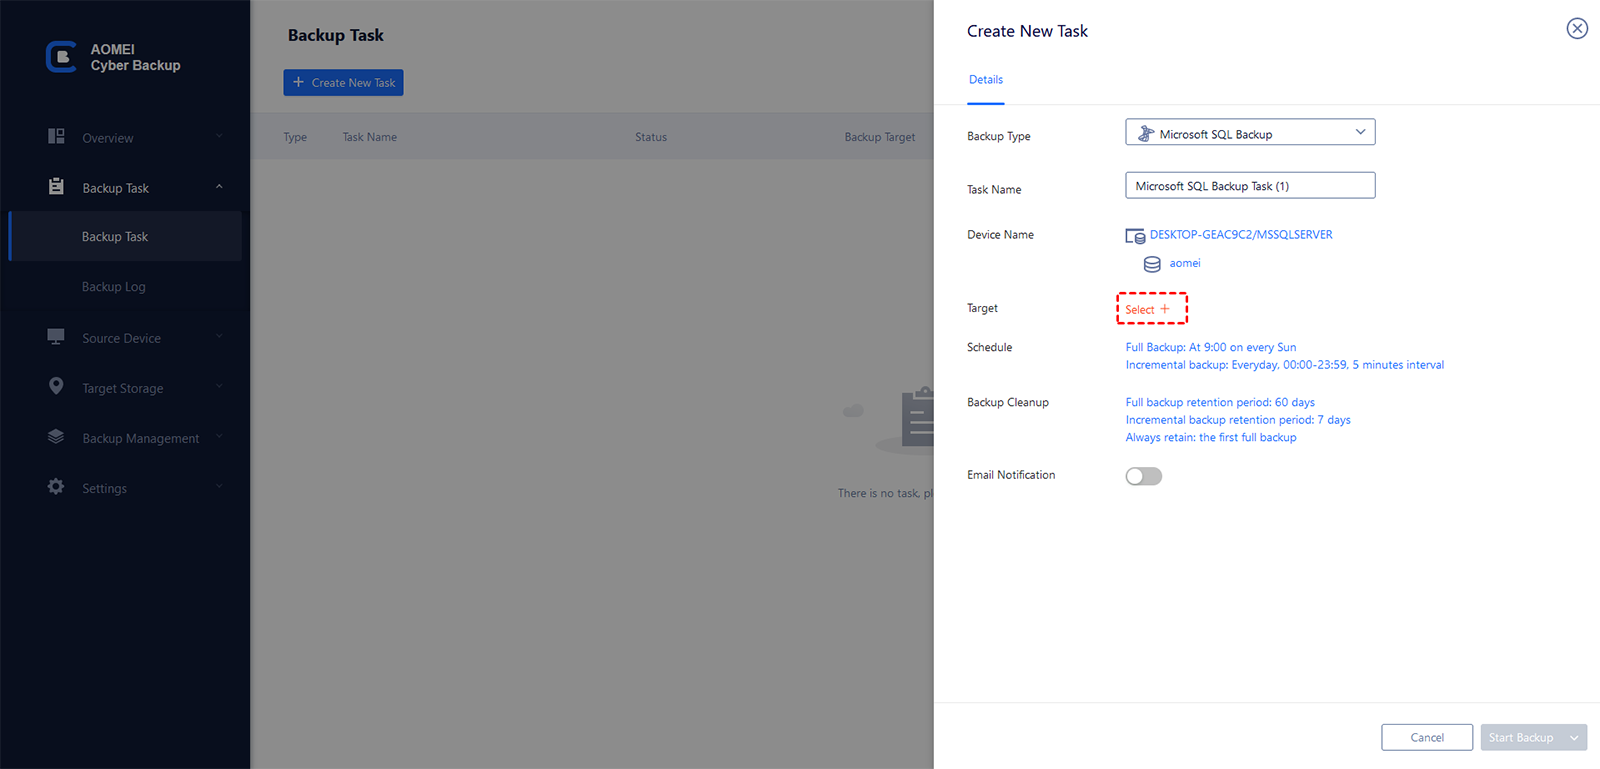
4. Set up a Schedule to run the SQL database backup daily, weekly or monthly, and set the backup method as Full, Incremental or Differential Backup.
* More useful features:
Backup Cleanup helps you to delete older backup version automatically and therefore save storage space.
Email Notification enables you to receive email notifications when the task is abnormal or successful.
💡 Restore a database in SQL Server easily
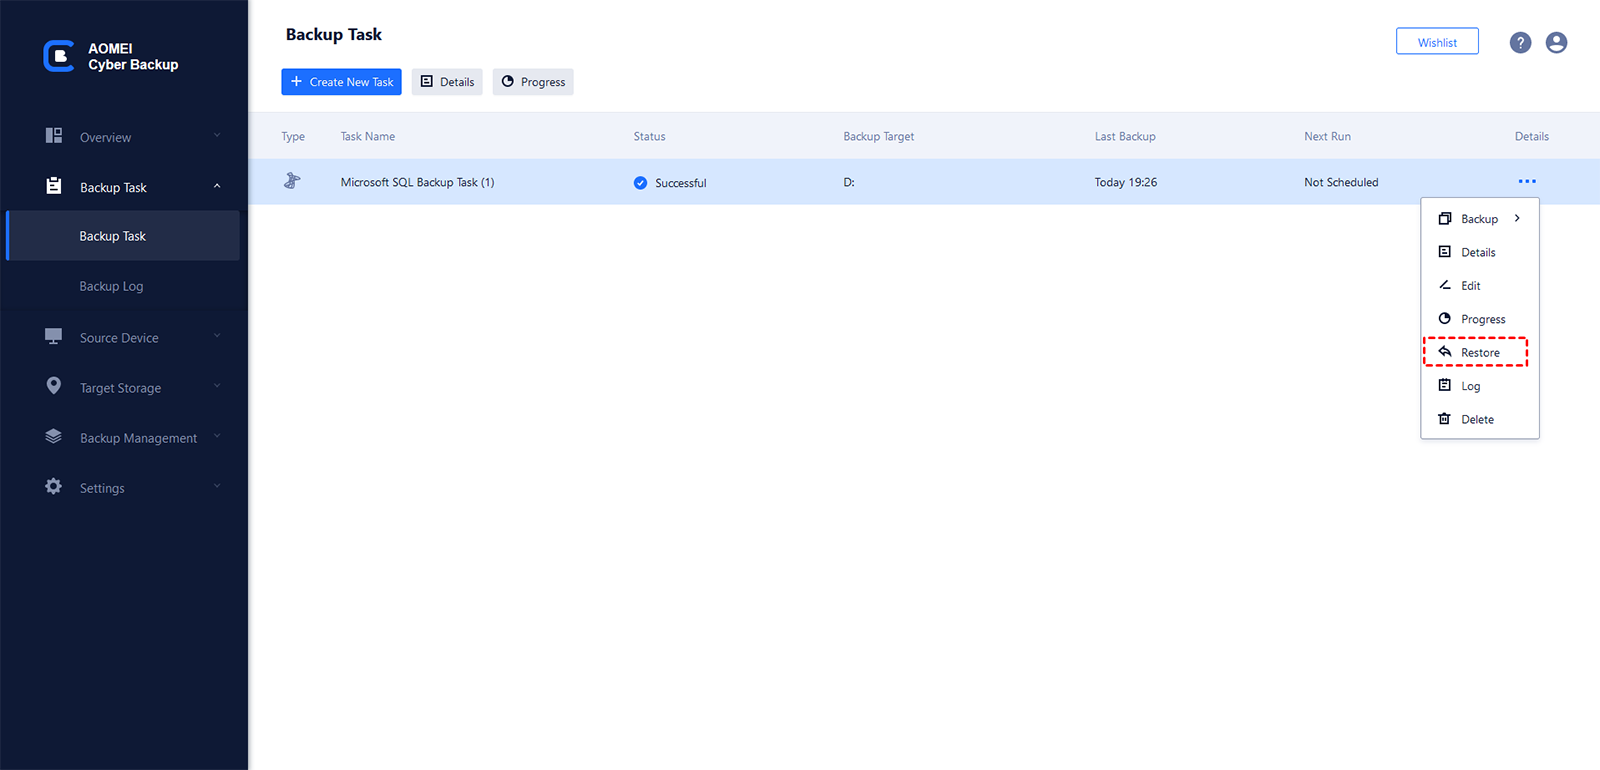
1. Click Backup Task on the left menu bar, locate the task you want to restore, and click ![]() -> Restore.
-> Restore.
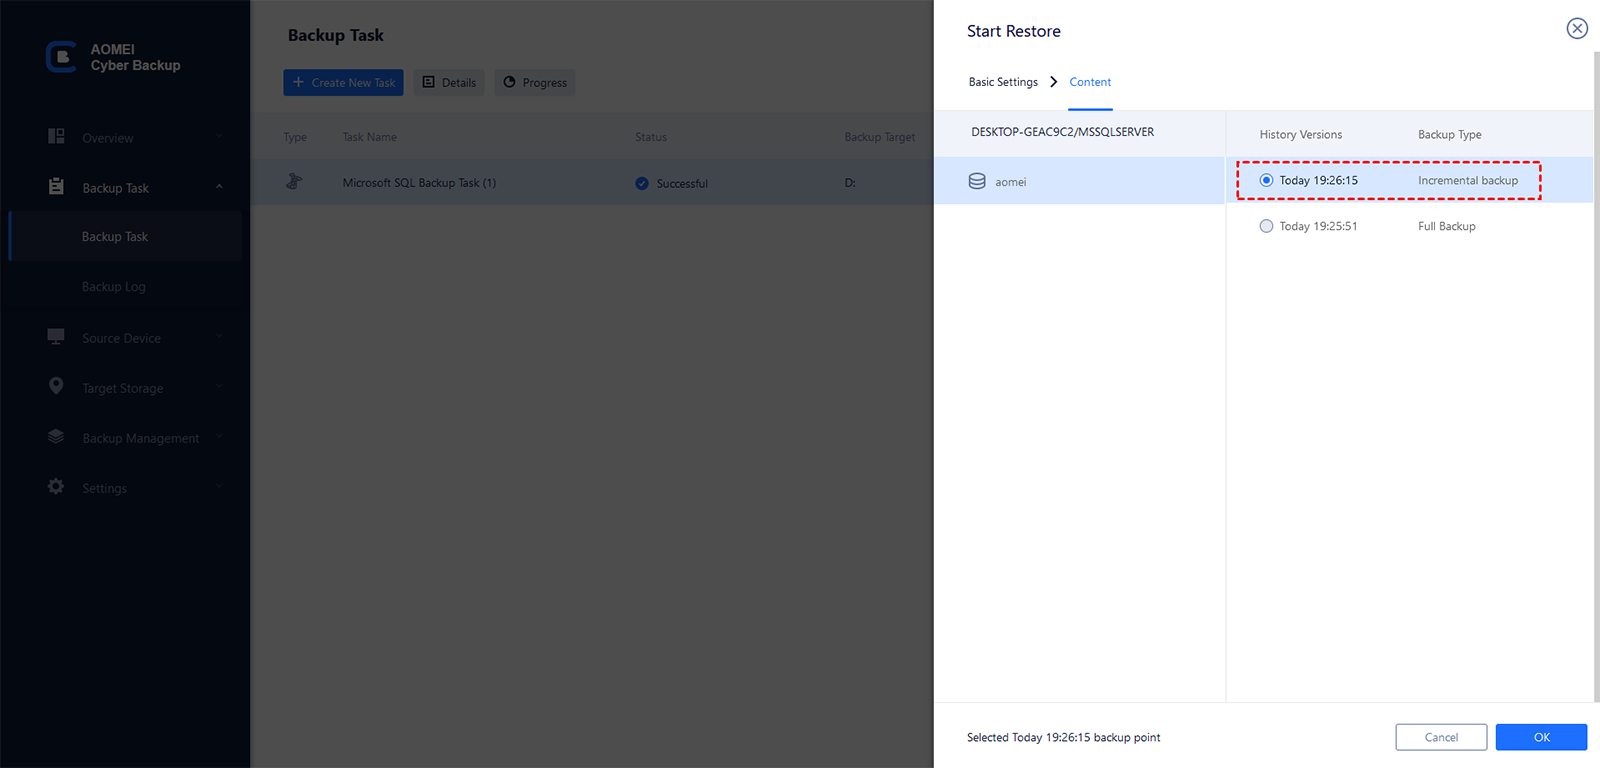
2. Choose the backup version you wish to restore.
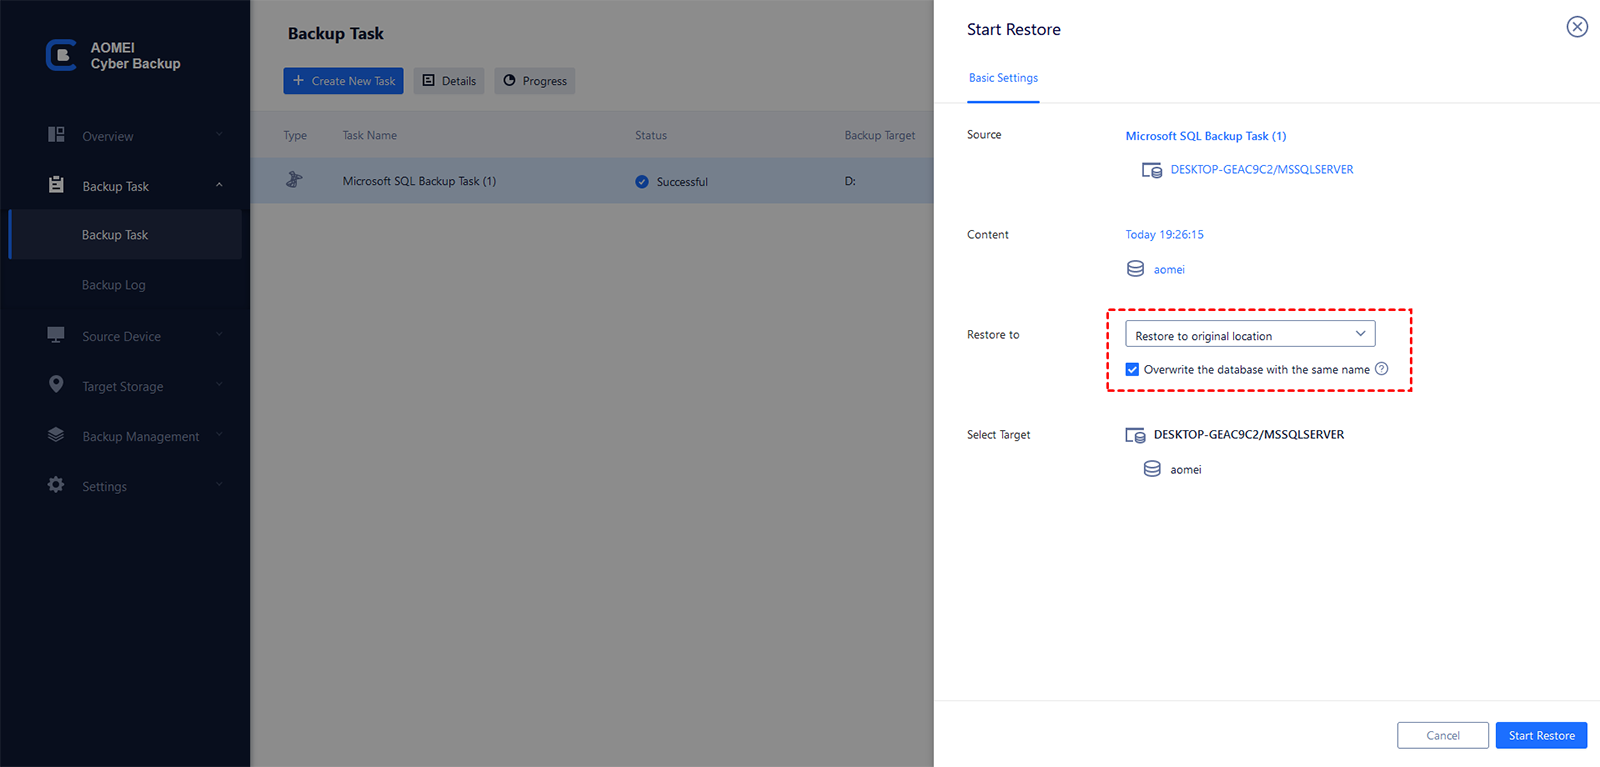
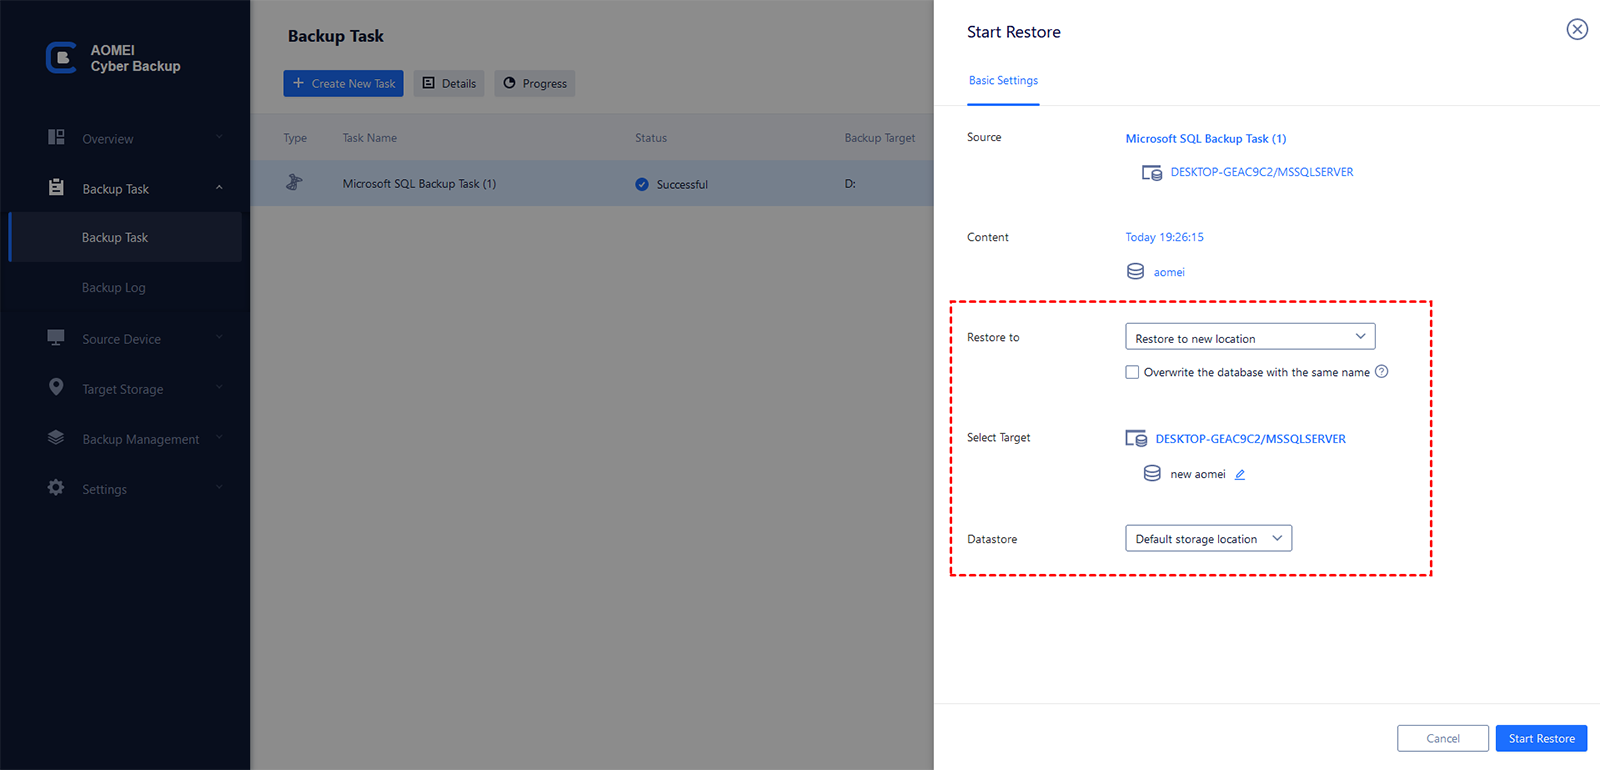
3. Choose the destination where you want to restore, and then click Start Restore.
* If you're restoring to the original location, no need to select a target. "Restore to original location" is automatically selected, allowing you to begin restoration directly.
If you prefer to Restore to a new location, you must choose a target and provide the name for the new database. You also have the option to adjust the storage location.
4. Confirm the settings, then click Start Restore to initiate the restoration process. Please wait patiently for it to finish. You can click on the![]() button to view restore details or cancel the process if needed.
button to view restore details or cancel the process if needed.

When the restore is complete, you can see the restored database in Microsoft SQL Server Management Studio. With AOMEI Cyber Backup's SQL backup, you can rest assured that your SQL databases are protected, allowing you to focus on your business without worrying about data loss or downtime.
Conclusion
This article aims to outline the steps for database backup using SQL Server Management Studio, offering four efficient methods along with a user-friendly alternative - AOMEI Cyber Backup. AOMEI Cyber Backup not only offers a sleek graphical interface but also streamlines database selection and plan creation. Serving as a centralized management tool, it even facilitates direct backup SQL databases to another server.

