
[Solved] Three Free Ways for jpg Recovery
Seeking solutions for jpg recovery? You can get several efficient ways to recover jpg images in this tutorial.
By Penny / Updated on April 2, 2024
Is it possible for jpg image recovery?
I deleted my jpg by accident several weeks ago. But I want to get them back. Who can help me to recover my jpg images?
My jpg images were lost, and I cannot find them in the recycle bin. Is there any way for jpg image recovery?
Many users may wonder is it possible to recover the deleted or lost jpg images. The answer is “Yes”. JPG recovery also is a part of the data recovery field. You can access your jpg images after salvaging them.
The space occupied by your deleted jpg images is available and it will be used to save new data. That is to say, you can retrieve the deleted jpg image before the deleted one is overwritten by another jpg file. Similarly, your lost jpg images might hide on your storage devices. Maybe it’s not gone.
Possible reasons for jpg recovery
This part tends to share some common scenarios for jpg image recovery with you. It’s a good habit if you focus partially on figuring out reasons beforehand.
▶Accidental deletion
▶Corruption of the file system
▶Storage device formatting
▶Move or copy errors
▶Virus attack or malware infection
Three freeways for jpg recovery
The top priority for users is to select a suitable way to recover your deleted or lost jpg images. These three free solutions come with respective highlights, and the most fascinating tool is based on the third solution. Please figure out how these three ways work in more detail in the following guide.
Way 1. Recover jpg images from the Recycle Bin
The first solution is the easiest way for jpg recovery. The recycle bin can store your deleted or lost jpg images for a limited time. So you can recover jpg images within these days. In any case, you can first attempt to recover deleted files from the recycle bin.
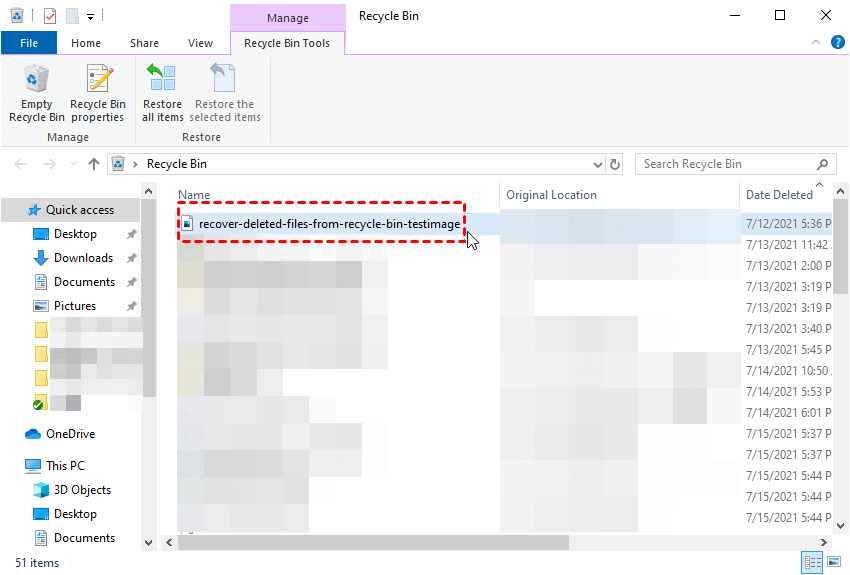
Step 1. Double click on the Recycle Bin icon on your Desktop.
Step 2. Select the jpg images you want in the Recycle Bin.
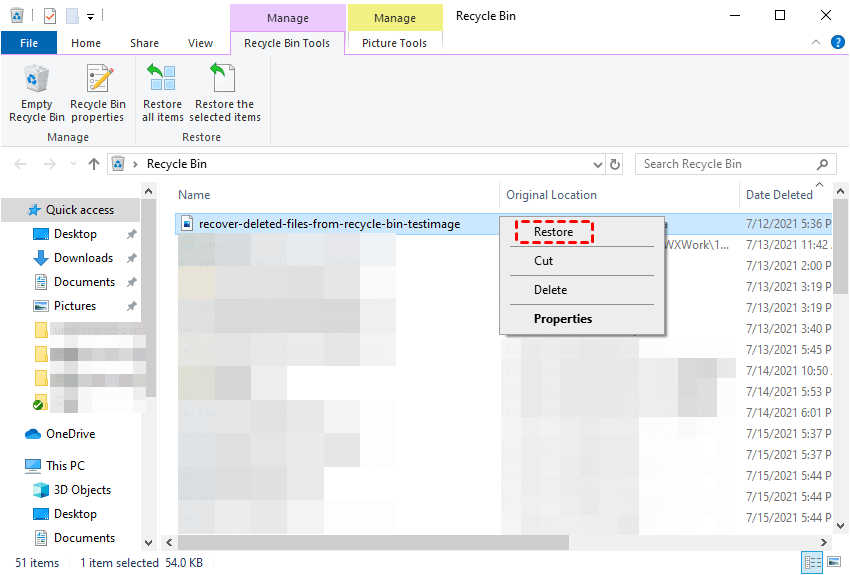
Step 3. Right-click on your selected jpg images, and click “Restore”.
Way 2. Recover jpg images from File History
File History is first used in Windows 8. This built-in and well-designed app can make backups of Documents, Music, Pictures, Videos, etc. So it’s convenient for you to recover jpg images with a valuable backup that contains your needed jpg images.
- Notes:✎...
- Ensure you’ve made backups using File History, otherwise, this method can’t work.
- If you’re not sure how to make backups with File History, maybe how to recover word files could give you some inspiration.
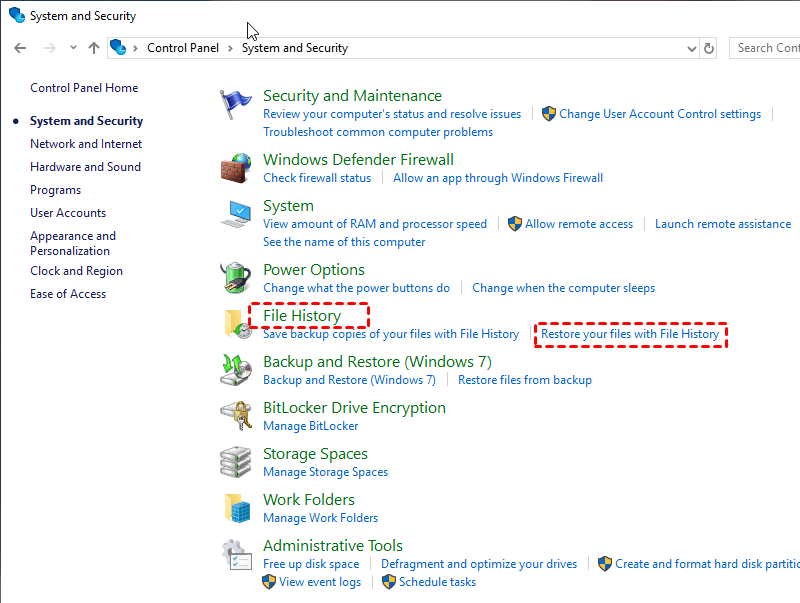
Step 1. In the Windows search box, enter Control Panel and click System and Security.

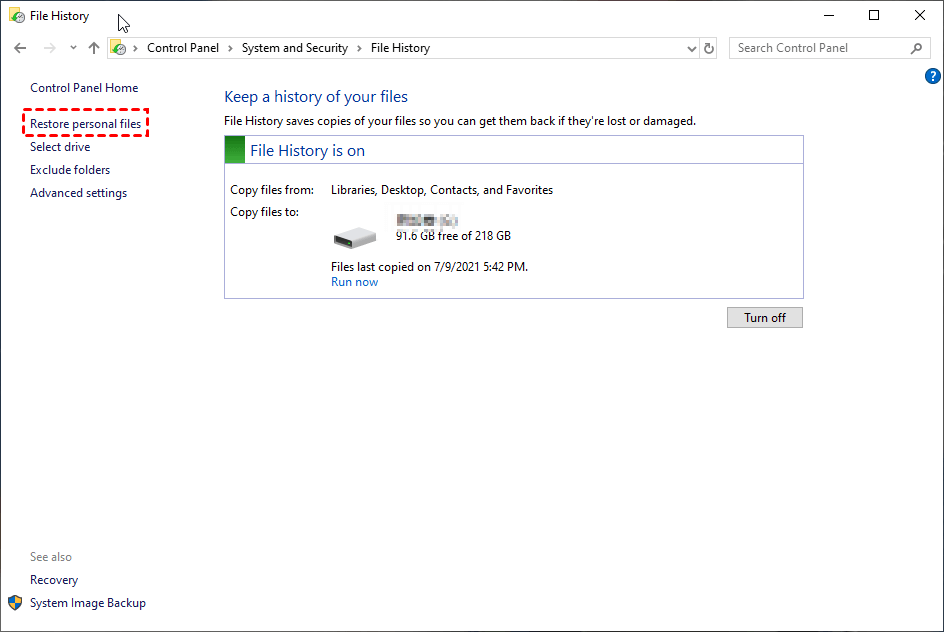
Step 2. Click “File History” and “Restore your files with File History”.
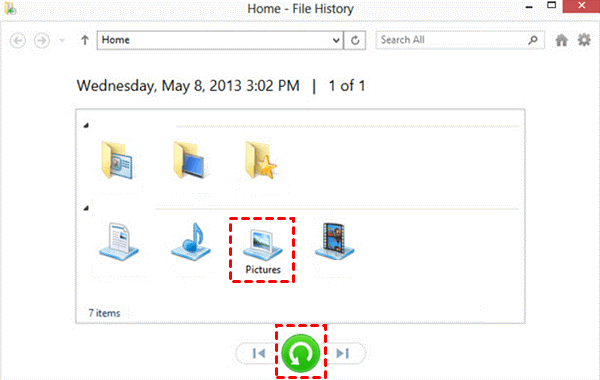
Step 3. Click “Restore personal files”.
Step 4. Select the jpg images you want to retrieve, then click “Restore” to get them back to the original location.
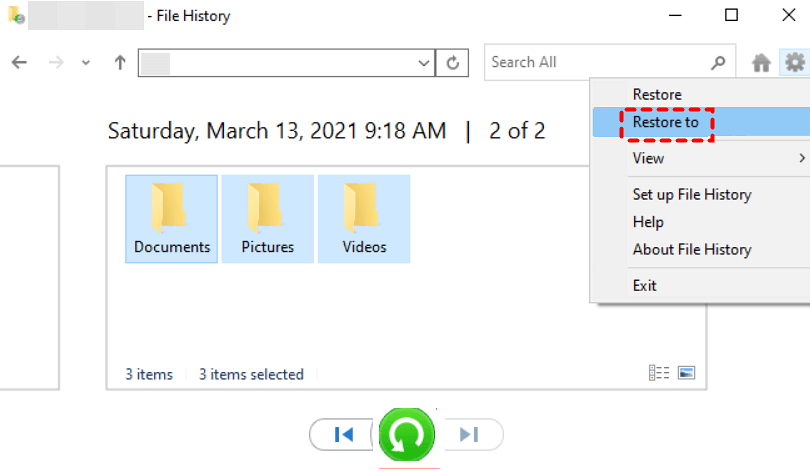
If you prefer to save the recovered jpg images in a different location, right-click “Restore” and select “Restore to”.
Way 3. Recover jpg images with Windows File Recovery
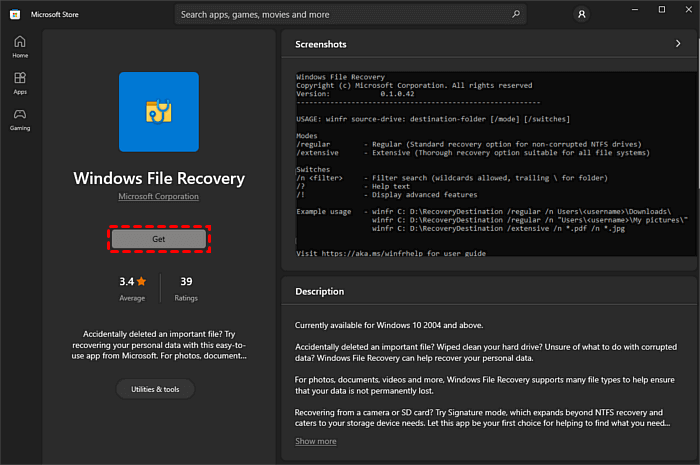
Microsoft released Windows File Recovery to recover the deleted/lost files in 2020. This free command-line utility needs to work with Windows 10 version 2004 and later from the Microsoft Store.
This tool can still be regarded as a powerful one. With 4 scanning modes (Regular, Extensive, Segment, Signature), Windows File Recovery allows you to recover files from hard disk drives (HDD), USB flash drives, or memory cards. Moreover, it supports NTFS, ReFS, FAT, and exFAT file systems.
So you can recover jpg images using command lines with the following explicit instructions.
Keep winfr source-drive: destination-drive [/mode] [/switches] in mind. Then you can adjust this command format in time.
Please note that your recovered jpg images need to be saved in a new location instead of the scanning partition.
Step 1. Download Windows File Recovery from the Microsoft Store and install it on your PC.
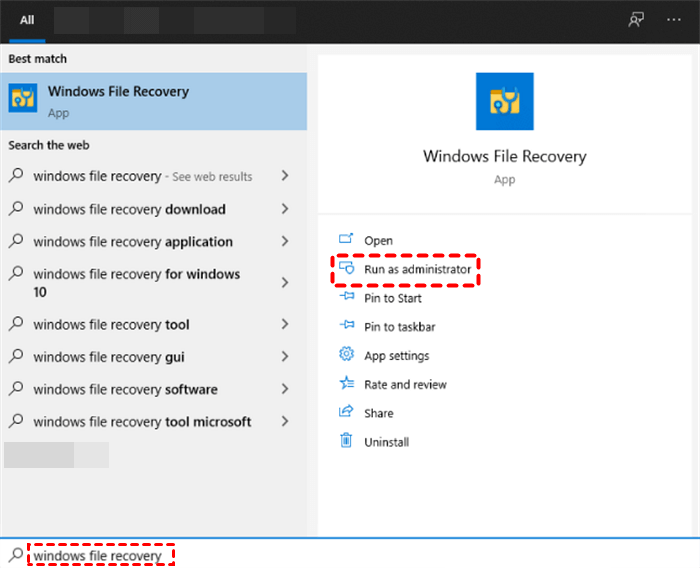
Step 2. Search Windows File Recovery in the search bar and Run as administrator.
Step 3. Select a suitable mode after checking your file systems. The following two notes also have an impact.
|
File system |
Examples |
|
FAT and exFAT |
SD cards, flash or USB drives (<4GB) |
|
NTFS |
Computers (HDD, SSD), external hard drives, flash or USB drives (> 4GB) |
- ★Notes:
- Recovering files from non-NTFS file systems is only supported by extensive mode.
- If you deleted your NTFS files recently, the Regular mode is your best option. Otherwise, the Extensive mode is your correct option.
Step 4. Resemble your command line with the common General and Advanced syntax. Microsoft official support could provide you with more details about parameters/switches.
General syntax
|
Parameter/switch |
Description |
Supported mode(s) |
|
/regular |
Regular mode, the standard recovery option for non-corrupted NTFS drives |
Regular |
|
/extensive |
Extensive mode, a thorough recovery option suitable for all file systems |
Extensive |
Advanced syntax
|
Switch |
Description |
Supported mode(s) |
|
/ntfs |
NTFS mode, a fast recovery option for healthy NTFS drives using the master file table |
NTFS |
|
/segment |
Segment mode, recovery option for NTFS drives using file record segments |
Segment |
|
/signature |
Signature mode, recovery option for all file system types using file headers |
Signature |
For instance, if you’d like to recover jpg images from C drive to E drive, the corresponding command line is winfr C: E: /x /y /:JPG
Step 5. Enter “y” to continue and wait patiently. Then your recovered jpg images will be saved in the destination drive you’ve chosen before.
Another free tool: Recover jpg images with WinfrGUI
How to recover jpg images? At the moment, you can utilize free WinfrGUI (Windows File Recovery GUI) for jpg image recovery. It has invoked all the functions of Windows File Recovery. Meanwhile, it has also enabled the graphical user interface with it. You can recover documents, photographs, movies, audio, web pages, zipped files, and custom suffix files with it.
Step 1. Download and install WinfrGUI on your computer. Then select two partitions for scanning data and saving the recovered jpg images respectively.
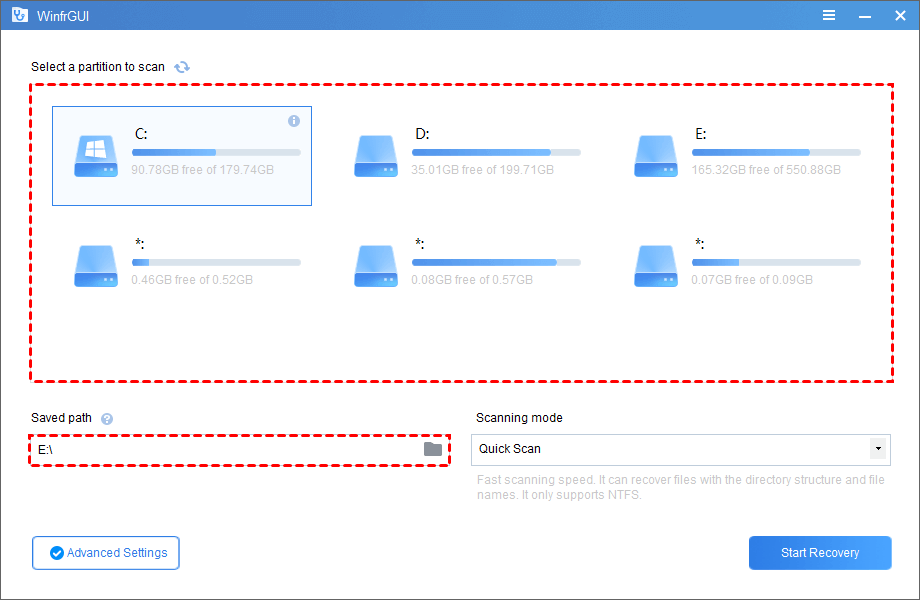
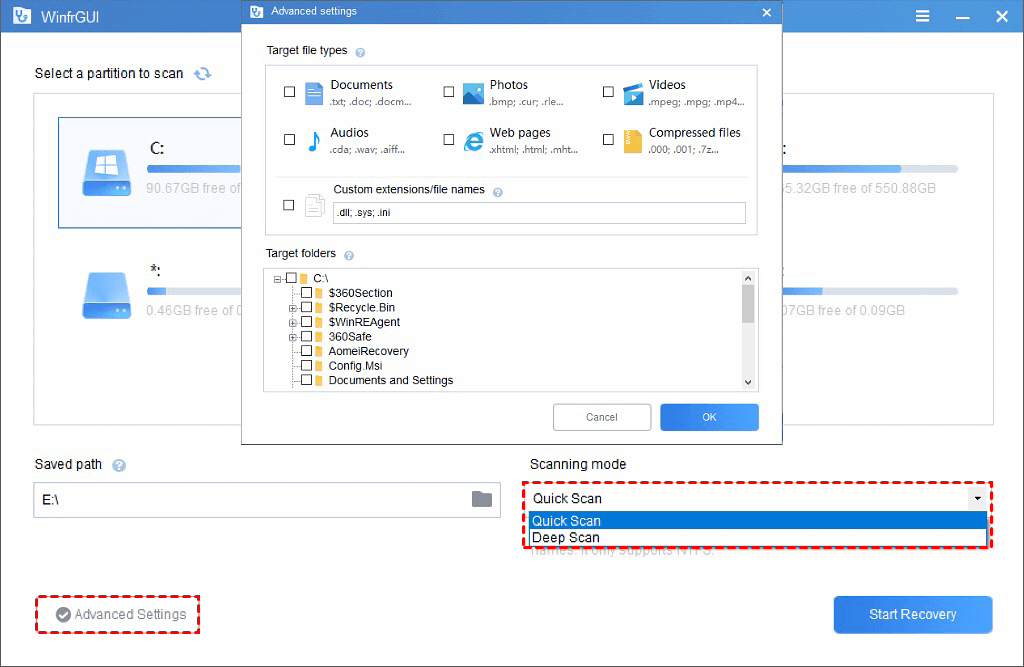
Step 2. Select a suitable mode: Quick Scan or Deep Scan. Then click “Advanced Settings” to target the file types and folders you need.
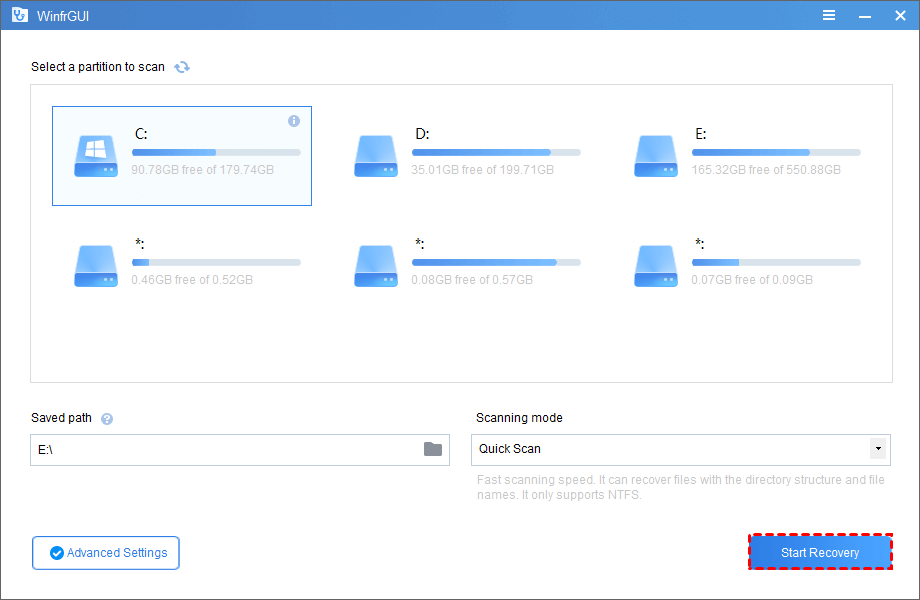
Step 3. Click “Start Recovery” to scan. Then your recovered jpg images will be stored in the destination drive after the scanning process is finished.
The most recommended: MyRecover
Are you seeking a higher recovery rate for jpg recovery? If it happens to be your case, MyRecover is your best choice because this software recovers jpg images exceptionally well.
Compared with WinfrGUI, this Windows data recovery software entails many unbeatable advantages. Please check them out below.
❥You're allowed to recover the deleted/lost data from SSD/HDD in its original format. And it's possible to retain the deleted files' directory and file name.
❥The software offers good coverage of 200+ types of data: Word, PPT, Excel, Photos, Videos, Audios, Emails, Webpages, and Compressed files.
❥The combined scanning method of Quick Scan and Deep Scan detects your deleted files and lost files.
❥It is compatible with Windows 11/10/8/7 and Windows Server.
If you are unwilling to recover jpg images one by one, MyRecover could improve your speed of jpg recovery. Don't hesitate to download it now!
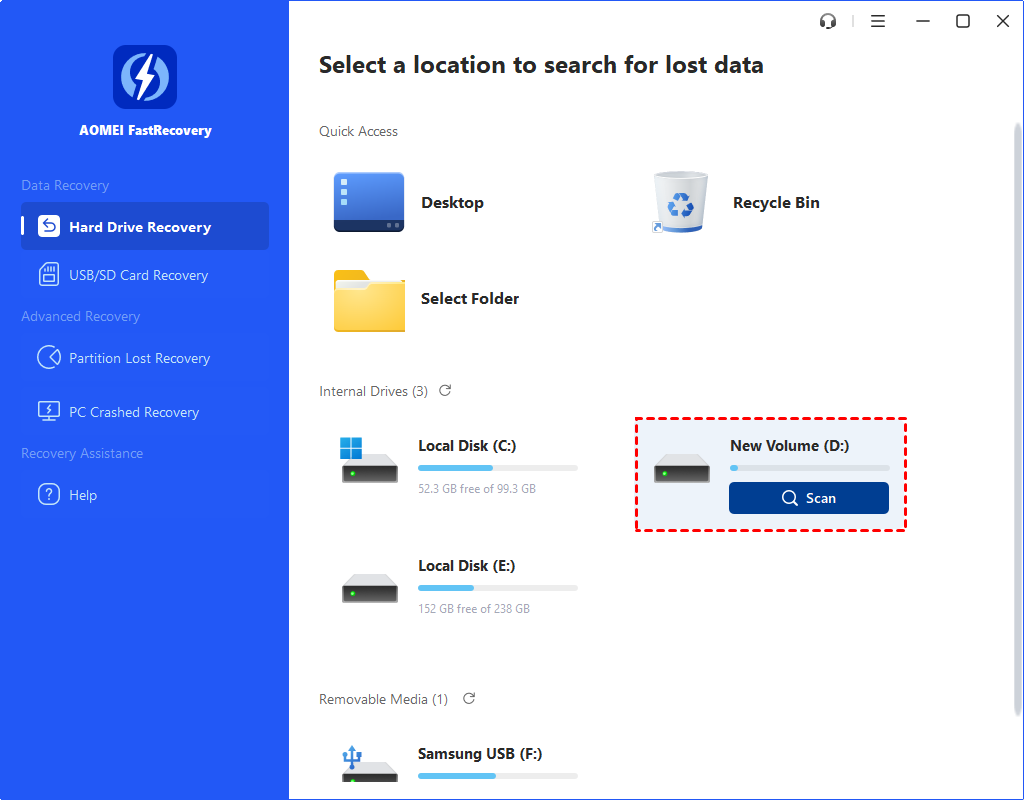
Step 1. Install and launch MyRecover on your PC. Hover the mouse over the drive saved deleted files before, and click Scan to scan.
Step 2. The software will run Quick Scan and Deep Scan automatically. You'll see all the deleted files and other lost files after scanning.
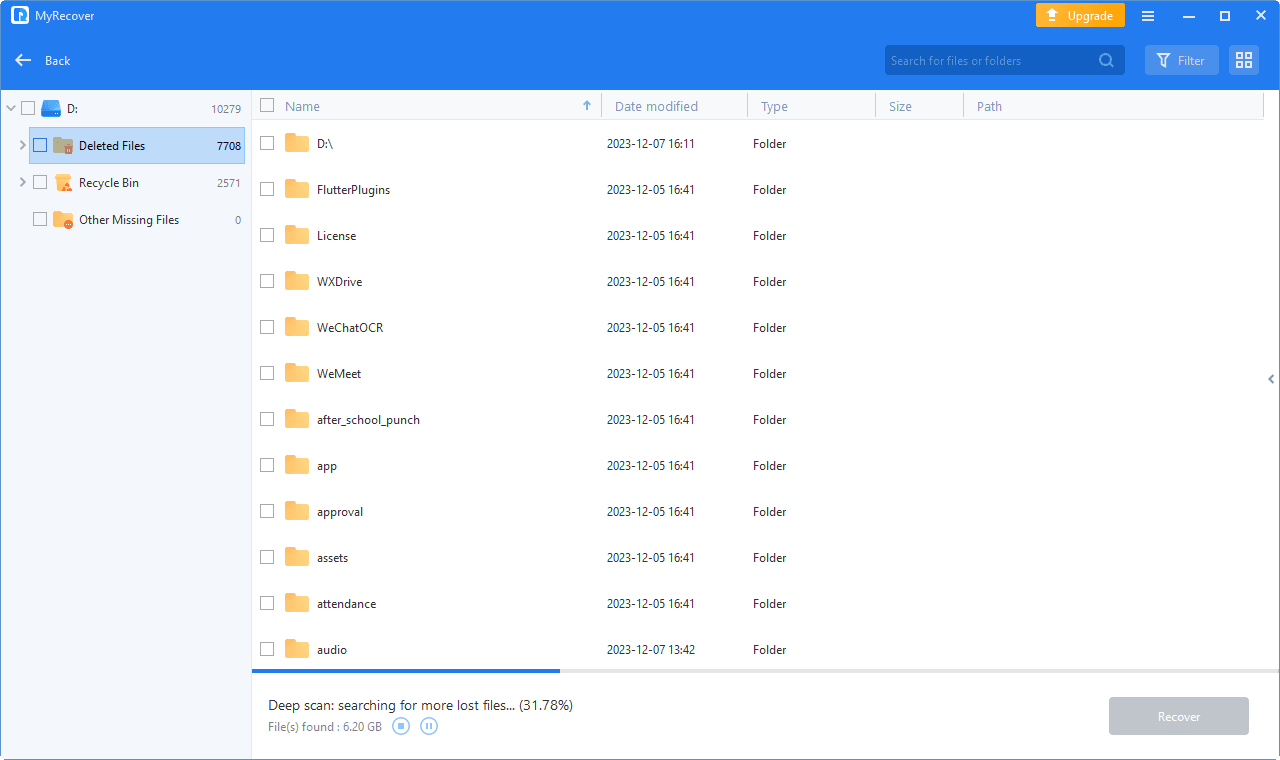
Step 3. Check the scanning results and click "Recover x files". And designate e a new location to save your recovered jpg images.

Related suggestions
In a nutshell, you can find several free solutions to recover jpg images in this tutorial. You’re expected to check the recycle bin first to avoid unnecessary steps. If there’s an available backup using File History, you can retrieve your deleted or lost jpg images within a few clicks.
To some degree, Windows File Recovery might be the last resort because command lines are really hard for the public to input. So you can tweak your plans and take this new way of jpg recovery, Winfr, or Windows Data Recovery for Windows into account.
If you’re hesitant to download software because it will take up storage space, you should make a habit of regularly backing up your data. Here, AOMEI Backupper can solve your problems from different aspects. For example, you can make automatic, full, incremental, and differential backups. It also supports you to sync files and folders to a USB or Cloud drive.