
4 Proven Methods to Use CMD Command to Recover Files from USB
Are you looking for a complete guide on how to use CMD to recover files from USB? This page covers everything you need to know about using CMD to retrieve files from USB.
By Kelsey / Updated on May 8, 2026
How can I recover my files from USB via CMD command?
After a late night at work last night, I accidentally lost my day's work of files on my USB flash drive. I don't remember deleting them, but they disappeared. My colleagues say that lost USB files can be recovered with the CMD command. Do any of you know anything about using the CMD command to recover files from USB? Thank you very much!
Command Prompt, often abbreviated to CMD, is a command-line interpreter application available to Windows operating systems. It is used to execute entered commands to troubleshoot certain kinds of Windows issues like recovering hidden files, restoring files from accidental deletion, repairing corrupted disks, and so on.
CMD data recovery can work for local disks, USB flash drives, SD cards, or other external hard drives. If you are searching for how to recover USB using CMD, your search is over. This passage offers 3 solutions with step-by-step guides to make USB flash drive and pendrive recover data with CMD easily.
Part 1. Recover hidden files on USB using CMD
How to recover deleted files from USB without software but using CMD? First, you can try to recover hidden files from an external hard drive such as USB with the attrib command. The attrib command is used to modify the attributes of the files and folders in the selected location. There are four typical attributes of files and folders: read-only, hidden, archive, and system. The hidden attribute is to make data not displayed in a directory listing.
Thus, when your USB files are hidden due to mishandling or virus infection, they will disappear from the USB. In this case, what you need to do is use the attrib command to restore hidden files. Follow the guide below to recover files from USB using CMD attrib now.
Step 1. Connect your USB to the computer.
Step 2. Press Windows + X keys to expand the Power User menu and select Windows PowerShell (Admin).
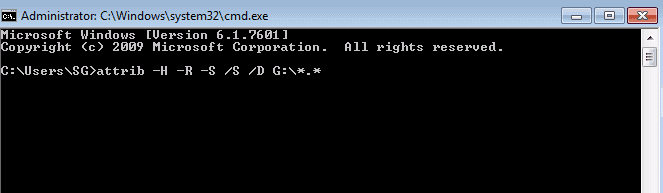
Step 3. Input “attrib -h -r -s /s /d G:\*.*” in it and press Enter. (The G: represents the drive letter. For example, if your USB drive letter is D:, please replace G: with D:.)
Attrib command explanation
- -h Clears the hidden attribute
- -r Clears the read-only attribute
- -s Clears the system attribute
- /s Executes to display or change file attribute of data on the subfolders within the selected drive.
- /d Applies attrib to include directories. You can only use /d with /s.
If the Attrib command is not working, either you made a typo on the command line, or the file has been deleted instead of being hidden. If it's the latter, turn to the other solutions in this article to recover pendrive data using CMD.
Part 2. Recover files from corrupted USB with CMD
There is a possibility that your data was lost due to a logical error or corrupted file system in the USB. You can run the CHKDSK command to recover corrupted hard drive.
CHKDSK (full name Microsoft Check Disk, which means disk check) is a command program for disk checking. It is commonly used to scan the integrity of the file system on the disk and to repair errors in the file system. How to recover files from USB using cmd with the CHKDSK command? Here is what to do:
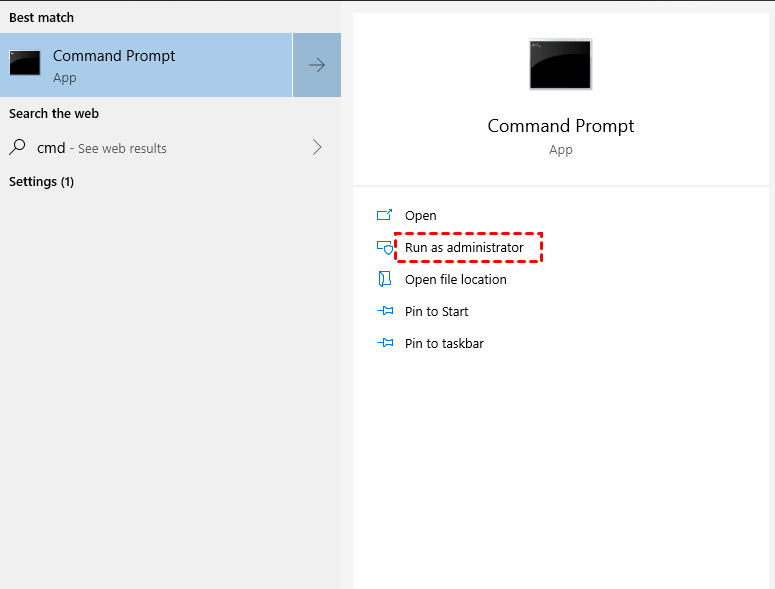
Step 1. Plug in the USB to PC. Then, start Command Prompt and choose Run as administrator.
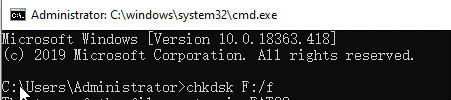
Step 2. Type “chkdsk F: /f” in the next window and click Enter (F: is the drive letter of the USB partition) to scan for drive errors and fix them.
Part 3. Restore deleted files from Recycle Bin via CMD
If your files are deleted, you can apply CMD to recover USB files from the Recycle Bin. Before executing this command, you need to check if the deleted USB files are still in Recycle Bin. If not, you cannot use this command to recover permanently deleted files.
The following is how to recover deleted files from USB using CMD:
Step 1. Search for “cmd” in the Windows search box and run Command Prompt.
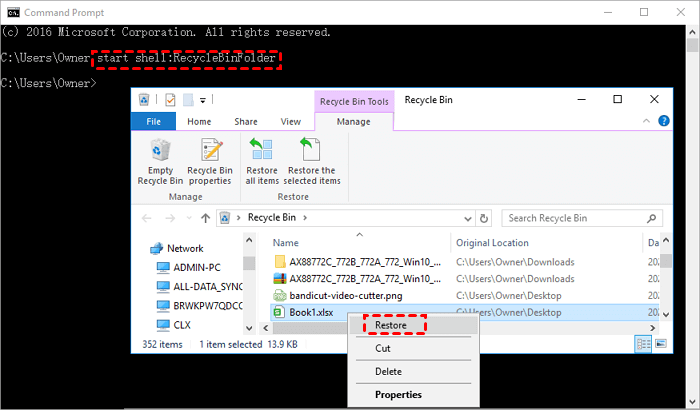
Step 2. Type “start shell:RecycleBinFolder” and hit Enter. Then, the Recycle bin folder will come out and shows the deleted items. You can choose the ones you need to recover and click Restore.
CMD command alternative - An Easier Ways to Recover USB files
We have explained how to recover pendrive data using CMD in the above. But in fact, if you are not very computer savvy, we don't recommend you to use the CMD command to recover files from USB. On the one hand, it is a little difficult to perform USB data recovery through the command line; On the other hand, it may not be possible to recover all lost files using CMD.
FastRecovery is a full-featured data recovery software that enables you to recover lost and deleted files in all situations with a high recovery rate. It comes with a user-friendly graphic interface that can be accessed by anyone.
Advantages of FastRecovery:
Easy to use: It entitles you to recover lost files in simple steps.
Widely compatible: It is supported to run on NTFS, FAT32, exFAT, and ReFS in Windows 11/10/8/7 and all kinds of Windows Servers.
Powerful recovery features: It supports recovering files from formatted hard drives, emptied Recycle Bin, disk drives with logical corruption and sector failure, etc.
Flexibility: It offers to restore more than 1000 types of data, such as documents, photos, audio, emails, webpages, and so on.
Click the download button below to get this tool and recover USB files easily now.
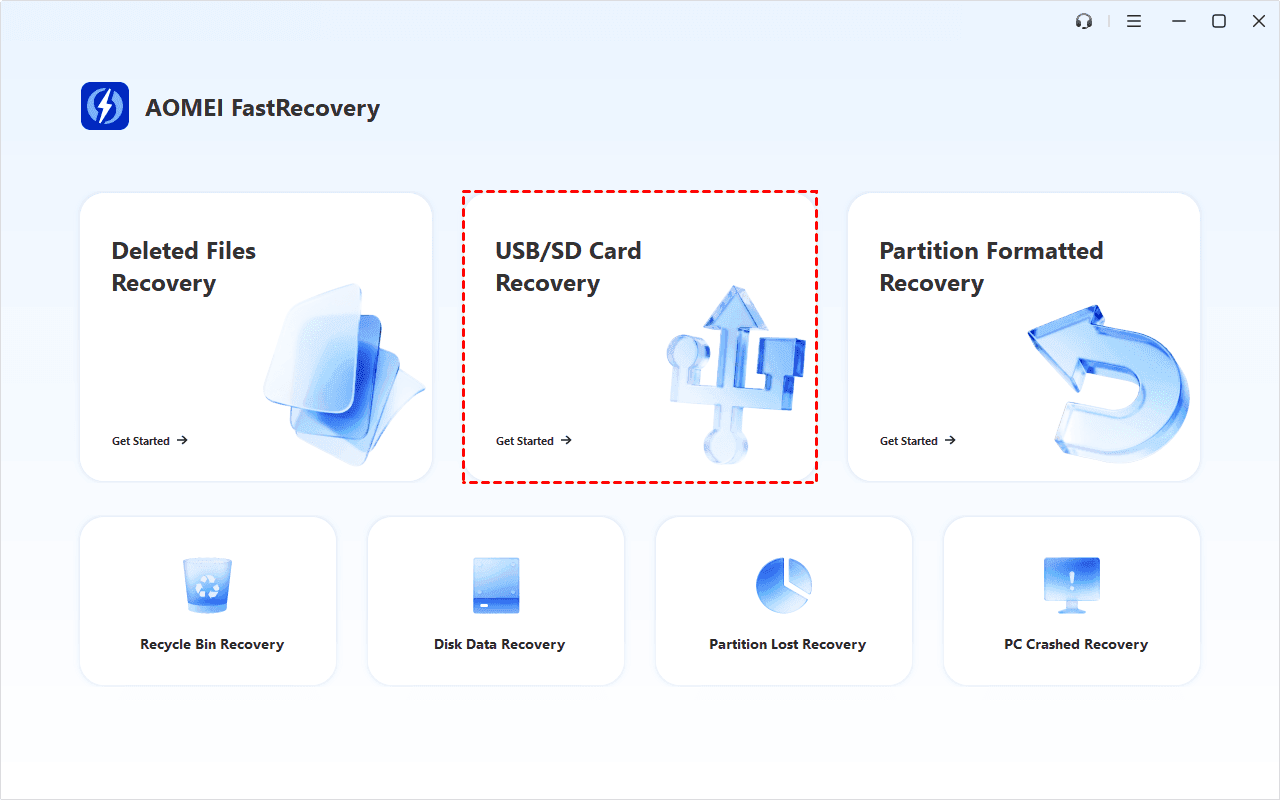
Step 1. Plug in the USB drive, run FastRecovery, then click USB/SD Card Recovery. You can also choose a more suitable alternative. All of them can help you retrieve data without causing any damage.
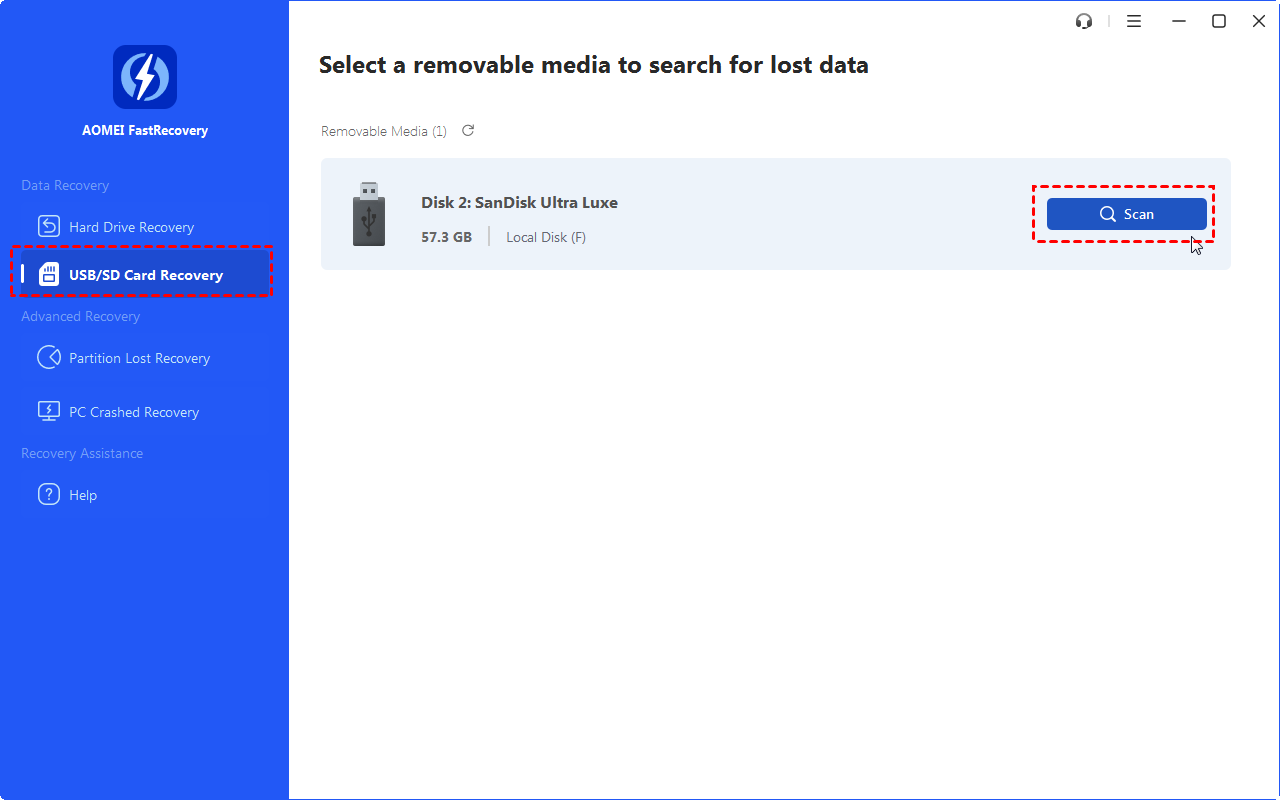
Step 2. Hover the mouse over the USB Drive from which you want to recover files, then click Scan.
Step 3. It will automatically start Deep Scan to scan every sector of the SD card to find files buried deeper in the file system. In contrast, this mode takes a long time, just be patient.

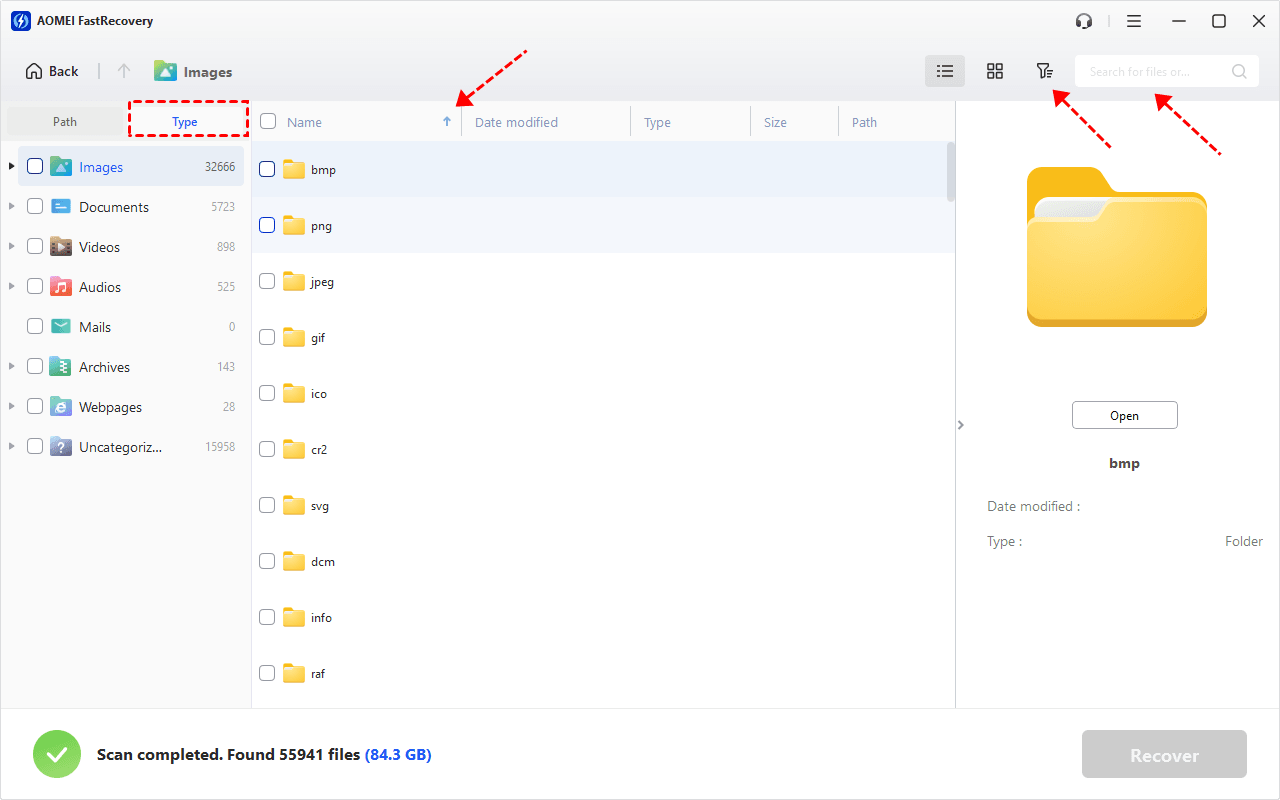
Step 4. Wait for the process to complete. The software is designed to organize and display data by Type (default) or Path, offering options to sort, search, filter, and preview files, thus making it easier to locate files.
👉Under the Type section:
- Specify the data type and click the arrow next to type, size, date modified, etc., to sort files.
- To locate files quickly, type the file name or extension in the search box.
- Or use the filter feature, similar to the Type category, allowing you to further specify the size of files, from less than 512 KB to 1GB above.
- Once found, double-click the files to preview.
👉 Under the Path section: Directly navigate to the original location where you saved deleted files. Sort files if needed.
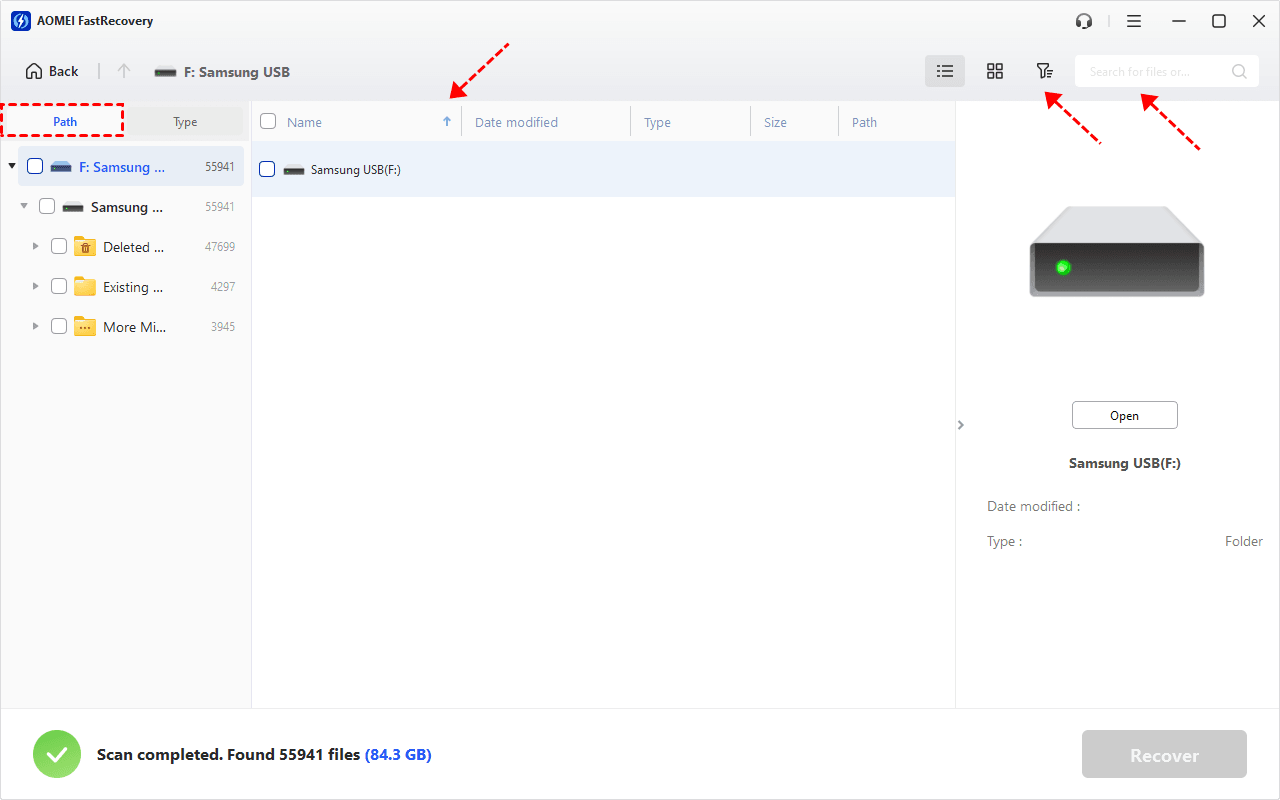
- The Type categories and filter options include all supported data types, such as images, videos, documents, mails, web pages, compressed files, etc.
- You can preview a wide range of data formats, such aswav, ico, jpg, png, bmp, jpeg, tif, svg, gif, mp4, mp3, txt, xlsx, pdf, ini, docx, etc.
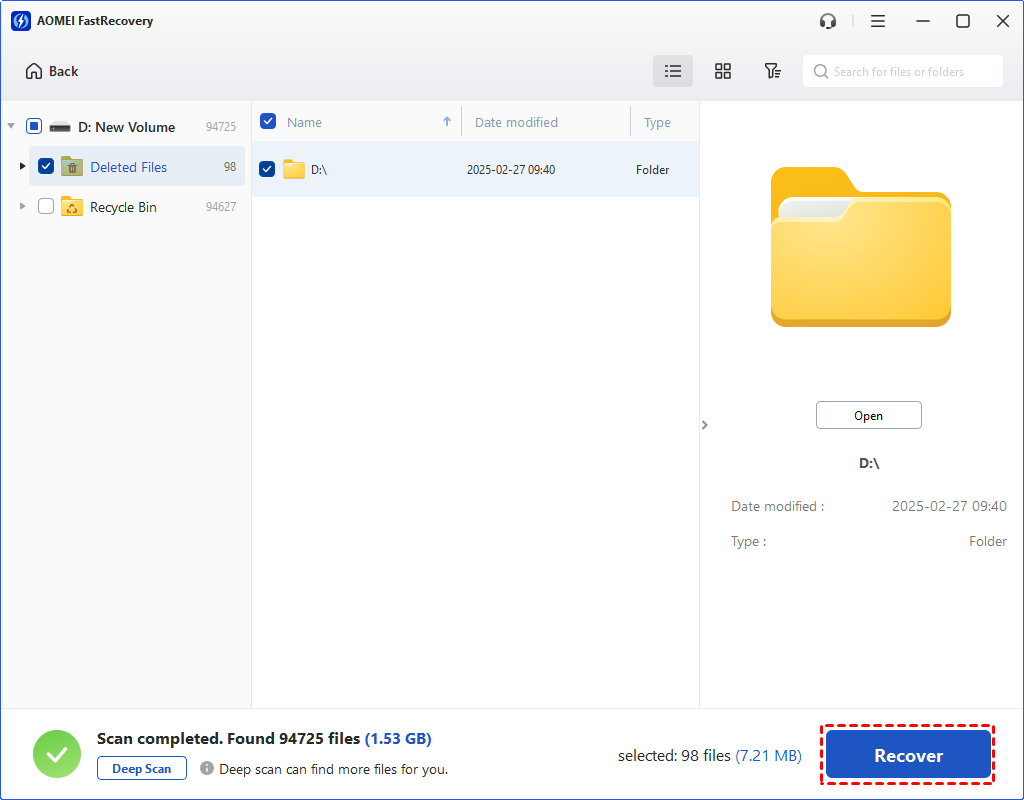
Step 5. Select all the files that you wish to recover and click Recover. Then, choose a new location for storing the files.
-
Restoring deleted photos to the original camera card will cause data overwriting.
-
The free edition only supports 500MB of data recovery. To recover more data, please upgrade FastRecovery to the advanced editions.
Final words
You can use the CMD command to recover files from USB with the complete guide on this page. But CMD USB recovery may cost you a lot of time and effort, and there is a possibility that you cannot recover data successfully with CMD. FastRecovery makes data recovery from USB much easier. You can download it and give it a try.
