How to Perform Server 2019 Schedule Reboot: Full Guide
If you want to perform Server 2019 schedule reboot, read this article to get a stepwise guide. The best Windows Server backup software is offered as well.
By Miya Updated on October 12, 2023
User Case: How Do I Schedule a Reboot in Windows Server 2019
“Hey there, folks! Quick question for all you tech-savvy folks out there. I've got this Windows Server 2019 running on my small business network, and I want to make sure it stays fresh and snappy. So, how do I schedule a reboot for this bad boy? I heard it can help with performance and stability. Any tips or tricks on how to set up a scheduled reboot? Thanks in advance for your help.”
If you set the server to reboot according to a predetermined schedule, such as daily, weekly, monthly, or any other specified interval, it will help ensure its stability, apply updates or clear any temporary issues that may be affecting its performance. So let’s take a look at how to perform Server 2019 schedule reboot.
How to Perform Server 2019 Schedule Reboot via Task Scheduler
Task Scheduler is an incredibly useful tool that lets you perform Windows Server 2019 schedule reboot. It gives you the power to manage and execute tasks, scripts, programs, and other processes at specific times or in response to certain events.
If you're one of the many users looking to schedule a reboot on Windows Server 2019, follow these simple steps:
Step 1. Open Task Scheduler by searching for task scheduler in the Windows search bar and clicking on the top result.
Step 2. Right-click on Task Scheduler Library and select New Folder from the options.
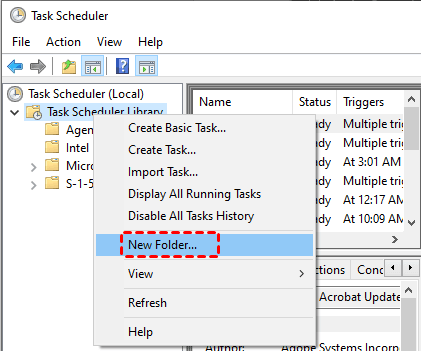
Step 3. Provide a name for the folder, such as "Server Reboot," and click OK. Creating a folder helps keep your tasks organized, making them easier to manage.
Step 4. Right-click on the newly created folder and choose the option to Create Task.

Step 5. On the General tab, provide a task name and description. Then, select Run whether user is logged on or not and Run with highest privileges options for optimal performance. Moving on to the Triggers tab, click on the New button.
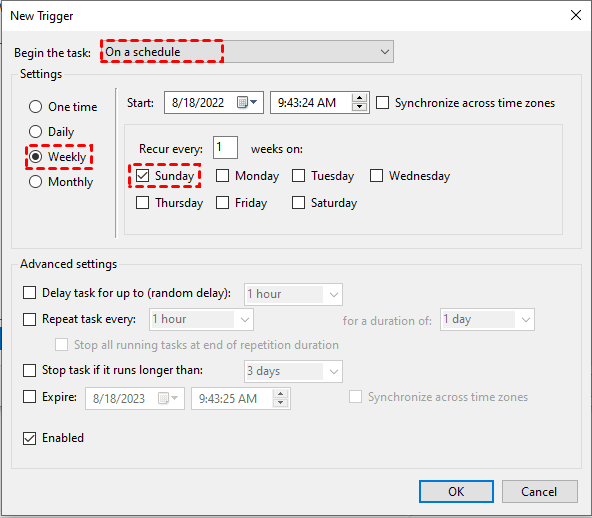
Step 6. From the drop-down menu, select On a schedule and specify the desired date and time for the restart. For example, you can choose to run this task every Sunday on a weekly basis. Once you've set the schedule, click OK.
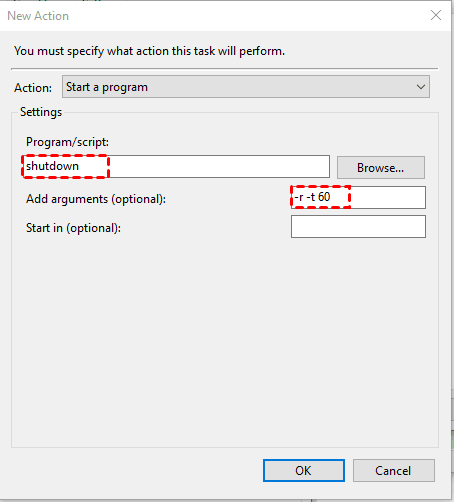
Step 7. Next, navigate to the Actions tab and click on the New button to initiate a new action. In the Program/script box, enter shutdown. In the Add arguments box, type "-r -t 60" to specify a restart with a delay of 60 seconds. Once done, click OK.
Note: For further information on shutdown commands, you can explore additional resources and details available.
Step 8. Next, proceed to the Conditions tab and leave the power settings unchanged if no modifications are required. To make further configurations, click on the Setting tab and adjust the settings as needed. Once you're done, click OK.
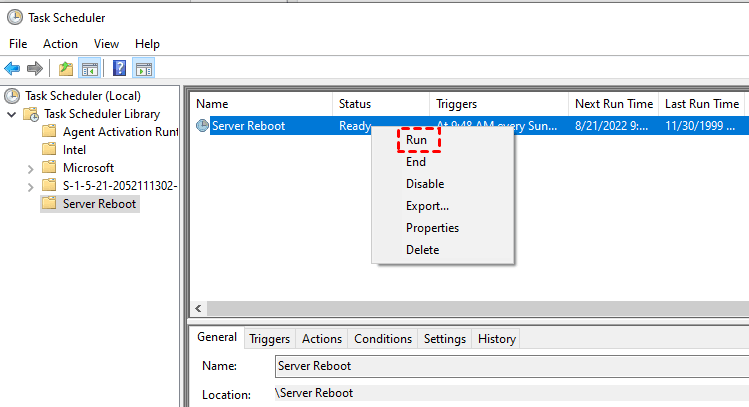
Step 9. Now you'll see that your task is prepared to run according to the specified schedule. If you want to run it at any time, simply right-click on the task and select Run to schedule task to reboot Server 2019.
Bonus Tip: Set Up Scheduled Backup on Server 2019
To ensure the protection of your Server 2019 system and data, it's crucial to establish a regular backup routine. While scheduling a Windows Server Backup can be a bit complex, there's an easier solution available: AOMEI Backupper Server, the best server backup software.
☁With AOMEI Backupper Server, you can enjoy a range of backup options, including system, disk, partition, and file backups.
☁It also supports scheduled backups, and incremental and differential backups, and offers flexible features such as adding comments, encrypting or splitting images, and setting up email notifications for successful backups.
☁Whether you're using Windows Server (such as Windows Server 2022/2019/2016/2012(R2)/2008(R2)/2003) or Windows PC (Windows 11/10/8.1/8/7/Vista/XP), AOMEI Backupper has got you covered.
Simply download AOMEI Backupper and follow the steps below to easily schedule backup on Windows Server 2019.
Step 1. Launch the program and navigate to the Backup section. From there, select System Backup as your desired backup option.

Step 2. Provide a name for the backup task. The necessary system partitions will be automatically selected. To choose a destination path, click on the second bar.

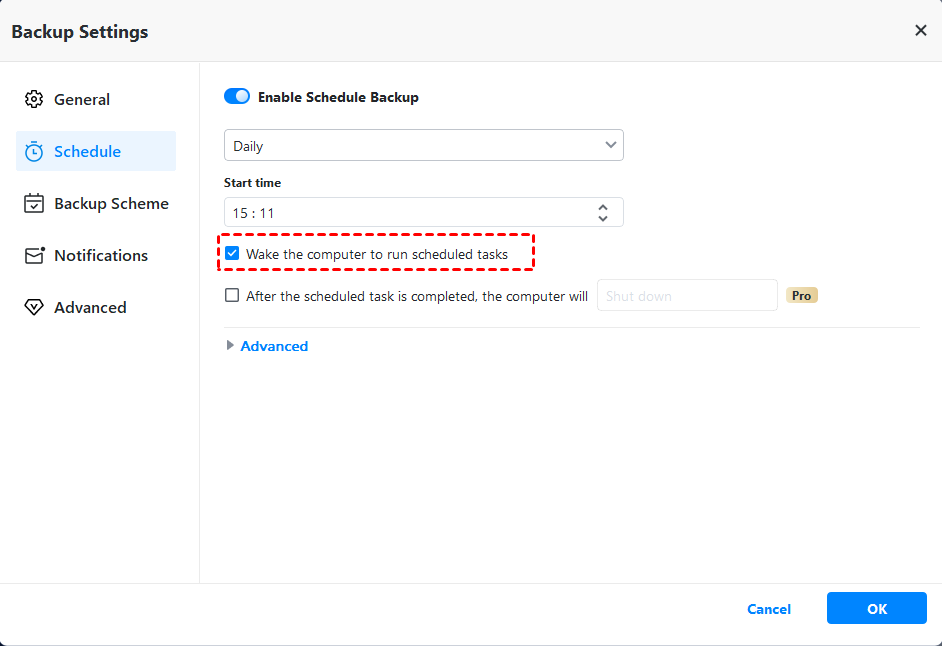
Step 3. Access the Schedule Backup option and enable it. From the drop-down menu, select daily, weekly, monthly, event triggers, or USB plug in mode. You can further specify the desired day and time for the backup to run.
Step 4. Take a moment to review your selections, and when you're ready, click on Start Backup to initiate the process.

Note: If you have concerns about running out of space on your backup disk, you can utilize the Backup Scheme feature to establish a backup retention policy. This will help manage the storage usage effectively.
Summary
Now that you're familiar with how to perform Server 2019 schedule reboot, there's more you can do to safeguard your server system and data. With the exceptional server backup software, AOMEI Backupper, you can easily schedule a weekly backup on Windows Server 2019.
What's even more impressive is that AOMEI Backupper is not just a backup program but also a specialized cloning tool. You can utilize it to clone hard drives on Windows Server 2016 and more. Don't hesitate to give it a try and explore its full range of capabilities!

