Full Guide: Windows 11 File History Add Folder
File History is a built-in tool to backup your files. You can follow the entire guide to do so! Also, a more applicable and easier way is here for you.
By Maggie Updated on October 23, 2023
User case: Add More Folders to File History in Windows 11
I would like to use File History in Windows 11. But I notice that it can only backup folders in Libraries, Desktop, Contacts and Favorites. However, I also want to backup folders in D drive.
Is there any way to add those folders?
- Question from Microsoft Community
Overview of File History
Backing up information is crucial for everyday computer use. Many valuable files can be lost or destroyed, making backups essential. While the internet often advises creating routine backups, most of us neglect to make multiple copies of important data, relying on just one file stored on our disk. Problems arise when there's a system crash, corruption, or disk failure, risking the loss of valuable data.

Microsoft Windows 11 offers the File History tool, a vital backup tool. File History backs up important folders like Documents, Music, Pictures, Downloads, Videos, offline OneDrive files, and Desktop folders. So to perform Windows 11 File History add folder, you need to include the folder in a library. To use it, connect a USB storage device such as a flash drive or an external hard drive, which should remain connected to your system.
How to add folders to File History
To perform File History Windows 11 add folder, you have several steps to do, please refer to the below content.
Stage 1. Set up and use File History
Step 1. Press Win + R to launch the Run command box. Type FileHistory in the text box and hit enter to continue.
▶Note: When you launch File History's control panel page, it will be inactive by default since you are setting up the feature for the first time.
Step 2. Connect an external USB storage device to your PC and make sure it can be detected.
Step 3. Click on the Turn On button to activate File History on your Windows 11 system. File History will start copying files to the external storage drive from the following locations: Libraries, Desktop, Contacts, and Favorites.
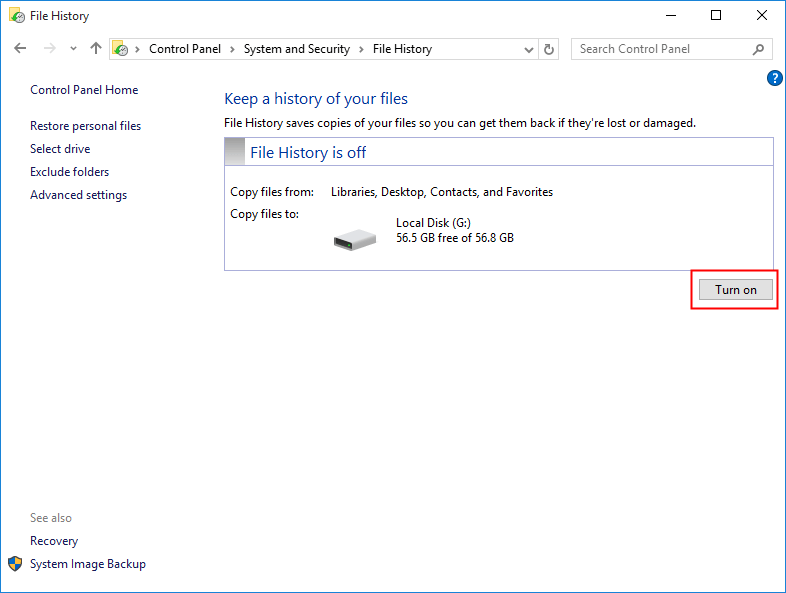
▶Note: To initiate a backup manually, click on the Run Now option.
File History is now active on your system. It will back up files from the Libraries, Desktop, Contacts, and Favorites folders. Additionally, it will also back up the Downloads, Saved Games, and OneDrive folders.
Stage 2. Configure File History
File History is active, but you might need to make some adjustments. Here's how to do it.
Step 1. Press Win + R to launch the Run command box. Type FileHistory in the text box and press the enter key.
Step 2. Proceed to the left-hand section and click on the Advanced Settings option.
Step 3. You can customize the backup frequency and decide how long to keep files. Go to the Save copies of files option, which is initially set to Every hour. Click on the drop-down list to explore additional options.
Step 4. Choose the time duration option that best suits your backup needs.
Step 5. Next, go to the Keep saved versions option. This setting allows you to retain backups on the external drive indefinitely, and it is set to Forever(default). Do not change this setting.
▶Note: To remove older backup versions of files and folders, click on the Clean up versions option. This action will delete all previous versions except the most recent backup copy.
Step 6. Finally, click on the Save changes button to apply and save your new settings.
Stage 3. Choose a destination to save
Once you assign a storage drive to File History, it becomes the default storage. However, if you want to switch to a larger storage drive, you can do so. Please note that you can only use one drive to save File History contents at a time.
Step 1. Press Win + R to launch the Run command box. Type FileHistory in the text input area and press the enter key.
Step 2. File History's control panel page will open. Click on the Select Drive option located in the left-hand section.
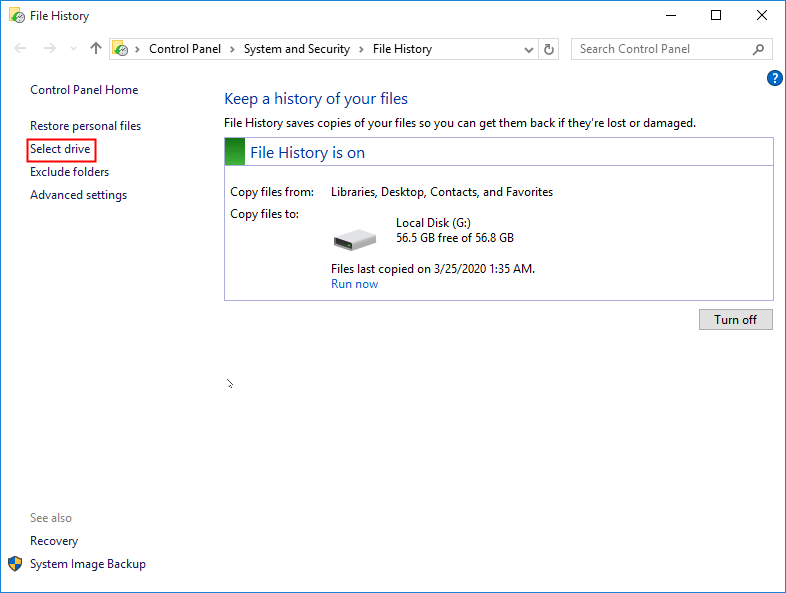
Step 3. A list of all available storage drives will appear. Select the USB storage device you want to use for File History by clicking on it.

Step 4. File History will prompt you to decide whether you want to move old files to the new drive. Click on the Yes button to proceed.
Step 5. Then, click on the OK button to save your changes.
Stage 4. Add folders to File History
The default selection of folders that File History backs up isn’t sufficient for every user. So, you will have to manually add a different folder if you want File History to back it up.
Here's how to add a folder to File History on Windows 11:
Step 1. Press Win + E to launch the File Explorer on your computer. Now, go to the folder location you want to add to File History. We have created a folder named Test for demonstration purposes.
Step 2. Right-click on the folder and select more options from the context menu. Then, click on the Include in Library option.
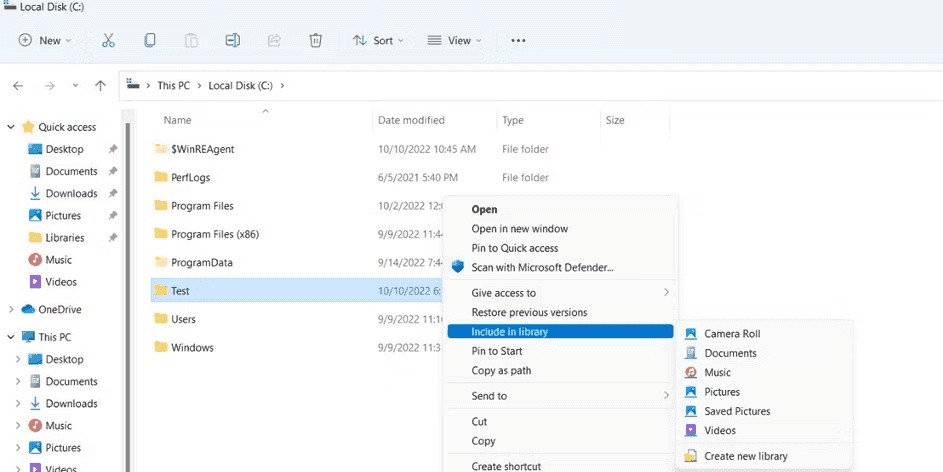
Step3. Select any one folder from the list of available options. We picked the Documents folder.
Step 4. File Explorer will include the Test folder in the Documents folder within the libraries. Click on the Documents folder located under Libraries in the Navigation pane to confirm this.
Step 5. Now, go to the File History feature in the control panel and click on the Run Now option to create a new backup.
Step 6. Open File Explorer, navigate to the USB drive, and access the Data folder. You will find the folder you added to the Libray appearing here.
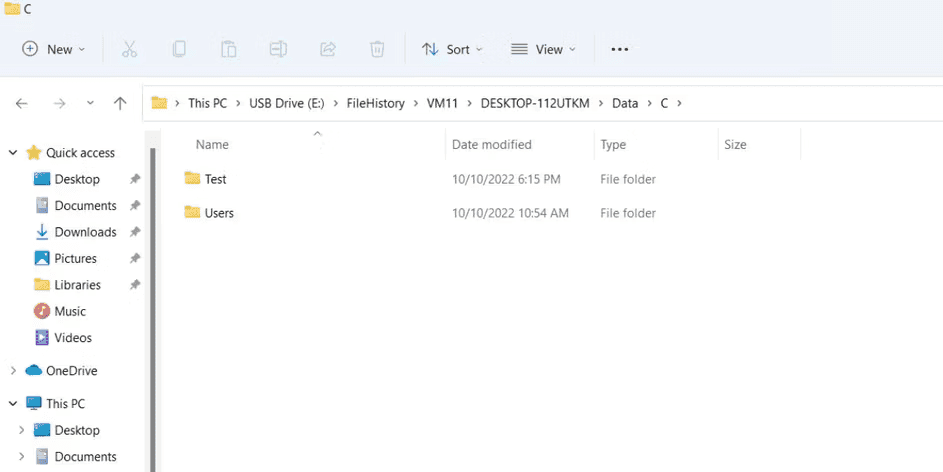
Now, File History will include the contents of the new folder you added to it.
If you have followed the steps above, you should have successfully been able to perform Windows File History add folder.
An easier and more professional way to backup your data
Windows 10/11 File History add folder can backup your important files and folders regularly. However, as you can see, the whole procedure is complicated and limited. You need to include some files and folders in the library so that you can enable such feature. Is there any easier way? Definitely. That’s AOMEI Backupper Standard.
✎It simplifies the backup and restoration process for files, operating systems, and entire disks with just a few clicks. Recently, it introduced a new feature called Cloud Backup, allowing users to directly back up files to AOMEI Cloud without installing the cloud drive desktop app.
✎It can backup files to internal/external hard drive, USB flash drive, network share, NAS, cloud, etc.
✎There are more useful options such as flexible schedule backup, full or incremental backup, backup compression, comment, etc.
Now download this software on your system, if you are a server user, consider its Server edition.
Step 1. Launch the software and choose Backup on the left, and then choose File Backup. Based on your needs, you can also choose other options accordingly.

Step 2. Click Add Folder or Add File to select the data that need to be backed up.

✍ Tips: You are allowed to backup multiple files and folders at once. In case you made a wrong choice, you can delete it by clicking the dustbin icon shown at the right edge of the selected file/folder.
Step 3. Click the second bar on the main interface and choose a destination. You can also Select a cloud drive or Add Share or NAS Devices as you need.

Step 4. Click Start Backup on the lower right corner and the software will start to work. When it's complete, click Finish to exit the interface.
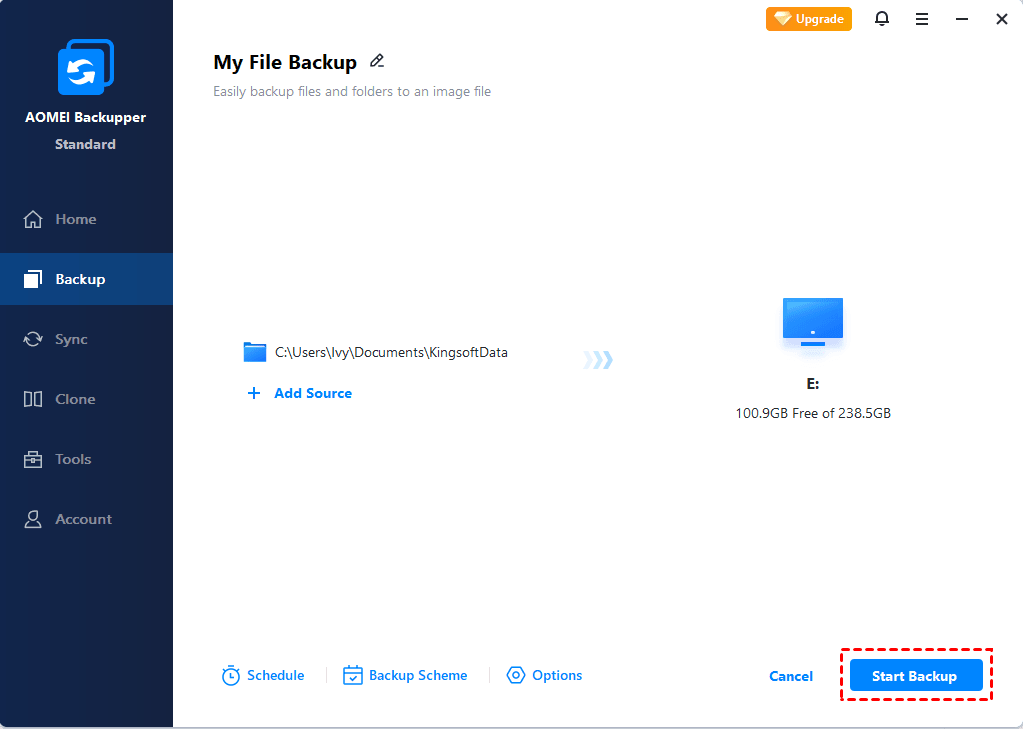
★ Tips: In addition, you can also click Options, Schedule Backup and Backup Scheme to customize the settings at the bottom left.
▶ Options: You can comment on the current backup task and enable email notifications. When you upgrade to the professional version, you can also enable encrypted backup.
▶ Backup Scheme: You can change the backup method to full backup, incremental backup and differential backup. The differential backup can only be used after upgrading to the professional version. In addition, after upgrading to a higher version, you can also turn on the automatic cleanup backup function.
Summary
Now you know how to perform Windows 11 file history add folder. Having an awareness is a good habit to always remain data safe. Also, there is another way to backup your files and folders, that’s AOMEI Backupper.
This software can not only backup your computer but also applicable to external hard drives as the best choice for Samsung T7 SSD software for example. Additionally, you can utilize its clone feature to migrate data securely.

