Windows 11 Disk Cleanup Not Working? Fix in 7 Ways
When you're troubled by the Windows 11 Disk Cleanup not working issue, read this article to find out why and 7 ways to fix it. And learn the importance of regularly backing up your system and how to do it.
by Maggie Updated on December 26, 2023
User case: Windows 11 Disk Cleanup not working
How can I fix the problem that Disk Cleanup in Windows 11 not working?
"I upgraded an old laptop to Windows 11 last month and it has been working fine for the past month. Just yesterday, I suddenly realized the problem of insufficient storage space on the local disk C and tried to use the Disk Cleanup utility to clean up some useless files, only to find that the utility does not work at all. I tried some methods given by my colleagues, but they all turned out to be pointless. I need to use this laptop for my recent work, but the lack of disk space may affect the normal use of this computer, can anyone give some reliable advice?"
Disk Cleanup is a utility built into Windows 10 and Windows 11 that helps you to remove useless junk files from your disk to improve the overall speed of your computer. Many users are used to using Disk Cleanup regularly to keep their system running smoothly, but some of them may find that this application does not work properly during the process. Although this problem does not affect your computer experience, you still need to pay attention to it because it may indicate some more serious system problems. Therefore, it is recommended that you understand the cause of the problem before trying to fix it.
Why Disk Cleanup not working in Windows 11?
An exploration of the cause of the disk cleanup not working will help us to solve it better. The following are the common reasons why Disk Cleanup does not work.
- Windows system file corruption
- No system administrator privileges granted
- Interference from malware or other applications
7 Ways to Fix Disk Cleanup Not Working in Windows 11
If you are at a loss for Disk Cleanup not opening in Windows 11, please try the following 7 methods, which we believe will help you solve the problem. Please note that the methods below can also be used to solve the problem that Disk Cleanup not working in Windows 10.
Method 1. Perform SFC and DISM scans
System File Checker (SFC) is a tool integrated into Windows that scans and verifies the integrity of all protected system files. If a corrupted system file is found, it will replace itself. Deployment Image Servicing and Management (DISM) is a command-line tool that allows system administrators to prepare, modify, and repair Windows system images, including Windows Recovery Environment, Windows Setup and Windows PE. Using these two tools together can help you troubleshoot Disk Cleanup not working in Windows 11.
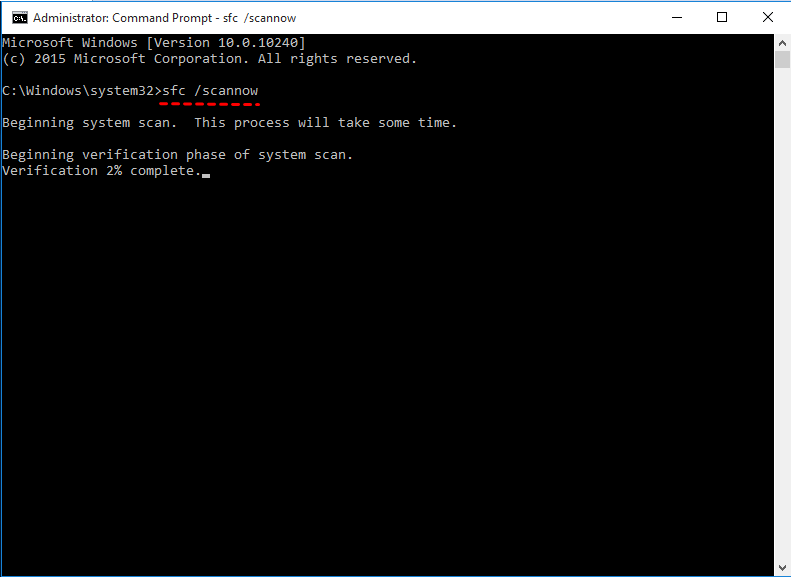
- Use Windows + S to open the search bar, type cmd and select Run as administrator.
- In the Command Prompt window, type sfc /scannow and press Enter.
- Enter the following commands in turn, and press Enter to execute the commands respectively.
- Dism /Online /Cleanup-Image /ScanHealth
- Dism /Online /Cleanup-Image /CheckHealth
- Dism /Online /Cleanup-Image /RestoreHealth
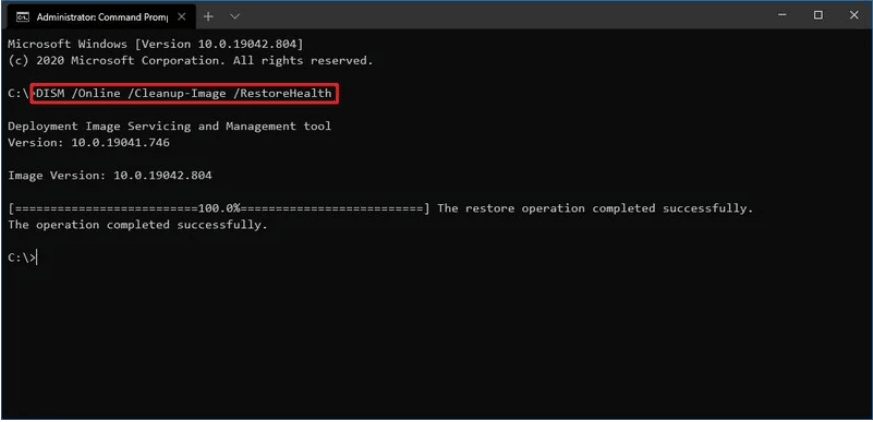
- Wait for the scan to complete and repair then restart your computer and try to perform Disk Cleanup again.
Method 2. Manually delete temporary files
'Windows 11 disk cleanup not deleting temporary files' is reported by users constantly. Additionally, if you have corrupted temporary files on your computer, it may prevent Disk Cleanup from working properly. In this case, you can try deleting all temporary files to fix Disk Cleanup not working in Windows 11.
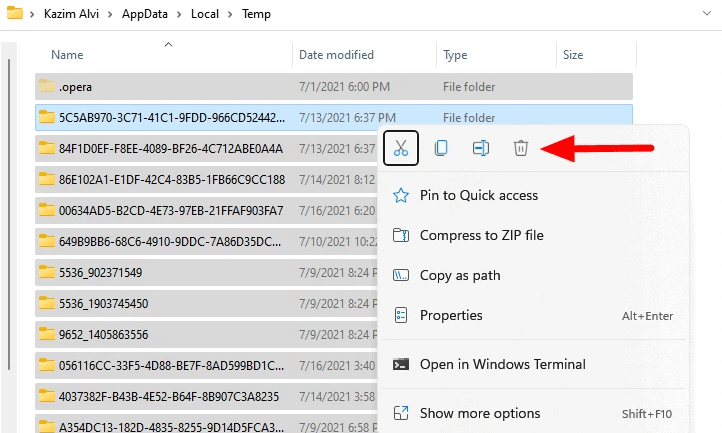
- Use Windows + R to open the Run window, type %temp% and press Enter.
- Press Ctrl + A to select all temporary files, right-click one of the folders and select Delete in the expanded menu.
Method 3. Perform Windows Troubleshooting
From the results of some users' feedback, Windows Troubleshooting helps to solve the problem that Disk Cleanup does not work in Windows 11.
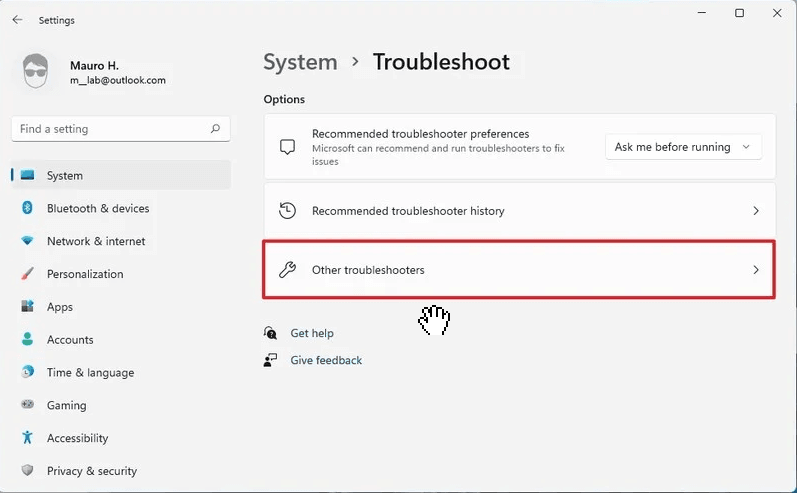
- Use Windows + I to open Windows Settings, click the System tab in the left panel, and click the Troubleshoot option in the right panel.
- In the Troubleshooter window, confirm if there is a Windows Update option. If not, please click the Other Troubleshooters button.
- In the Most frequent section, find the Windows Update option and click the Run button. Wait for the troubleshooting process to complete, restart your computer, and try Disk Cleanup again.
Method 4. Run Disk Cleanup as administrator
If you're currently using an account that doesn't grant administrator privileges, then you may have issues with Disk Cleanup not working in Windows 11. To fix this, you can try run Disk Cleanup as administrator.
- Use Windows + S to open the search bar, type Disk Cleanup, and click Run as administrator in the right panel.
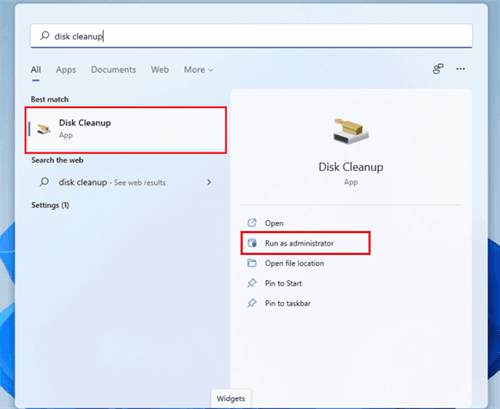
✍ Note: If you are currently logged in to an account that is not an administrator account, you may need to enter the administrator password.
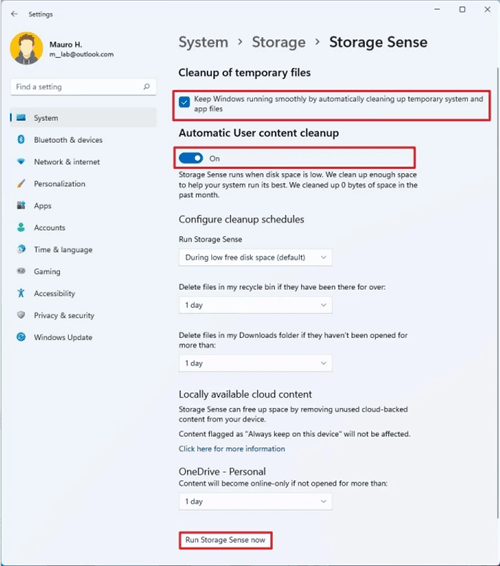
Method 5. Turn on the Storage Sense utility
Storage Sense is a utility that regularly cleans up your computer and is also the best alternative to the Disk Cleanup application. When you encounter problems with Disk Cleanup not working in Windows 11, you can consider opening this utility to solve the problem.
✍ Note: It should be noted that although Storage Sense can help you clean up useless files, it may also delete files that interfere with Disk Cleanup.
- Use Windows + I to open Windows Settings, select the System tab in the left panel. Then click the arrow to the right of Storage in the right panel.
- In the Storage window, find the Storage Sense in the Storage Management section and click it.
- Turn on Automatic User Content Cleanup and then click the Run Storage Sense now.
Method 6. Enter into Windows Safe Mode
The easiest way to troubleshoot whether the problem of Disk Cleanup not working in Windows 11 is caused by malware, viruses or non-Microsoft applications is to enter Windows Safe Mode.
- Use Windows + I to open Windows Settings, click System -> Recovery.
- In the Recovery Options section, find the Advanced option and click the Restart Now button.
- After confirming that all the work at hand is saved, select the Reset Now button.
- Enter the Windows Recovery Environment (Windows RE), and in the selection options window, click Troubleshooting -> Advanced Options -> Startup Settings -> Restart.
- After the computer restarts, press F4 or the number key 4 to start Windows Safe Mode.
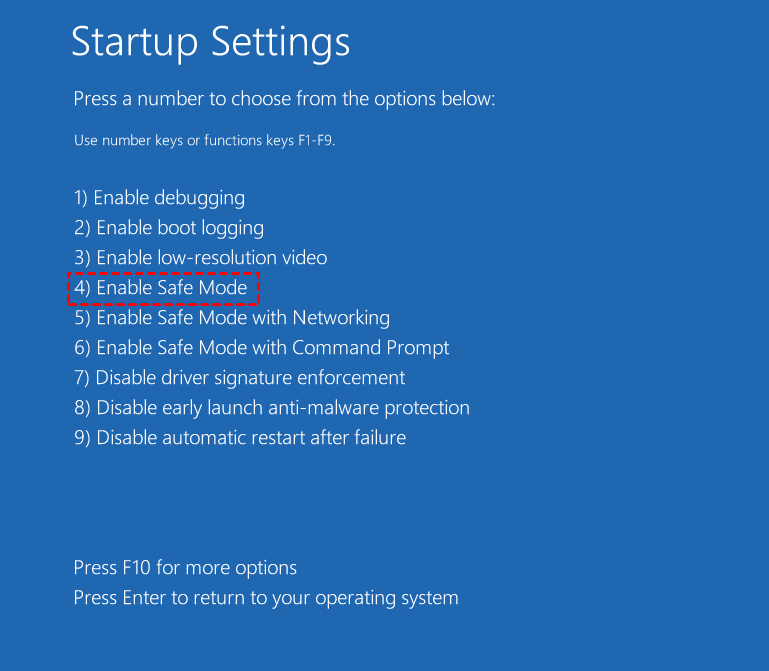
Try opening the Disk Cleanup application in Windows Safe Mode, if the application still does not work, it means that your Windows installation may have a serious fault or error, try the next method.
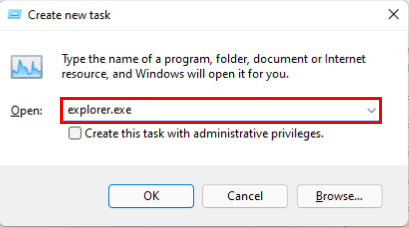
Method 7. Restart Windows Explorer
According to some user feedback, they solved Disk Cleanup not working in Windows 11 by restarting Windows Explorer. Let’s see how to do it.
- Use Ctrl + Shift + Esc to start Task Manager.
- Under the Processes tab, find Windows Explorer and right-click on it, and select End task in the expanded menu.
- Click the File option at the top left of Task Manager, then select Run new task, enter explorer.exe and click the OK button.
Make regular system backups to prevent system damage
If you are struggling with the problem of Disk Cleanup not working in Windows 11, please refer to the 7 methods provided in the article to solve the problem after understanding the cause. However, we must remind you that the cause of this problem will involve system file corruption, which may lead to system crash in serious cases.
Therefore, for the sake of system security, we recommend that you use AOMEI Backupper Standard to perform regular system backups. So that you can restore from system backup in time when you encounter system problems, which will also help you solve the above problem.
AOMEI provides free and professional system backup service for Windows 11/10/8.1/8/7/Vista/XP, etc. It is capable of backing up system files, boot-related partitions (EFI system partition and recovery partition, etc.), applications and user profiles on the system disk to any location.
If you have never used this software before, please follow the steps below. First, download and install it on your computer (For Windows Server users, please turn to AOMEI Backupper Server):
- Run AOMEI Backupper Standard, select the Backup tab in the left panel, and select System Backup in the right panel.

- You can change the save path of the system backup in the System Backup window, and then click the Start Backup button. If you have more than one backup task at the same time, you can also change the task name by clicking the pencil icon in the upper left corner.

✎ Tips: Before the backup starts, you can click on Options, Schedule Backup and Backup Scheme in the lower left corner for additional settings.
>> Options: You can annotate the current backup job and enable email notifications to receive backup job completion in real time. Enabling encrypted backups can improve your backup security, but requires an upgrade to the pro version.
>> Schedule Backup: You can enable the free scheduled backup feature to automatically back up your system on a daily, weekly, or monthly basis. When upgrading to the Pro version, you can also set up automatic backup of your system on event triggers and USB plug in.
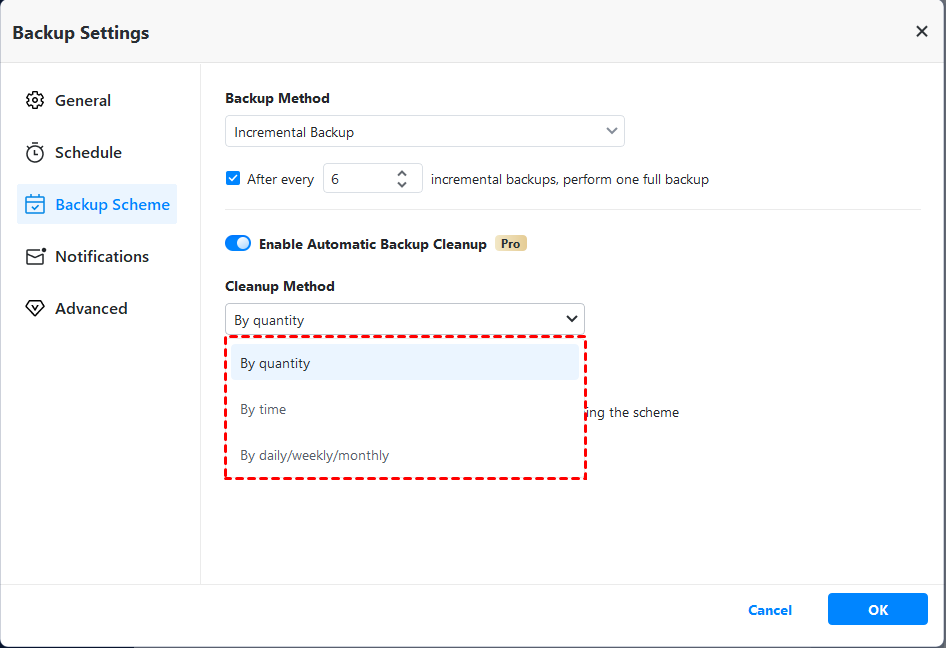
>> Backup Scheme: You can change the current backup method, including incremental backup, full backup and differential backup, where differential backup is available in the professional version. You can also enable the auto clean backup feature in the pro version.
✩ In addition to System Backup, AOMEI Backupper can provide you with more useful functions.
- With a system backup image, whenever you encounter any unsolvable system problems, you can use the System Restore function to quickly restore the system to its previous state, which is more time-saving than reinstalling the system.
- To prevent the system from crashing and failing to boot, it is recommended that you create bootable media. When encountering the problem that the system cannot be started, you can perform a safe boot and automatically execute AOMEI Backupper Standard, which will assist in system recovery.
- The system backup function only backs up data in the partition where the system is located. If you also want to protect data in other partitions on the disk, use the Partition Backup function.
- If you upgrade to the Pro version, you can use the System Clone feature to migrate your system completely to another hard drive and ensure that your computer boots safely.
Summary
If you don't know how to fix Disk Cleanup not working in Windows 11, read above in detail. I believe the 7 methods listed in this article can help you solve this problem. However, this problem will involve corrupted system files, which in severe cases may lead to a system crash. Therefore, it is recommended that you back up your system regularly to prevent system crashes.
AOMEI Backupper Standard has a clear interface and is easy to use. You only need to follow the above steps to create a system backup image to provide security for your computer system. In addition, you can use this software to help you upgrade hard drive on Windows 11.

