6 Fixes: Memory Management Blue Screen on Windows 11
Why does Memory Management blue screen on Windows 11 appear? This article tells you why and offers six ways to fix the problem! Please read it carefully.
By Miya Updated on October 27, 2023
Why Does Memory Management Blue Screen on Windows 11 Occur?
What causes Memory Management blue screen? The occurrence of Memory Management blue screen on Windows 11 can be attributed to several factors. Here are some common reasons:
- Faulty RAM: Issues with the computer's random access memory (RAM), such as defective modules or incorrect installation, can lead to Memory Management errors.
- Outdated or incompatible drivers: Incompatible or outdated device drivers can cause conflicts in Memory Management, resulting in blue screen errors. It is crucial to keep drivers up to date to ensure compatibility with the Windows 11 system.
- Software or system conflicts: Certain software programs or system processes may conflict with the Memory Management functions of Windows 11, leading to blue screen errors. This can occur due to incompatible software installations or conflicts between different system components.
- Hardware issues: Faulty hardware components, such as a failing hard drive, malfunctioning motherboard, or overheating system, can impact Memory Management and trigger blue screen errors.
- Malware or viruses: Malicious software or viruses can disrupt the normal functioning of the operating system, including Memory Management processes, leading to blue screen errors.
So how to fix Memory Management blue screen error? There's no need to feel panicked though, as we're going to provide six effective ways to fix this blue screen error. In order to avoid problems with your computer that can lead to data loss, we recommend you to backup your Windows 11 in advance so that you can utilize the backup to restore to a previous version in case of problems. Let's take a look at how to do it below.
6 Ways to Fix Memory Management Blue Screen on Windows 11
With a clear understanding of the underlying cause of this error, we can now proceed to troubleshoot the Memory Management error in Windows 11.
1. Execute the Memory Diagnostic Tool
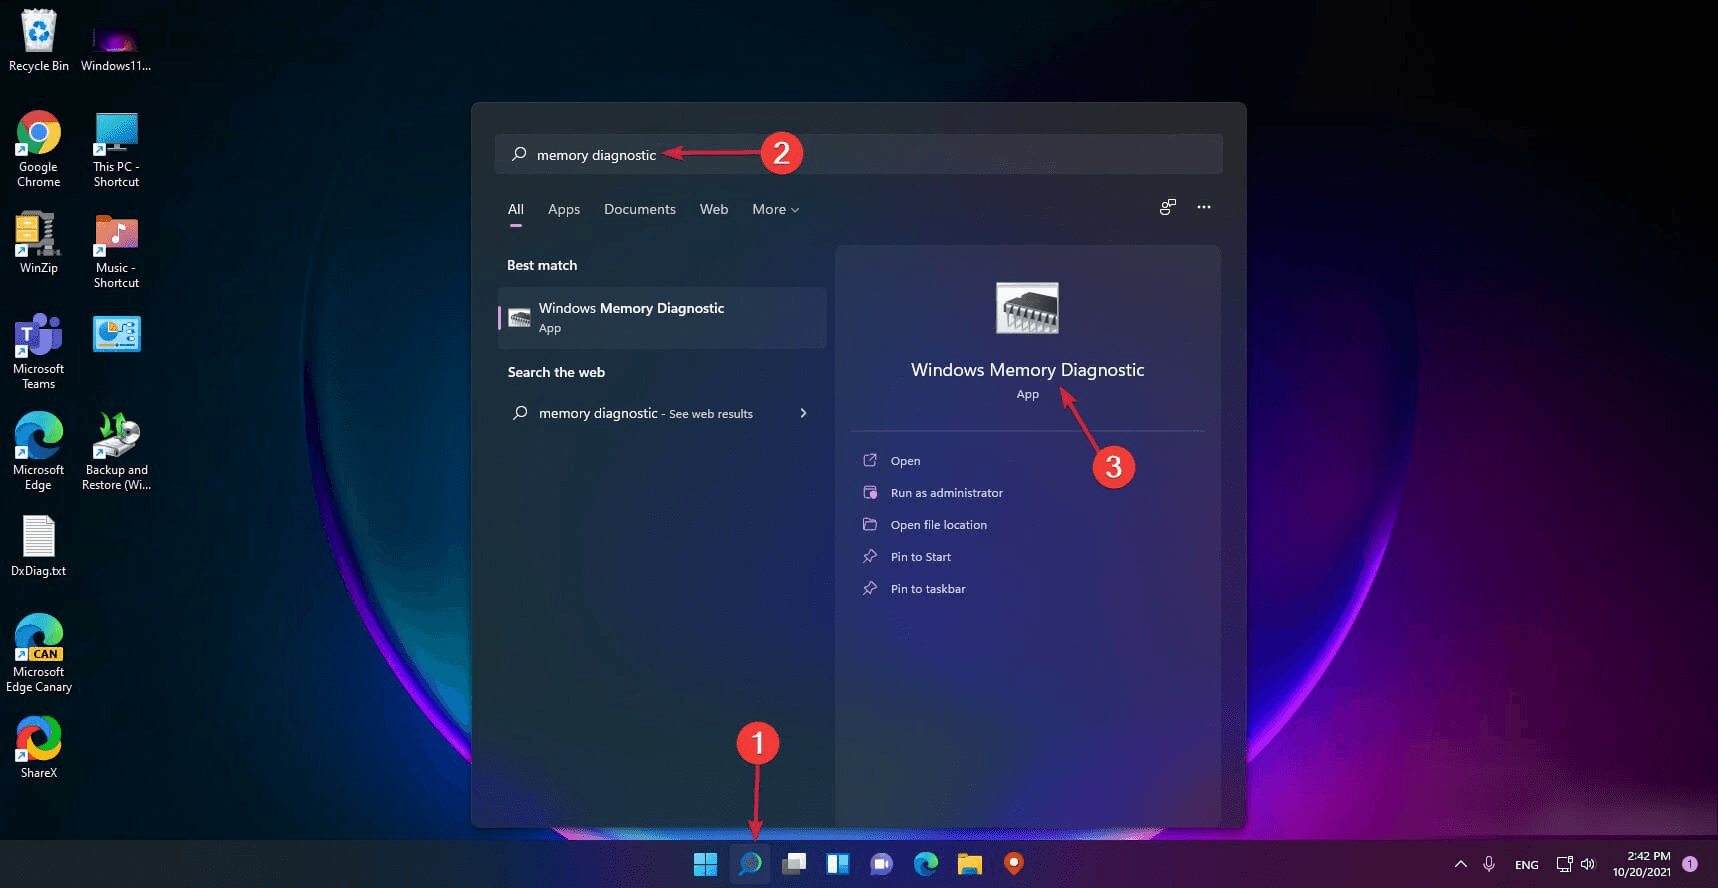
Step 1. To access the Windows Memory Diagnostic app, simply click on the Search icon located on your Taskbar. Then, type memory diagnostic in the search bar and select the Windows Memory Diagnostic app from the displayed results.
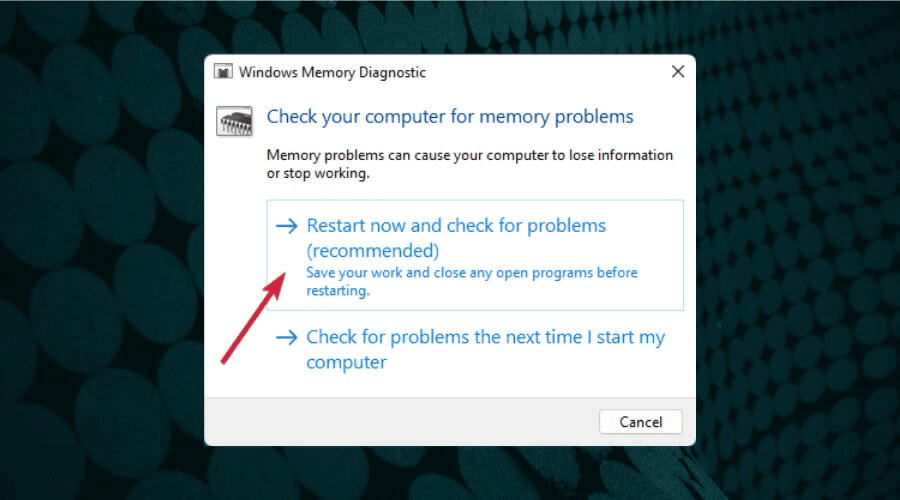
Step 2. Choose the initial option, which is to Restart now and check for problems.
Step 3. After the restart, the Memory Diagnostic tool will scan your RAM for issues, providing detailed information if any are detected. Otherwise, the system will proceed with the regular boot process.
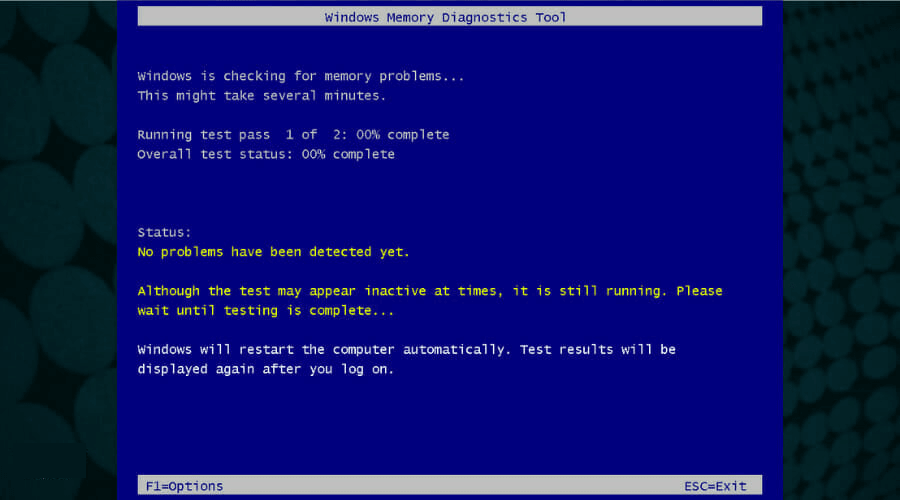
If the tool detects a problem, it is often related to faulty RAM modules. Check the compatibility and proper insertion of recently replaced modules. Afterward, confirm if the Memory Management error in Windows 11 has been resolved.
2. Verify Windows Updates
At times, a straightforward system update can resolve the issue without revealing the initial cause. For instance, installing the latest OS version can address the Memory Management BSOD error that occurred following a Windows update.
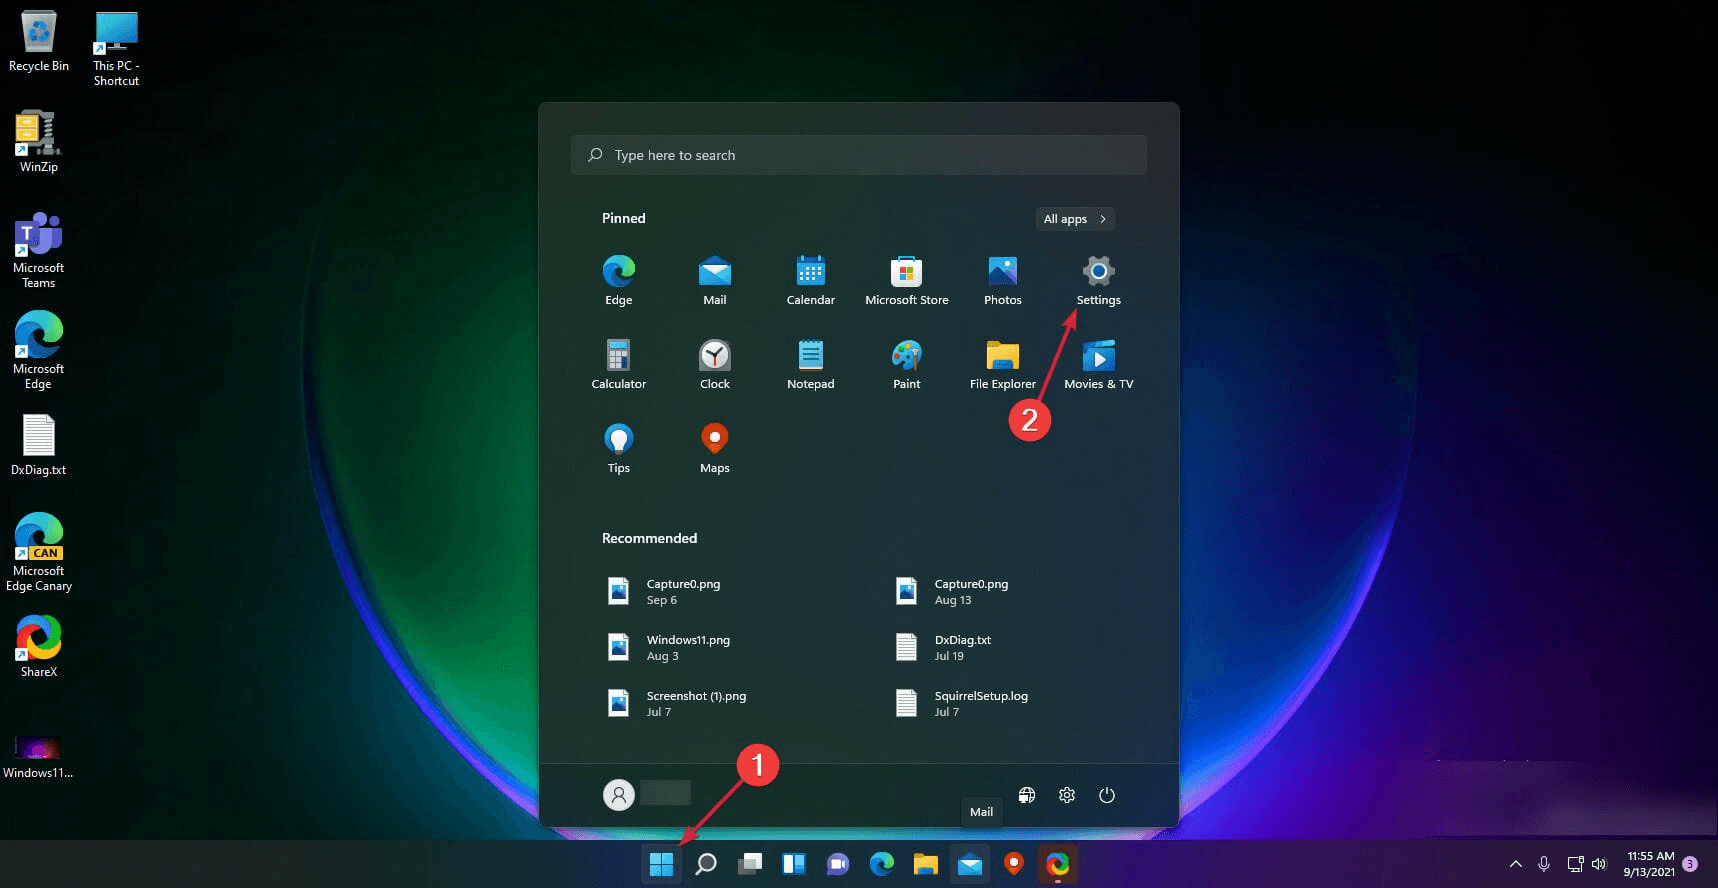
Step 1. Click on the Start button and select Settings.
Step 2. Choose Windows Update from the left menu and click on the Check for updates button in the right pane.
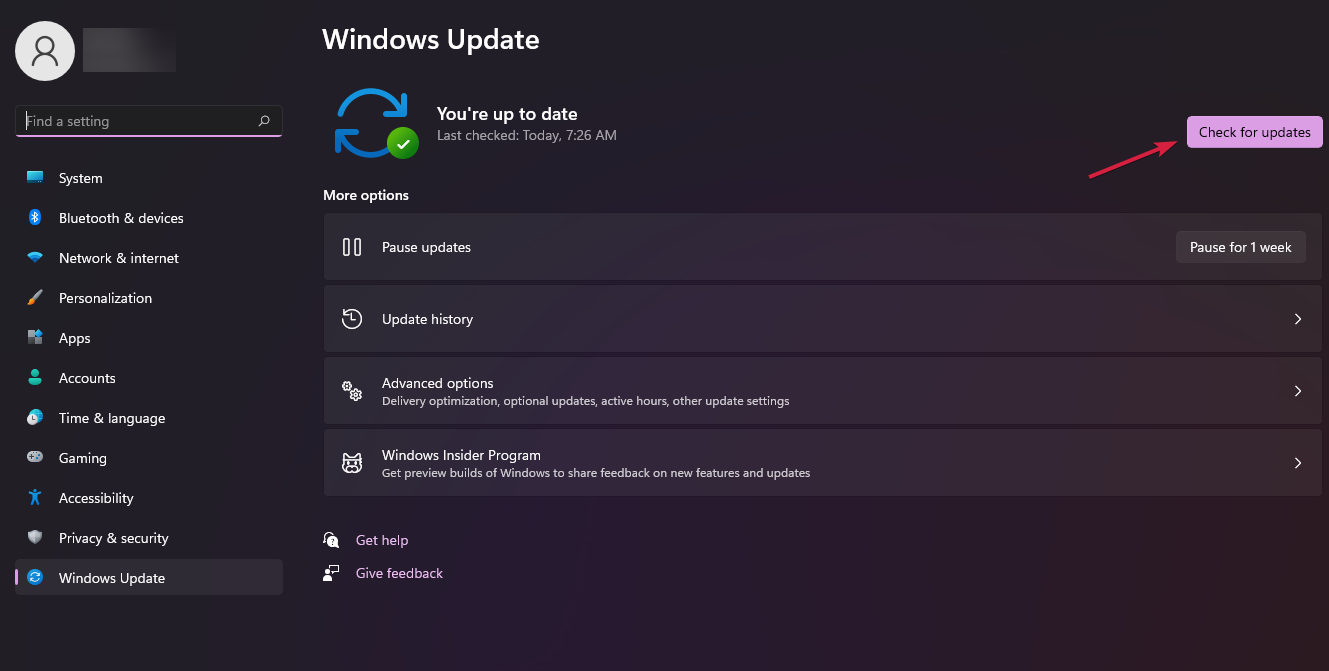
Step 3. If updates are available, the system will download and install them. Once the process is complete, restart your PC.
3. Verify Driver Problems
An alternative approach to resolving driver issues is to utilize specialized software that scans your PC for missing or outdated drivers, providing prompts to update them.
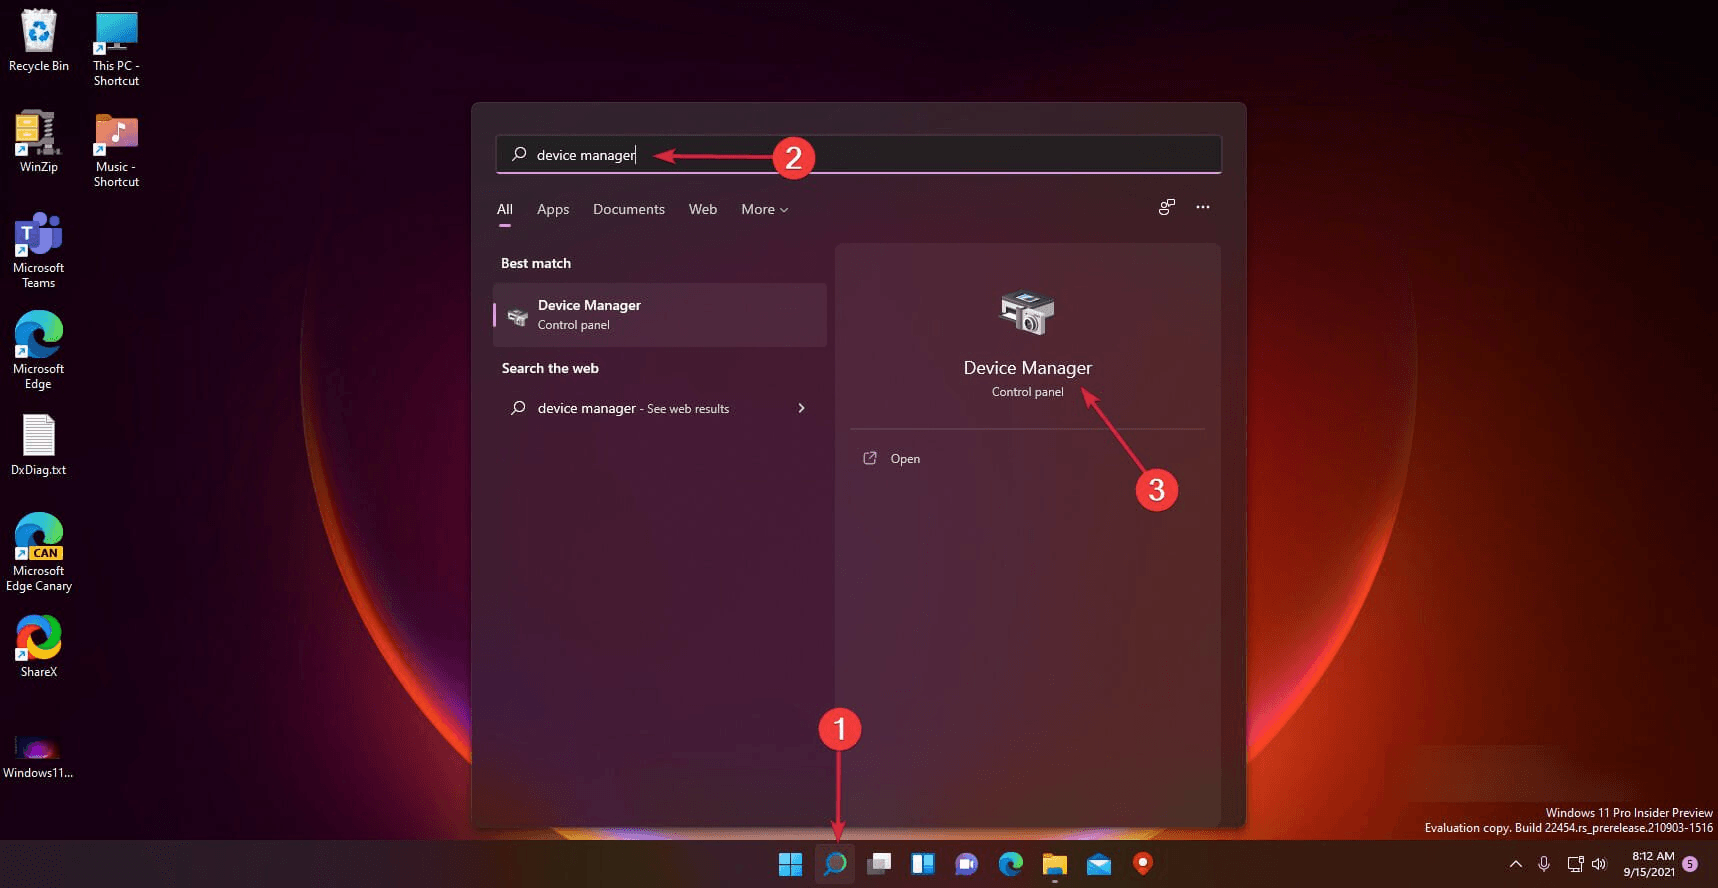
Step 1. Click on the Search icon located on your Taskbar, then type device manager and select the corresponding app from the search results.
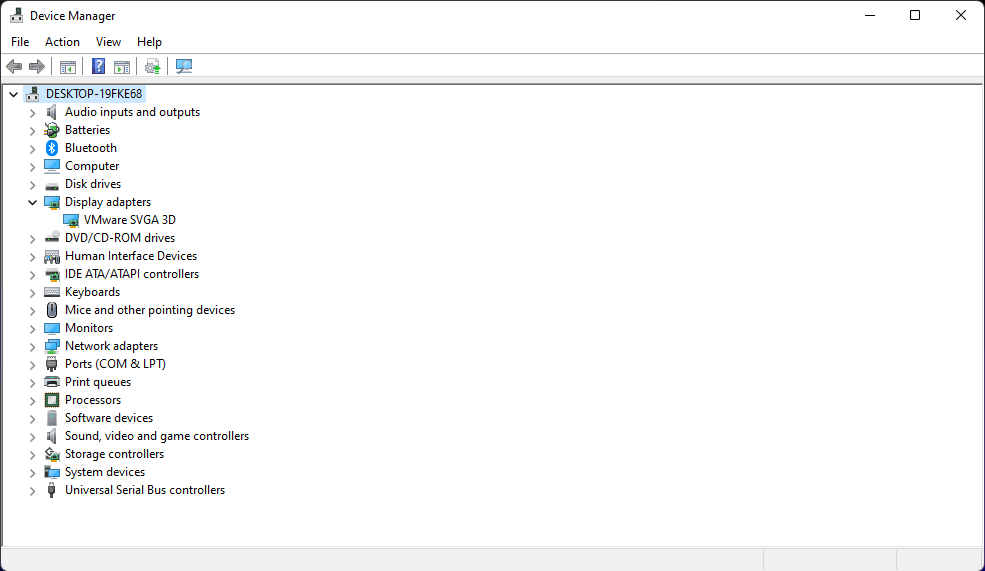
Step 2. Inspect the list and search for any drivers that are labeled with an exclamation mark.
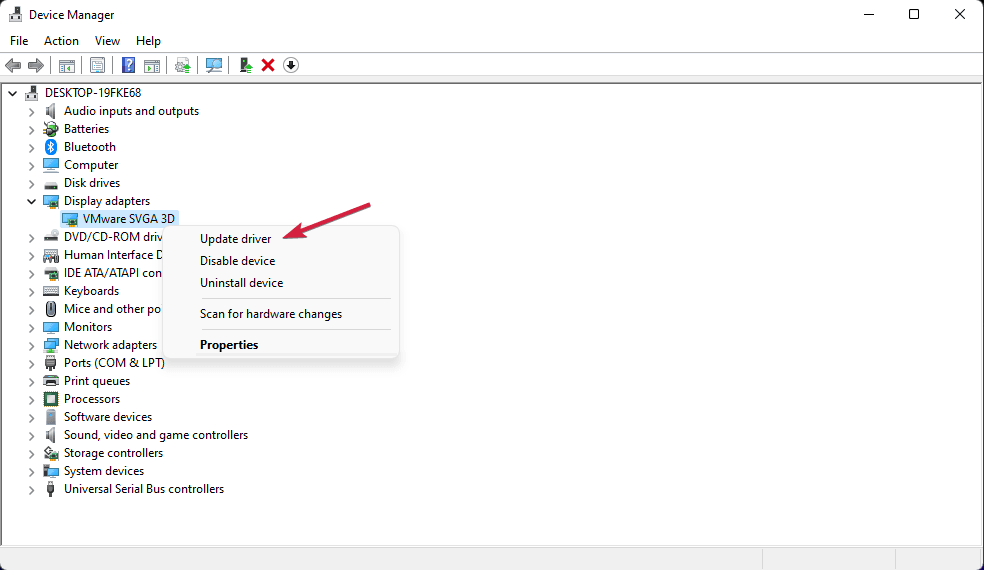
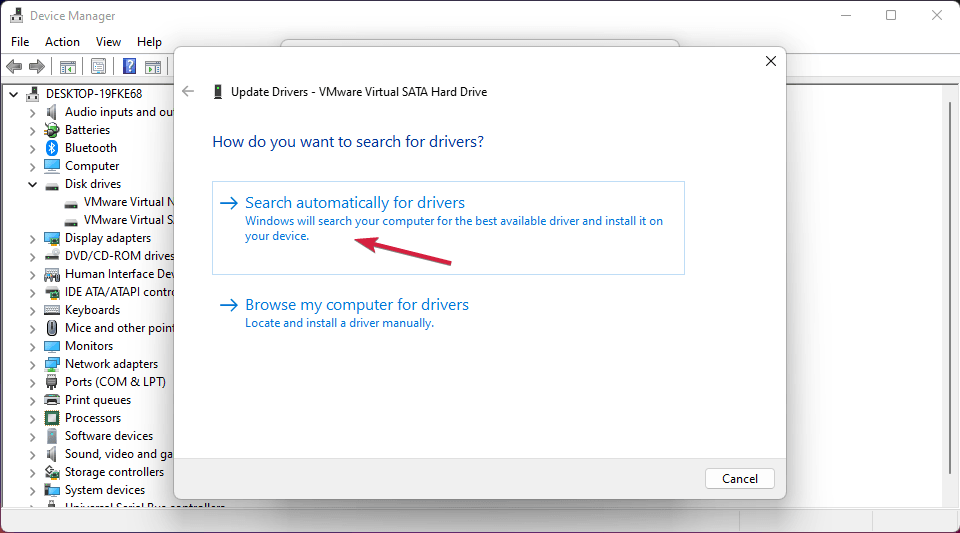
Step 3. If you come across one, right-click on it and choose Update driver.
Step 4. Choose the initial option, which is Search automatically for drivers.
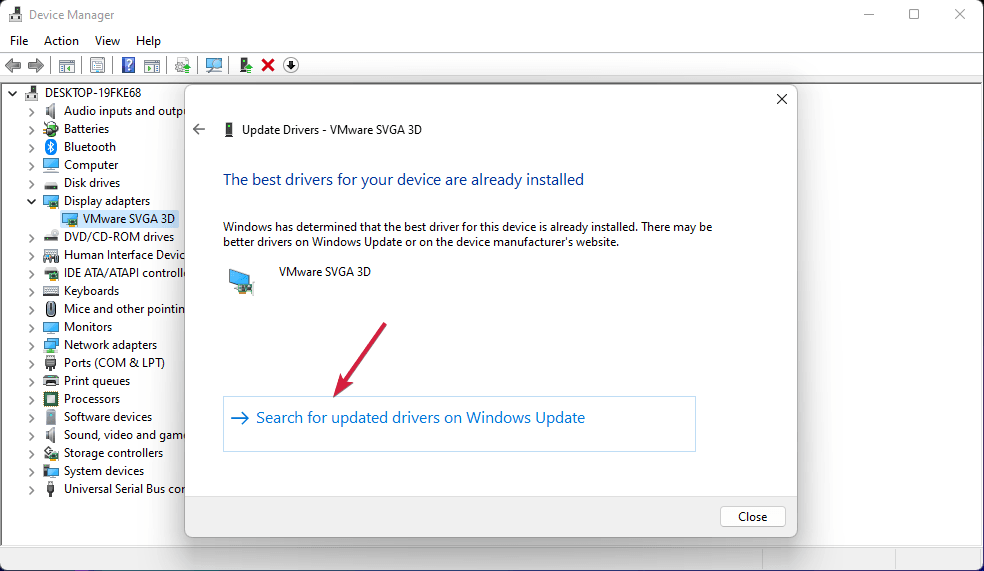
Step 5. If a new driver is detected by the system, it will install it, and you will receive a prompt to restart. If not, you can click on Search for updated drivers on Windows Update.
Step 6. Choose Advanced options.
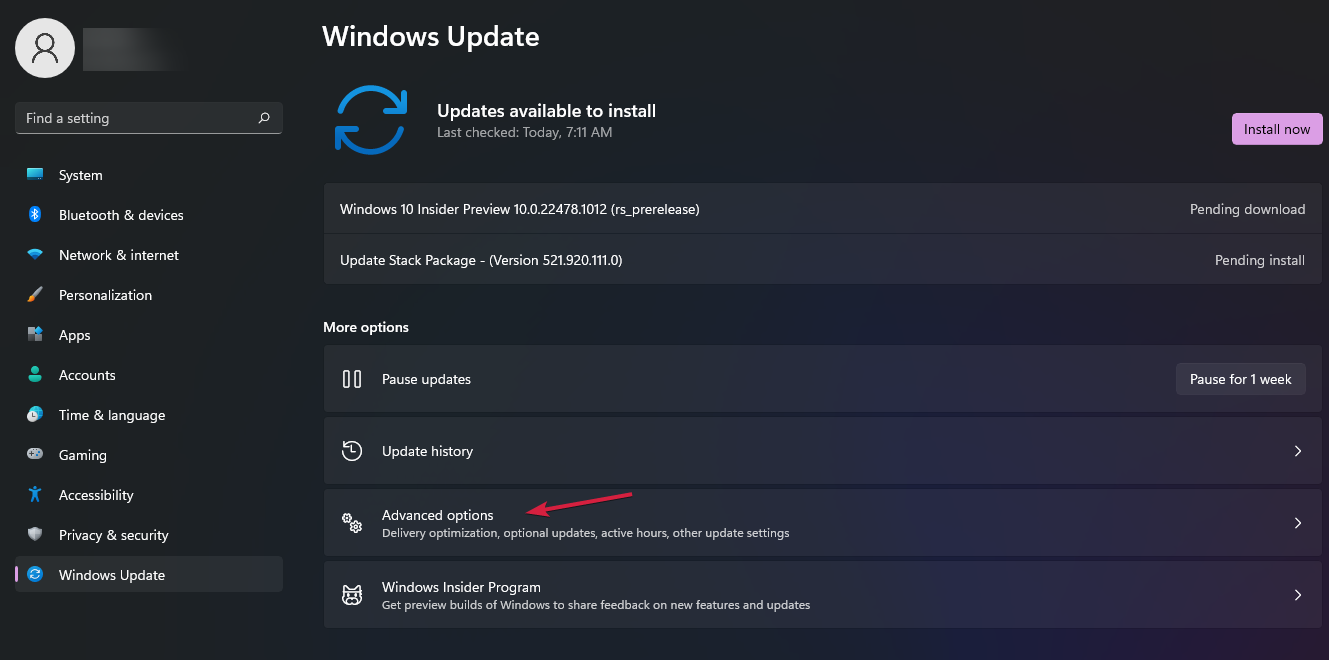
Step 7. Navigate to the Optional updates section and check for any updates specifically related to drivers. If you find any, proceed to install them and subsequently restart your PC.

4. Perform an SFC Scan
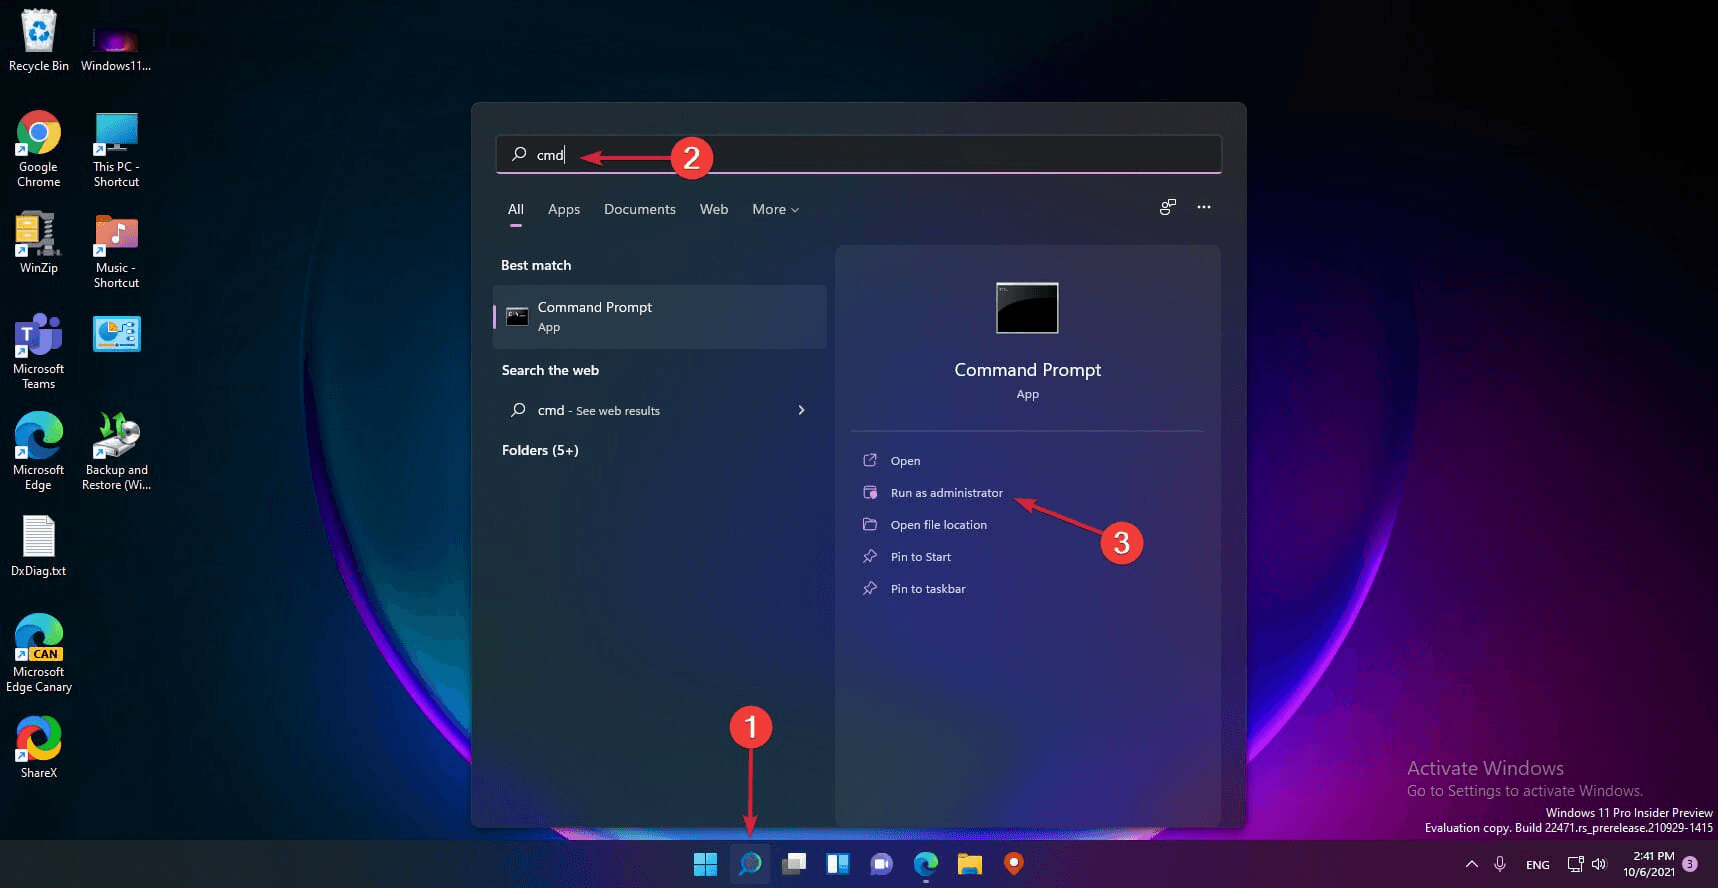
Step 1. Click on the Search icon located on the Taskbar, type cmd, and choose Run as administrator to launch Command Prompt with elevated privileges.
Step 2. Enter or copy and paste the following command, then press Enter to execute it:
- sfc /scannow
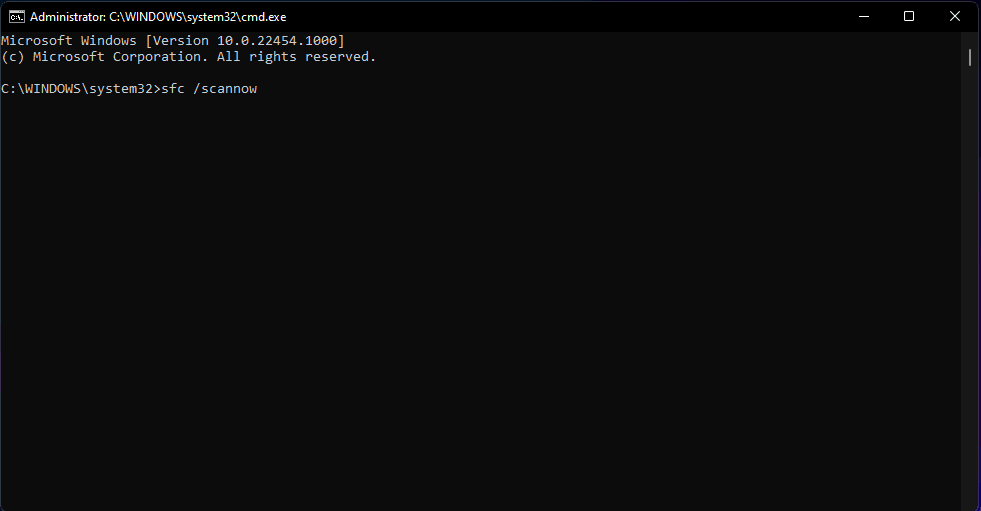
Step 3. The System File Checker will scan for any corrupted system files and attempt to repair them. Please wait for the process to complete, and then restart the system to fix error blue screen Memory Management on Windows 11.
5. Perform a CHKDSK Scan
Step 1. Click on the Search option located on the Taskbar, type cmd, and choose Run as administrator to open Command Prompt with administrative privileges.
Step 2. Enter or copy and paste the following command, then press Enter to execute it:
- chkdsk /r
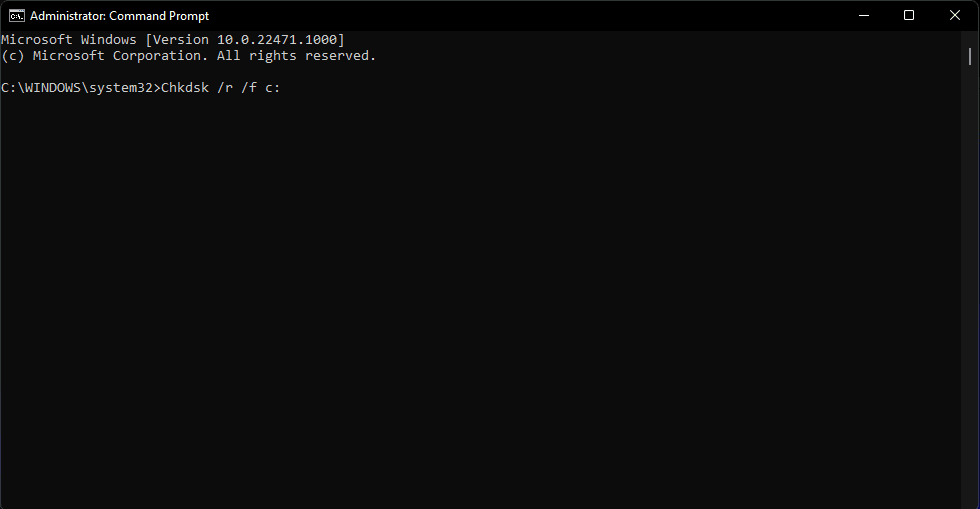
Step 3. The CHKDSK tool will begin scanning your drive for any issues and attempt to resolve them. Please wait for the process to complete, and then restart your PC.
After completing the previous steps, verify if the SSD Memory Management error in Windows 11 has been resolved. If you continue to experience the Memory Management blue screen on Windows 11 error, proceed to the final method.
6. Reset Your PC
Note: Prior to proceeding with this step, it is strongly recommended to create a backup of your crucial data such as backup Windows 11, as it may result in data loss.
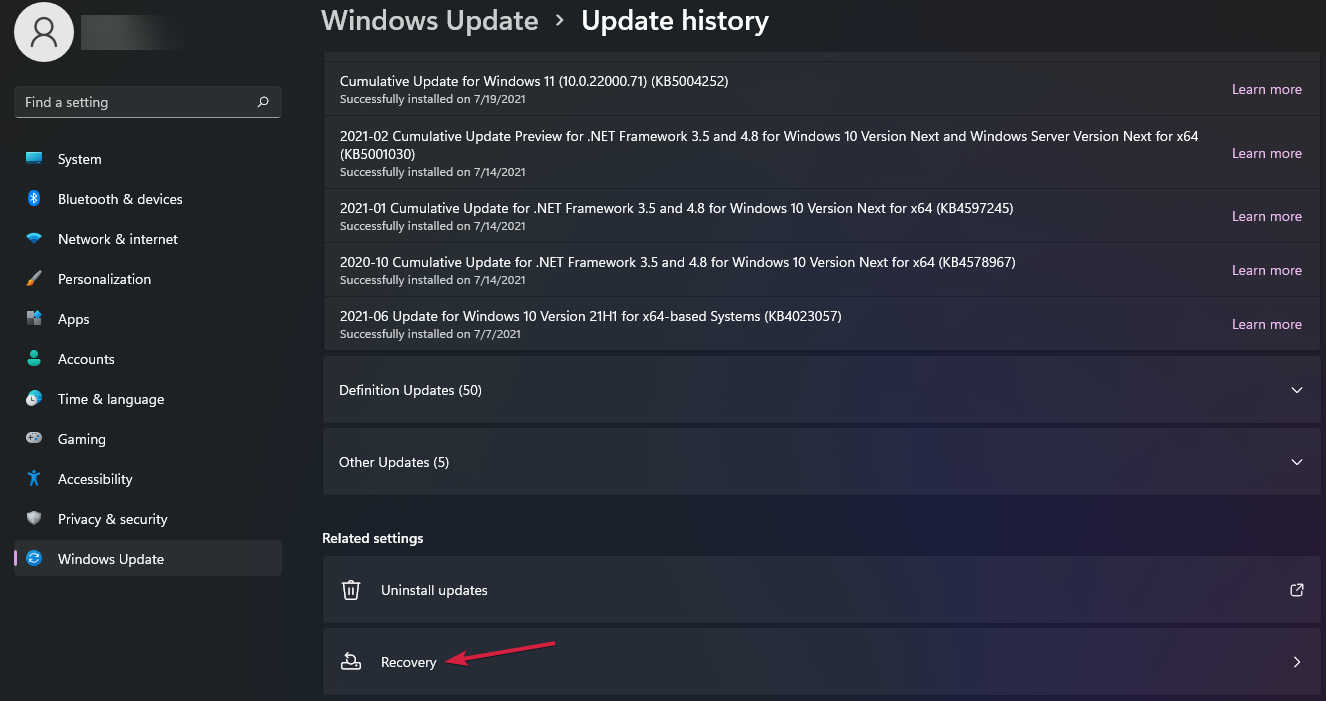
Step 1. Click on the Windows button and choose Settings.
Step 2. Select System from the left pane, then scroll down in the right pane and click on Recovery.
Step 3. Now, choose the button located to the right of the Reset this PC option.
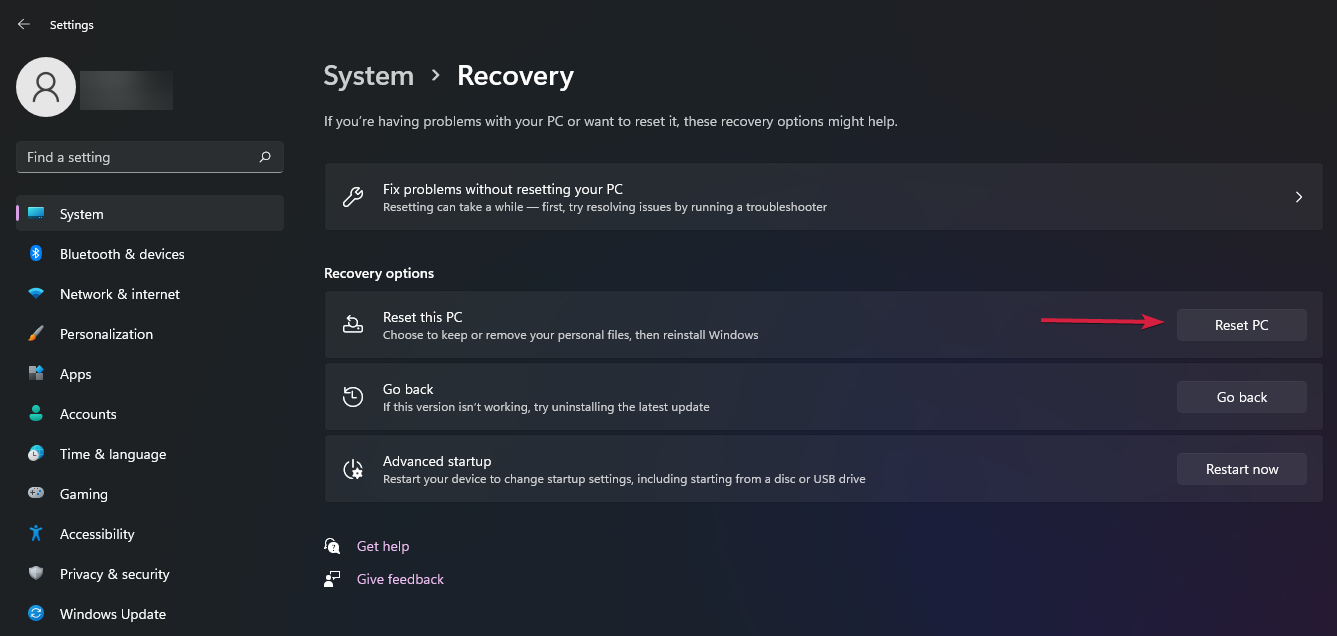
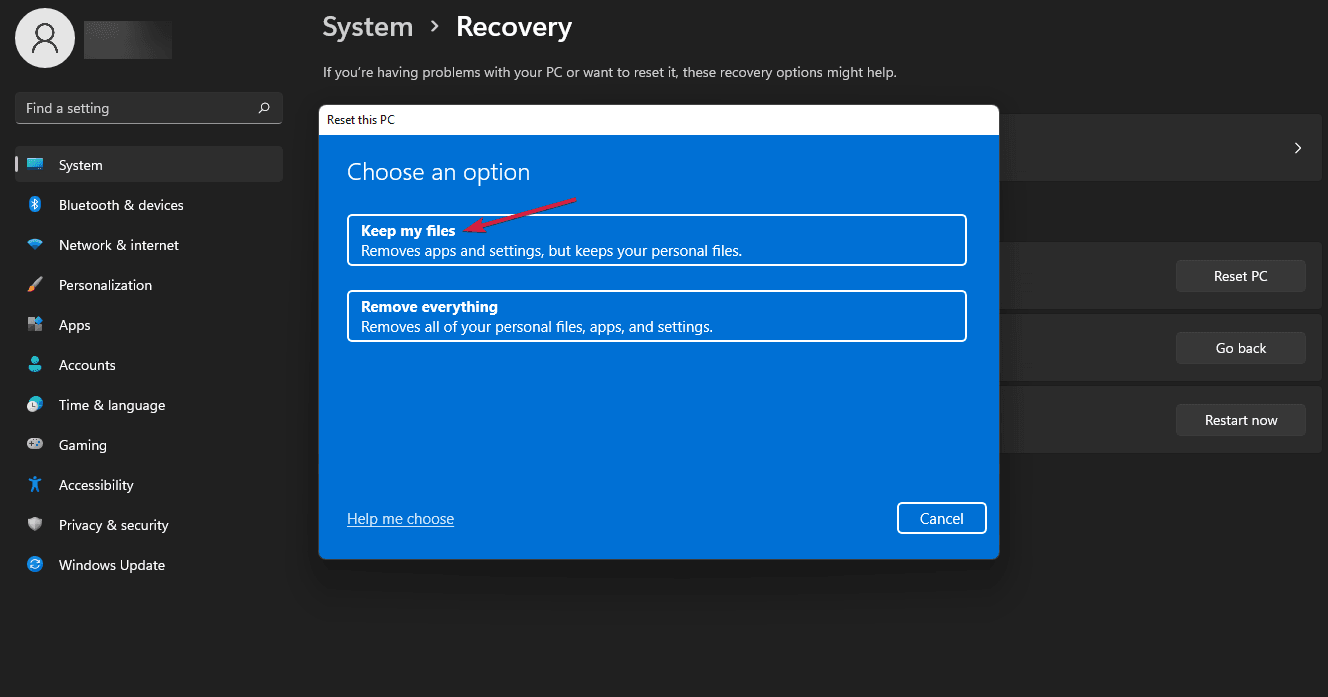
Step 4. You have the option to either keep your files or erase them, and we recommend selecting the first choice.
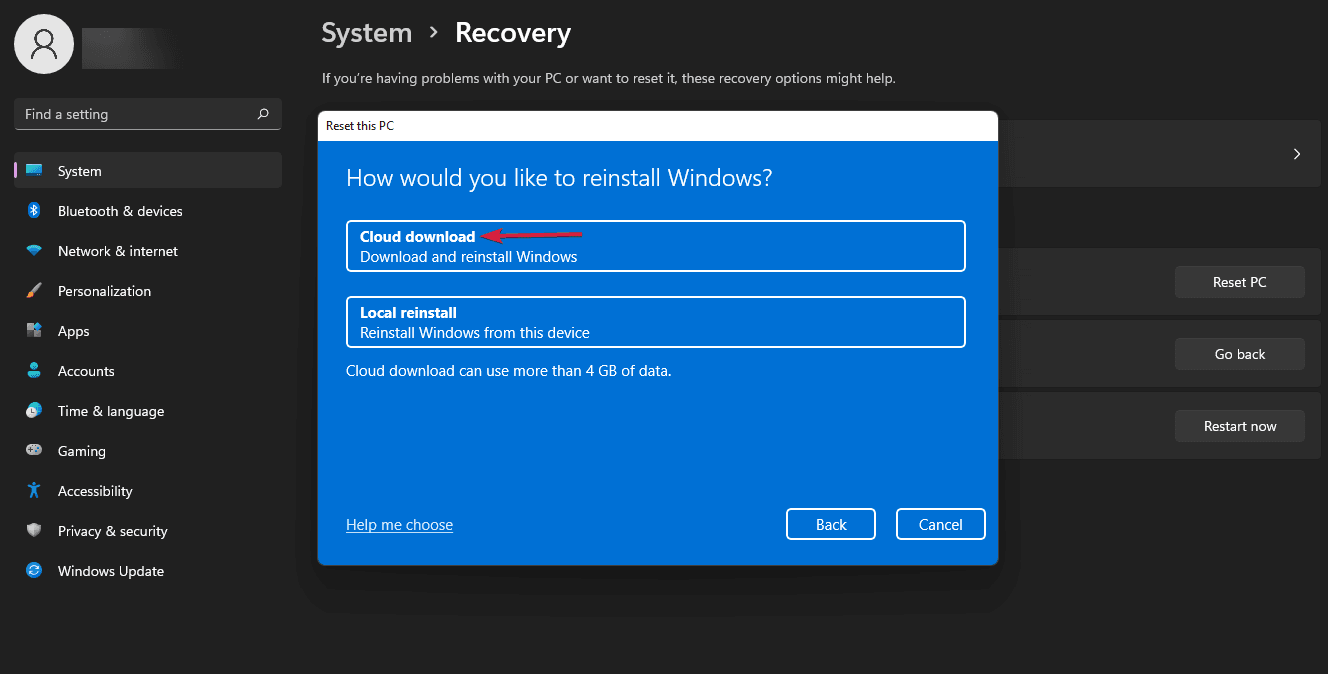
Step 5. At this point, you can select either a Cloud download or a local source for the Windows 11 installation files. Once again, we recommend choosing the first option, although it will require 4 GB of free space on your drive.
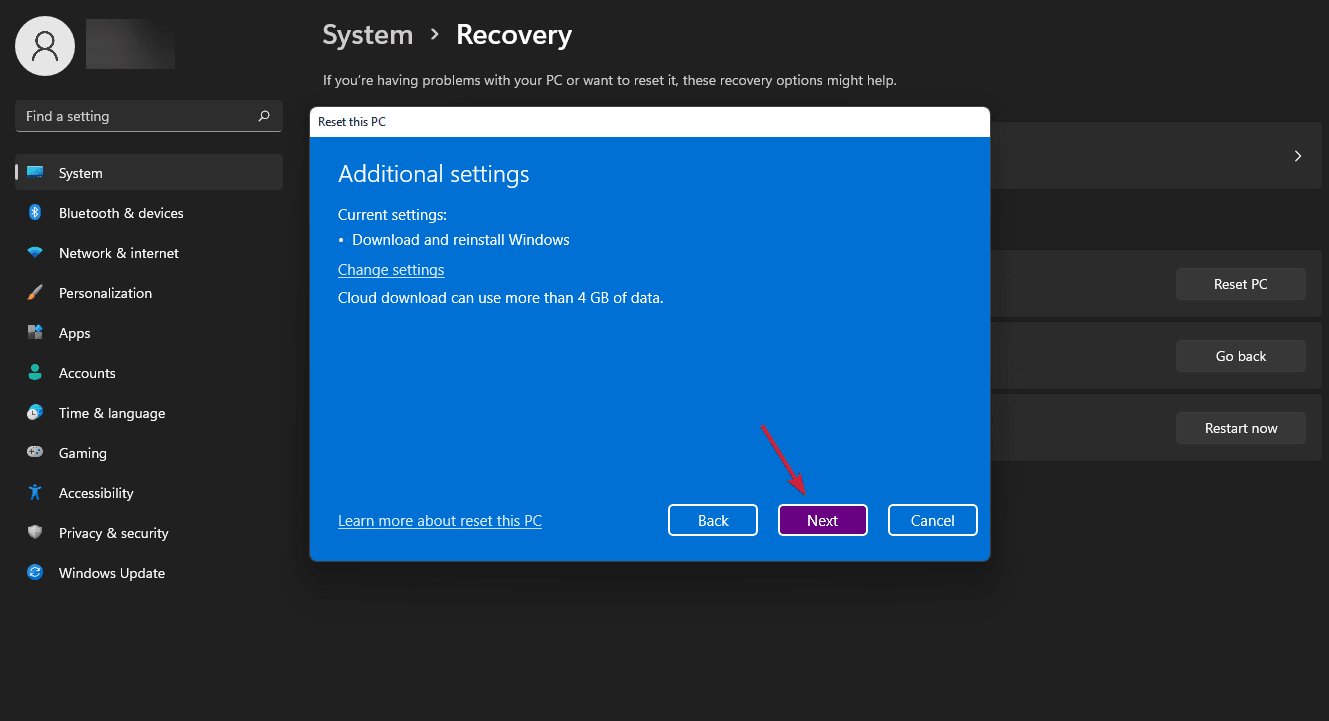
Step 6. Please review the information and click on the Next button to proceed.
Step 7. After the PC restarts, the Windows 11 installation process will commence. Follow the on-screen instructions diligently to successfully complete the procedure.
Resetting your computer is the final option to consider for resolving the Memory Management Windows 11 blue screen error, and it should be considered if all other methods fail to resolve the issue.
These are the six methods used to fix Memory Management blue screen on Windows 11. We highly recommend you to backup your Windows 11 in advance, so that if your system or computer has problems, you can roll back to the previous version without worrying about losing any of your data. Avoiding the hassle will give you peace of mind.
Below we will show you how to use the best backup software to backup your Windows 11.
Foolproof: Backup Windows to Prevent Data Loss
While backing up to an external hard drive may seem like a good option, it carries risks such as hard drive failure and data loss. Additionally, be mindful of malware attacks, hardware failures, upgrade-related issues, and other potential problems that can impact your backup files and system.
If you're still searching for the best way to backup your important files and operating system, consider using AOMEI Backupper Standard. This free backup software offers a user-friendly interface, allowing you to easily backup your files or entire system in just a few steps. Here are some key features:
◉ Four backup types: System Backup, Disk Backup, Partition Backup, and Files/Folders Backup.
◉ Support for various backup destinations, including backup Windows 11 to Synology NAS, local disks, external hard drives, network shares, USB devices, and cloud drives.
◉ Automated backup scheduling options, allowing you to set up daily, weekly, monthly, and other recurring backups.
◉ The free version is compatible with Windows 11/10/8/7/XP/Vista. For server users, AOMEI Backupper Server is recommended.
Below, you will find a step-by-step tutorial on how to backup the Windows 11 OS using the best free backup software for Windows 11, AOMEI Backupper.
Step 1. Download and install AOMEI Backupper Standard, then open the software. Click on Backup and select System Backup.

Step 2. The software will automatically select the system-related partition(s) as the source data. You simply need to choose a destination path. If you want to backup Windows 11 to a USB drive, you can select the USB as the location.

Step 3. Click on Start Backup to initiate the backup process for your Windows 11.

✍Tips:
Options: Add comments and enable email notifications for your task.
Schedule Backup: Automate file backups with options for daily, weekly, or monthly frequency.
Backup Scheme: Choose between Incremental and Differential backup methods. While both improve efficiency, it's recommended to opt for differential backup due to easier restoration. The scheme also helps remove old backup images automatically, freeing up storage space (available in the Professional edition).
✈To restore the system image backup when necessary, follow these steps:
Click on Restore and choose either Select Task or Select Image File. Proceed with the provided wizard to complete the system recovery process.

Summary
This article describes in detail why Memory Management blue screen on Windows 11 appears and provides six ways to fix it. You can try each one of them according to your needs, and finally, we strongly recommend you to backup your Windows 11 data in case anything happens to your system or computer. You will be able to roll back to the previous version and protect your data without any hassle.
I wholeheartedly recommend giving AOMEI Backupper a try. Its comprehensive and exceptional features will greatly alleviate your troubles. With this software, you can effortlessly backup your Windows 11 and synchronize your files. Additionally, if you require assistance with wiping an external hard drive, it serves as an excellent Disk Wipe assistant. The true extent of its capabilities can only be experienced by trying it out, so don't hesitate to give it a go!

