How to Use Lenovo Recovery for Windows 11
You can learn how to use Lenovo Recovery in Windows 11 to recover system by creating a recovery USB key. Finally, we recommend back up Windows 11 system to protect your data.
By Miya Updated on August 25, 2023
What Is Lenovo Recovery?
Lenovo Recovery simplifies the process of creating system backups for Lenovo devices. Typically, a Lenovo Windows 11 Recovery media, such as a DVD or USB, is required to store a backup of the computer's original factory state. With Lenovo Recovery, you can reformat your hard drive, reinstall the operating system, or restore your Lenovo device to its factory condition. To recover your Windows 11 on Lenovo device, it is necessary to create a Lenovo Recovery USB key beforehand.
Lenovo Recovery serves as a solution for failures in the hard disk driver and can also address issues caused by operating system or software corruption. When faced with difficulties such as the inability to restart your Lenovo device or encountering blue or black screens, Lenovo Recovery can come to your rescue.
☎ Requirements for utilizing Lenovo Recovery:
1. Supported operating systems: Windows 7, Windows 8, Windows 8.1, and Windows 10, Windows 11.
2. Compatible devices: Lenovo desktops, laptops, and tablets.
How to Use Lenovo Recovery on Windows 11
To utilize Lenovo Recovery, you can create a Lenovo Recovery USB key in Windows 11. Here is a breakdown of the detailed process for this method.
1. Create a Recovery USB Key
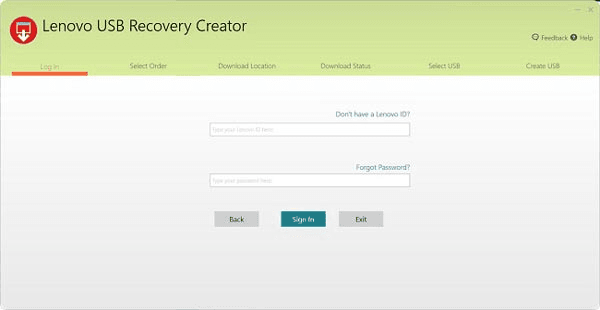
Step 1. To begin, obtain the Lenovo USB Recovery Creator, a specialized tool designed for Lenovo Recovery on Windows 11. Download this program to facilitate the creation of a Lenovo Recovery USB Key. Once downloaded, you can proceed to log in using your Lenovo account.
Step 2. Choose the option labeled Download Recovery files and Create a Recovery USB Key. If you have previously made a digital download order using your Lenovo account, you will be able to download all the files within a 72-hour window, limited to a one-time download.

Step 3. Insert a USB key into your Lenovo computer, ensuring that it is accessible from within Microsoft Windows. Your computer will automatically detect the USB key. Copy any desired files that you wish to keep onto the USB key. Once the USB recovery key is prepared, you can safely remove it from your Lenovo computer.

2. Use Lenovo Recovery USB Key to Recover Windows 11
When creating the Lenovo Recovery USB key, it can be used to reinstall Microsoft Windows 11 on the specific computer models for which it was created. It is important not to modify the recovery files or structure after downloading the Lenovo Recovery media, as it can affect the USB recovery key creation process.
- Insert the USB key into the computer
To use the USB key, insert it into the Lenovo computer on which you wish to restore the operating system. Restart the computer to initiate the recovery process.
- Reboot the Lenovo computer
If your PC cannot boot into Windows 11, keep the USB recovery drive inserted and reboot your PC. Press F12 consistently to access the boot menu. From there, follow these steps: Select Troubleshoot -> "Refresh your PC" or "Reset your PC" and then follow the on-screen instructions.
- Recover Lenovo from USB
If your Windows tablet does not have a keyboard, keep the USB recovery drive inserted and then press Volume Up + Power. Select the boot menu and choose the UEFI device. Wait for your PC to boot from the recovery drive. You will then see your computer system being restored.
☏ Note: It is important to note that Lenovo Recovery is a tool specifically designed for backing up and restoring system files. However, please keep in mind two important rules:
1. You must create a recovery USB key in Windows 11.
2. Restoring the system files will erase all existing data.
Backup Your Windows 11 to Prevent Data Loss
You can back up Windows 11 system before or after creating Lenovo Recovery in Windows 11. Because it can create a comprehensive backup of your Windows 11 PC, encompassing essential system boot files, settings, and user profiles to prevent system crashes, hard disk damage, and other surprises. So, I recommend using a user-friendly and free backup tool - AOMEI Backupper Standard to complete backup.
It is a comprehensive and professional utility designed to simplify the process of backing up your Windows 11 operating system. It offers a range of features, including:
❂ Multiple backup types: With four backup options available - System Backup, Disk Backup, Partition Backup, and File Backup - you can choose the one that best suits your specific backup requirements.
❂ Versatile backup locations: AOMEI Backupper supports various backup destinations, allowing you to back up your Windows 11 system to USB drives, local disks, external hard drives, network shares, NAS devices, cloud drives, and more.
❂ Scheduled backups: You can schedule automated backup tasks on a daily, weekly, monthly, event triggers, or USB plug in basis. This ensures that any modified data is captured and not lost during the backup process.
❂ For more critical situations such as system crashes or disk failures, it is highly recommended to create a bootable media in advance. This will enable you to restore your system using the bootable media in case of emergencies.
Below is a step-by-step guide on how to utilize this software to create a comprehensive backup of your Windows 11 PC and perform a restoration.
Download and install the Standard version. Once installed, launch the software to begin.
Note: For server users, please select AOMEI backupper Server.
Step 1. Navigate to the left side and click on the Backup option. From there, select System Backup if you wish to create a backup of your entire system.
Tip: Alternatively, if you want to back up the entire disk of your computer, choose the Disk Backup option.

Step 2.Where the program will automatically identify the system-related partition(s) as the source data. Your task is simply to choose a destination path where the backup will be saved.

Step 3. Click on the Start Backup button to initiate the backup process for Windows 11. Allow the software to proceed and patiently wait until the process is successfully completed.

Tips:
❃ Options: This feature offers flexible backup options, allowing you to write comments for your backups, choose the compression level, and set up email notifications according to your preferences.
❃ Backup Scheme: This feature provides multiple backup methods, including full, incremental, and differential backups (available in Pro version). The last method is particularly useful for conserving space on the destination disk as it only backs up different files.
These settings offer enhanced control and customization options to optimize your backup process.
✍To restore your system image backup, follow these steps:
Step 1. Click on the Restore option.
Step 2. Choose either Select Task or Select Image File depending on your preferred method.

Follow the guided instructions provided by the wizard to successfully complete the system recovery process.
✍ It is highly recommended to create Lenovo recovery disk on Windows 11 in advance. This will enable you to restore your computer in case it encounters boot failure.

Conclusion
That concludes the entire process of utilizing Lenovo Recovery on Windows 11 PC. To accomplish this task, you can create a recovery USB key. Additionally, we strongly advise you to safeguard your valuable data by backing up your Windows 11 system using AOMEI Backupper.
Moreover, this software offers a free SSD clone tool, allowing you to effortlessly clone SSD to SSD in Windows 11. Why not take advantage of this opportunity and give it a try now?

