Top 3 Ways to Erase All Data on Windows 11
This article will tell you how to erase everything on your Windows 11 in 3 different ways. Now start your reading to get an idea.
By Maggie Updated on May 9, 2024
The necessity to completely erase all the data on Windows 11
Generally, people need to delete all the data on their computers in case of personal data leaks when they plan to sell or donate. Or, you have other plans. To be more specific, you must notice the necessary benefits to erase all data Windows 11 as below:
⚘Improve computer performance: excessive data overburden your computer. However, erasing data will release the storage to speed up your computer.
⚘Troubleshoot serious computer issues: erasing all the data with the proper method will definitely help you get rid of any viruses or malware software to keep PC healthy.
⚘Keep personal data privacy: just as we mentioned before, when you decide to donate or sell your old computer, it is necessary for you to erase all your important personal files.
⚘Manage computer properly: one case is that there’s messy article distribution stops you access the target files. Windows 11 erasing all data will help you reallocate your disk or partition layout, then you can manage your computer efficiently.
Resetting your PC may be one of the best ways to erase everything on your computer. However, this is not the only way, some software is equipped with wipe tools to help erase whatever you want. Hence, this article is going to show you how to erase all data Windows 11.
How do you completely delete everything on Windows 11?
This part offers 3 feasible methods to answer how to erase all data on laptop/desktop Windows 11. You can delete everything via the built-in utilities in Windows. Also, an alternative software is offered for you.
Note: Please make an efficient backup before you start to erase everything.
Method 1. Reset this PC
Step 1. Type and search Reset this PC in the Windows search bar, then click Open.
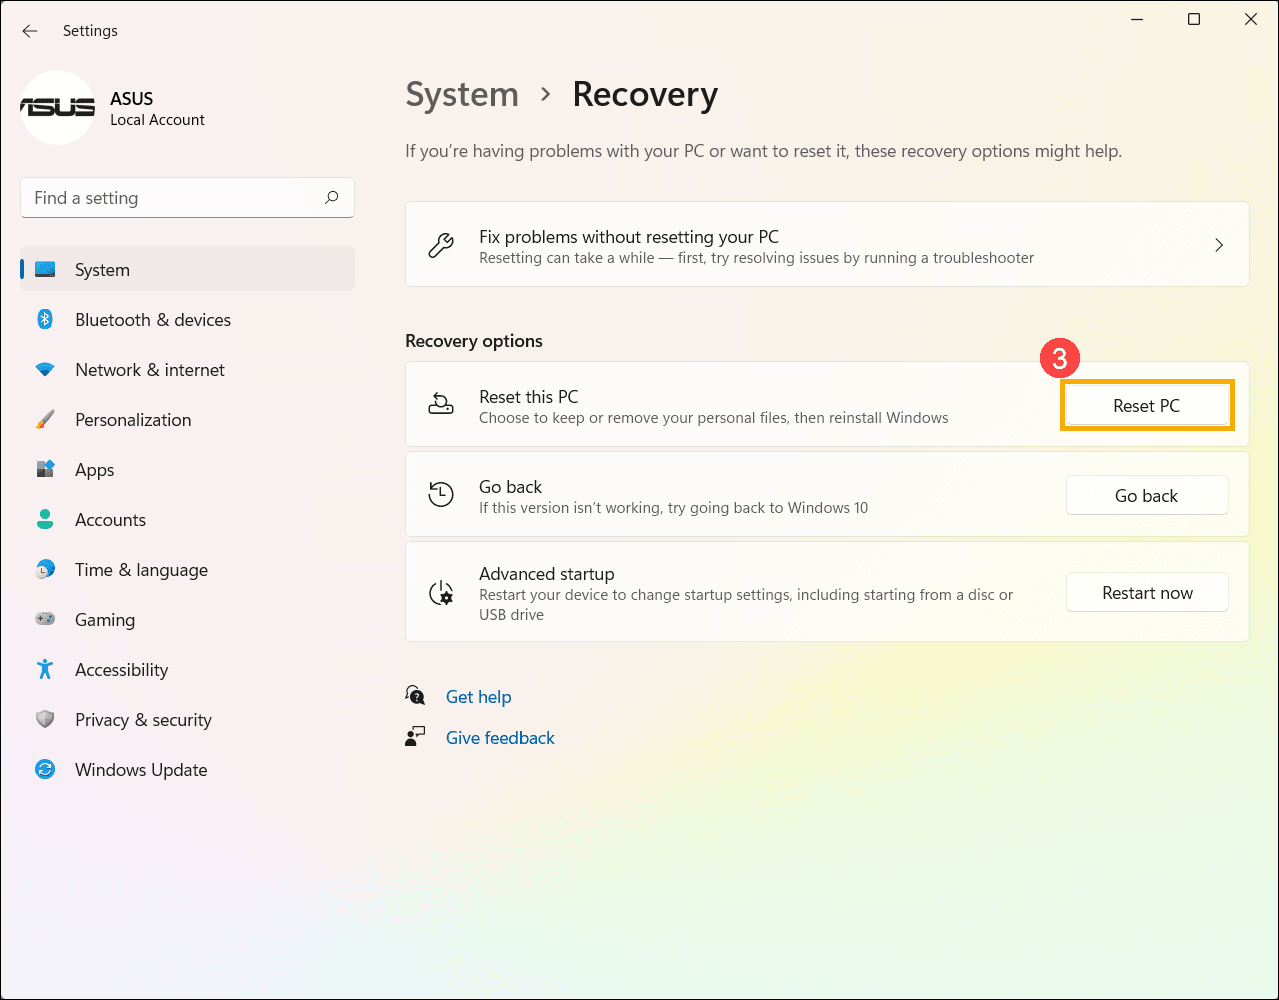
Step 2. Click Reset PC in Reset this PC field.
Step 3. Select Remove everything.

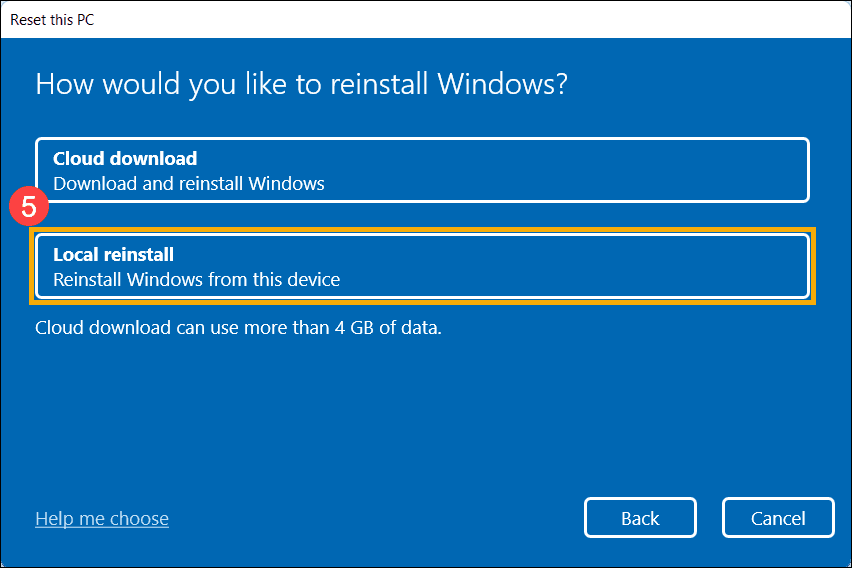
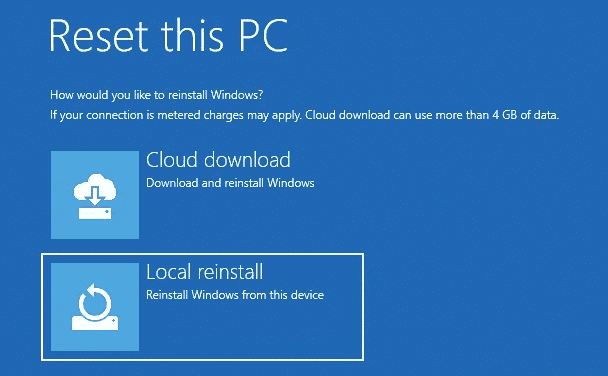
Step 4. You need to reinstall your Windows system at this step. Click Local reinstall.
✍Note: If you cannot reinstall Windows via Local reinstall or any errors happened, you can choose Cloud download as long as you have ensured a stable network connection.
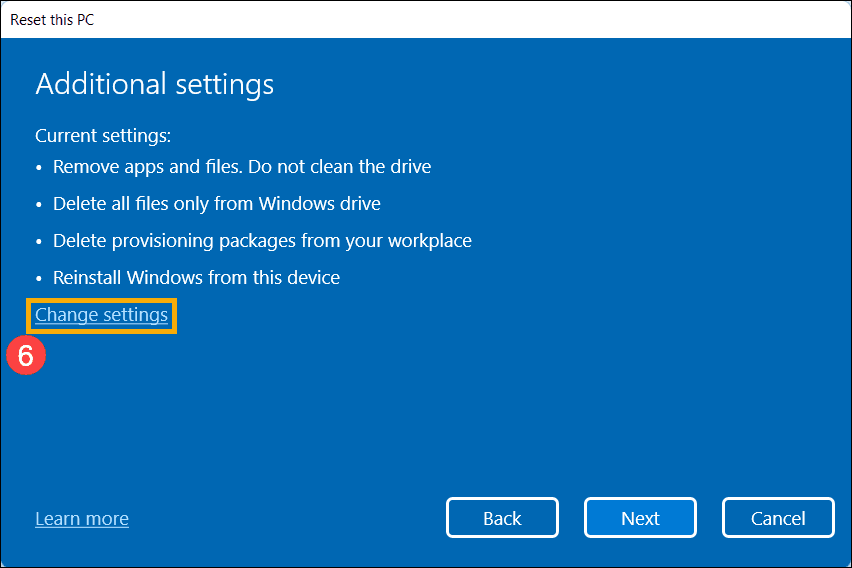
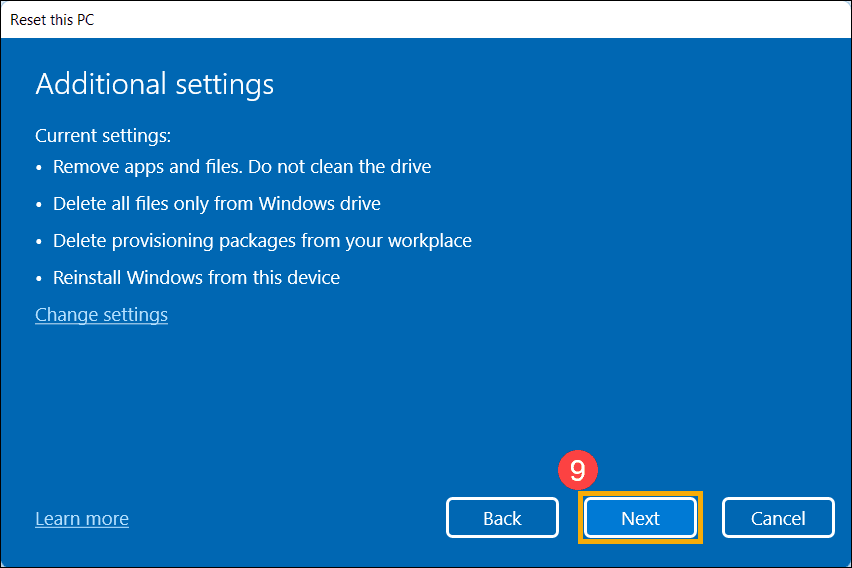
Step 5. Click Change settings.
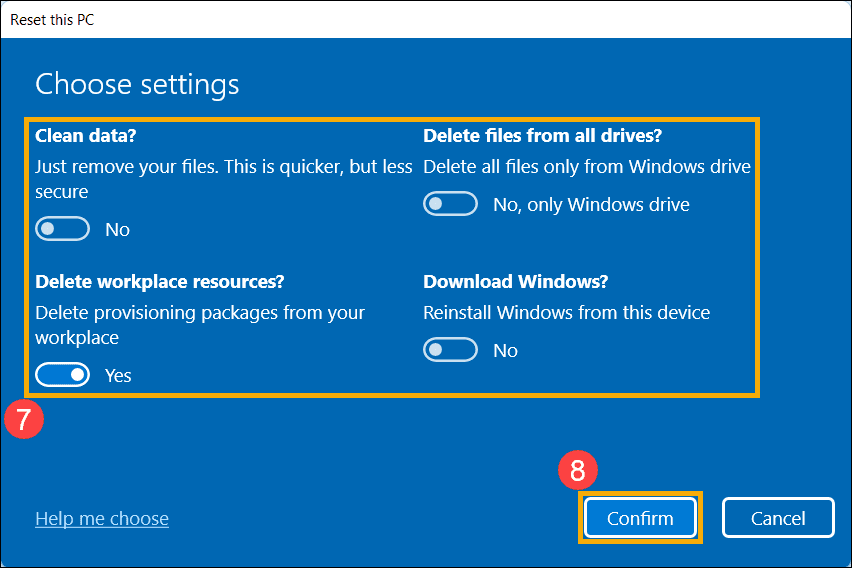
Step 6. In the next window, select the appropriate settings based on your own needs (you can choose more than one option here), then click Confirm.
Step 7. Confirm all your settings and click Next to continue.
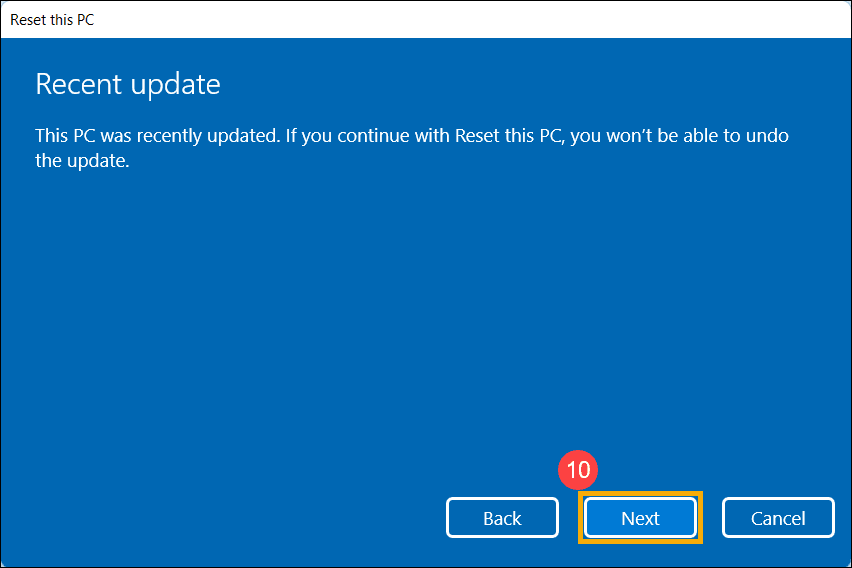
Step 8. You may receive the following notification, select Next to continue the reset process.
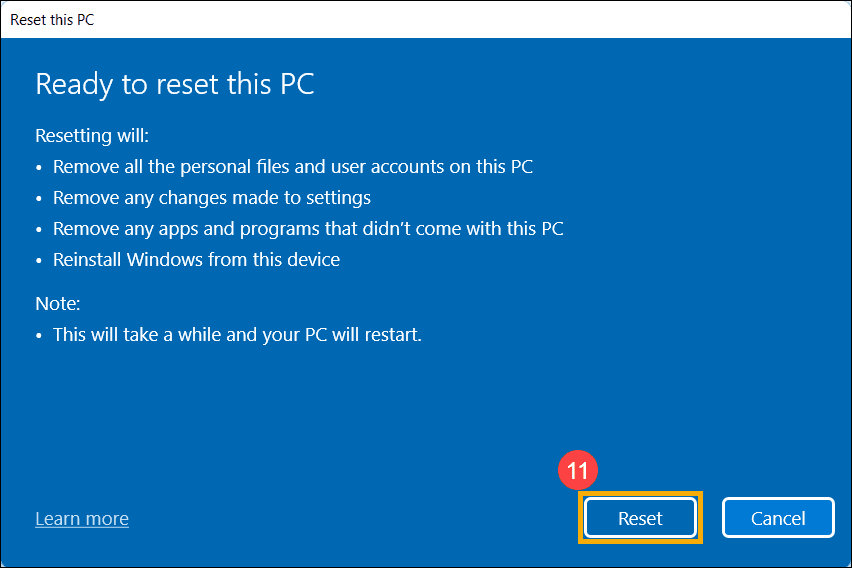
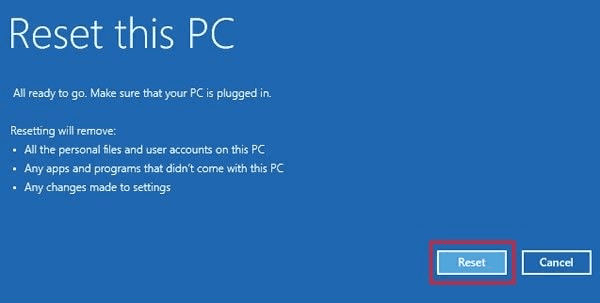
Step 9. Then you click Reset to start reinstalling Windows 11, and your computer will restart after the reinstallation is completed.
Method 2. Reinstall Windows from boot (BIOS)
Step 1. Power off your computer completely and then restart your computer.
Step 2. Hold down the power button immediately to shut down your computer completely when you see the start-up logo screen. Repeat twice and then start normally to enter the Windows Recovery environment. (WinPE environment)
Step 3. Then enter the Troubleshoot to select Reset this PC.
Step 4. Then click Remove everything under the Reset this PC option.

Step 5. Choose Local reinstall to install your Windows 11 after resetting.
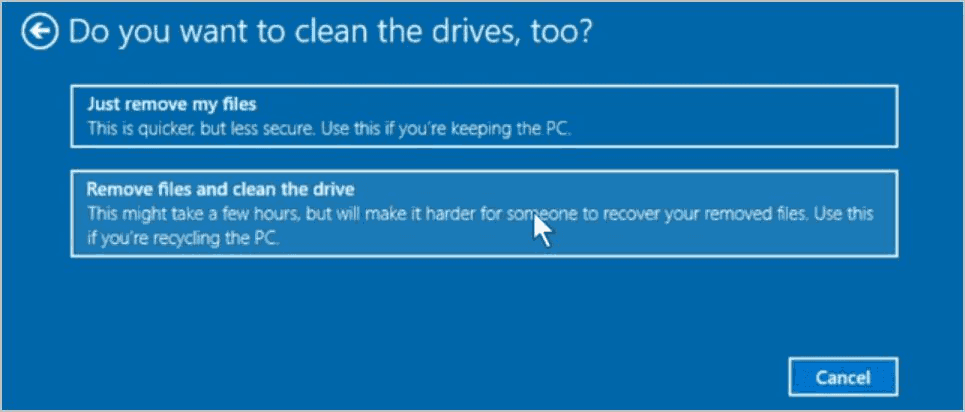
Step 6. Now in the next window, you can choose Just remove my files if you plan to keep the device, or Fully clean the drive if you decide to get rid of this PC.
Step 7. Confirm your settings and choose Reset to perform.
Method 3. Erase everything through the best disk wipe tool----AOMEI Backupper
The best alternative to Windows 11 erasing all data is AOMEI Backupper Professional. The obvious advantage is that even users with little computer knowledge can use it proficiently.
★Various erase options: you can erase everything on your computer by wiping disks. Also, you can erase certain areas like partitions and unallocated spaces as you like.
★For compatibility: it is compatible with various Windows including Windows 11/10/8.1 and even some previous systems. It is also applicable to erase all data Windows 10. If you are using server systems, please try AOMEI Backupper Server.
★More functions: you need to notice that once you erase everything on your computer, it cannot be restored anymore. Then you can still use this software to backup files in advance.
▌Part I. How to secure erase everything with its disk wipe tool
Here is a detailed guide to erase all your data on Windows 11. Now download AOMEI Backupper and launch it.
Step 1. Click Tool in the left tab, and then choose Disk Wipe tool.

Step 2. In the Wiping Type window, you will see two options. Here choose Wipe disk to erase all data Windows 11.
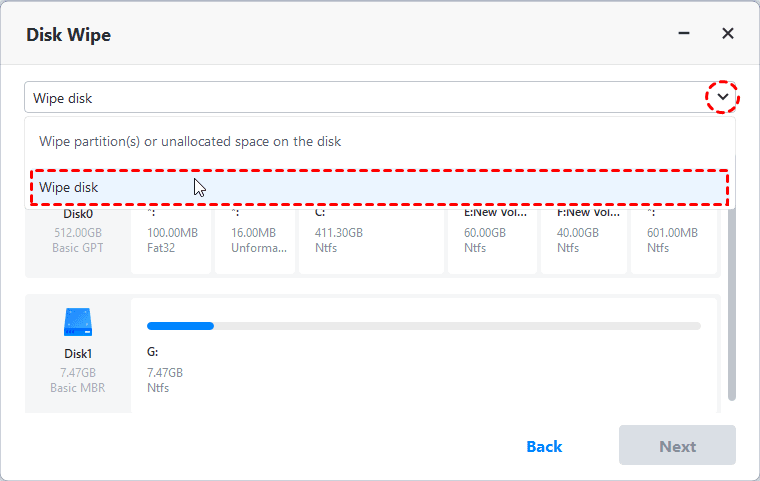
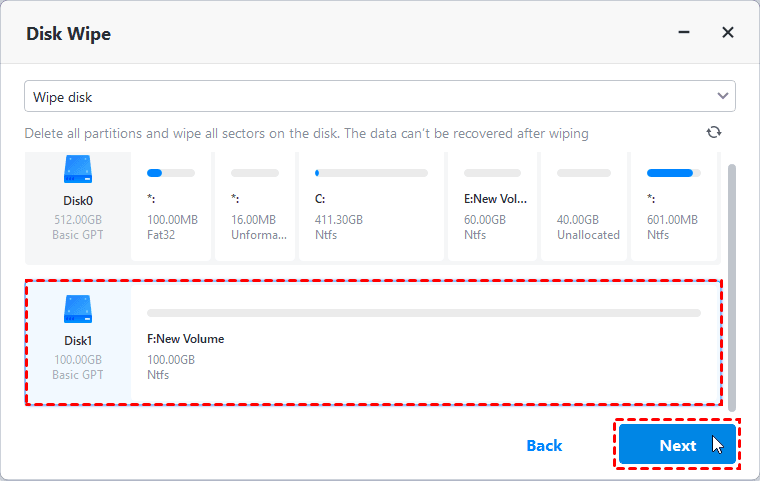
Step 3. Then choose all the disks (you can choose multiple ones at the same time) on your Windows 11, and then hit Next.
Step 4. Here are four wiping methods available for you. Choose one and click Start to run the process.
✍Note: Difference between the 4 wiping methods:
■Fill sectors with zero: is quick and safe
■Fill sector with random data: is also quick and safe
■DoD 52220.22-M: is safer than the previous two but comparatively slower
■Gutmann: is the safest but at the same time slowest

Step 5. Wait for a while to finish the erase process. Then you need to reinstall your Windows 11 system if you plan to keep the PC.
▌Part II. How to install new windows 11 system
After your erase all your data on Windows 11 system, nothing is left including the Windows 11 system, then you need to reinstall a clean Windows 11 system to run the PC. Now I’ll show you how to install a clean Windows from start.
Step 1. Download a new Windows 11 ISO file and then boot from the file, or you can boot your computer from Windows 11 installation media.
Step 2. Then when you see the Windows Setup window, choose your language, keyboard and input methods and other preferences to continue. Then hit Next to confirm and click Install now.

Step 3. You’ll be asked to activate Windows. Enter your product key or click I don’t have a product key if you’re reinstalling Windows.
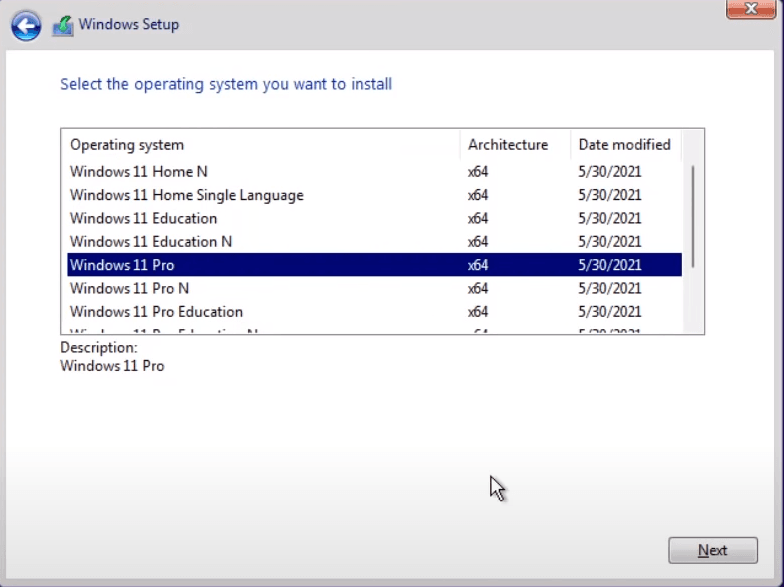
Step 4. Select the operating system you want to install and click Next. You can choose from Windows 11 Home, Pro, Education, and Enterprise, etc.
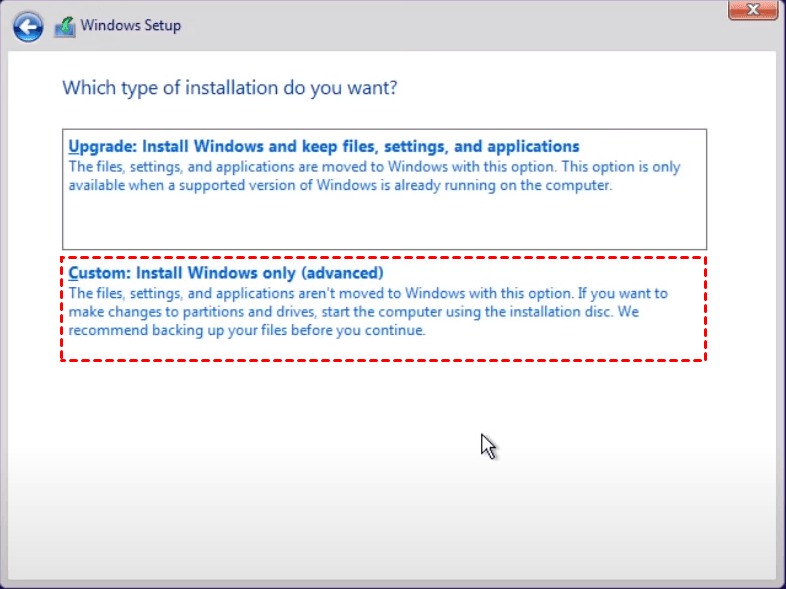
Step 5. Accept the license terms and click Next. Then, choose Custom: Install Windows only (advanced).
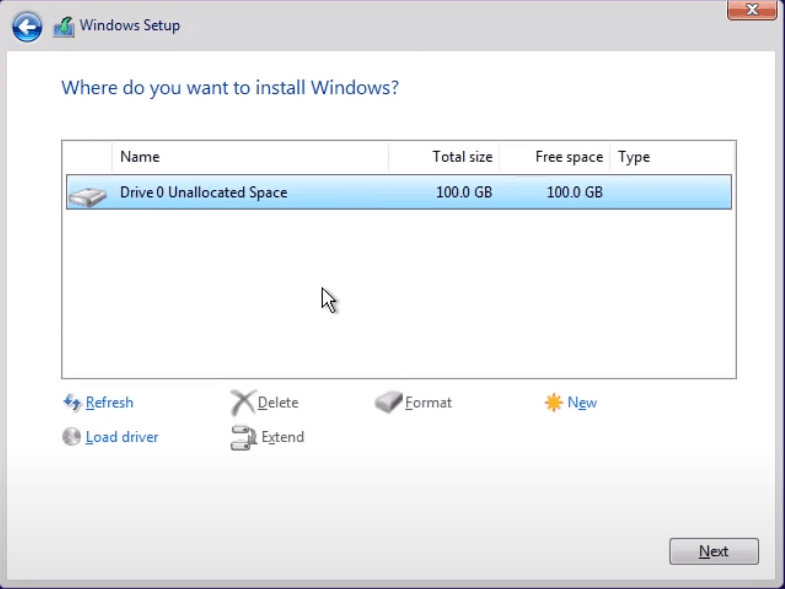
Step 6. Select the drive where you want to install Windows and click Next. Wait for the installation process to be done.
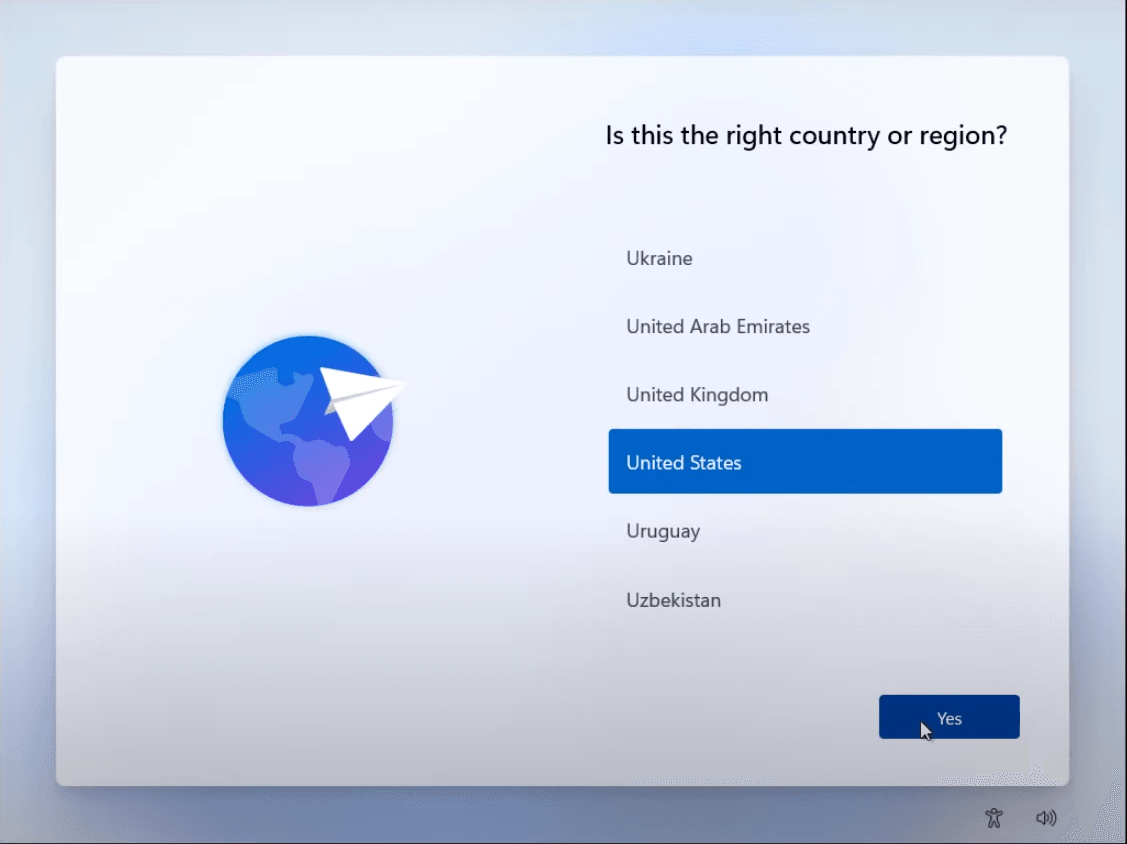
Step 7. Then after you download Windows 11 successfully, you will enter the setup process. Now you need fill in the required info. After that, you can get into a new Windows system.
To sum up
This article tells you three methods to erase all data Windows 11. You can reset your PC to perform fully clean via the built-in utilities as Settings and WinPE environment. Also, AOMEI Backupper Professional is helpful not only in cleaning computers but also can reset Kingston SSD to factory with a few clicks.

