Fast & Easy | How to Backup and Restore Gmail Emails
You can learn 3 separate effective and safe ways to backup and restore Gmail emails when you finish reading this article. And if you are a newbie then this article will be good for you.
By Miya Updated on July 12, 2023
Overview of performing backup and restore for Gmail Emails
Wondering how to backup and restore your Gmail emails? You are at the right place to clarify your doubts here. Many users want to backup and restore their Gmail emails, but it is time consuming and tedious to do it manually, and finally they may not find the right and easy way. So this article will provide three separate ways to backup and restore Gmail emails to help you backup and restore your email messages quickly and effectively.

3 solutions to backup and restore Gmail emails
Here we will separately recommend three ways to effectively backup and restore your Gmail emails.
1. Backup Gmail emails to OneDrive using download and upload
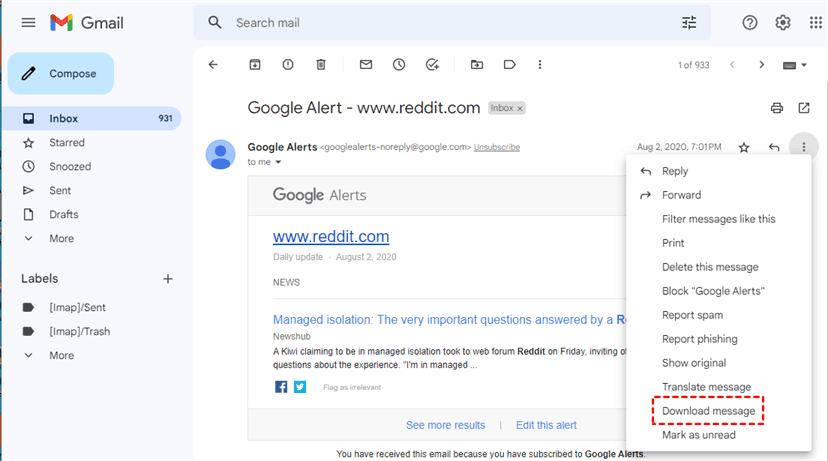
Step 1. Access your Gmail account and double-click the email you wish to open. Then, click on More and select Download Message.
Step 2. To back up multiple emails, repeat the previous step for each email.
Step 3. Afterward, navigate to the local Downloads folder, select all of the emails, and save them in a new folder.
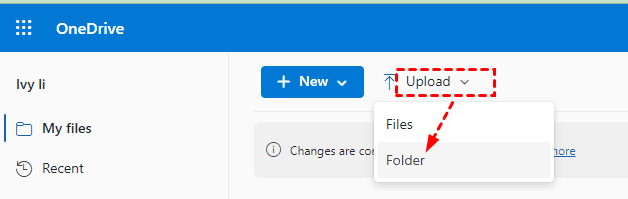
Step 4. Go to onedrive.com, and log in with your account. Click on Upload and then Folder. Next, select the folder that contains all of the downloaded Gmail emails.
2. Backup Gmail emails to hard drive
Step 1. Access Gmail on your web browser and sign in using your login credentials (Gmail email and password).
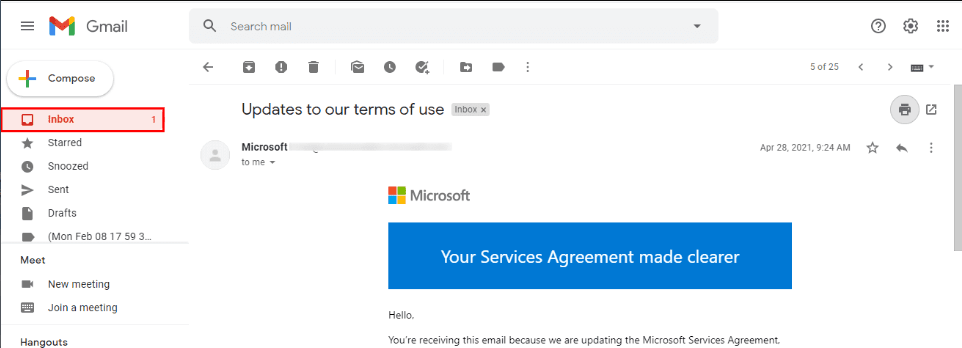
Step 2. Navigate to the Inbox folder and select the emails you wish to save to your hard drive.
Step 3. Click on the Print All icon located at the top right corner of your browser. From there, you can preview the message of the selected email. Utilize the various built-in features such as Destination, Pages, Layout, and Color.
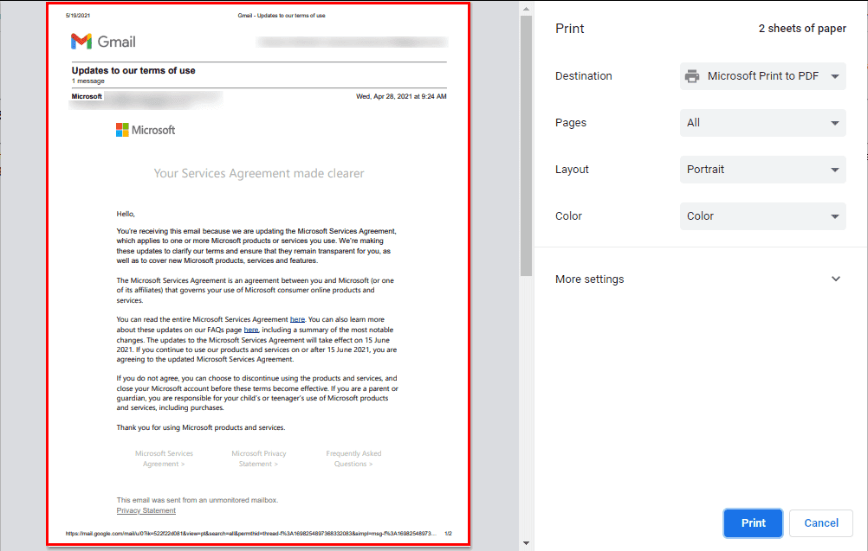
Step 4. Once you have made your desired selections, click on the Print button to initiate the email backup process.
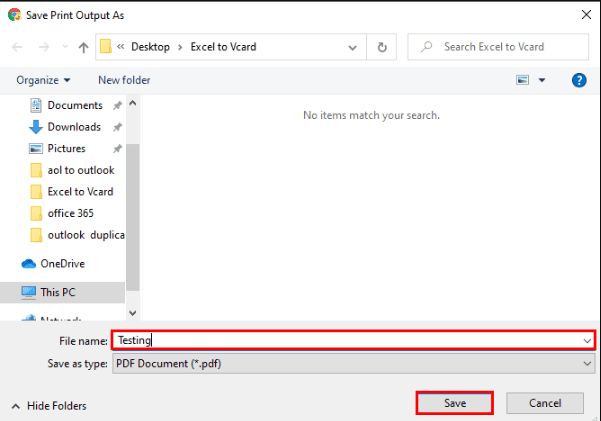
Step 5. A pop-up tab will then appear on your screen, prompting you to enter a File Name. After entering a suitable name, click on the Save button to complete the process.
Step 6. Once the email has been saved as a PDF, you can copy it from your PC and paste it onto the target hard drive.
3. Backup Gmail emails to Synology NAS with the easiest way
By searching for keywords such as "backup Gmail to Synology NAS" or "backup Gmail Synology", you can find various methods for backing up your Gmail emails. However, few articles provide clear step-by-step instructions, and many lack relevant screenshots, making it a challenge for users (especially novices) to use them effectively.
Fortunately, there is the easiest way to back up Gmail to Synology, using the powerful Outlook backup software, AOMEI Backupper Professional.
☞ This software provides an Outlook Backup feature, which allows you to back up emails, attachments, calendars, contacts, and other data from Gmail or other email services in Outlook.
☞ It also enables you to back up Gmail to Synology NAS, as well as backup Gmail to hard drive (local and external) and cloud drive and other storage devices.
☞ Furthermore, the software can perform backup automatically if you enable the Schedule Backup feature. You have five options to choose from, including Daily, Weekly, Monthly, Event triggers, and USB Plug-in. You can even wake your computer at a specific time to perform the backup.
To conduct Synology Gmail backup, please download this powerful backup software.
Note: The Professional edition supports Windows 11, 10, 8, 7, XP, and Vista. For server users, try AOMEI Backupper Server!
▶ How to backup Gmail emails with Outlook Backup feature step by step
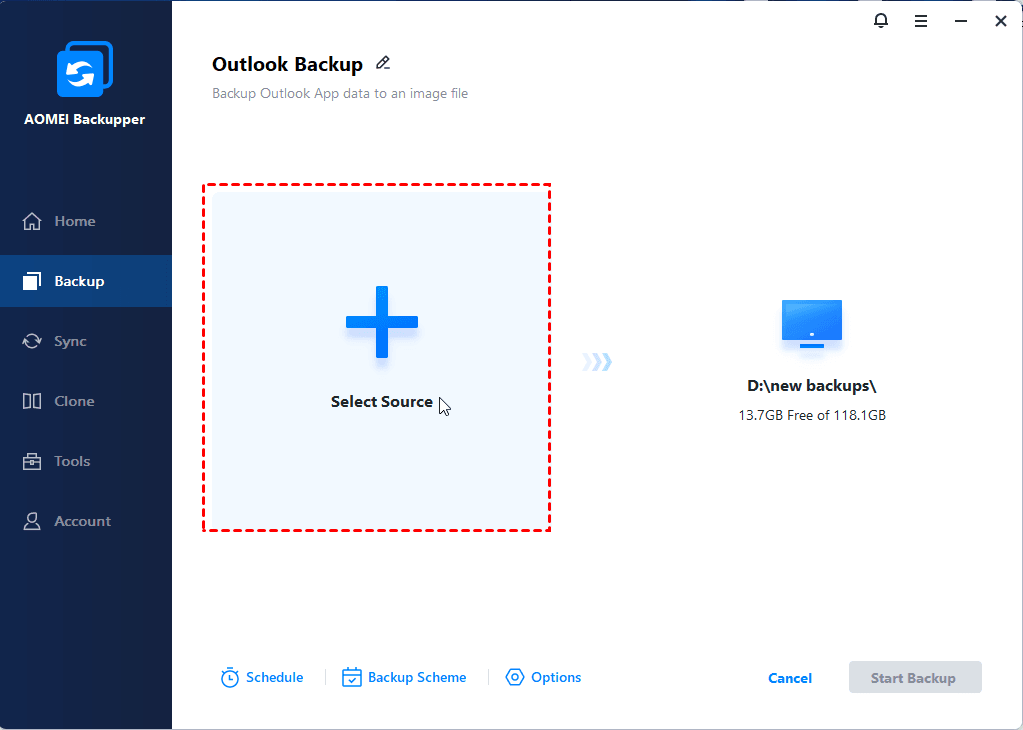
Step 1. Add your Gmail account to Outlook. Launch AOMEI Backupper Professional and select Backup, then Outlook Backup.

Step 2. Click on Add Outlook data and choose the Gmail account that includes the emails you wish to back up. Afterwards, click OK.
Note: If you do not wish to back up all of the emails in your Gmail account, you can choose specific folders to back up instead.
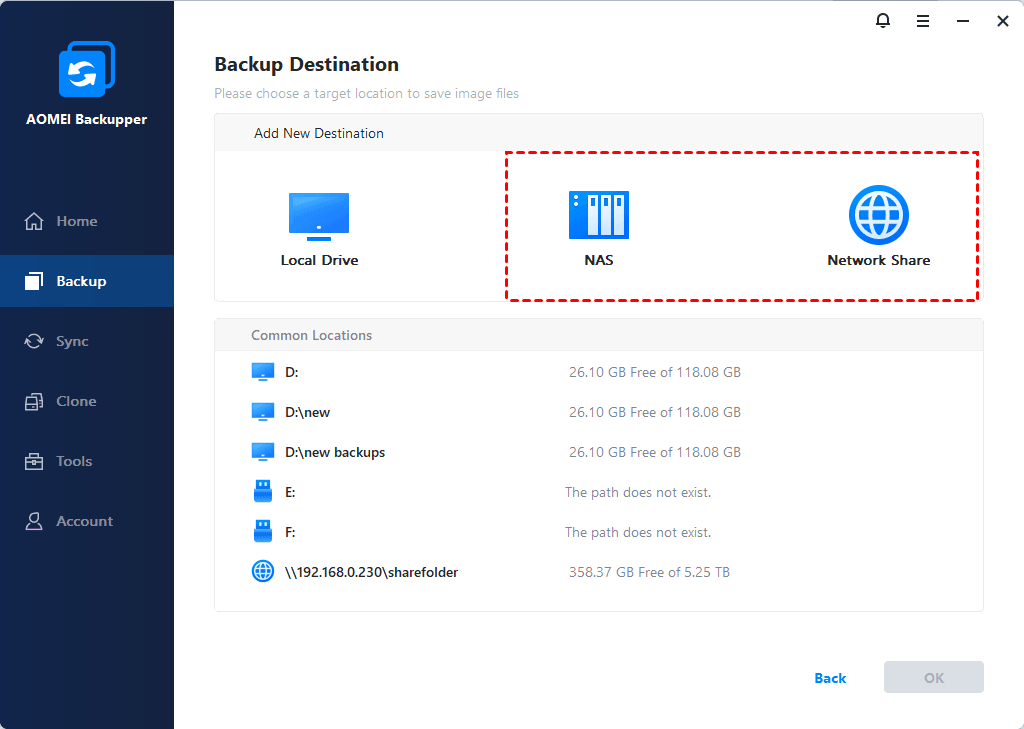
Step 3. Choose Add Share or NAS Device.
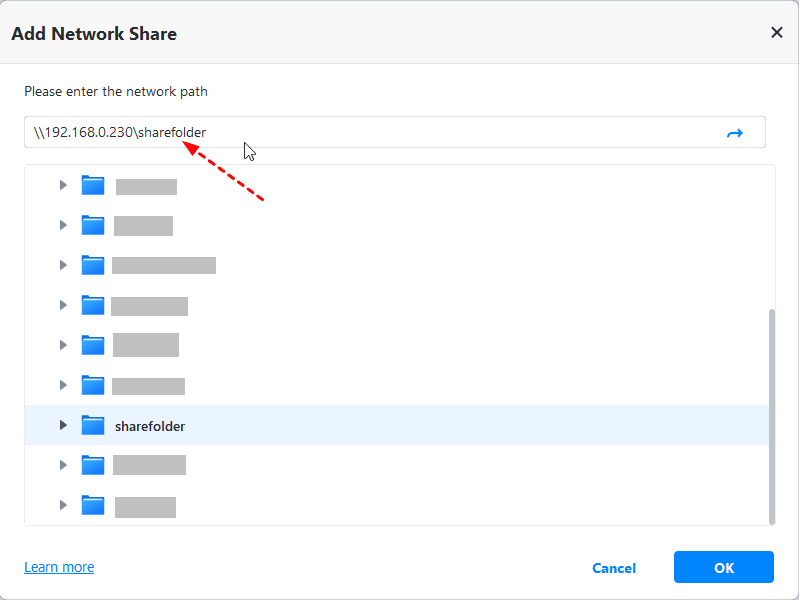
Step 4. Enter the network path of your Synology NAS in the provided field and select a folder on the NAS to store your Gmail emails.
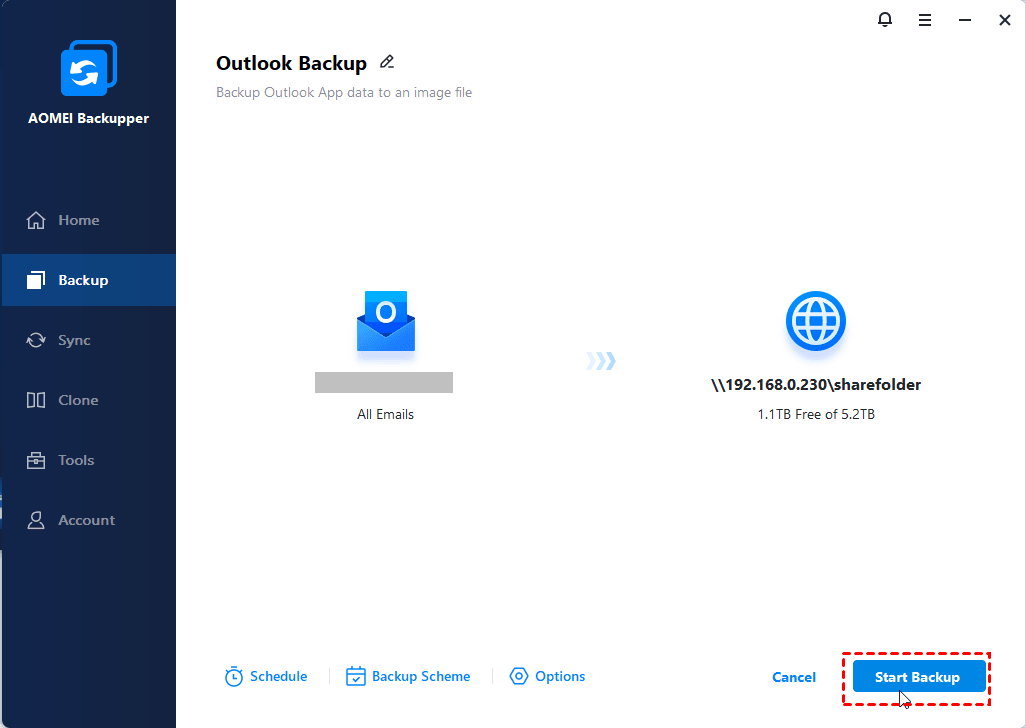
Step 5. If you wish to schedule regular backups, choose your preferred frequency under Schedule Backup. Then, click Start Backup to initiate the process of backing up your Gmail to Synology NAS.
Notes:
✦ The "Wake the computer to run scheduled task" option is not supported for Event triggers.
✦ In a scheduled task, the software will enable incremental backup to back up only changed files. You can also switch to differential backup, which is based on full backup and provides greater security.
✦ Additionally, you can activate automatic backup cleanup in Backup Scheme to free up space on your Synology NAS. This feature will directly delete old backup images based on the selected cleanup methods.
▶ How to restore Gmail emails with Outlook Restore feature step by step
If your original email files are lost or damaged, you may need to recover Gmail emails from backup. Fortunately, AOMEI Backupper comes with an Outlook Restore feature that can help you recover email data to its original state at the time when you backed it up into an image file. Here is how to restore Gmail emails from backup.
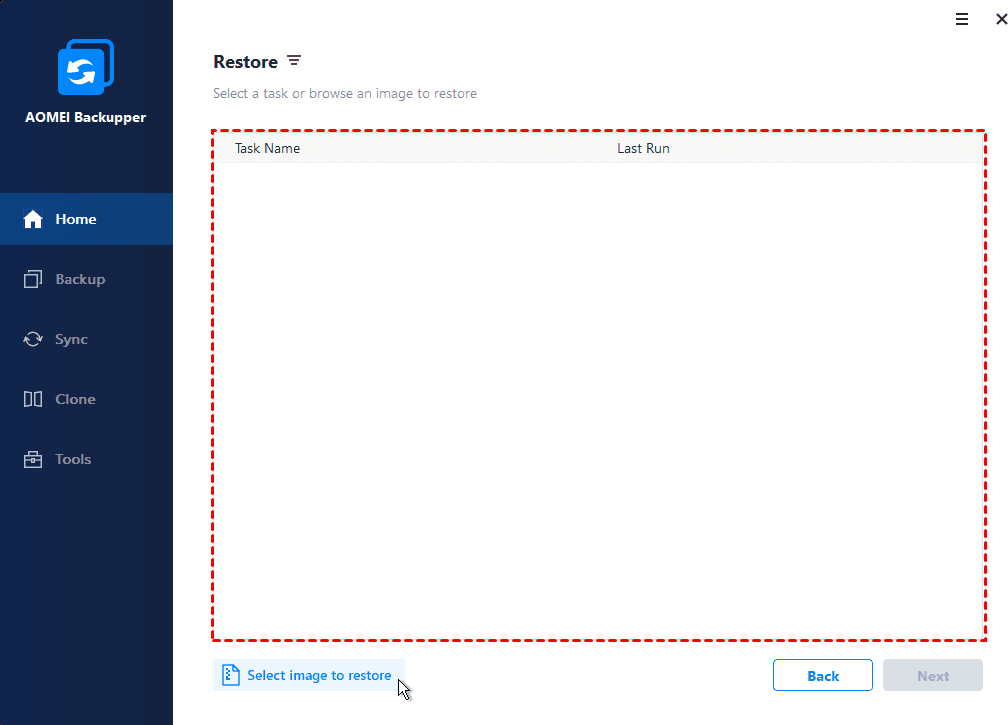
Step 1. On the left tab page, choose Restore and click on Select Task.
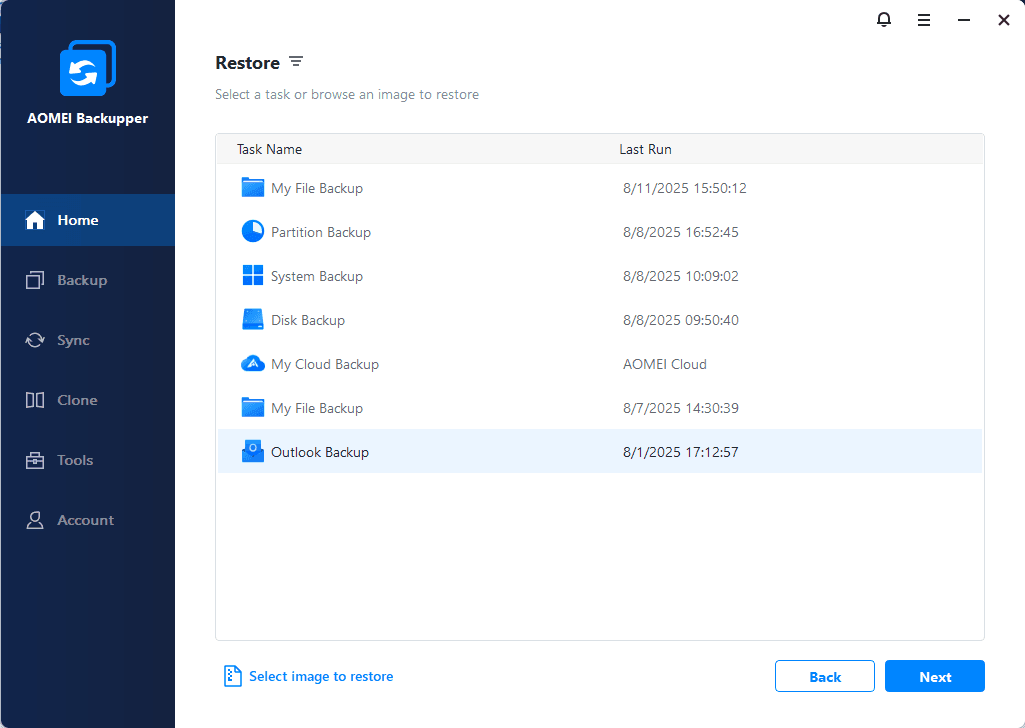
Step 2. Choose a backup point based on the created time and backup type, and then click the Next button.
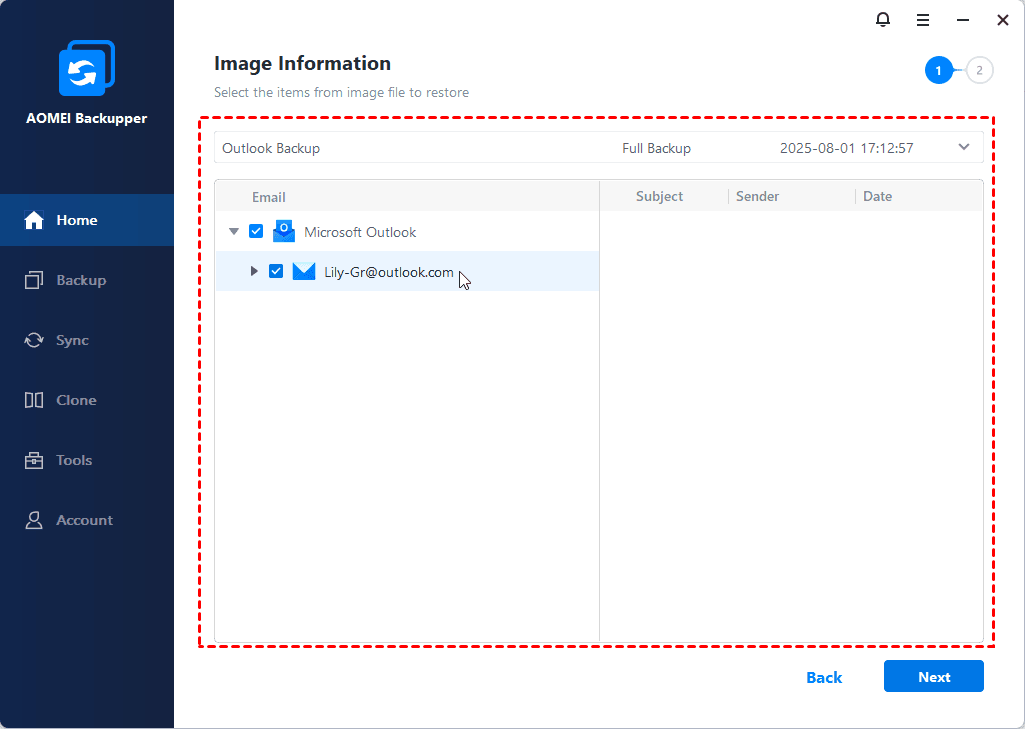
Step 3. Choose the email lists in the image file that you want to restore. Select the email you wish to restore and click on the Next button.
Step 4. Select a destination path to save the mailbox files. You can choose between Restore to original location and Restore to a new location. Then, click on Start Restore to restore Gmail email backup easily.

3 solutions to restore deleted/missing Gmail emails
In this section, we will introduce three quick and effective ways to restore Gmail emails.
1. Restore deleted Gmail emails from Trash
Recovering Google emails from the trash folder is one of the most popular methods for restoring deleted files as it allows you to recover the files directly. However, if the 30-day limit is exceeded or you have emptied recycle bin, the files will be permanently deleted from your account. Follow the steps below to learn how to recover recently-deleted emails in Gmail on your computer.
Step 1. Open Gmail on your PC and sign in to your Google account.
Step 2. Click on Settings, then scroll down to find More and select Trash.
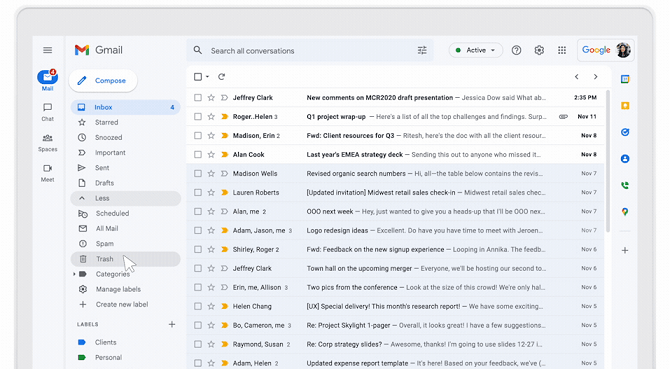
Step 3. Choose the emails you wish to restore and click on the Move to icon and select where you want to move the messages.
![]()
2. Restore Gmail emails by editing/deleting filter
In some cases, messages may disappear unexpectedly because a filter was created that automatically archives or deletes emails. If this happens, you can check your filters by following these instructions:
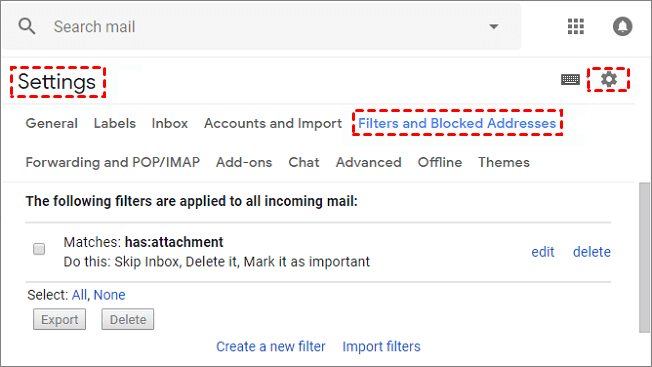
Step 1. Sign in to your Gmail account and click on Settings > See all settings.
Step 2. Select Filters and Blocked Addresses to locate the filter that contains Delete or Skip the Inbox.
Step 3. Choose to either edit or delete the filter. If you want to edit the filter, click on Continue. If you wish to delete the filter, click on Delete and then select OK.
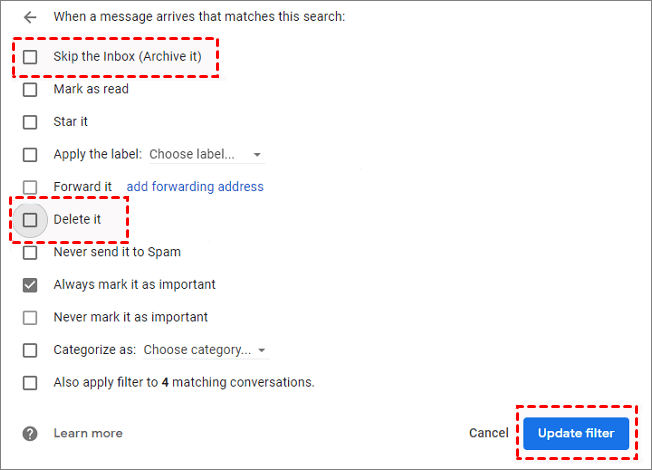
Step 4. Uncheck the Skip the Inbox or Delete it option, then click on Update filter.
3. Restore Gmail emails with Google Admin console
Recovering permanently deleted Gmail emails from the Google Admin console can be a useful approach. Administrators have the authority to recover lost emails from the Google Admin console. Here are the specific steps to restore Gmail emails with Google Admin console.
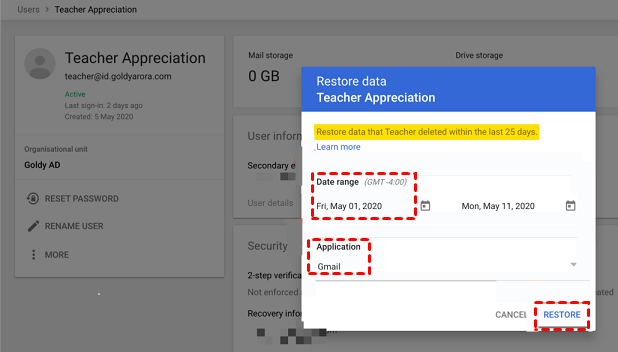
Note: This method only applies to recovering emails that were permanently deleted from Gmail's trash within the past 25 days.
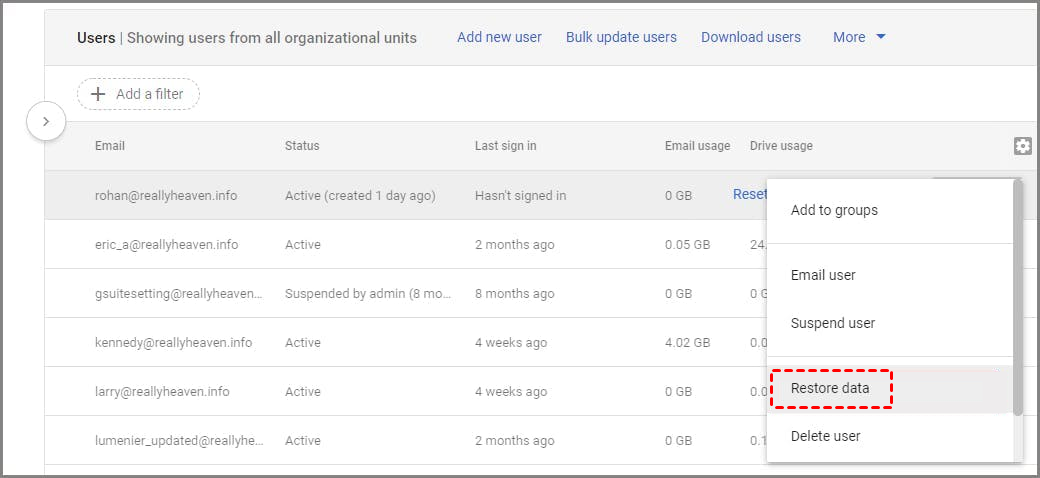
Step 1. Sign in to your Admin Console and navigate to the user section.
Step 2. Click on More in the pop-up window and select Restore data.
Step 3. Choose the date when you wish to restore the deleted Gmail emails and select Gmail from the Application drop-down menu.
Step 4. Click on RESTORE.
Summary
In this article, we have introduced 3 quick and easy ways to backup and restore Gmail emails respectively. For newbies, we recommend a professional backup and restore software - AOMEI Backupper Professional, which not only has Outlook backup and restore function but also has Schedule Backup function and other powerful features. Hurry up and download it to experience its useful features for yourself!

