Use Clonezilla Clone SSD to NVMe SSD without Losing Data
Don’t know how to use Clonezilla to clone SSD to NVMe? This guide will walk you through all the details and how to use Clonezilla, including the best alternative to make the task easier and more flexible.
By Miya Updated on August 31, 2023
Can Clonezilla clone to an NVMe drive?
If you're looking to upgrade your computer's hard drive from an SSD to an NVMe SSD, you may be wondering about the best way to enable that. One popular option is Clonezilla, a free and open-source disk cloning software that allows you to create an exact copy of your hard drive, including the operating system, applications, and personal data.

It is available for free and runs on various systems including Linux, Mac OS, Windows, FreeBSD, NetBSD, OpenBSD, and more. With Clonezilla, users can complete the task of system backup, full drive clone, system deployment, etc. According to some users, when they use the latest Clonezilla, the clone process is really painless. This tutorial aims at solving the task of how to clone SATA SSD to NVMe with Clonezilla and its best alternative due to it has some limitations.
How to use Clonezilla clone SSD to NVMe SSD
1. Create a Clonezilla bootable USB drive or CD/DVD. Insert it into your computer and boot from it.
2. Select Clonezilla Live from the menu and press Enter.
3. Select your preferred language and keyboard layout and press Enter.
4. Select Start Clonezilla and press Enter.
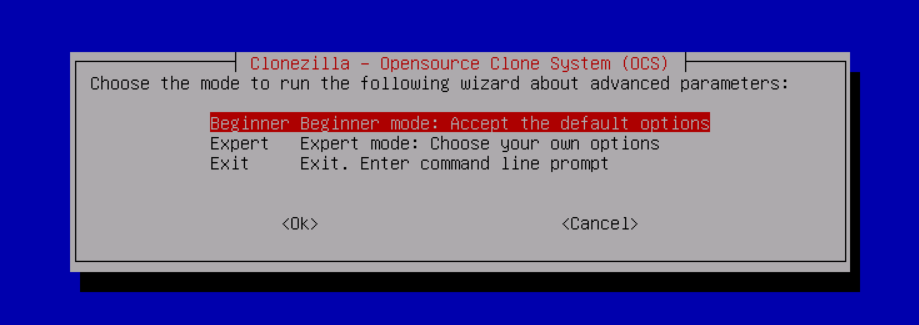
5. Select device-device, choose Beginner mode if you're new to Clonezilla to accept the default options, and press Enter.
6. Choose the source disk (your SSD) and press Enter.
7. Choose the destination disk (your NVMe SSD) and press Enter.
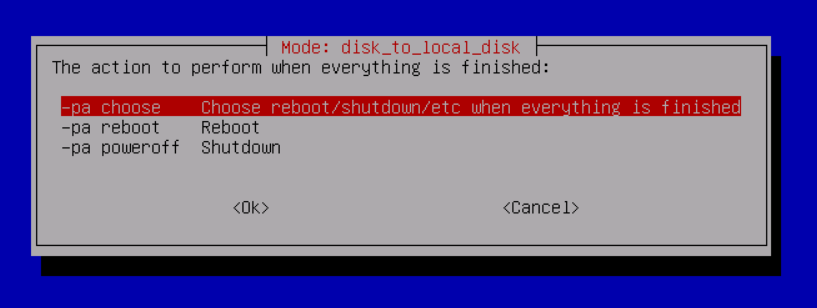
8. Choose the action to perform after the cloning. The default option is Choose reboot/shutdown/etc when everything is finished.
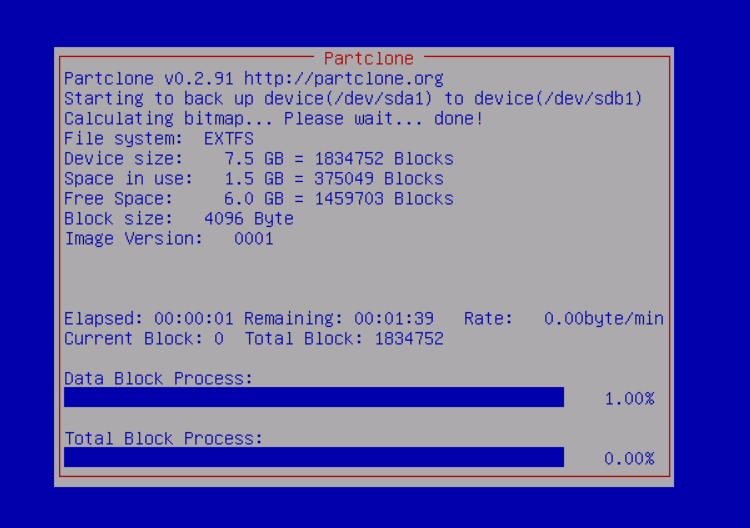
9. Review the disk layout and confirm that you want to proceed with the cloning process. Wait for the cloning process to complete.
Clonezilla does have some limitations
While Clonezilla is a popular and effective disk-copying software, it does have some limitations.
👉 As you can see, the whole Clonezilla SSD to NVMe clone process needs lots of steps, which can be complicated and time-consuming for beginners.
👉 Many users have encountered that Clonezilla failed to clone bad sectors. Where there’s a bad sector on your disk, there’s a high probability that you will encounter this problem.
👉 When you use Clonezilla to clone HDD to a smaller SSD, you are asked that the target SSD needs to be the same or larger size as your drive. Therefore, if you want to clone to a smaller SSD, this process may fail.
👉Unable to mount Clonezilla imageto restore a single file.
Therefore, you should try the best Clonezilla alternative. AOMEI Backupper Professional is an excellent disk cloning software designed for Windows 11/10/8.1/8/7, It supports cloning large SSDs to smaller ones, as long as all data on the source SSD can be transferred to the smaller SSD.
Best alternative to Clonezilla to clone SSD to NVMe
AOMEI Backupper Professional breaks the limitations of Clonezilla. It is a marvelous hard drive cloning software for Windows 11/10/8.1/8/7. It has a user-friendly GUI instead of text-based interface. It completely supports cloning large disk to small disk as long as all the data on the source disk can fit on the smaller one. It makes full use of "intelligent clone" feature that will only copy used sectors and ignore bad or unused sectors while cloning.
Steps to clone SATA SSD to NVMe with AOMEI Backupper:
Tip: As the destination NVMe SSD will be overwritten in the cloning process, backup important files beforehand if there are some important files on it.
1. Download and install this powerful disk cloning software on your PC.
2. Launch the software, go to Clone tab, and choose Disk Clone. If you only want to clone Windows 10 to NVMe SSD, you can also use the System Clone feature.

3. Select the SATA SSD as the source disk, and click Next. Then select the NVMe SSD as the destination disk, and hit Next to continue.


4. Tick SSD Alignment to improve the performance of the NVMe SSD, then click Start Clone to execute the operation.

✍ More advanced features you may need:
◍ Sector By Sector Clone: Clone all the sectors, including the blank and logically bad sectors. You can tick this option if the target NVMe SSD is larger. It will take a longer time accordingly.
◍ Wipe the source SSD: As for the SATA SSD drive, you could use the Disk Wipe feature to wipe the hard drive if you still want to use it as the secondary storage.
◍ For computers with different hardware, you can use the Universal Restore feature to ensure your computer can boot successfully.
Conclusion
That’s all for Clonezilla SSD to NVMe cloning details and process. It can be a useful tool for cloning your SSD to an NVMe SSD, but it does have some limitations and can be difficult to use for beginners. If you're looking for a more user-friendly and reliable alternative, we recommend using AOMEI Backupper’s clone feature. This feature can also help you enable HP Omen 15 SSD upgrade.
Besides, it is more than a powerful alternative to Clonezilla. It is also regarded as the best alternative to SyncToy on Windows 11, a free backup and restore software, which offers various options to keep your data safe.

