
What Is INX Files? How to Recover Deleted INX Files
This article describes how to recover deleted INX files in 4 simple and effective methods including using the powerful data recovery tool - MyRecover.
By Ivy / Updated on October 30, 2024
What Is INX File Format?
The .inx file extension was developed by Adoble, most associated with InDesign, known as Adoble InDesign Interchange Files, categorized as Page Layout Files. The INX files are documents exported in XML format and include information on the pages, page content, text frames, colors, margins, guides, and other important elements.

Most of the InDesign CS2 files are exported in INX format and can be accessed through InDesign CS. It recognizes all page contents and formatting except for the features only available in InDesign CS2 alone such as the footnotes, tracked changes, imported PSD files with layers, SING glyphlets, etc.
🌈💕You may also be interested in:
How to open the INX file?
The simplest method is to double-click the .inx file. If your file associations are set correctly, the .inx file will be open. If not, right-click it and select Open with. Pick the right software to open your .inx file, such as Adobe InDesign, Galvanize ACL, Inkscape, Sublime Text, Vim, etc.
Among them, only Adobe InDesign has full permission to access your INX file. If you don’t have a full version of this software, you can download its free version on the official website. It allows you to do a quick edit on the INX file.
Common reasons for INX file deletion
Several factors can lead to the deletion of INX files. Some common reasons include:
- Human error, such as accidental deletion, formatting, etc.
- Sudden power outage or system shutdown.
- Software glitches.
- Virus or malware attacks.
- Storage device failure or damage.
- ...
Can I Recover Deleted INX Files?
Like other files, we may delete or lose INX files due to different reasons and need to recover them. Fear not, you can recover deleted INX files.
Here are some useful methods below, please select the one that best suits you.
| Scenario | Description | Method |
|---|---|---|
| 🔁check the Recycle Bin folder | The deleted files are usually sent to the Recycle Bin. If you find it there, try to recover deleted files from Recycle Bin. | - |
| 📂check for backups |
InDesign offers users an automatic recovery feature to protect against unexpected power or system failures. In addition, if you enable Backup and Restore, File History, or third-party software like AOMEI Backupper Standard, you can also restore from them. |
Way 2; Way 3; Way 4 |
| ❌permanently deleted |
If your files are not in the Recycle Bin or Adobe InDesign’s recovery folder, they are likely to be permanently deleted. In this case, employing professional data recovery software will be a great choice if you don't have any backup images. |
Way 1; |
How to Recover Deleted INX Files
Now, you can recover deleted INX files in 4 easy and quick ways below.
Way 1: Recover Deleted INX Files using Software
If the INX files are deleted permanently, don't worry, you still can rely on powerful data recovery software - AOMEI FastRecovery to scan your disk thoroughly and search for deleted files. It even allows you to preview files before recovery.

- Apply to: recover deleted INX as well as XML, INX, VWX, JPG, SVG, HEIF, AVI, MP4, DOCX, TXT, XLS, etc. over 1000 formats.
- Have a high success rate and fast recovery speed.
- Top algorithms - finds deleted or lost files effectively.
- Pinpointing files - search or filter files quickly through types, file names, extensions, etc. You can preview it for confirmation.
- Fast recovery - recover specific files or folders instead of all, without waiting for the final result.
- Wide compatibility - support Windows 7/8/10/11 and servers as well as NTFS, FAT32, exFAT, and ReFS file systems.
- Powerful data processing - retrieve files lost in any scenario, such as accidental deletion, formatting, virus infection, corrupted disk, etc.
- It has a free version that recovers up to 500MB of data.
In addition, the software does not require technical expertise and is friendly to novices, making the recovery process seamless.
Please download AOMEI FastRecovery to have a try!
Step 1. Scan your computer drive.
Launch Windows data recovery software - AOMEI FastRecovery. Hover the mouse over the drive saved deleted files before, and click Scan.

Step 2. Locate deleted INX files.
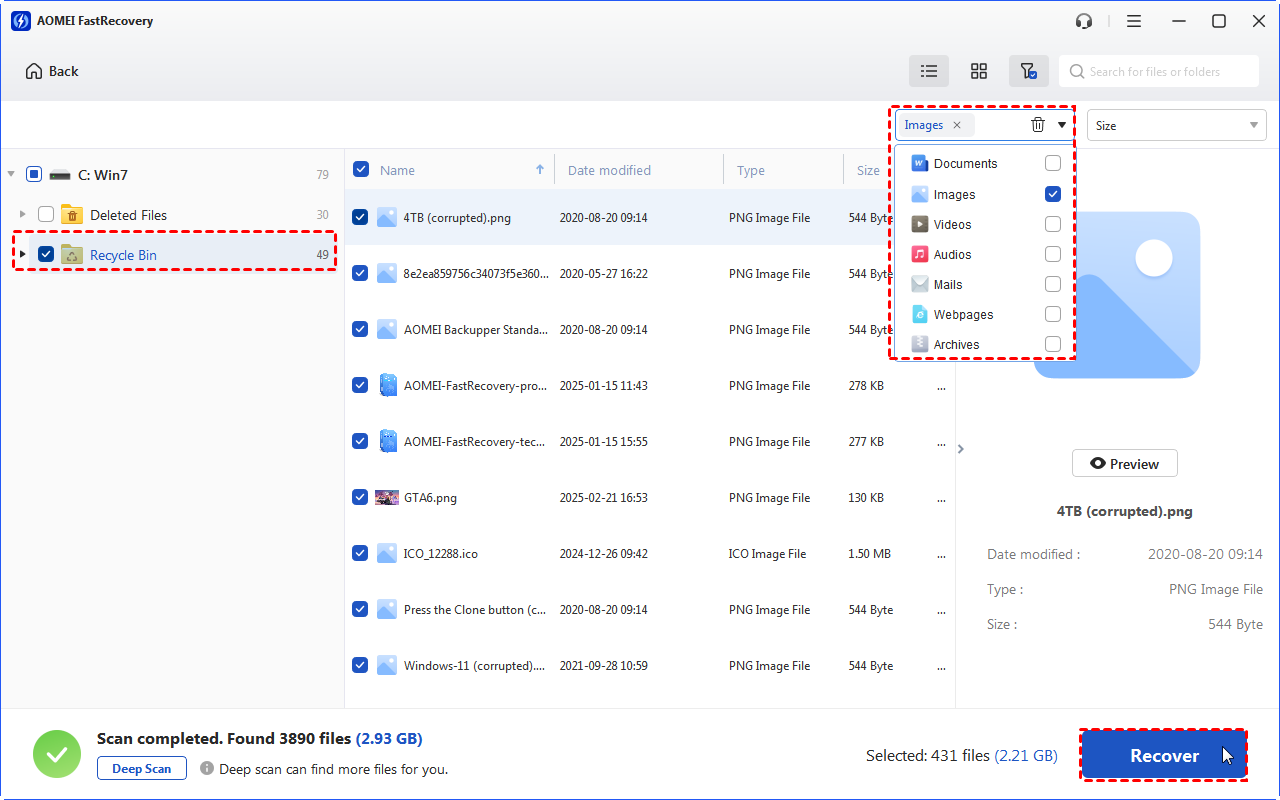
It will automatically run Quick Scan and Deep Scan to find all deleted or lost files. To locate deleted INX files quickly, directly type the .inx extension in the search box. Or click the Filter feature to specify the "Documents" type first.

Step 3. Start the INX file recovery.
Select the desired files and then click Recover x files to recover deleted INX files. You will then be asked to select a location. Please select a new location instead of the original location to prevent potential data overwriting.
-
The restore button will display the number of selected files and their full size.
-
You can perform INX file recovery for free, up to 500MB. Once exceeded, please upgrade to the advanced editions.
-
In addition, you still can use this software to recover different file types, such as Recover deleted X3F, 3FR, WMV, DBF, ASPX, LAB, etc.
Way 2: Restore from InDesign Automatic Recovery Feature
If there are any unexpected power or system failures, you can choose to recover Adobe InDesign files from its automatic recovery feature. It will save your changes every minute and store them in a temporary file, separating them from the original document.
Step 1. Restart your system after unexpected power or system failures.
Step 2, Then, open InDesign. It will check the recovery folder and display the recovered document whose file name usually ends up with “Recovered”.
Step 3. Open the recovered document and click File > Save as.
Step 4. Specify a new location and click Save.
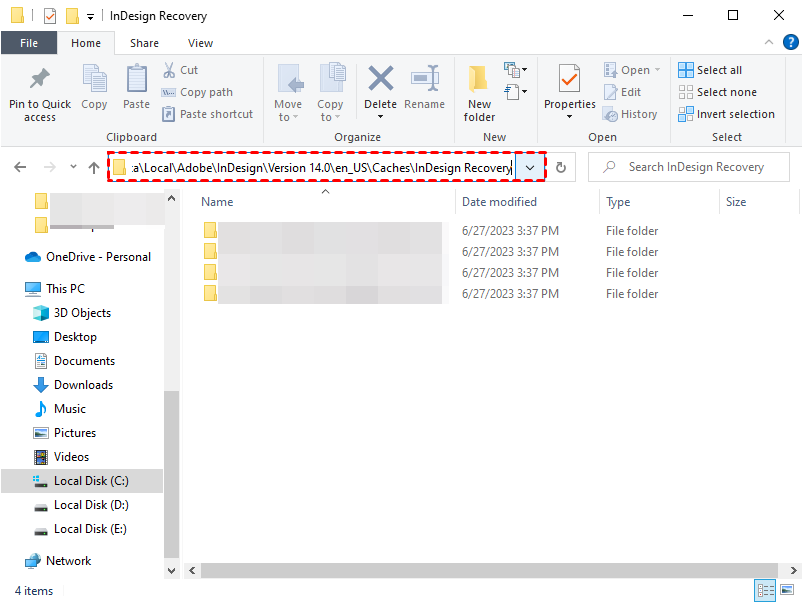
Or you can directly go to the InDesign recovery folder location (C:\Users\[User Name]\AppData\Local\Adobe\InDesign\Version [#].0\en_US\Caches\InDesign Recovery) and check if there are unsaved INX files.
Way 3: Recover Previous Versions of INX Files
If you enable the File History feature, it will save a copy of your files and allow you to restore them to previous versions.
Step 1. Start File Explorer. Locate the folder containing deleted INX files.
Step 2. Right-click this folder and select Properties.
Step 3. In the Previous Version tab, check the folder version and select the previous one. Finally, click Restore.

Way 4: Recover Deleted INX using Backup and Restore (Windows 7)
Backup and Restore (Windows 7) is a built-in Windows backup utility inherited from Windows 7 to backup and restore files on a local disk. Try it if you create a file backup in advance.
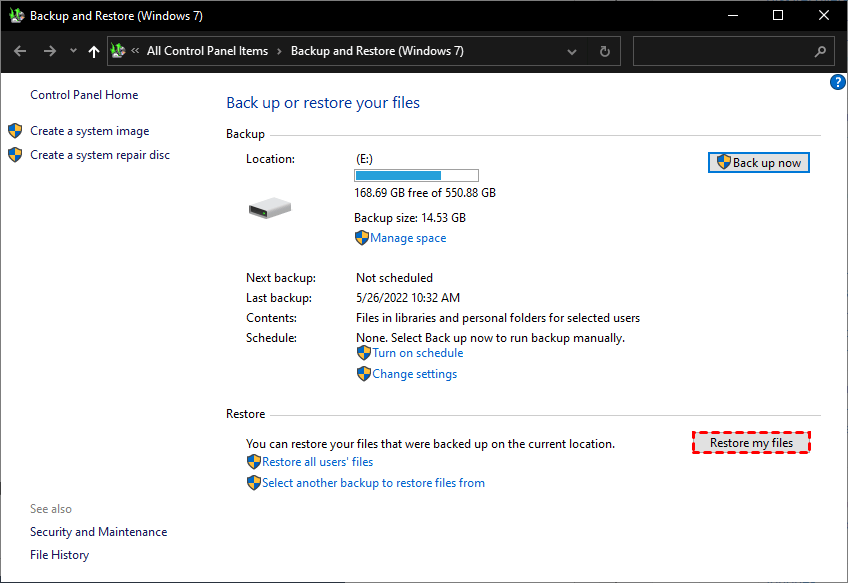
Step 1. Navigate to Control Panel > System and Security and select Backup and Restore (Windows 7). Then, click Restore my files.
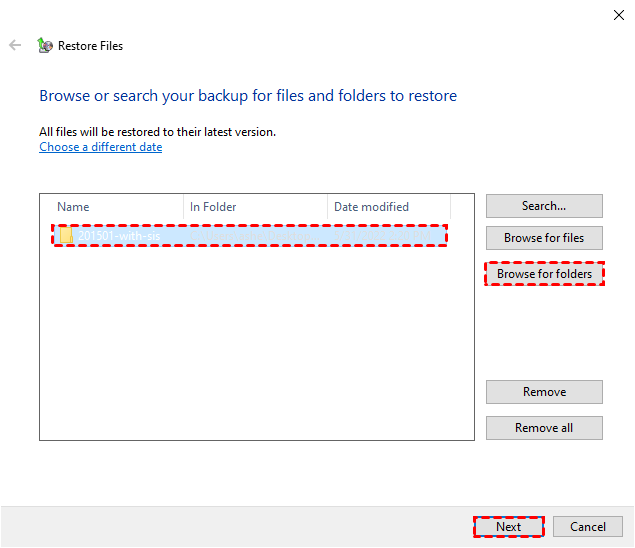
Step 2. In the Restore Files window, you can search or browse for INX files and folders to restore.
- Search: type part of the name of the files and select the deleted files to restore.
- Browse for files: navigate to the folder containing deleted files and select it. Then, click Add Files.
- Browse for folders: select the entire folder with deleted files.
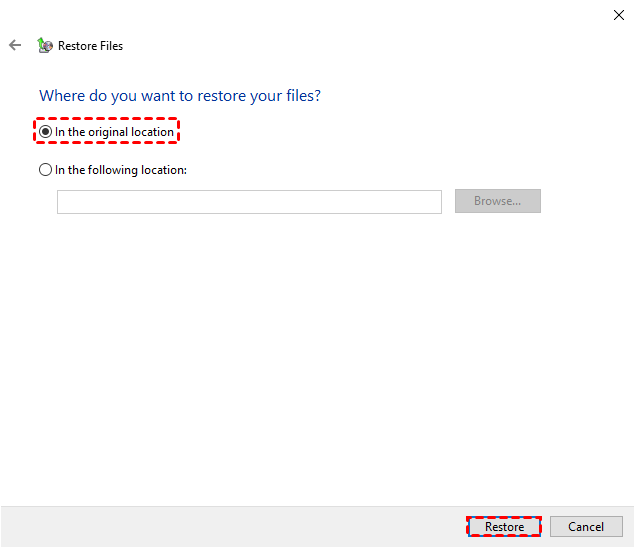
Step 3. Select a location to restore deleted INX files. You can choose the original location or browse to a new location. Then, click Start Restore.
Prevention Tips to Avoid INX File Deletion
Taking precautions can help you avoid the stress of INX file deletion in the future. Here are some helpful tips:
1. Be Cautious with Deletion
2. Run Antivirus Software Regularly
3. Regular Backups
Conclusion
Losing INX files can be troublesome, but with the right approach, you can recover deleted INX files easily and quickly. Always check the Recycle Bin first, and if needed, employ reliable file recovery software.
Additionally, to prevent data from deleting in the future, it’s suggested to backup your INX files immediately after recovery. At the same time, you need to be cautious with deletion, run antivirus software regularly, etc.
FAQs
1. Can I recover an INX file deleted a year ago?
2. How often should I back up my files?
3. How to recover deleted INX files on Mac

