How to Recover Data from Dead M2 SSD Drives?
Learn to recover data from dead M2 SSD drives after fixing dead, failing, or crashed M2 SSDs on this page. Besides, there’re relevant SSD data loss prevention tips.
By Penny / Updated on April 30, 2026
Is it possible to recover data from dead M2 SSD drives?
Nowadays, most desktops and laptops include Solid-State Drives like M2 because SSDs are faster than traditional hard drives, consume less power, and perform better. Though SSD drives are more shock-resistant than HDDs, many users meet data loss for various reasons.
Help! My M.2 SSD seems to have kicked the bucket, and I've got some crucial data stuck in there. I was using it on my Windows 10 laptop. Any ideas on how I can recover the data from this dead M.2 SSD? Thanks.
Actually, it's possible to recover data from dead M2 SSD drives if they were not physically damaged.
Phase 1. 5 ways to fix dead, failing, or crashed M2 SSD drives
How to recover data from dead M2 SSDs? Please refer to the following five feasible fixes to solve this issue.
Fix 1. Use the Power Cycle way
In the event of a power failure causing corruption or loss of your SSD drive, power cycling might offer a helpful solution. By power cycling, you can potentially address the issue and restore functionality.
Step 1. Unplug the data cable of your M2 SSD drive> leave the power on for at least 30 minutes > and turn off the power for 30 seconds.
Step 2. Reconnect the power for 30 minutes > turn it off for 30 seconds > and reconnect the data cable.
Fix 2. Connect dead or failing M2 SSD to another working PC
If your PC won't boot because of a dead M.2 SSD or a deleted boot partition, take out the dead SSD from your PC and connect it to another working computer. Then you might get your important data back. Just be careful when handling hardware.
- Note:✎...
- Sometimes, this way also can help you recover files from a dead computer.
Step 1. Unlock your dead laptop with the screwdriver and take out the dead SSD drive.

Step 2. Connect this SSD as an external hard drive with a USB 3.0 connection cable.
Besides, you can reinstall this drive as a new drive via a SATA cable and a power cable.
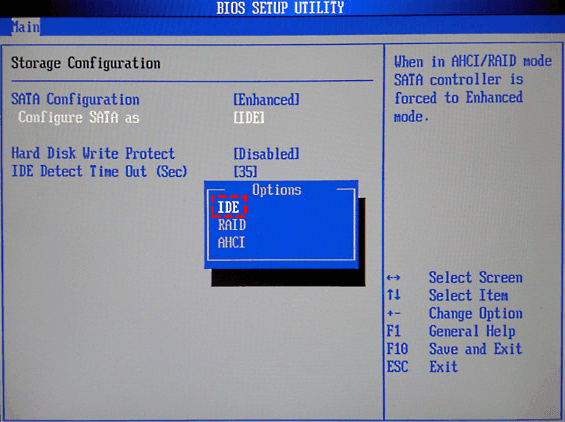
» If the PC supports installing a second hard drive, press F2/Del to enter BIOS. Then select Advanced > IDE Configuration > Configure SATA > hit Enter > AHCI to save these changes.
After that, you can transfer your SSD data to a PC or USB drive.
Fix 3. Update M2 SSD firmware via Device Manager
If your SSD is acting up, try updating its firmware to perform dead hard drive recovery. Please avoid interruptions or power failures during the update process, as that could lead to your SSD going into fail-safe mode. Keep it steady, and you’ll be fine.
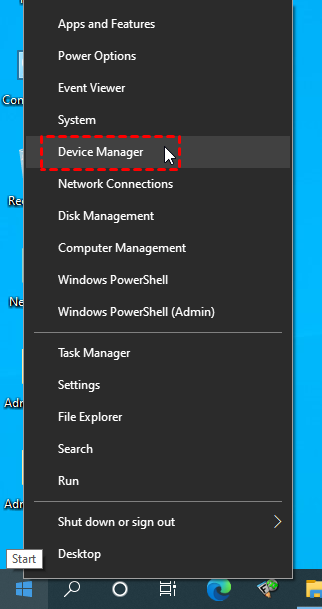
Step 1. Press “Win + X” and open Device Manager by clicking it.
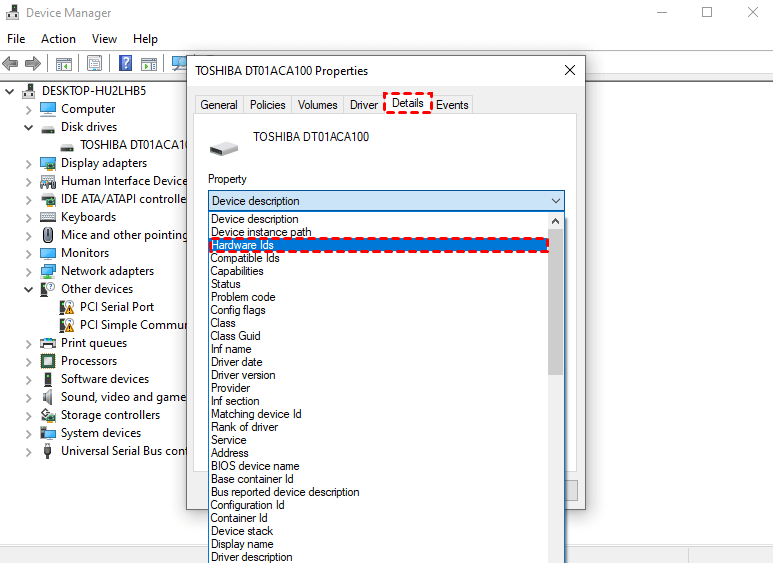
Step 2. Go to Disk drives and expand it. Then right-click on your SSD drive and select the “Properties” button.

Step 3. Under the Details tab, select Hardware Ids > click OK to save these changes.
Fix 4. Update M2 SSD device driver via Device Manager
No doubt about it, outdated SSD device drivers can cause data access issues and even impact reading and writing performance. If your Solid-State drive writes slowly, it's more prone to breaking down.
To fix this, make sure to update its device driver. Keeping your SSD drivers up-to-date will help ensure smooth performance and safeguard your data.
Besides, it's also one of the possible reasons for the M2 drive not showing up in Disk Management.
Step 1. Open Device Manager by entering it in the search bar.
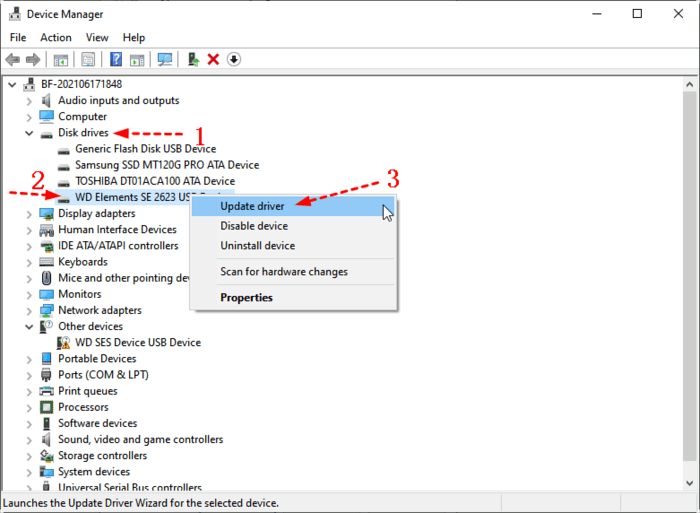
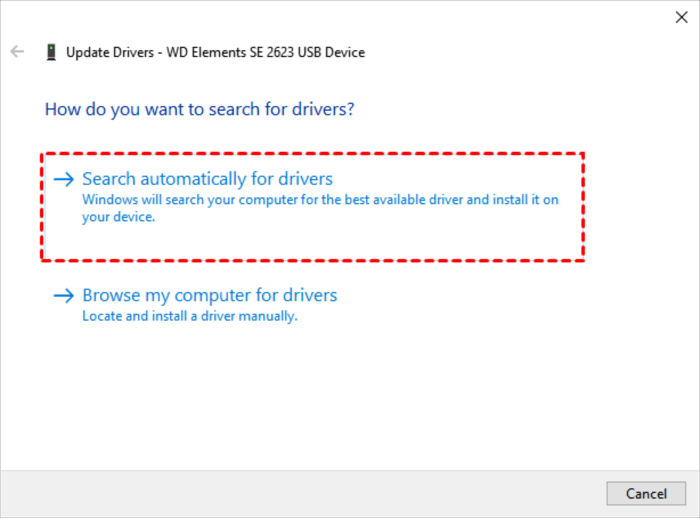
Step 2. Go to Disk drives and right-click on your solid-state drive. Then select the “Update driver” option.
Step 3. Select the “Search automatically for drives” option. Please wait patiently.
Fix 5. Repair corrupted file systems via CHKDSK.exe
When you encounter issues like file system problems or bad sectors on your SSD, using CHKDSK can be efficient. However, many users aren't keen on learning CMD or typing command lines to fix them.
If that's the case for you, consider trying out AOMEI Partition Assistant Standard. It's a free partition manager with a user-friendly GUI, making it easy to check partitions and fix errors using CHKDSK.exe.
- Note:✎...
- If you intend to recover data from SSDs that won't boot, you can also seek help from AOMEI Partition Assistant Standard to make a bootable media. Then change the boot order from your bootable USB drive.
Step 1. Download and install this free software on your Windows 11, 10, 8.1, 8, 7, Vista, or XP computers.
Step 2. After entering the main interface of this utility, right-click on your selected SSD. Then click Advanced > Check Partition.
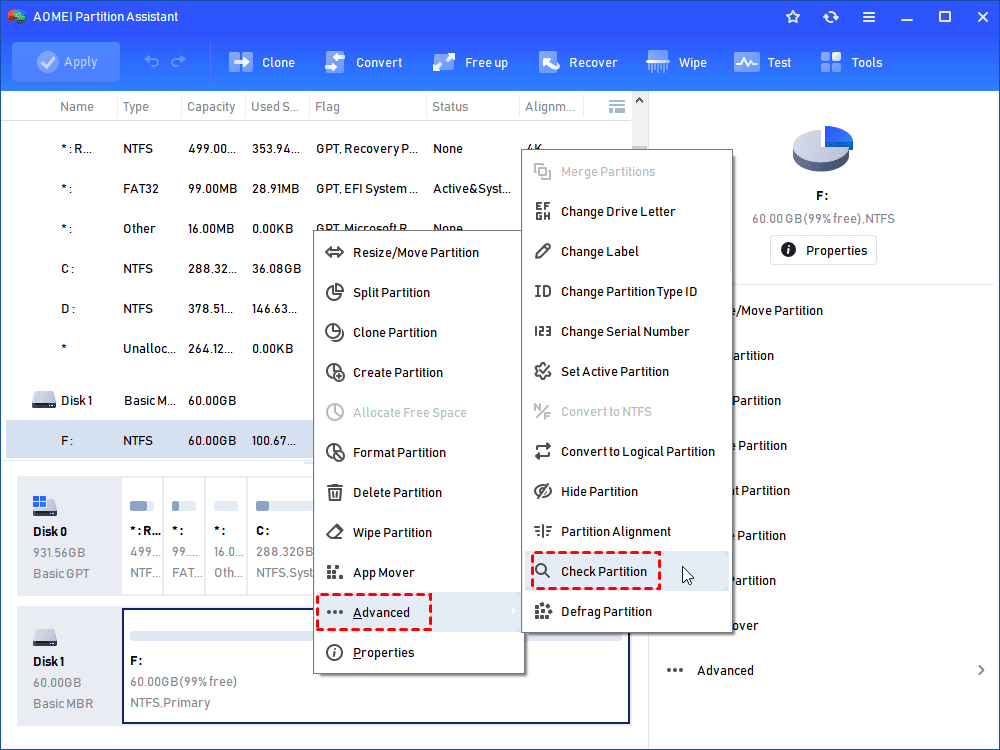
Step 3. Select Check Partition and fix errors in this partition by using chkdsk.exe > click OK. Please select the last option if your hard drive is in RAW format.

Phase 2. Recover data from dead M2 SSDs via data recovery software
How to recover deleted files SSDs? In computing, there is an area called free space, where your permanently deleted data is initially stored, awaiting newly added data to overwrite it. But after data erasure, it poses challenges in recovering your deleted or missing data.
For a higher data recovery rate, please avoid writing new files to your M2 SSD drives. Moreover, the sooner you start video recovery via reputable data recovery tools, the better your chances.
Supported by AOMEI Tech, FastRecovery is good at recovering deleted and missing files from SSDs (M2, Samsung, Sandisk, Kingston, Crucial, etc.) HDDs, SD cards, and other storage devices.
Data Recovery Software for Windows:
- High-efficiency: Recover 1000+ types of files such as videos, audio, photos, compressed files, songs, websites from HDD, SSD, USB, SD cards, etc.
- Advanced scanning method: FastRecovery runs Quick Scan or Deep Scan automatically to search all the recoverable files.
- Flexible layout: Organize and display data by Type or Path, allowing you to sort, search, filter, and preview files.
- Excellent compatibility: Support NTFS, FAT32, exFAT, and ReFS file systems and be compatible with Windows 11, 10, 8, 7, or Server PC.
-
Don't download and install FastRecovery to the drive where you store deleted files, which may cause data overwriting.
-
Any newly added data or disk formatting can overwrite data. Please avoid these operations after deletion.
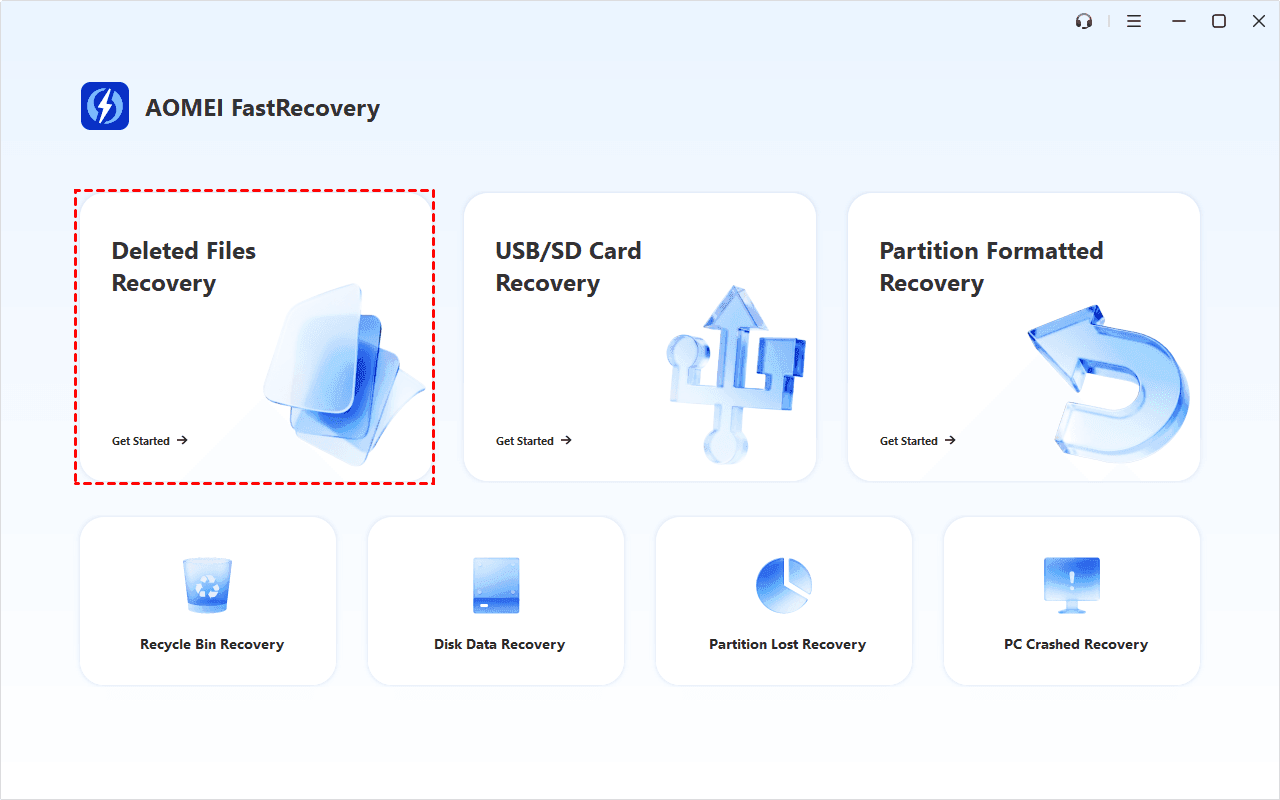
Step 1. After launching FastRecovery, click Deleted Files Recovery. You can also choose a more suitable alternative, such as Disk Data Recovery. All of them can help you retrieve data without causing any damage.
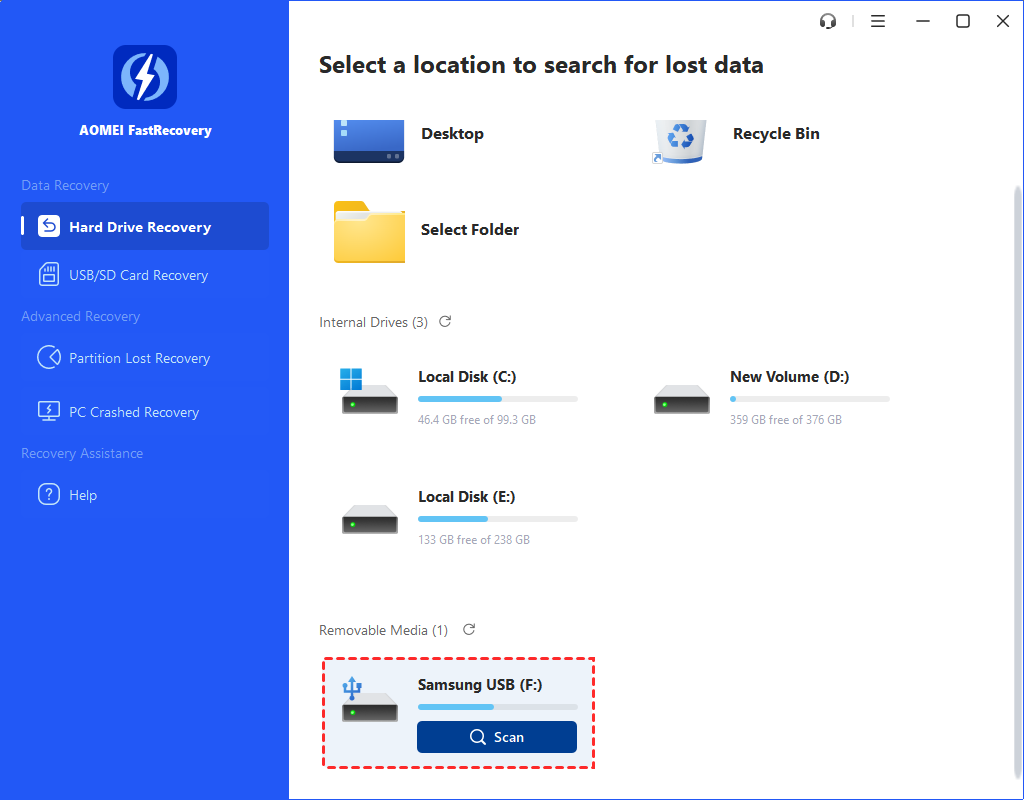
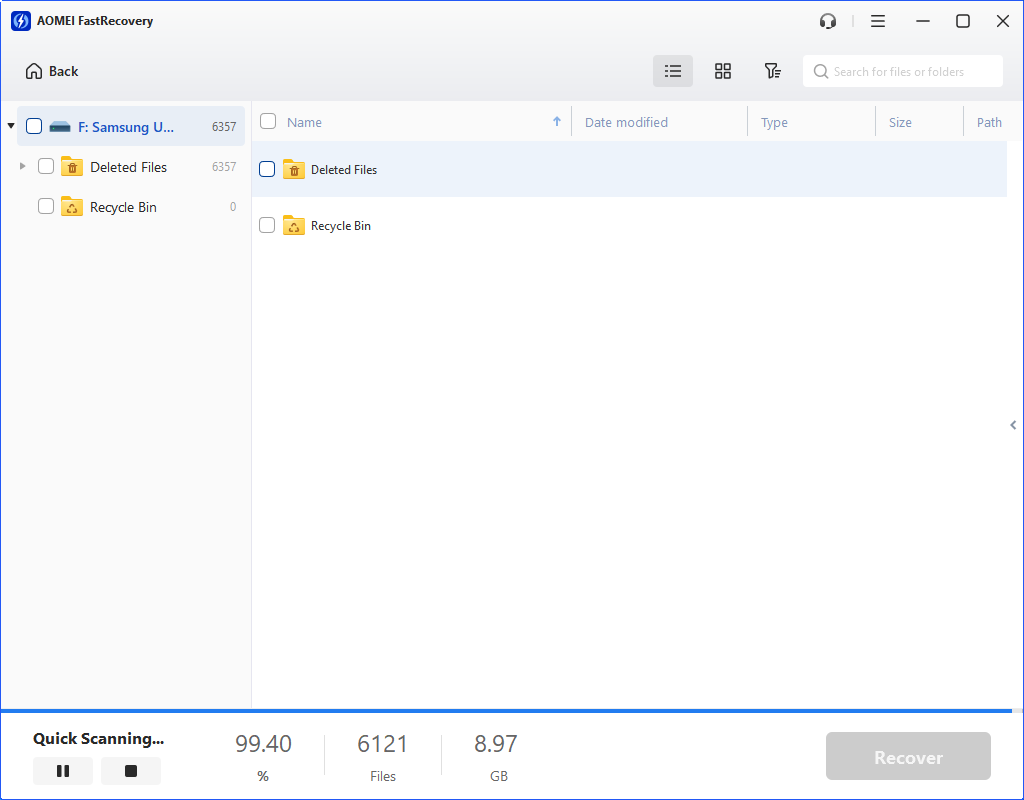
Step 2. You'll see all available drives. Choose your SSD drive and click the “Scan” button.
Step 3. It will start the quick scanning process automatically and display all recoverable data. You can select files by Type (default) or Path, and combine them with options to sort, filter, search, and preview files.
- Sort: Sort files by name, date modified, type, etc., on the right panel.
- Filter: Specify the Type/Size (from Less than 512KB to 1GB above)to target your search.
- Search: Type the file name or extension in the search box to locate deleted files precisely.
- Preview: Preview files in a clear thumbnail, such as wav,ico, jpg, png, bmp, jpeg, tif, svg, gif,mp4, mp3, txt, xlsx, pdf, ini, docx, etc.
- The Type categories include all supported data types, including images, videos, documents, mails, web pages, compressed files, etc.
- Click the Deep Scan to find more data if Quick Scan fails. It will scan every sector of the disk and take longer.
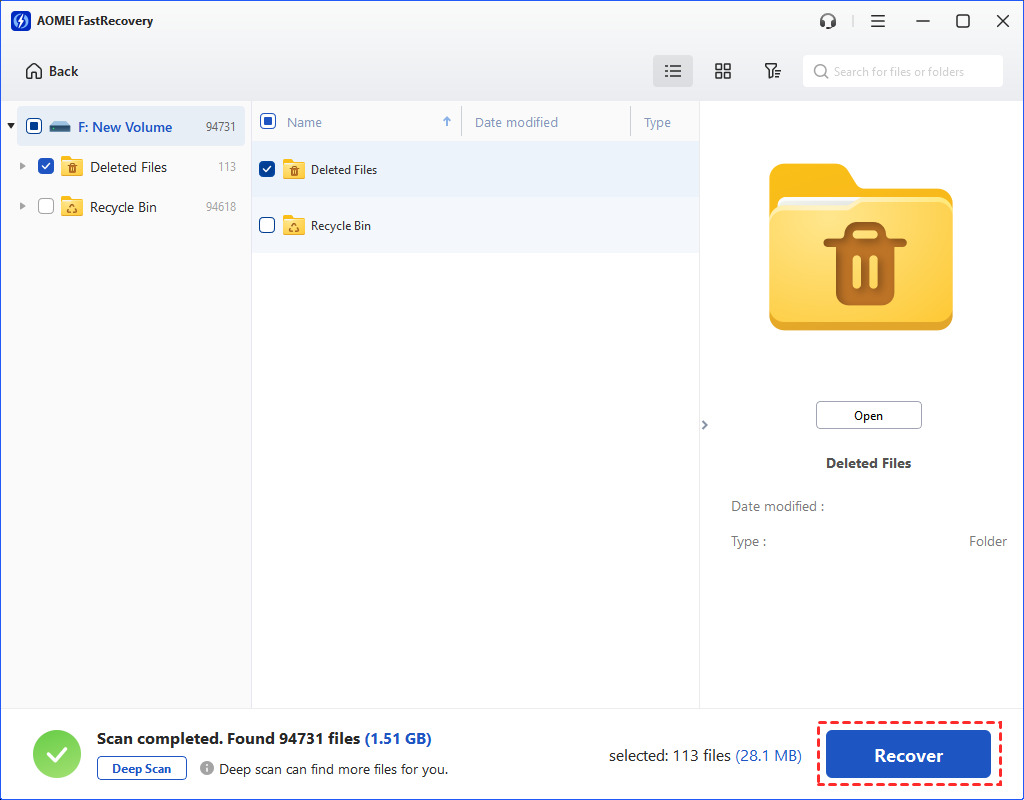
Step 4. Select the data you want and click “Recover” to begin the SSD data recovery process. Don't save the recovered files to the original location, as it may cause data overwriting.
The free edition only supports 500MB of data recovery. To recover more data, upgrading FastRecovery is a better and more cost-effective choice.
Further reading: How do I protect my SSD drive?
Safeguard your SSD drives from data loss by developing a regular habit of creating disk backups using the free Windows backup software, AOMEI Backupper Standard. Taking this proactive approach will give you peace of mind and ensure your important data stays safe and sound.
- Key features of AOMEI Backupper Standard:✎...
- Enable to back up files, folders, partitions, disks, or systems to an internal/external hard drive, USB stick, Network, or Cloud drive.
- Implementing intelligent backup strategies allows you to create daily incremental backups, effectively conserving storage space.
- By scheduling backups, you can ensure the continuous protection of your valuable data.
Step 1. Launch AOMEI Backupper on your Windows PC. Under the Backup tab, select the “File Backup” option.

Step 2. Click “Add Folder/Add File” to add the folder or files you want to back up.

Step 3. Click “Schedule Backup” to enable Daily, Weekly, Monthly, Event triggers or USB plug based on your needs. Then click the “Start Backup” button.