4 Free Ways to Recover Deleted Pictures Not in Recycle Bin
This post introduces how to recover deleted pictures not in Recycle Bin. No matter whether you have a backup of your pics or not, you can properly recover them via 4 free ways.
By Lori / Updated on April 30, 2026
How do I recover photos that are not in the Recycle Bin?
To clean up my computer drive, I removed a lot of images. And several pictures are simultaneously mistakenly removed. They are not in the Recycle Bin when I try to get them back. How do you restore a deleted picture that is not in Recycle Bin?”
- Question from a user

You may encounter the same issue that the deleted pictures are not in Recycle Bin. How to fix this problem? Read on and you will get a solution that fits your needs most.
Why are deleted photos not in the Recycle Bin?
When you find that the deleted pictures are not in Recycle Bin, the following reasons could be why:
- ◉The Recycle Bin is damaged or overloaded.
- ◉You have emptied the Recycle Bin.
- ◉The size of the deleted files is larger than what the Recycle Bin can hold.
- ◉The files are hidden and are not available.
How to recover deleted files not in Recycle Bin (4 ways)
In this post, we offer you a stepwise tutorial to recover deleted pictures not in Recycle Bin in 4 ways.
If you didn’t backup your Windows before, you can restore them using Way 1or Way 2. If you already made a backup of your deleted pictures, you can directly go to Way 3 or Way 4 to recover deleted pictures with backup.
Way 1. Use professional data recovery software [recommended]
How to get photos deleted from Recycle Bin? It may be a hard task for you to do this job without any backup resources. In this case, you need professional data recovery software FastRecovery to retrieve your deleted data safely and quickly.
Due to the following advantages, FastRecovery can be the ideal option for you:
- Easy-to-use. It requires no technical experience to recover deleted data in only 4 steps.
- extensive. Support 1000+ file formats, such as, DOCX/XLSX/PPT/PDF documents, PNG/JPG/JPEG/GIF images, MP4/MOV/WMV videos, MP3/WMA audio, and more.
- Efficient. To quickly and completely search your missing files, this tool uses a sophisticated scanning technique.
- Practical. It offers a variety of solutions to protect you from all data loss scenarios, such as permanent deletion, Recycle Bin emptied, formatted drives, etc.
- Compatible. It supports NTFS, FAT32, exFAT, and ReFS both in Windows 11/10/8/7 and Windows Server.
- Free. It allows you to recover up to 500 MB of data without any cost.
-
Don't download and install FastRecovery on the SD card where you store deleted files, as this may cause data to be overwritten.
-
Any newly added data or disk formatting can overwrite data. Please avoid these operations after deletion.
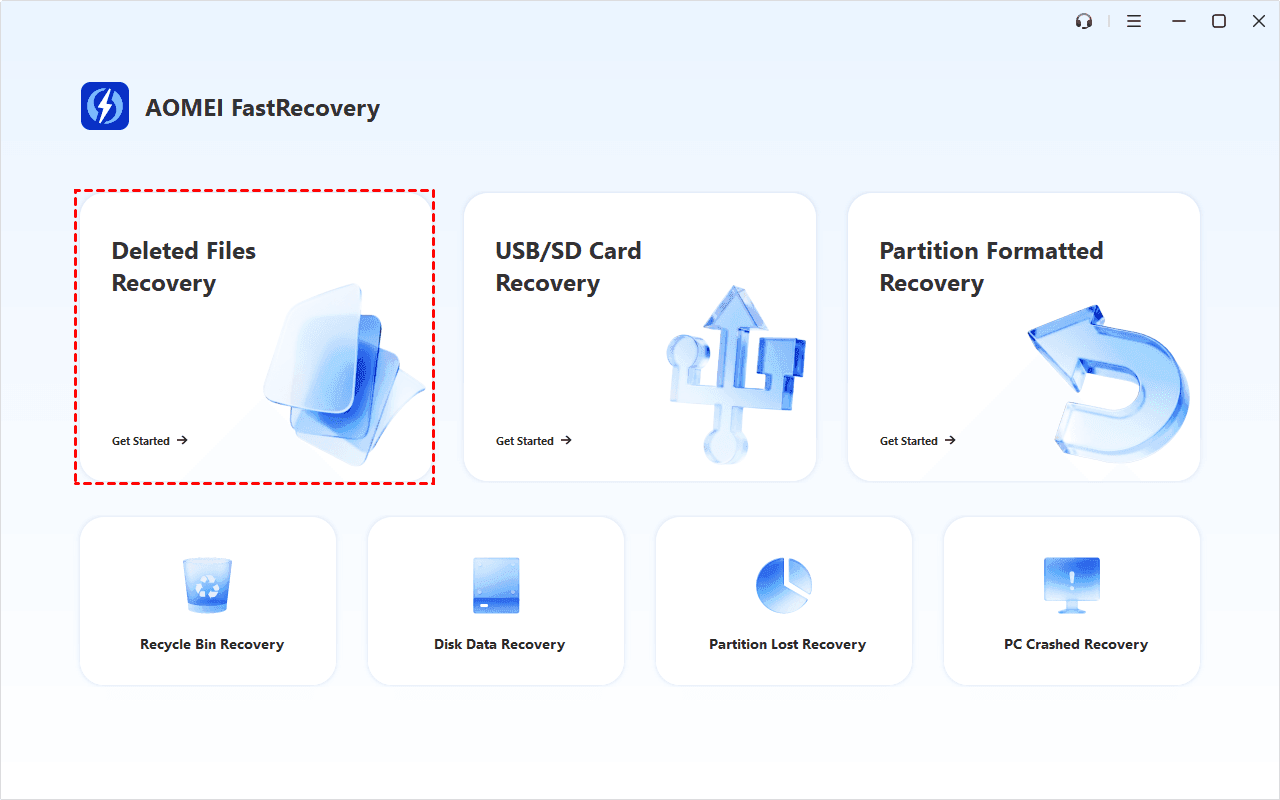
Step 1. Install and run the software, click Deleted Files Recovery. You can also choose a more suitable alternative, such as Disk Data Recovery, Recycle Bin Recovery, etc. All of them can help you retrieve data without causing any damage.
Step 2. You'll see all available drives. Hover the mouse over the drive, and click Scan.

Step 3. By default, it will start Quick Scan automatically for any deleted or lost files. You can select files by Type (default) or Path, and combine them with options to sort, filter, search, and preview files.
- ⬆⬇ Sort: Sort files by name, date modified, type, etc., on the right panel.
- 🔽 Filter: Specify the Type/Size (from Less than 512KB to 1GB above) to target your search.
- 🔎 Search: Type the filename or extension in the search box to locate deleted files precisely.
- 👁🗨 Preview: Double-click files to preview formats such as wav, ico, jpg, png, bmp, jpeg, tif, svg, gif, mp4, mp3, txt, xlsx, pdf, ini, docx, etc.

- The Type categories and filter option include all supported data types, including images, videos, documents, mails, web pages, compressed files, etc.
- If you can’t find the deleted or lost files, click Deep Scan to search the disk thoroughly. It will scan every sector of the disk to find files buried deeper in the file system.
Step 4. Switch the Path section, select Recycle Bin, and click Recover.

-
Don't save the recovered files to the original location, as it may cause data overwriting.
-
The free edition only supports 500MB of data recovery. To recover more data, upgrading FastRecovery is a more cost-effective and labor-saving option.
Way 2. Recover deleted pictures via Windows File Recovery
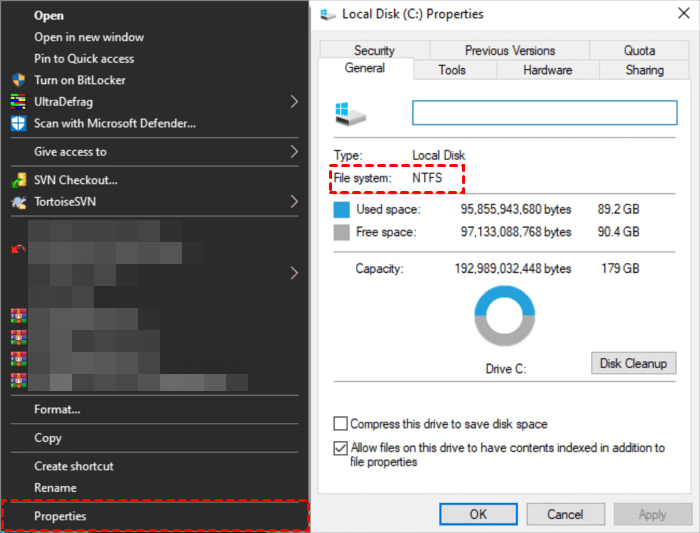
You must first examine your File system before using Windows File Recovery. Right-click the disk where you previously stored your deleted pictures in This PC, and then select Properties.
Then you need to select the right mode depending on the file system.

Next, choose the switch according to the table below to help you narrow the scanning range.
| Switches | Meaning | Supported mode(s) |
| /n | Filter the scan range: scans for a specific file with its file name/path/type, etc. | All |
| /y: | Recovers specific extension groups. | Signature |
| /k | Recovers system files. | NTFS Segment |
| /segment | Segment mode; recovers files under NTFS drives using file record segments. | Segment |
| /signature | Signature mode; recovers files under all file system types using file headers. | Signature |
| /u | Recovers undeleted files, for example, from the Recycle Bin. | NTFS Segment |
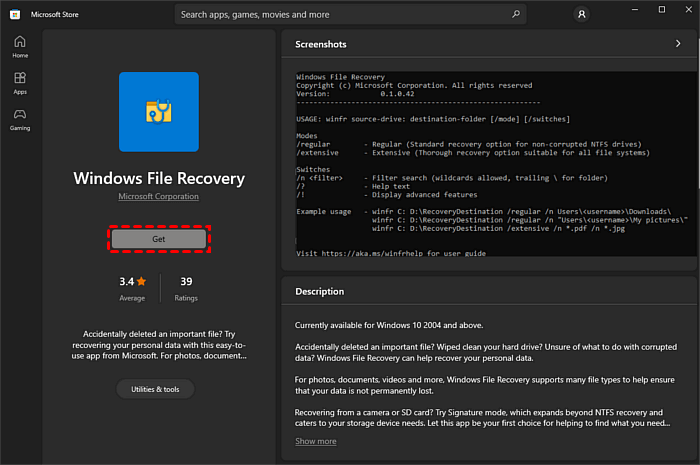
Step 1. Get Windows File Recovery in the Microsoft Store.
Step 2. Run Windows File Recovery as administrator and then enter the following command:
winfr source-drive: destination-drive: [/mode] [/switches]
- source-drive: the drive where you lost your images
- destination-drive: the target drive you want to restore your recovered pictures, which can’t be the same as the source drive
For example, if you deleted a picture named “paper” in D: drive, and now you want to recover it to E: drive. You can input the following command:
winfr D: E: /extensive /n *paper*
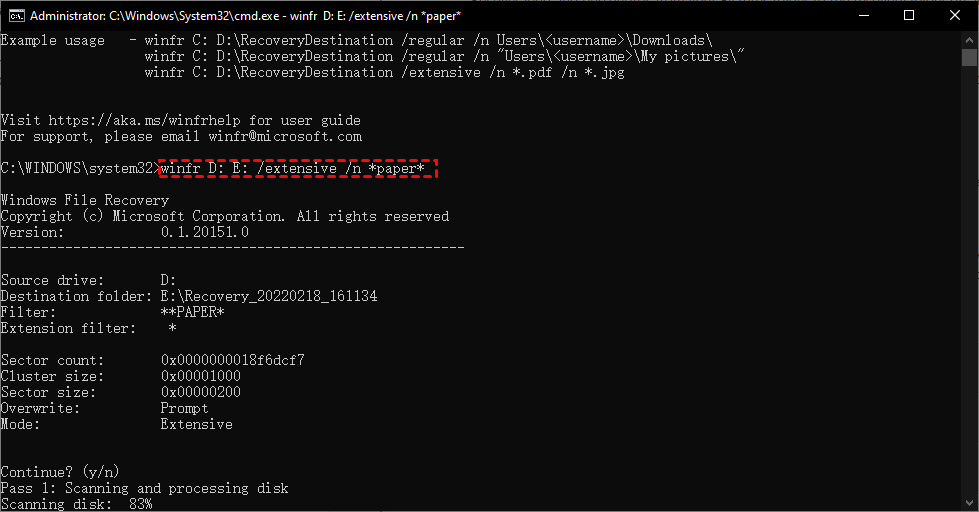
When the scanning procedure is finished, locate the target drive to find a folder with the name "Recovery (date and time)".
Way 3. Recycle permanently deleted pictures from File History
As a Windows built-in backup feature, File History backups files automatically by coping the files and restoring the copies in target folders. If you have kept it on to have a backup, then you can restore your deleted pictures to the original location.
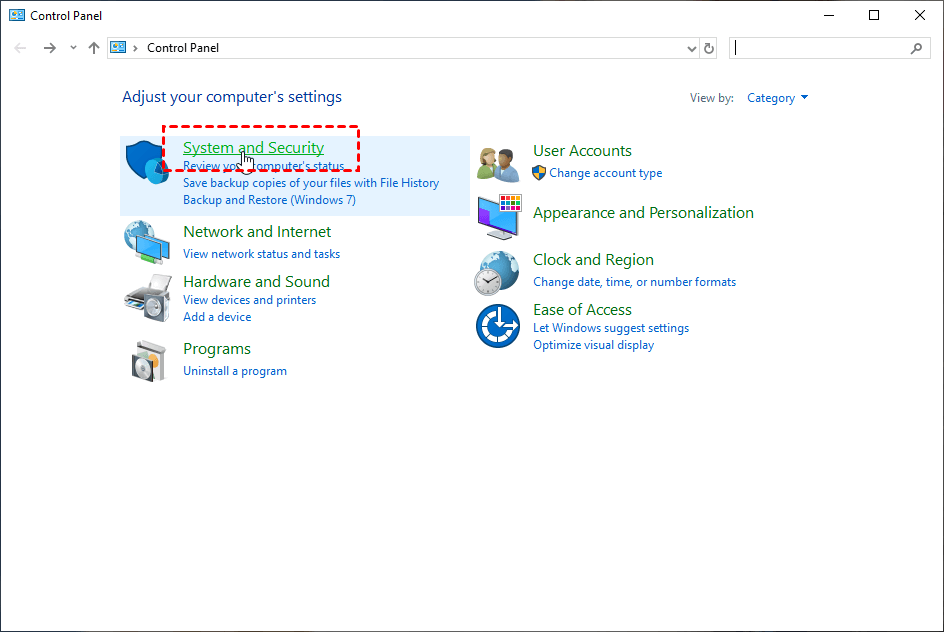
Step 1. To open the Control Panel first, type "Control Panel" into the search box and press Enter. Click System and Security after that.
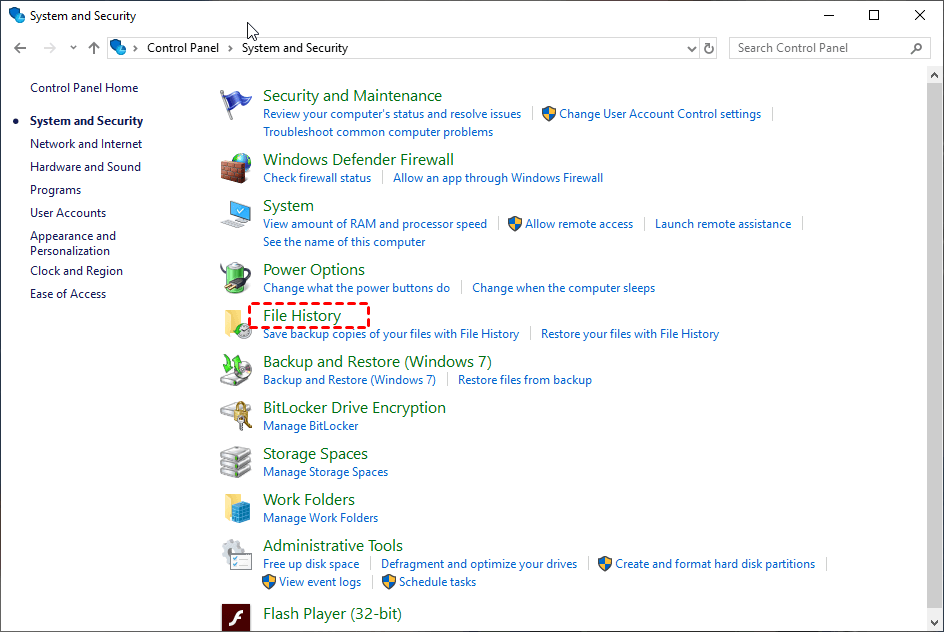
Step 2. Find and click File History in the list.
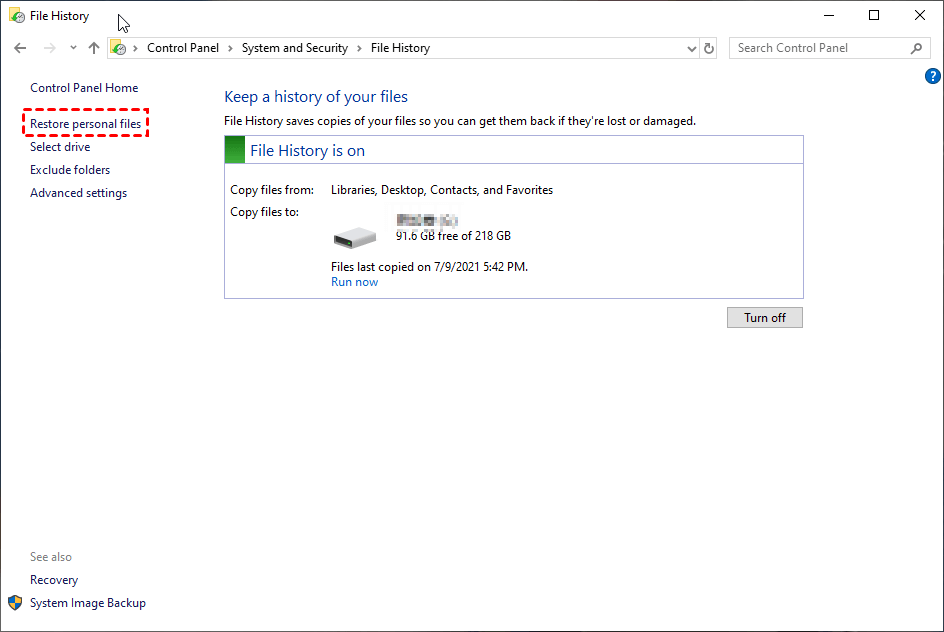
Step 3. Select Restore personal files on the left pane.
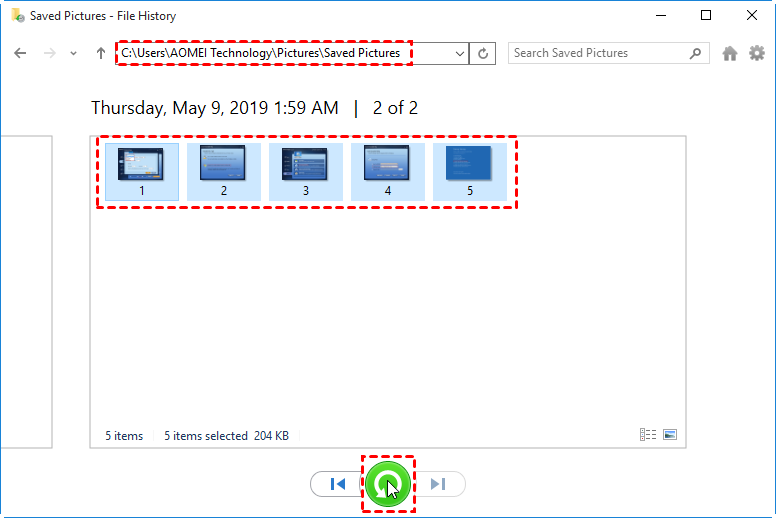
Step 4. Locate your deleted pictures and then click the green Recycle button to restore them to the original location.
Way 4. Deleted pictures recovery with Backup and Restore
You can also restore your deleted pictures from Backup and Restore if you enabled this option before.
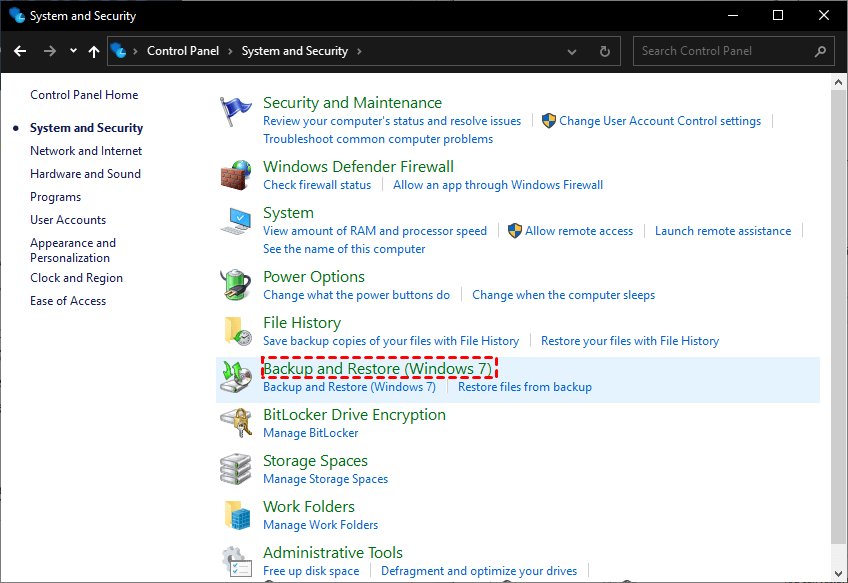
Step 1. Open Control Panel, then click System and Security > Backup and Restore (Windows 7).
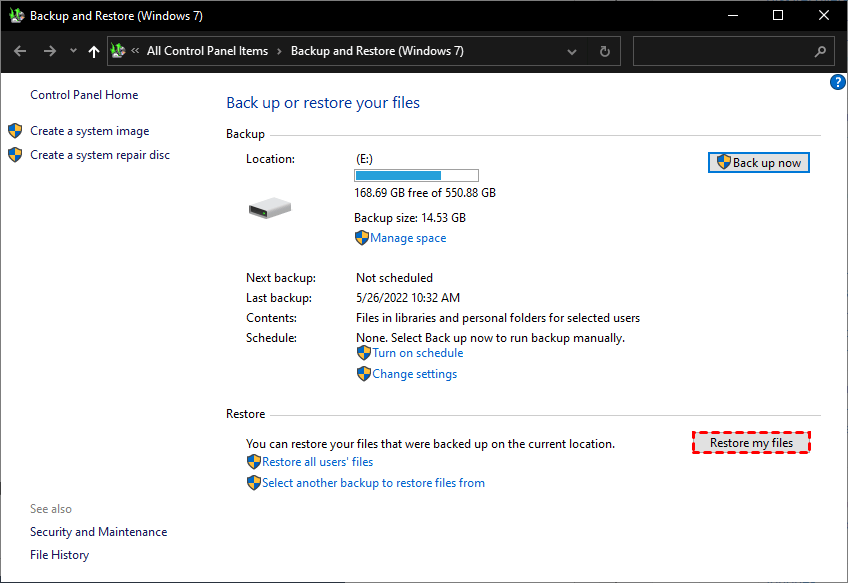
Step 2. Click Restore my files.
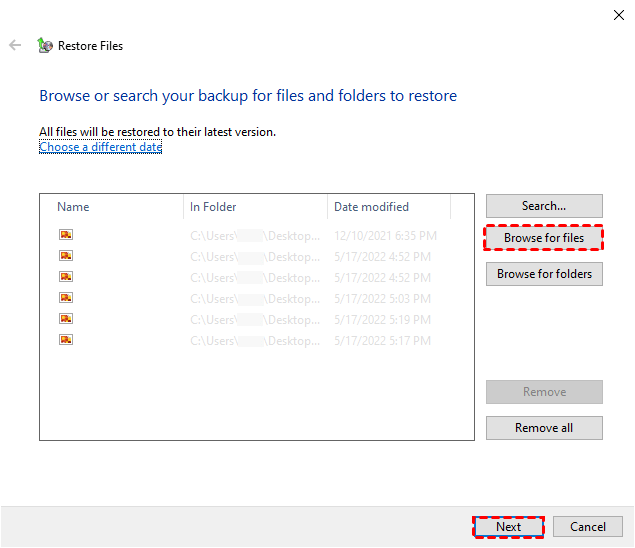
Step 3. Choose the target pictures you want to restore and click Browse for files or Browse for folders, and then click Next.
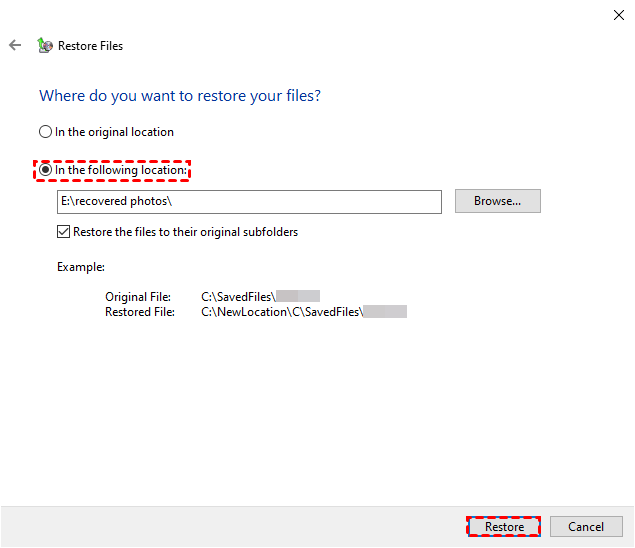
Step 4. Choose where to restore your files and then click Restore.
Conclusion
In this tutorial, you can grasp how to recover deleted pictures not in Recycle Bin. It can much easier if you have a backup of your pictures. If not, we recommend you use professional data recovery software to avoid extra issues. FastRecovery provides users with a simple, fast photo recovery experience at high recovery rate.